Create & View Shared Credential
The EmpowerID Chatbot lets you securely create and view shared credentials—vaulted usernames and passwords for privileged accounts. You can initiate these tasks using the menu or simple text commands.
- Create Shared Credential
- View Shared Credential
tip
Supported Commands:
The chatbot recognizes commands like create shared credential or create shared creds to launch this workflow. See Chatbot Commands for more.
- Type help in the bot to bring up the options menu.
- Click the Create Shared Credential button.
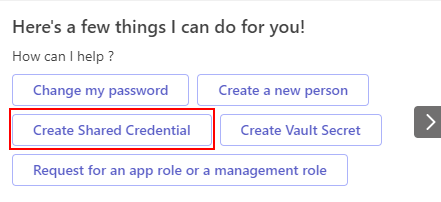
- Complete the form and click Submit.
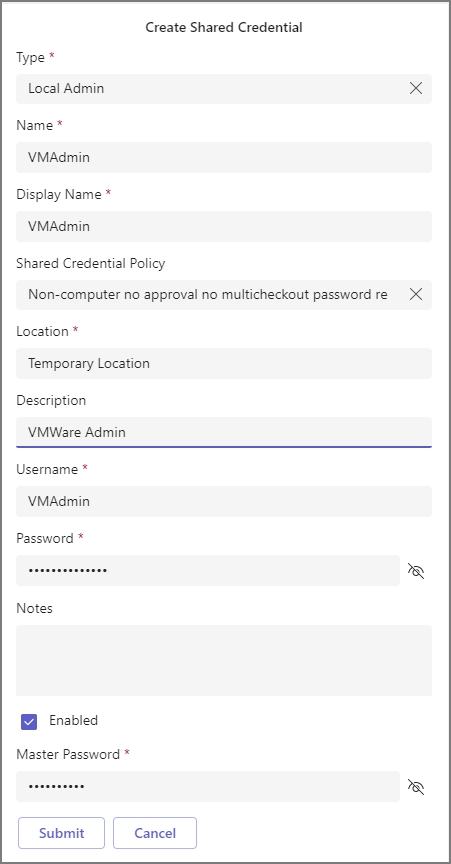
| Field | Description |
|---|---|
| Type | Select the type of shared credential to create. |
| Name | A unique identifier for the shared credential. |
| Display Name | Friendly name shown in the UI (optional). |
| Shared Credential Policy | Policy that defines how this credential is managed. |
| Location | OrgZone or location where this credential applies. |
| Description | Description of the credential’s purpose. |
| Username | Username to store in the credential. |
| Password | Corresponding password. |
| Notes | Optional notes. |
| Enabled | Enable/disable the credential. |
| Master Password | Your EmpowerID master password (linked to your person object). |
- You'll see a confirmation message once the shared credential is successfully created.

tip
Supported Commands:
Use commands like get shared creds or retrieve creds to launch the View Shared Credential workflow. See Chatbot Commands for more.
- Type help in the bot to bring up the options menu.
- Click the View Shared Credential button.
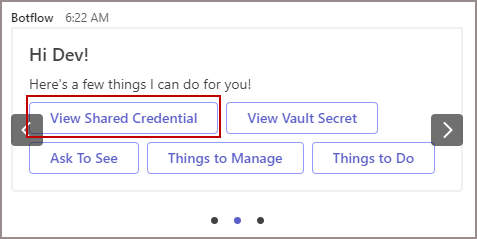
- Enter the name of the credential you want to view.

- Fill out the Checkout Credential form.
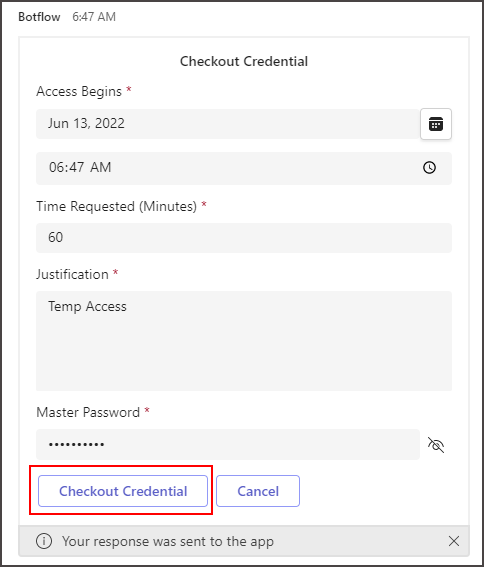
- The bot will display the shared credential details after successful checkout.
