Create a Person
The EmpowerID Chatbot lets you easily create a new Person record—EmpowerID’s core identity object that ties together accounts, permissions, and business roles.
This guide walks you through the full workflow.
Supported Commands:
You can type phrases like add new person, create a new person, or register new user to launch the workflow. For more examples, see the Chatbot Commands page.
How to Create a New Person
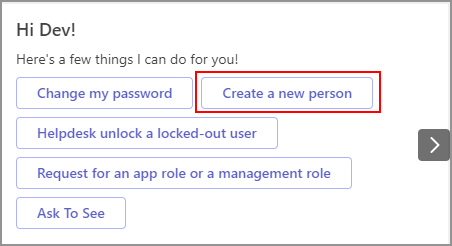
1. Launch the Workflow
Type help in the chatbot and click the Create a New Person button.
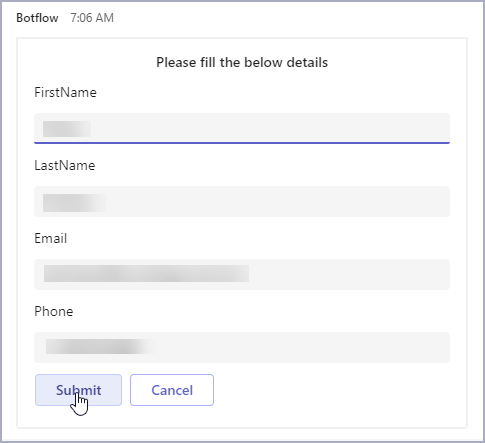
2. Enter Personal Details
Fill in the required fields and click Submit.
Required Fields:
- First Name – The person’s first name
- Last Name – The person’s last name
- Email – A valid and unique email address
- Phone – A contact number
3. Assign a Business Role
Type the Business Role name into the prompt and click Submit.
- If multiple matches are found, the chatbot will display options to choose from
- Select the correct match from the list
4. Select a Location
Enter the location (OrgZone) for the person.
- The chatbot will attempt to intelligently match your entry
- If there's no exact match, it will suggest nearby options
- Choose the correct location from the list
5. Confirm Creation
When everything is complete, the chatbot will display:
✅ "Your request has been processed successfully. Thank you!"
The Person record is now created in EmpowerID.
What Happens Next
Once the person is created:
- Their identity is stored in EmpowerID
- Business Role and Location permissions are applied
- The person appears in organizational structures
- An audit trail is automatically created and updated
Troubleshooting
| Issue | How to Resolve |
|---|---|
| Role not found | Check that the Business Role name is spelled correctly and exists in your organization |
| Location mismatch | Use one of the suggested matches shown by the chatbot |
| Duplicate email | Make sure the email isn’t already in use for another person |