Remove Groups from Management Roles
Remove groups from Management Roles through a cart-based business request process. You can remove multiple groups in a single request.
Prerequisites
Before removing groups from Management Roles, ensure you have:
- Access to Resource Admin with permissions to manage the target Management Role
Procedure
-
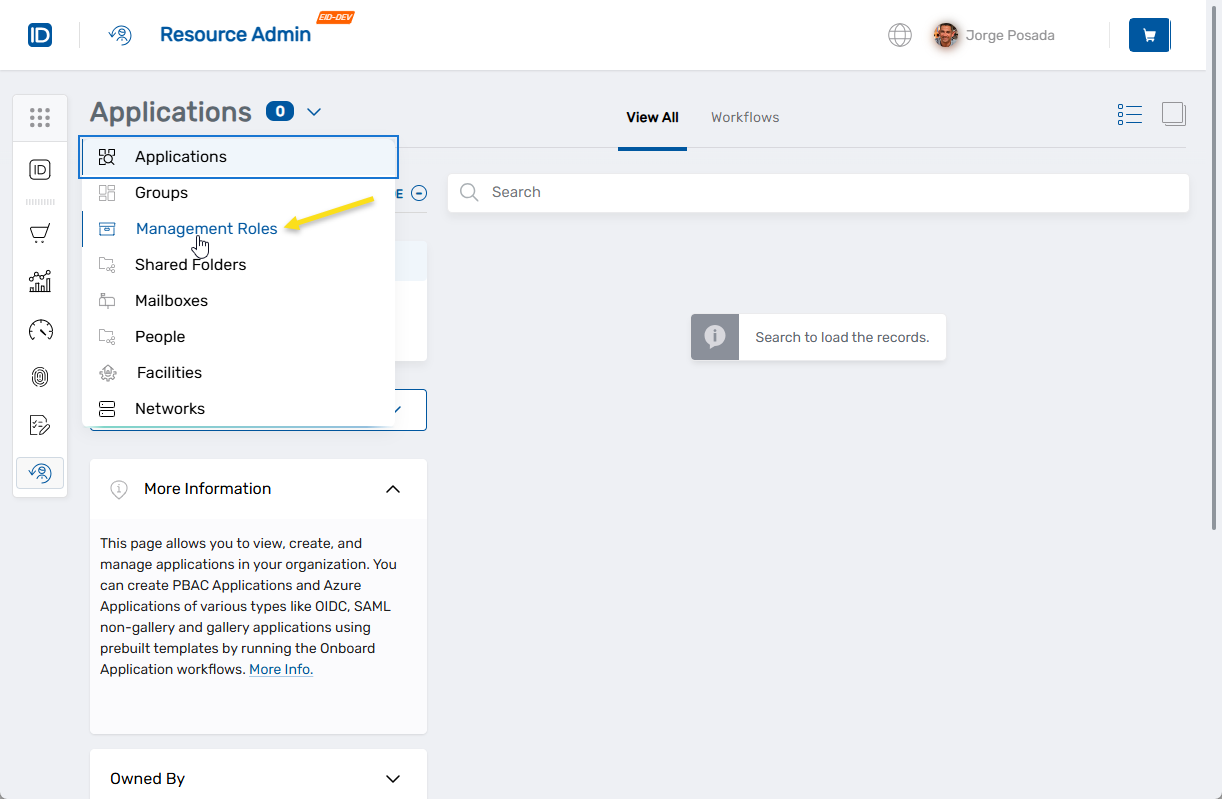
Navigate to Resource Admin.
-
Select Management Roles from the Resource dropdown menu.
-
Locate the desired Management Role and click the Details button.

-
In the role sidebar, navigate to Management Role Members > Groups.

-
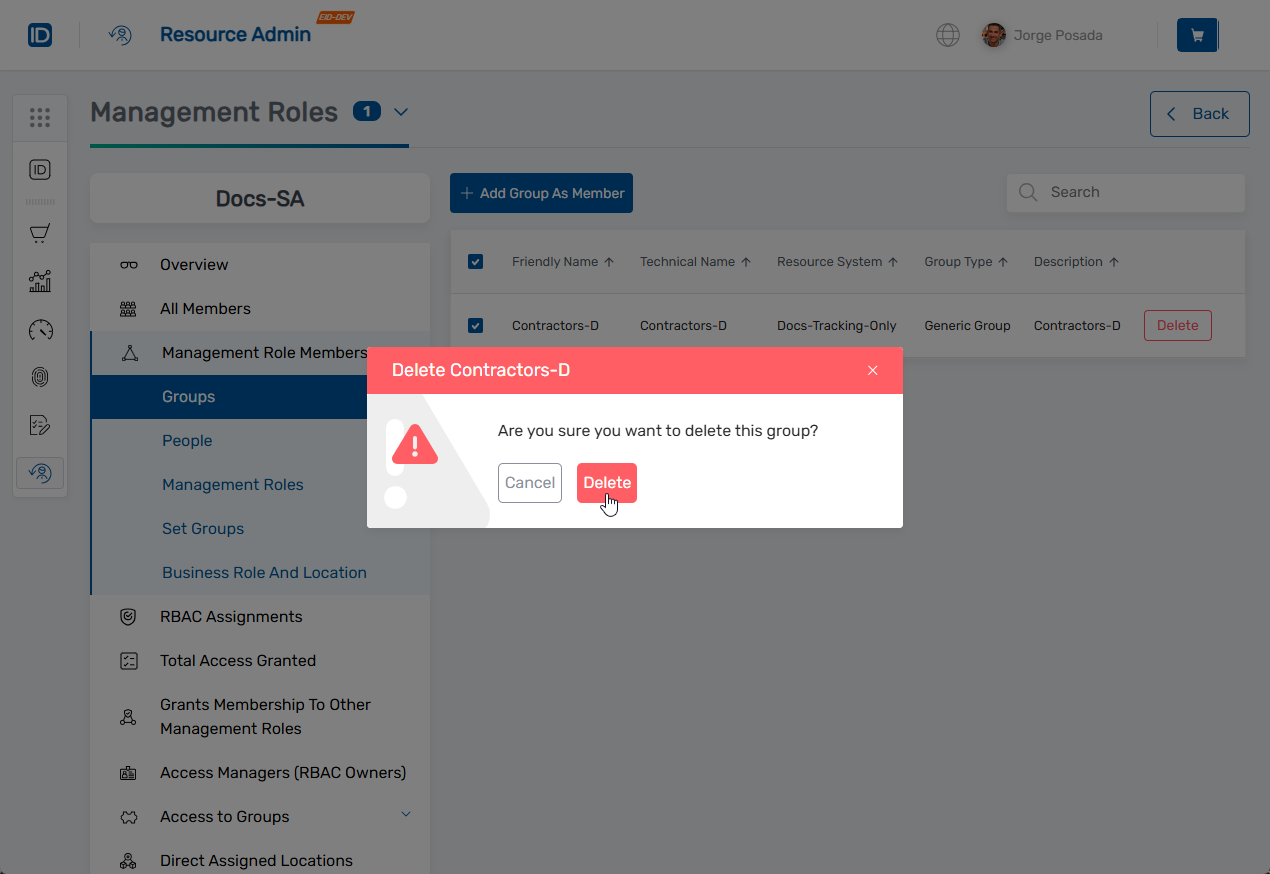
Select the groups you want to remove by checking the boxes next to their names.

-
Click Remove [x] Selected Groups (where [x] is the number of groups selected).
-
Click Delete to confirm.
-
Click the Shopping Cart icon at the top of the page.
-
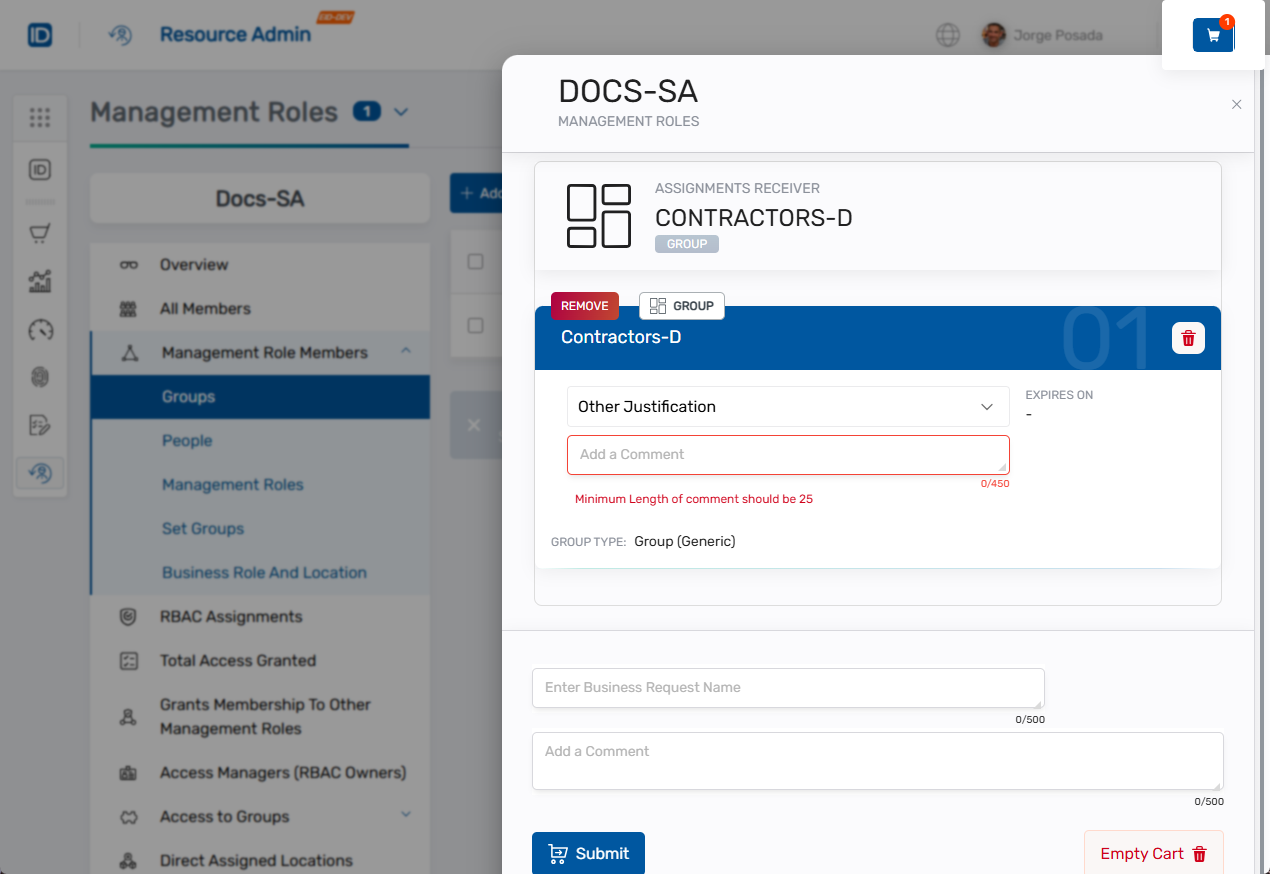
Review the selected groups marked for removal.
-
Complete the justification:
- Select a predefined justification from the Justification dropdown, OR
- Select Other Justification and enter a comment
-
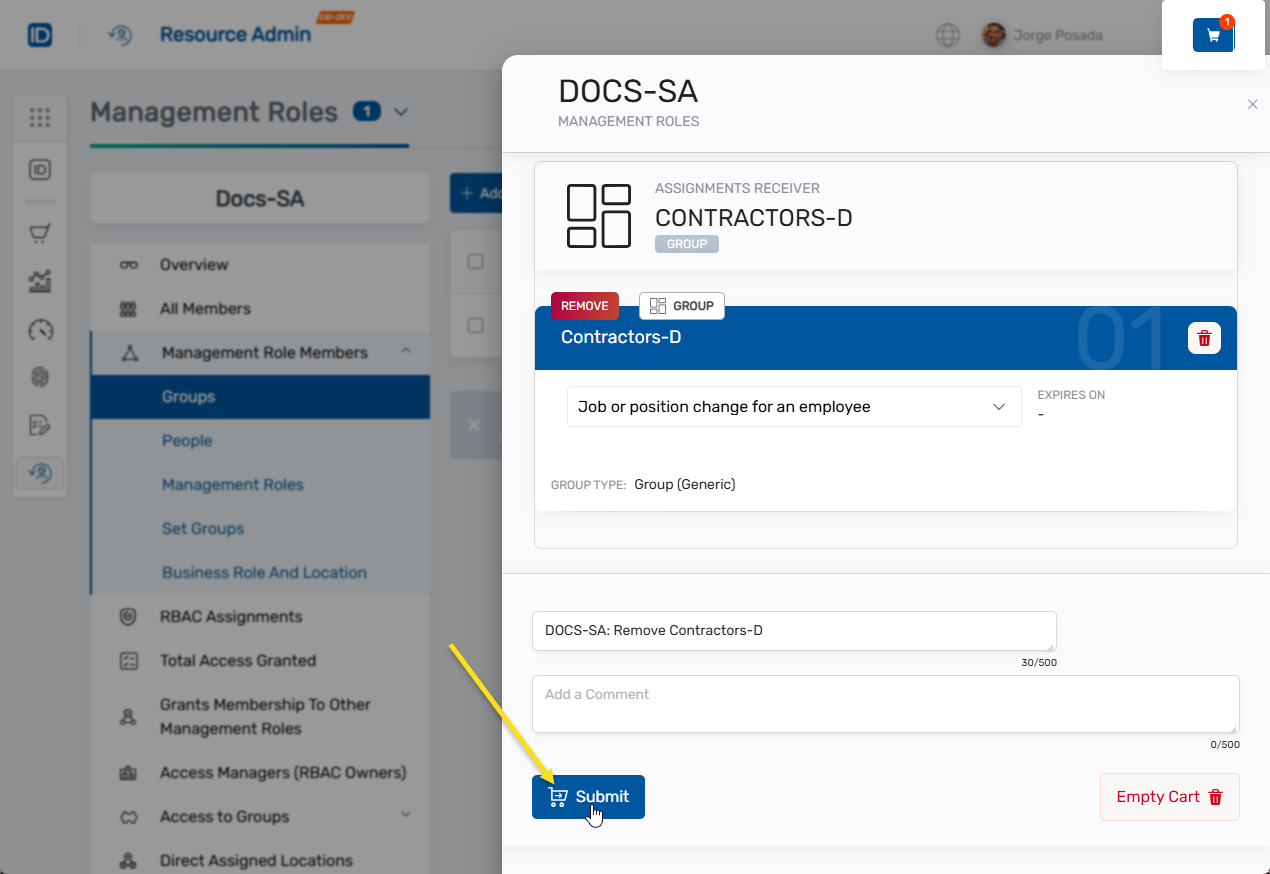
Enter a Business Request Name for the removal request.
-
(Optional) Add additional comments to provide context for approvers.
-
Click Submit to create the business request.
Verify the Results
Group removal may require approval depending on your organization's policies. To verify the removal:
- Note the request status displayed in the submission status modal.
- If approval is required, click the status link to track the request in My Tasks.
- Once the removal completes, return to the Management Role's Management Role Members > Groups section to confirm the groups were removed.
Related Topics
- Add Groups to Management Roles - Add groups to roles
- Edit Group Assignments - Modify group assignments using the wizard
- Approve Management Role Changes - Approve role membership changes
- Edit Management Role Owners & Deputies - Modify role ownership