Using the Interactive Localized Text Editor
EmpowerID provides an interactive localized text editor that allows administrators and developers to modify localized strings directly in the user interface. By appending the query string parameter ?langdebug=true to the application URL, you can identify, edit, and add locale keys in place without needing to search through a list of localized values.
This editor enables the following actions:
- Create new locale keys (primarily for developers)
- Edit existing localized values
- Add new translations to existing or new keys
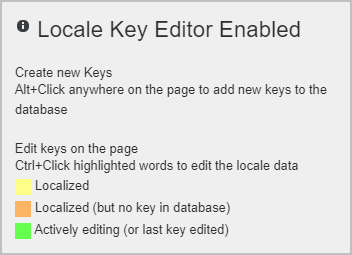
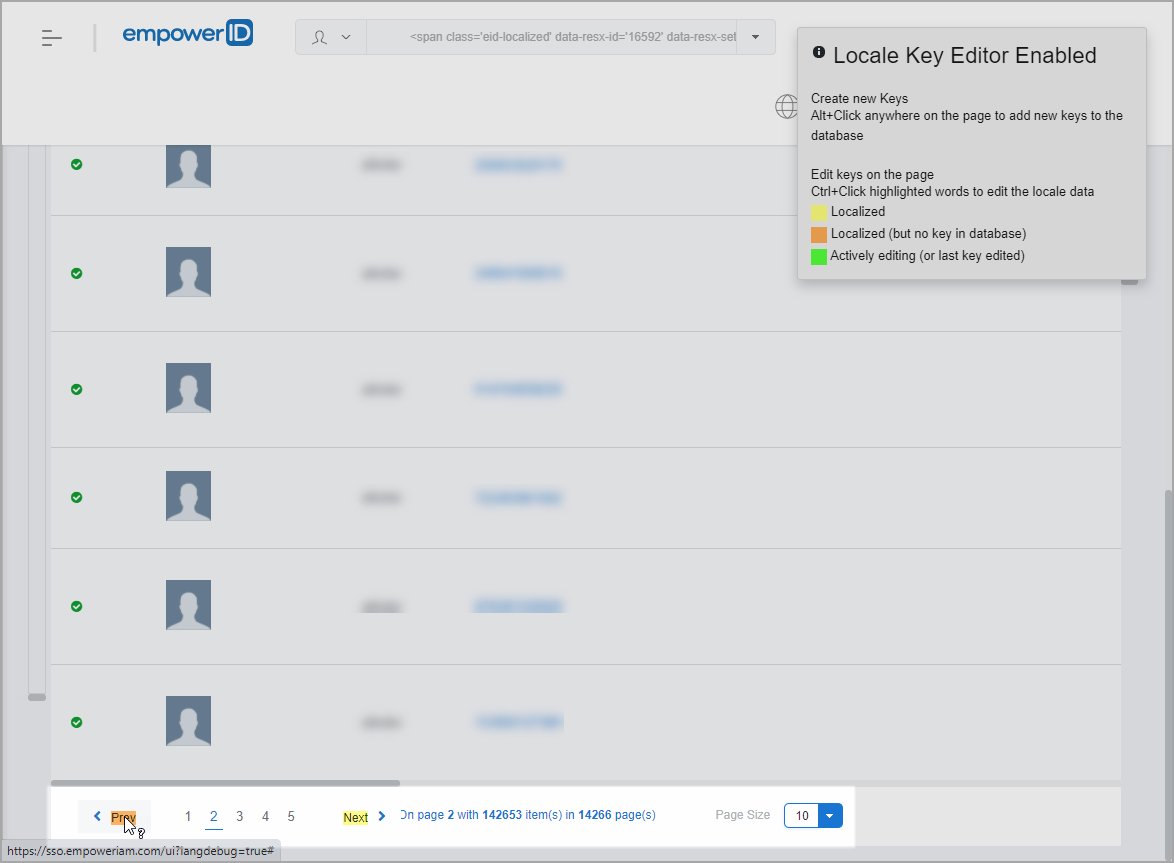
💡 The editor overlays existing UI text with color-coded highlights for real-time editing. Once enabled, a Locale Key Editor Enabled info box appears to guide usage.
Prerequisites
- EmpowerID Web UI access
- Role with permission to modify localized content
- Optional: ISO locale knowledge (e.g.,
fr-fr,ja-jp) for testing translations
Enabling the Locale Key Editor
💡 The
?langdebug=trueparameter persists across pages until removed, so you can continue localizing as you navigate.
-
Navigate to any page in the EmpowerID Web UI.
-
In the URL, replace the slash after
/UI/with?langdebug=true.
Example:
Original:
https://sso.empoweriam.com/UI/#Common/Find/Person
With editor:
https://sso.empoweriam.com/UI?langdebug=true#Common/Find/Person -
The interface displays:
- Yellow highlights for existing localized strings
- Orange highlights for text with no key in the database
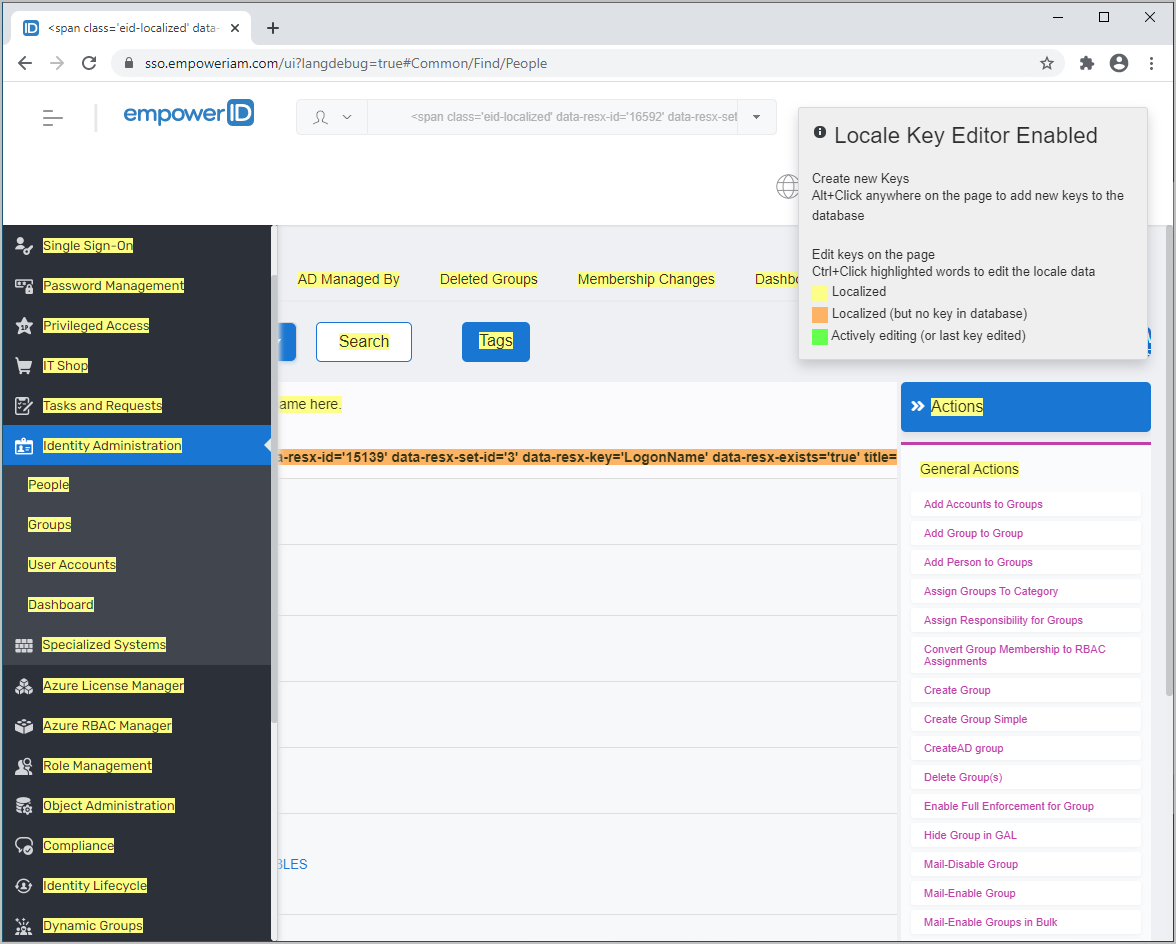
-
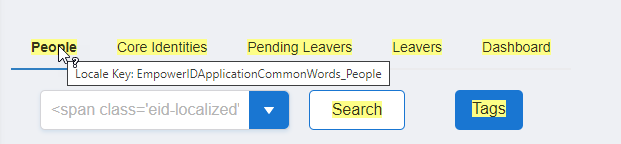
Hover over any highlighted text to view its locale key.
Editing Localized Text for Existing Keys
- Hold Ctrl, then click any yellow highlighted text.
The text turns green and an edit dialog opens.
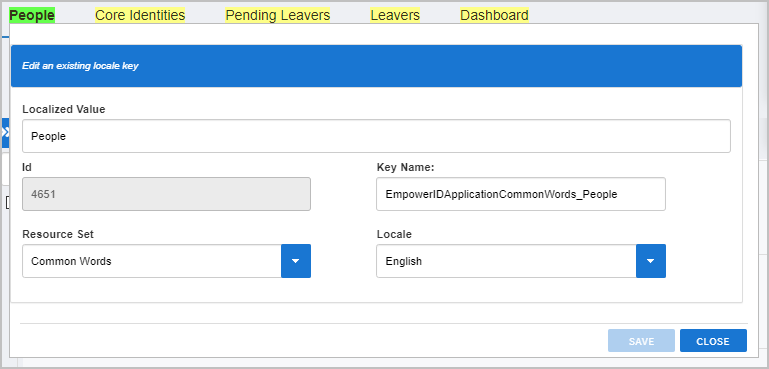
- In the Localized Value field, enter the new label.
Do not modify the Key Name field.
Example: Replace"People"with"Associates"to reflect internal terminology.
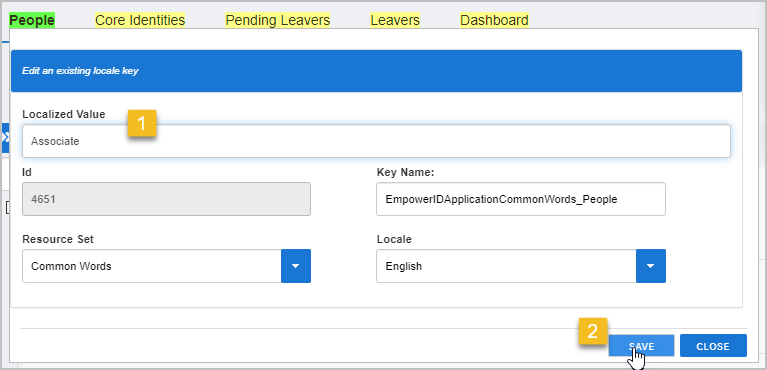
- To add or update translations:
- Open the Locale drop-down and select a language.

- Enter the translation and click Save.
- Open the Locale drop-down and select a language.
- Repeat for other languages as needed.
- Click Close when finished.
The most recently edited string remains highlighted in green.
Adding a New Locale Key from the UI
If a piece of UI text is highlighted in orange, it exists in the code but has no corresponding key in the database.
- Hold Ctrl and click the orange highlighted text.
The text turns green to indicate it is being edited.
- The Change or update a locale key dialog appears.
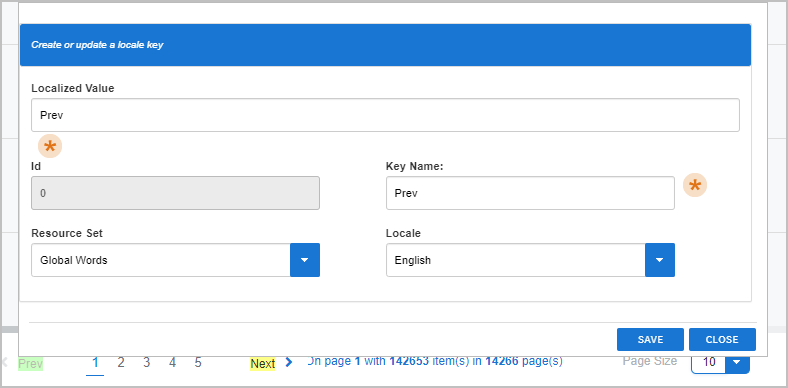
- Review the suggested key and value, then click Save.
This creates the key in the database and assigns the localized value.
Verifying Translations via URL Parameters
✅ Use this method to preview how the interface appears in other languages.
-
Add the
langparameter to any EmpowerID Web UI URL using the format:
?lang=<ISO-639-code>-<ISO-3166-code>Examples:
- Japanese:
?lang=ja-jp - French:
?lang=fr-fr
- Japanese:
-
Example full URL:
https://sso.empoweriam.com/UI/?lang=ja-jpEmpowerID will apply the selected language to all pages for the duration of the session, or until the parameter is removed from the URL.
Disabling the Locale Key Editor
To turn off the editor and remove highlights:
- In the URL, replace
?langdebug=truewith/or navigate to another page. - The Locale Key Editor Enabled box disappears and highlights are removed.
Additional Notes
- Administrators should only edit the Localized Value, not the Key Name.
- The editor is ideal for testing new translations and refining terminology before deployment.