Configure Web Security Settings
EmpowerID allows administrators to manage Cross-Origin Resource Sharing (CORS) and Content Security Policy (CSP) directives directly through the Web Console. These controls determine which external origins and content sources are permitted to interact with EmpowerID, enabling a strong browser-side security posture without manually editing any server configuration files.
All changes made through the UI take effect after the EmpowerID web environment reloads its configuration.
Prerequisites
- Access to Apps and Authentication > SSO Connections > Security.
- Permissions to modify CORS and CSP entries.
- Awareness of how to apply configuration changes in your environment (cloud vs. on-prem).
Overview of Settings
EmpowerID provides two categories of Web Security configuration:
- CORS — Defines which external origins can make requests to EmpowerID resources.
- CSP — Defines which content sources (scripts, stylesheets, images, etc.) browsers may load when interacting with EmpowerID.
Step 1: Open the Web Security Settings
- In the EmpowerID Web Console, go to Single Sign-On > SSO Connections > Security.
- The Find Security page displays two tabs:
- CORS
- CSP
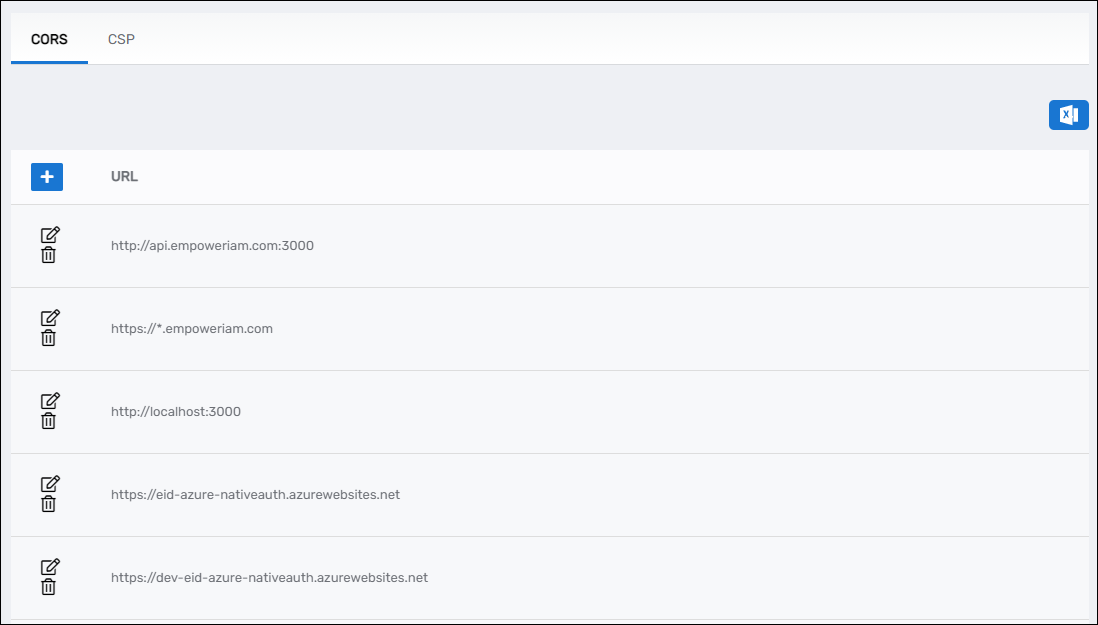
Step 2: Configure CORS Settings
- Select the CORS tab.
- Click Add.
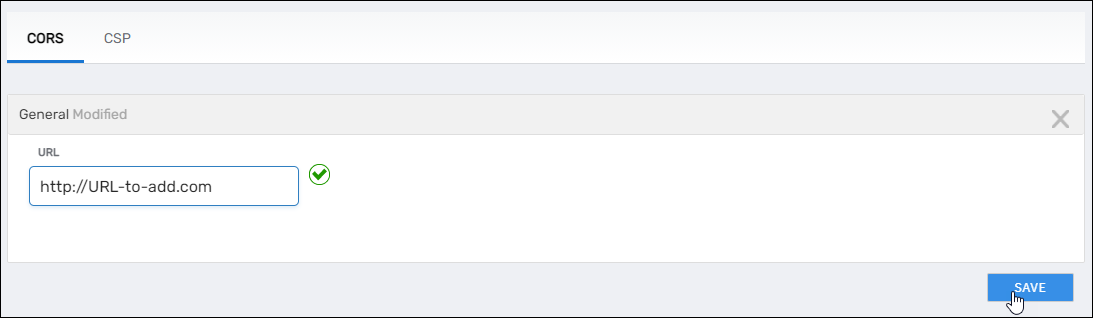
- Enter the trusted origin (e.g.,
https://portal.example.com) in the URL field. - Click Save.
Repeat this step for each additional origin that must be permitted.
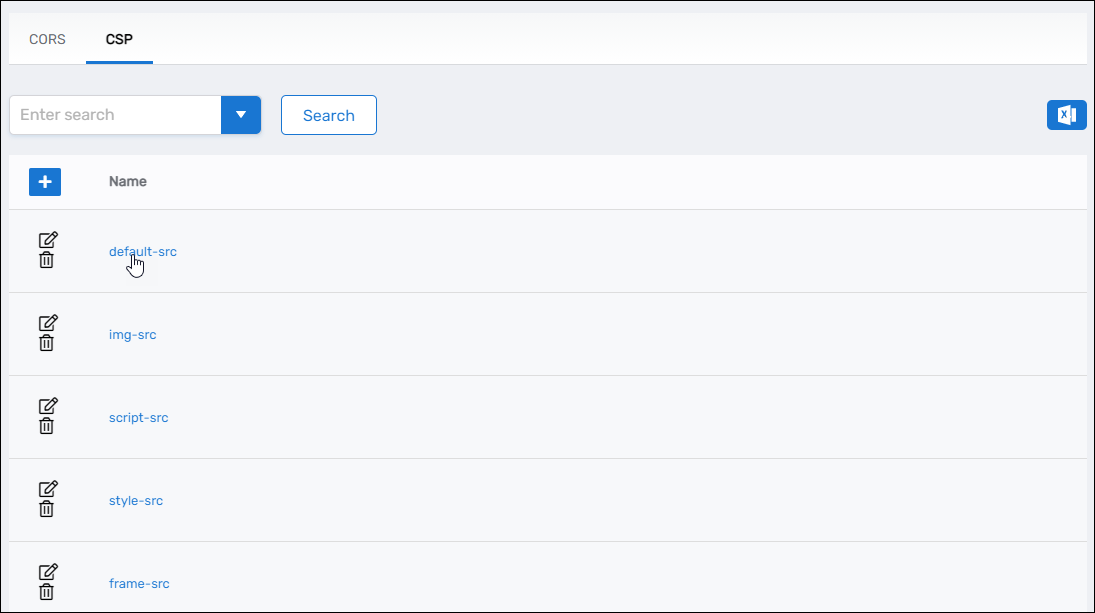
Step 3: Configure CSP Directives
- Select the CSP tab.
- Click the Name of the directive you want to update (such as
script-srcorimg-src). - Expand the Values accordion.
- Click Add.
- Enter the permitted content source (e.g.,
'self',https://cdn.example.com). - Click Save.

Repeat this process for each directive or value as required.
Step 4: Apply the Configuration
After saving your CORS or CSP changes, EmpowerID must reload its web configuration for the updates to take effect. The required steps differ based on whether your environment is cloud-hosted or on-premises.
Cloud (SaaS) Tenants
Cloud tenants do not restart services directly. When a configuration change requires the environment to refresh:
- Navigate to IT Shop > Workflows.
- Select Recycle Service Environment.
- Confirm the action.
This process temporarily takes the tenant offline while the environment reloads.
If you are unsure whether a recycle is required for your change, contact EmpowerID Support.
On-Premises Deployments
For on-prem installations, apply changes by restarting the EmpowerID web components:
- Restart IIS on the Web Role server.
- Restart the EmpowerID Web Role Windows Service (and any other EmpowerID services as needed).
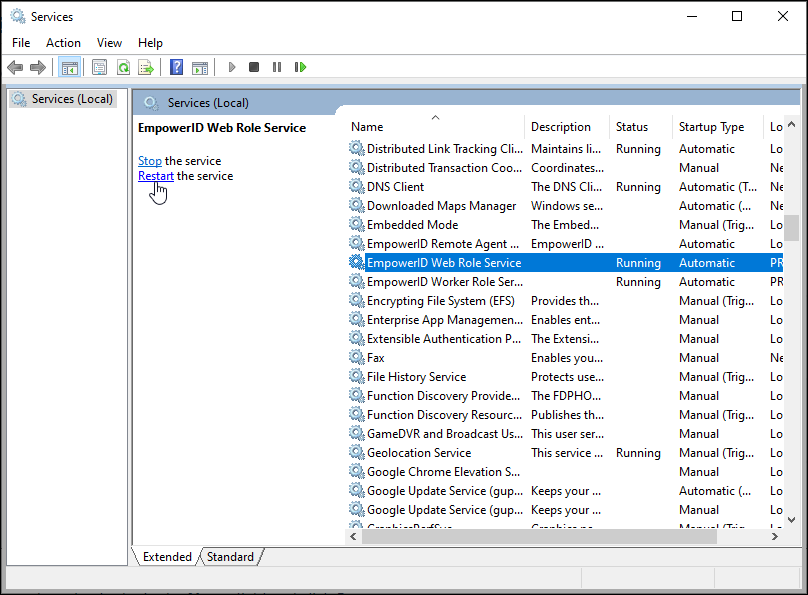
Restarting the services forces EmpowerID to rebuild and apply the updated configuration.
Notes
- CORS and CSP changes do not apply until the web environment is refreshed.
- Cloud customers should use the Recycle Service Environment workflow when a refresh is needed.
- On-prem customers should restart IIS and EmpowerID services to apply changes.