Onboard Group
When you need to organize users and control access to resources, you can create new Groups in EmpowerID. Groups provide a centralized way to manage access for multiple users who require the same level of access to systems, applications, or resources.
Access Requirements: You must have appropriate permissions to create Groups in Resource Admin.
Use this workflow when setting up access for new teams, departments, or project groups that need shared access to resources.
Before You Start
Make sure you have:
- A clear understanding of the group's purpose and membership requirements
- Knowledge of who should own and manage the group
- Decisions about what resources and access the group should provide to members
- Information about whether the group should be available for self-service requests
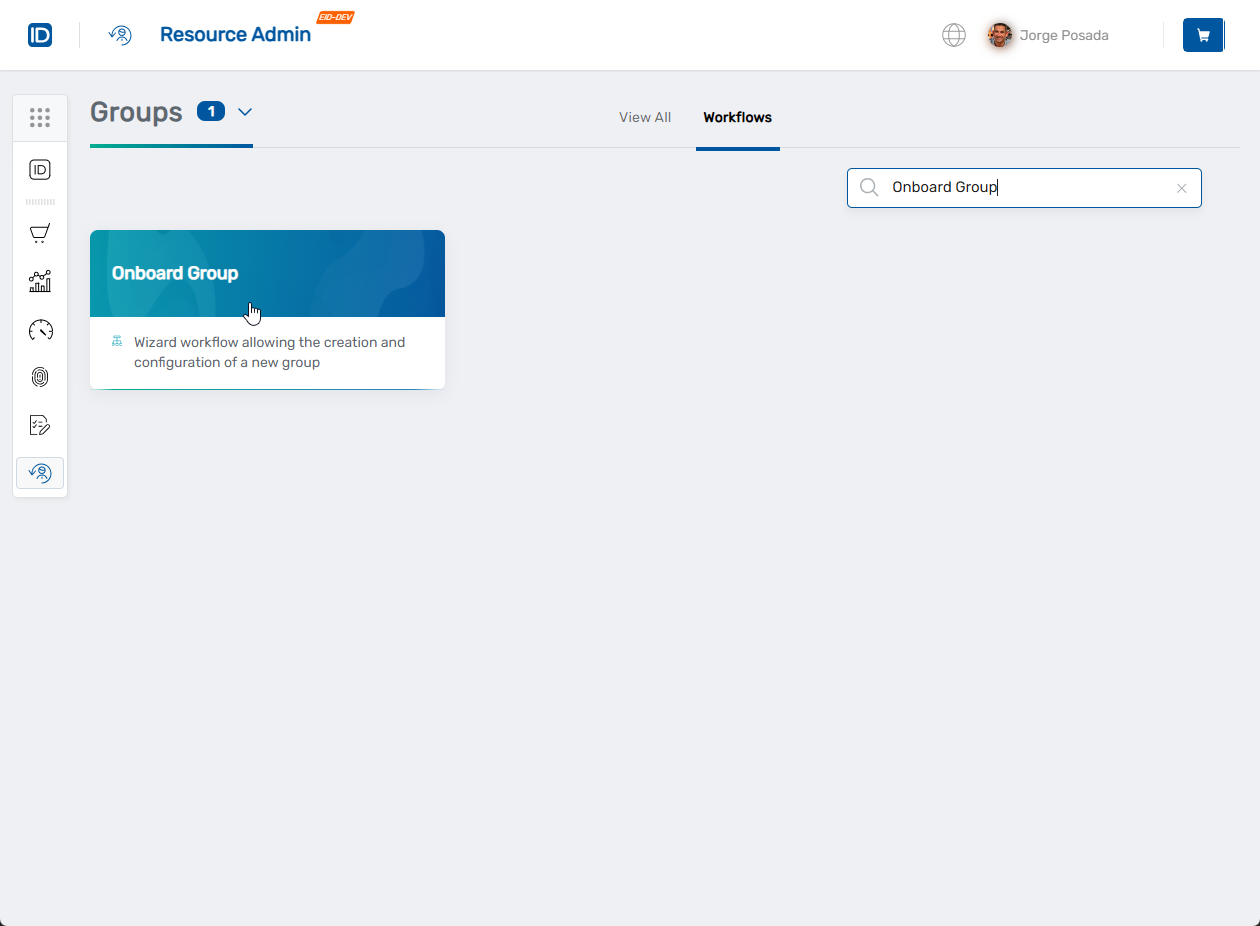
Get Started
- Navigate to the Resource Admin portal
- Select Groups from the resource type menu
- Click the Workflows tab
- Find and click Onboard Group
Step 1: Select Tenant or Directory
-
Select the tenant or directory where the group should be created using the dropdown
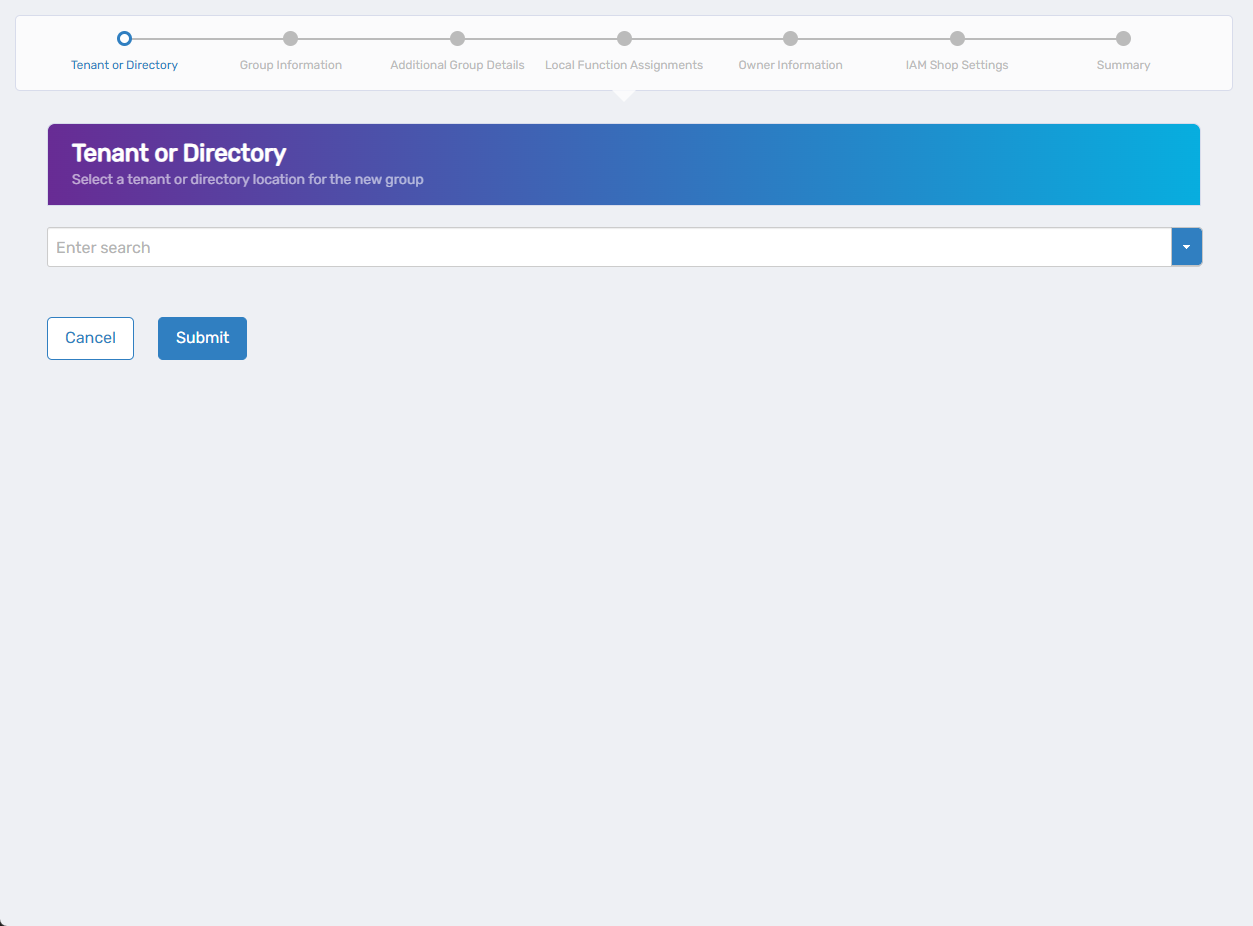
-
Complete the location selection:
Some tenant types require you to specify a location within the tenant before proceeding:
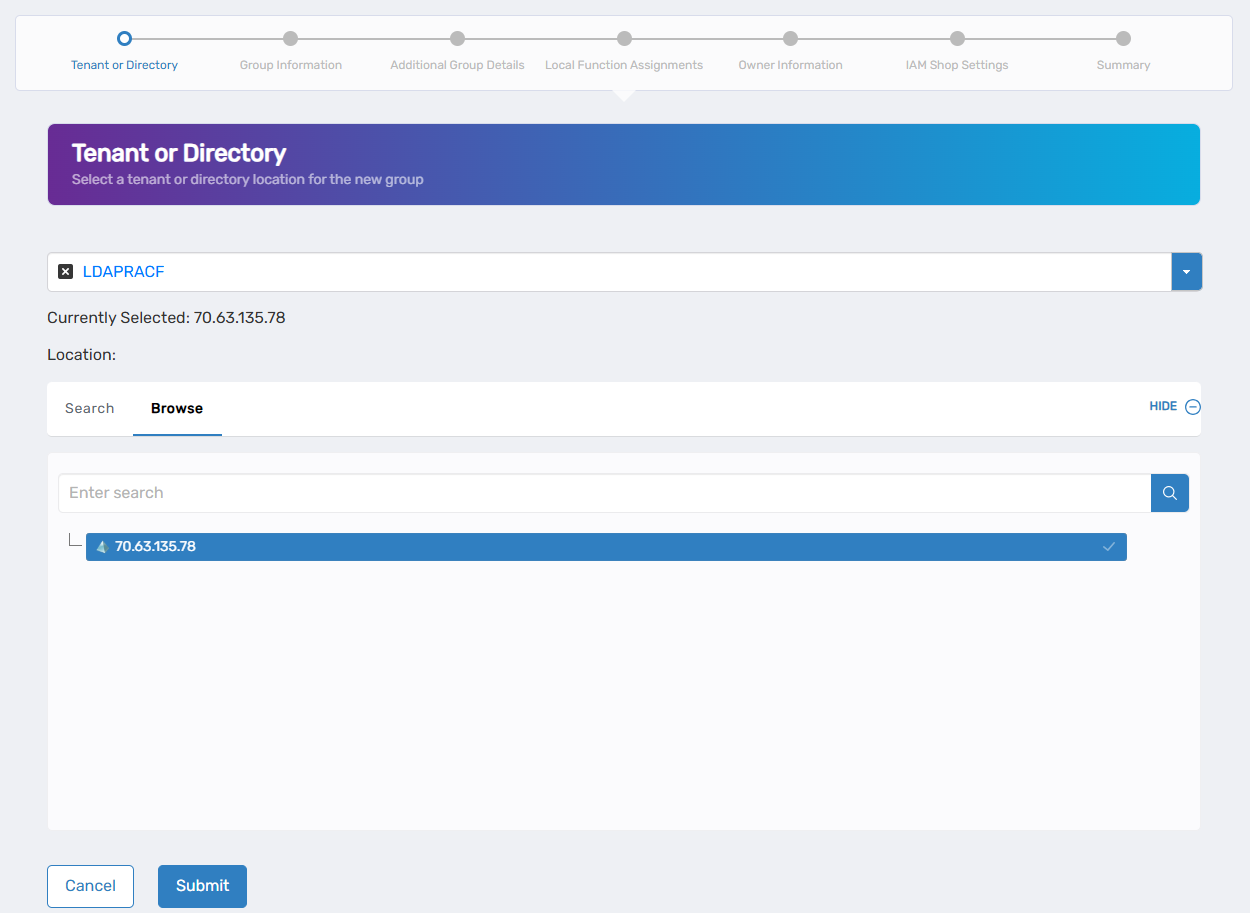
- Use the Search or Browse tabs to locate the appropriate container for the new group.
- Select the specific location where the group should be created.
If your tenant type doesn't display location selection options, proceed directly to the next step.
-
Click Submit to proceed to group information.
Step 2: Configure Group Information
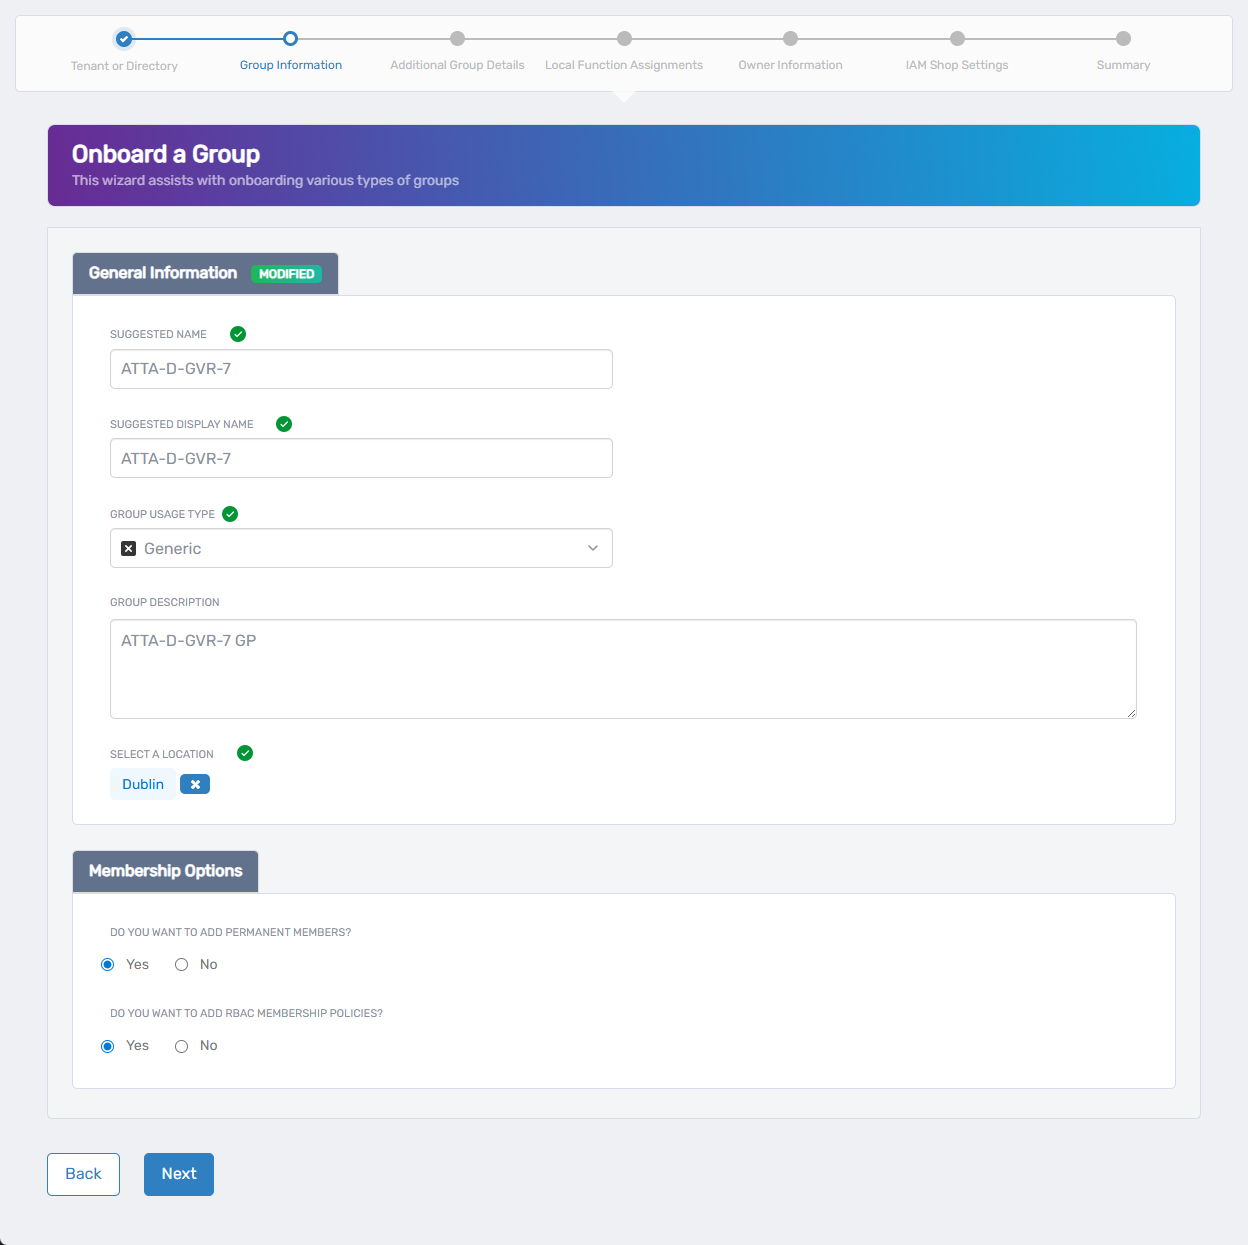
- Complete the required fields:
- Suggested Name: Enter a unique name for the group that clearly identifies its purpose or membership.
- Suggested Display Name: Enter a user-friendly name that will appear in interfaces and self-service portals.
- Group Usage Type: Choose the type of group based on your organizational needs:
- Security Group - For access control and resource access.
- Distribution Group - For email distribution lists.
- Generic Group - For general organizational purposes.
- Group Description: Provide a clear description of the group's purpose, membership criteria, and what access it provides.
- Select a Location: Choose the EmpowerID location to assign for RBAC and visibility. Click to open the location selector, then use either:
- Browse tab: Navigate the organizational hierarchy tree to find the appropriate location.
- Search tab: Enter search terms to find locations, then select from the results table showing Display Name and Full Path.
- Configure Membership Options:
- Do you want to add permanent members? Select Yes to add initial members during group creation, or No to create an empty group and add members later.
- Do you want to add RBAC membership policies? Select Yes to configure automatic membership rules based on organizational attributes (department, location, other roles), or No to manage membership manually.
- Click Next to continue to additional group details
Step 3: Additional Group Details
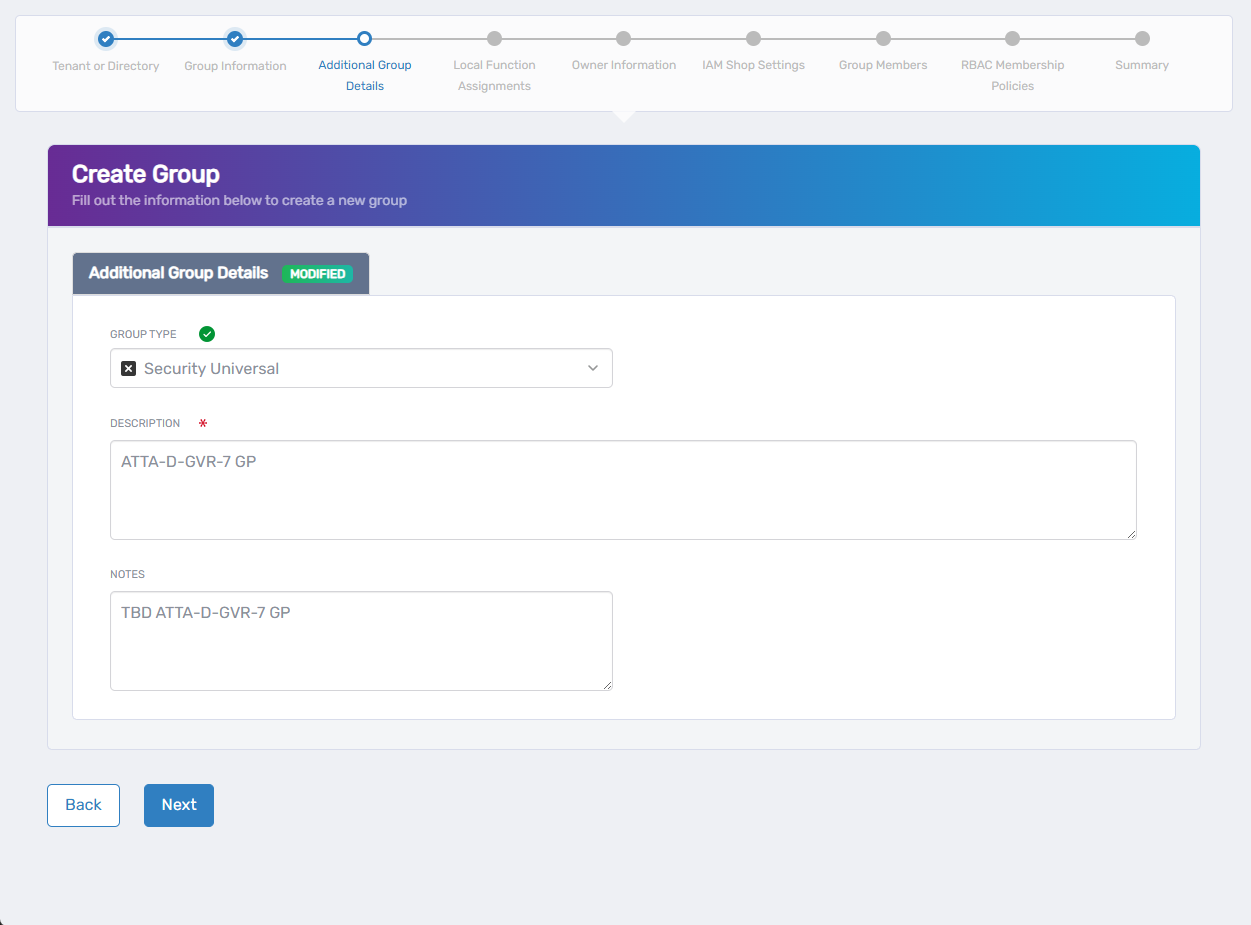
- Complete the required fields: Group Type: Select the appropriate group type from the dropdown (options vary by tenant). Description: Provide additional details about the group's purpose and usage (if this field appears for your tenant type). Notes: Add any additional notes or comments about the group (optional).
- Configure tenant-specific options (if displayed):
- Hidden In GAL: Check to hide the group from the Global Address List.
- Is Mail Enabled: Check to enable email functionality for the group.
- Click Next to proceed to local function assignments
Step 4: Local Function Assignments (Optional)
Local functions are system-specific capabilities that define what users can do within particular applications or environments.
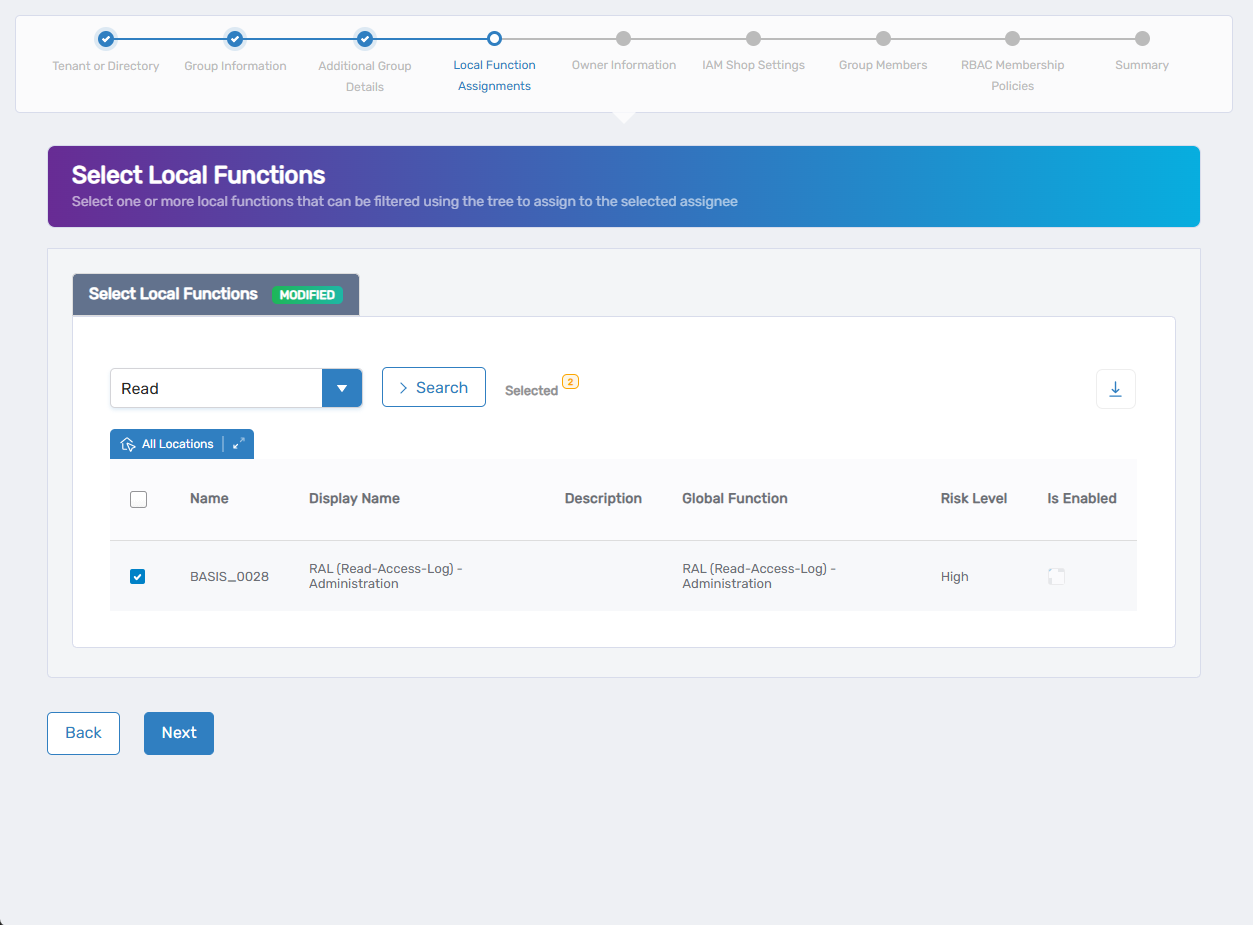
- Assign local functions to the group:
- Use the search field to find specific local functions, or click the dropdown arrow for advanced search options.
- Use the location filter to narrow functions by specific locations if needed.
- Check the box next to each local function you want to assign to this group.
- Repeat as needed to add multiple functions.
- Skip this section if the group doesn't require specific function assignments.
- Click Submit to continue to owner information
Step 5: Configure Owner Information
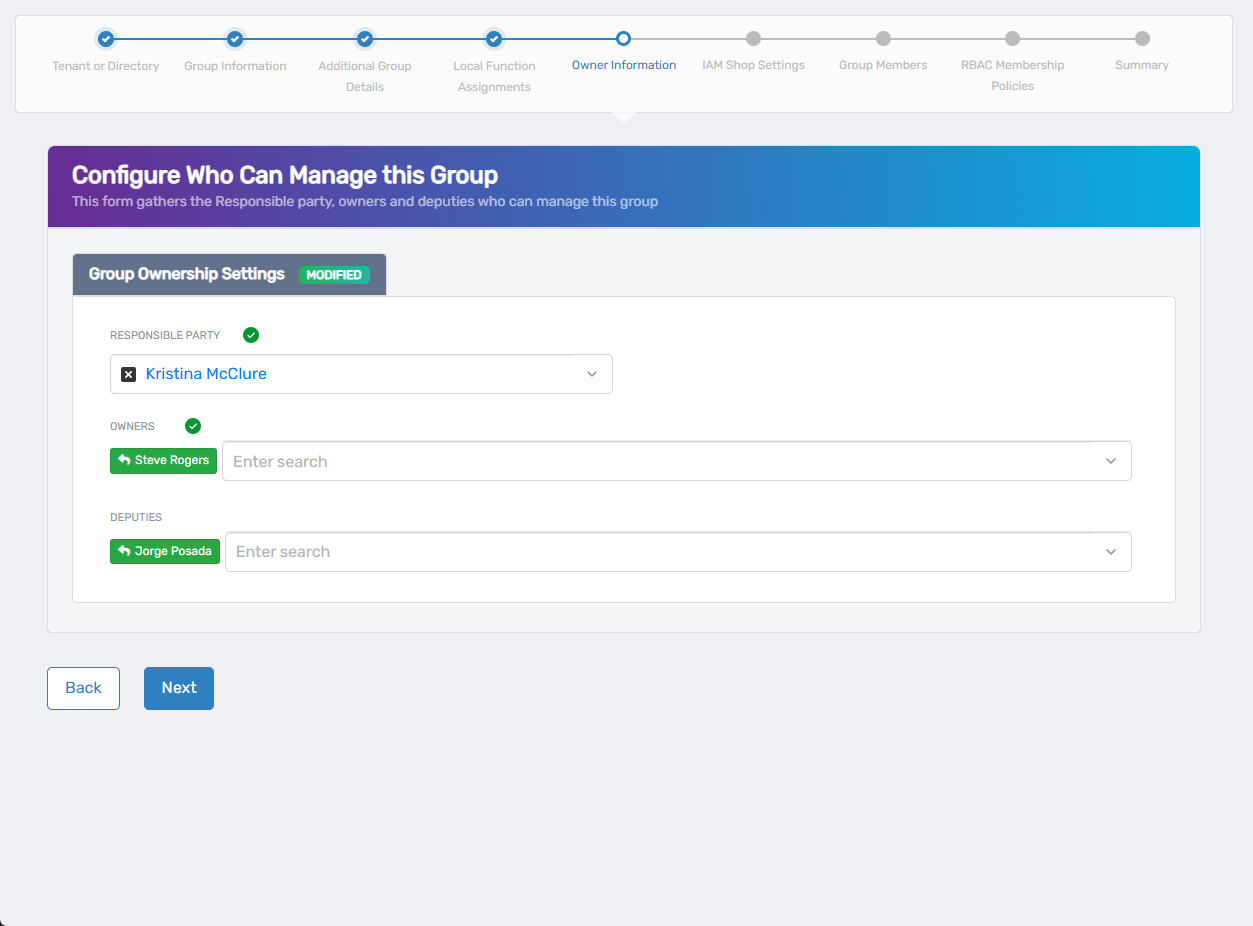
- Assign the Responsible Party:
- Search for and select the person with business accountability for this group and its membership decisions.
- Add Group Owners:
- Use the search field to find and select one or more owners who can manage group membership and settings.
- Owners can add/remove members and modify group properties.
- Multiple owners provide backup management coverage.
- Add Deputies (optional):
- Use the search field to find and select backup managers who can assist with group management.
- Deputies can act when primary owners are unavailable.
- Recommended for business continuity.
- Click Next to proceed to IAM Shop settings
Step 6: IAM Shop Settings (Optional)
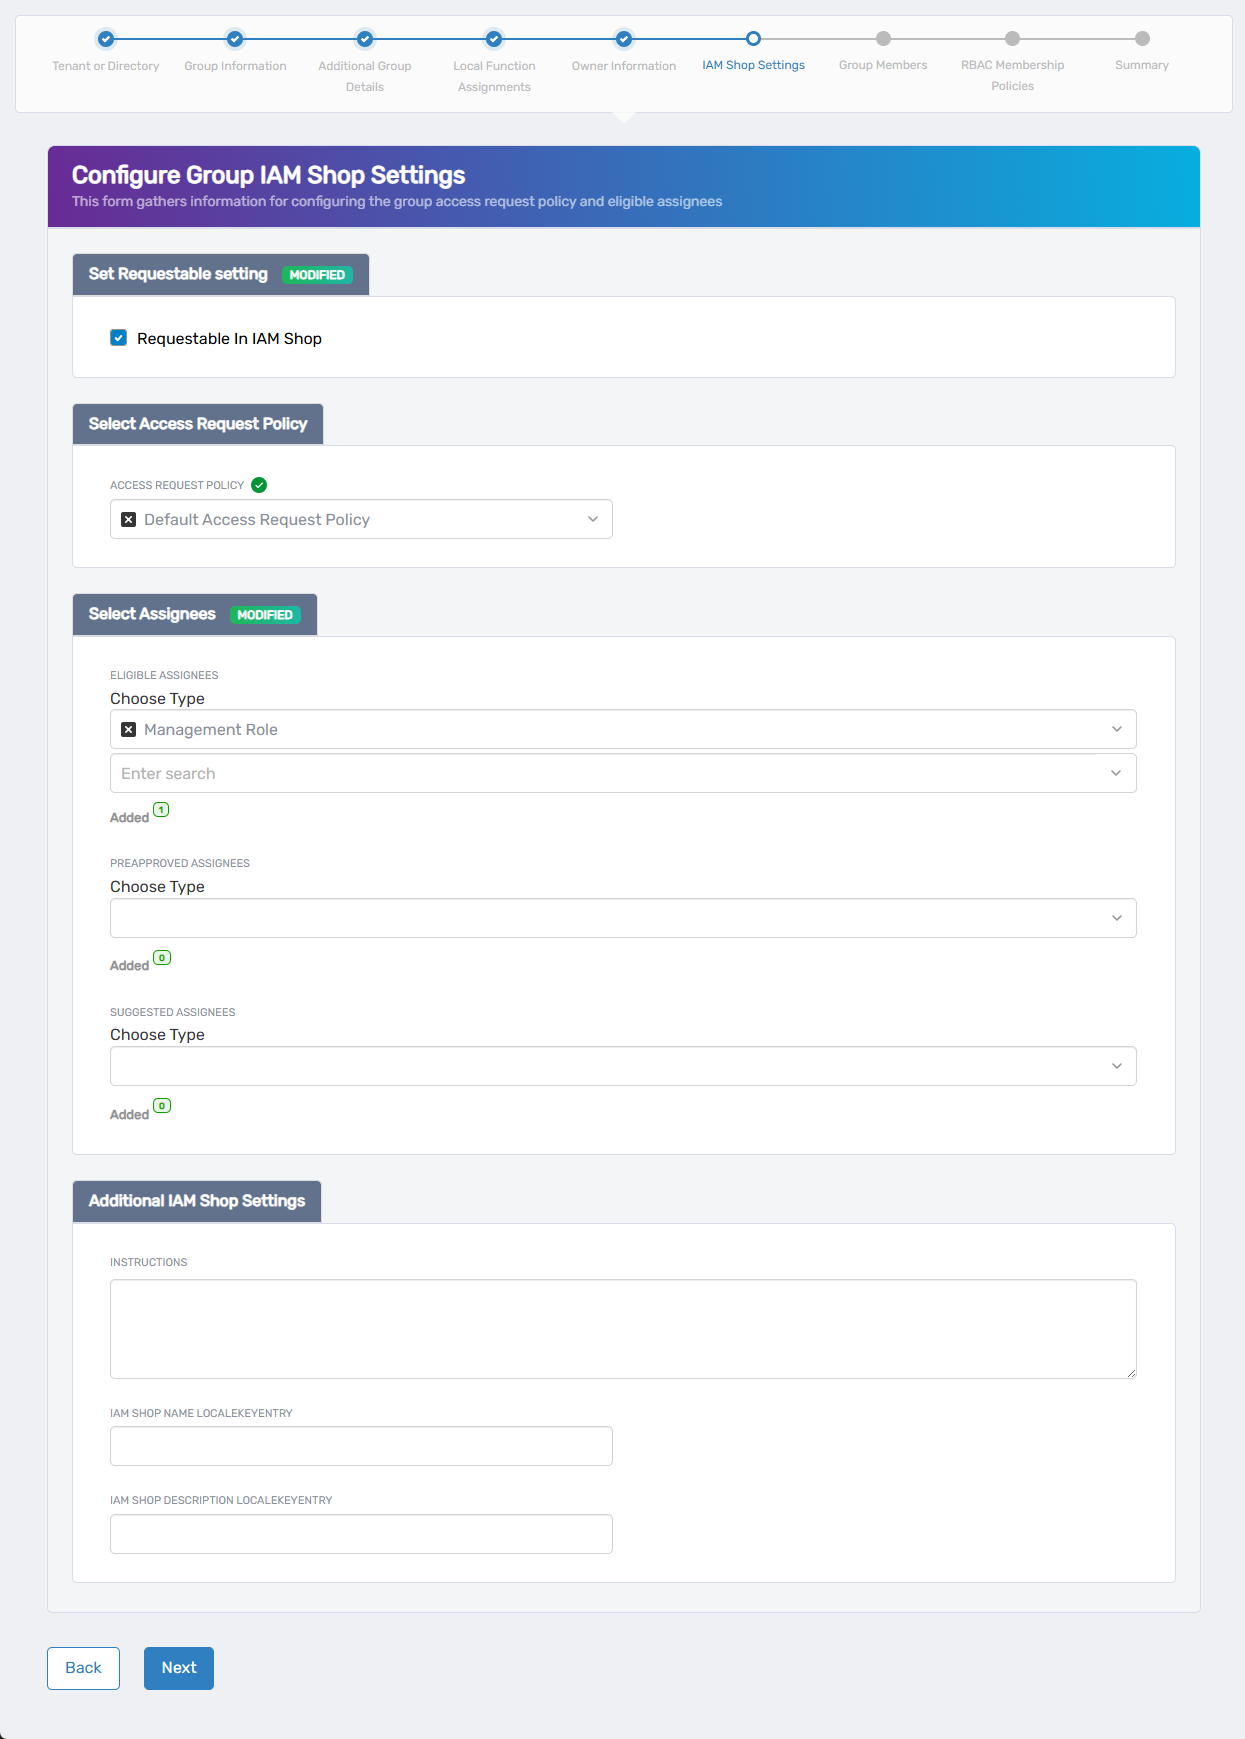
- Enable IAM Shop visibility (if desired):
- Check Requestable in IAM Shop if users should be able to see and request membership in this group through the self-service portal.
- If you do not want to publish the group in IAM Shop, leave this unchecked and proceed to step 4.
- Select Access Request Policy:
- Choose the policy that will process membership requests for this group.
- Configure assignee settings:
- Eligible Assignees: Choose assignee type and search for people, groups, or roles who can see and request this group.
- Preapproved Assignees: Choose assignee type and search for people, groups, or roles who get automatic approval for membership.
- Suggested Assignees: Choose assignee type and search for people, groups, or roles who will see this group as a suggested resource they can request access to.
- Use the Added counters to track your selections for each category.
- Configure Additional IAM Shop Settings:
- Instructions: Enter custom instructions that will appear to users when they view this group in the IAM Shop (optional).
- IAM Shop Name (Locale Key Entry): Specify an entry for the IAM Shop Name that can be used for localization (optional).
- IAM Shop Description (Locale Key Entry): Provide an entry for the IAM Shop Description that can be used for localization (optional).
- Click Next to continue to group members
Step 7: Group Members (Optional)
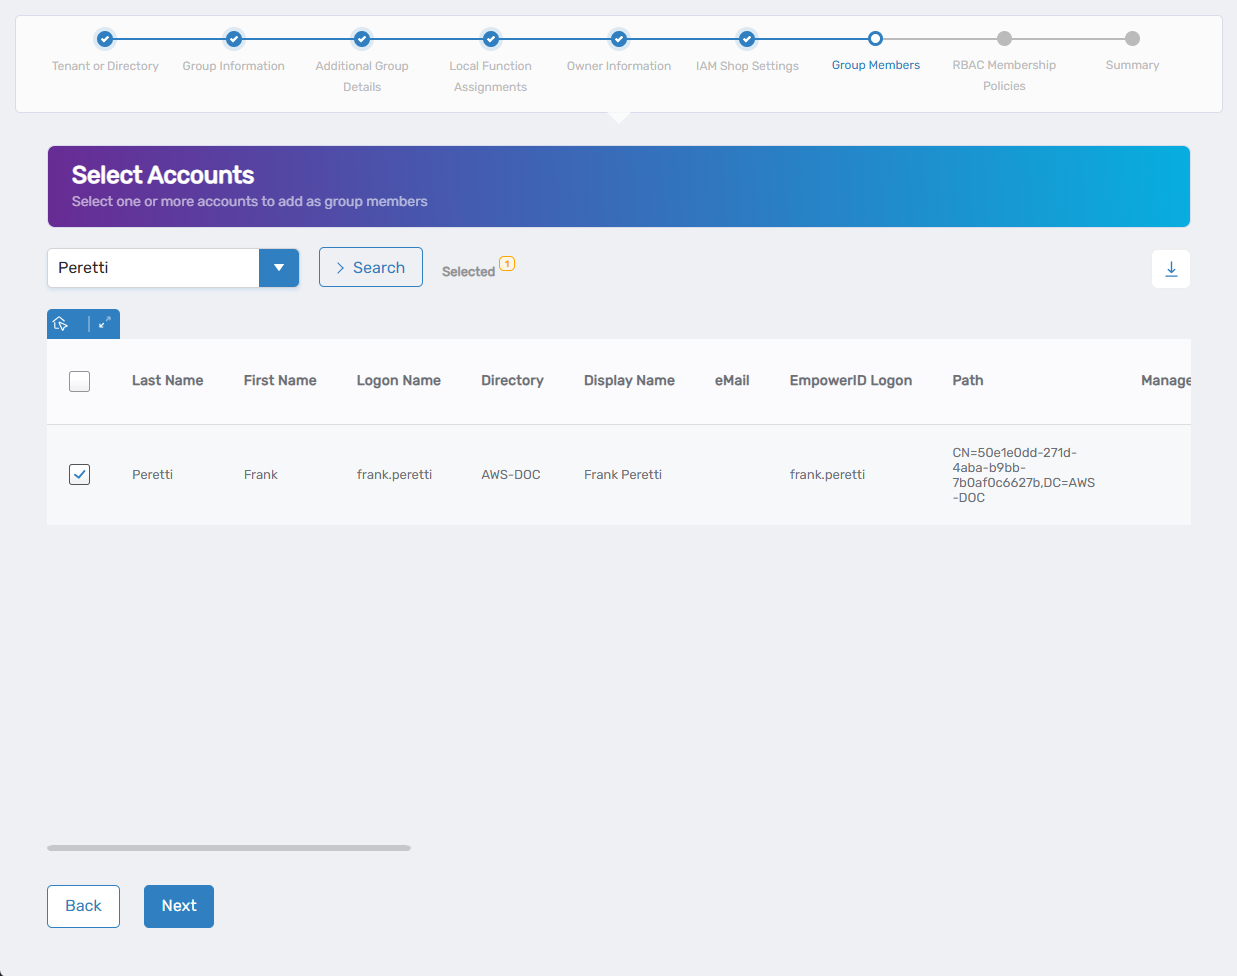
- Add initial members (if you selected "Yes" for permanent members in Step 2):
- Search for and select user accounts to add as initial group members.
- Check the box next to each account you want to include.
- Review the Selected counter to track your choices.
- Skip this section if you decide you do not want to add individual accounts at this time, simply click Next to continue. You can always add these later.
- Click Next to continue to RBAC membership policies
Step 8: RBAC Membership Policies (Optional)
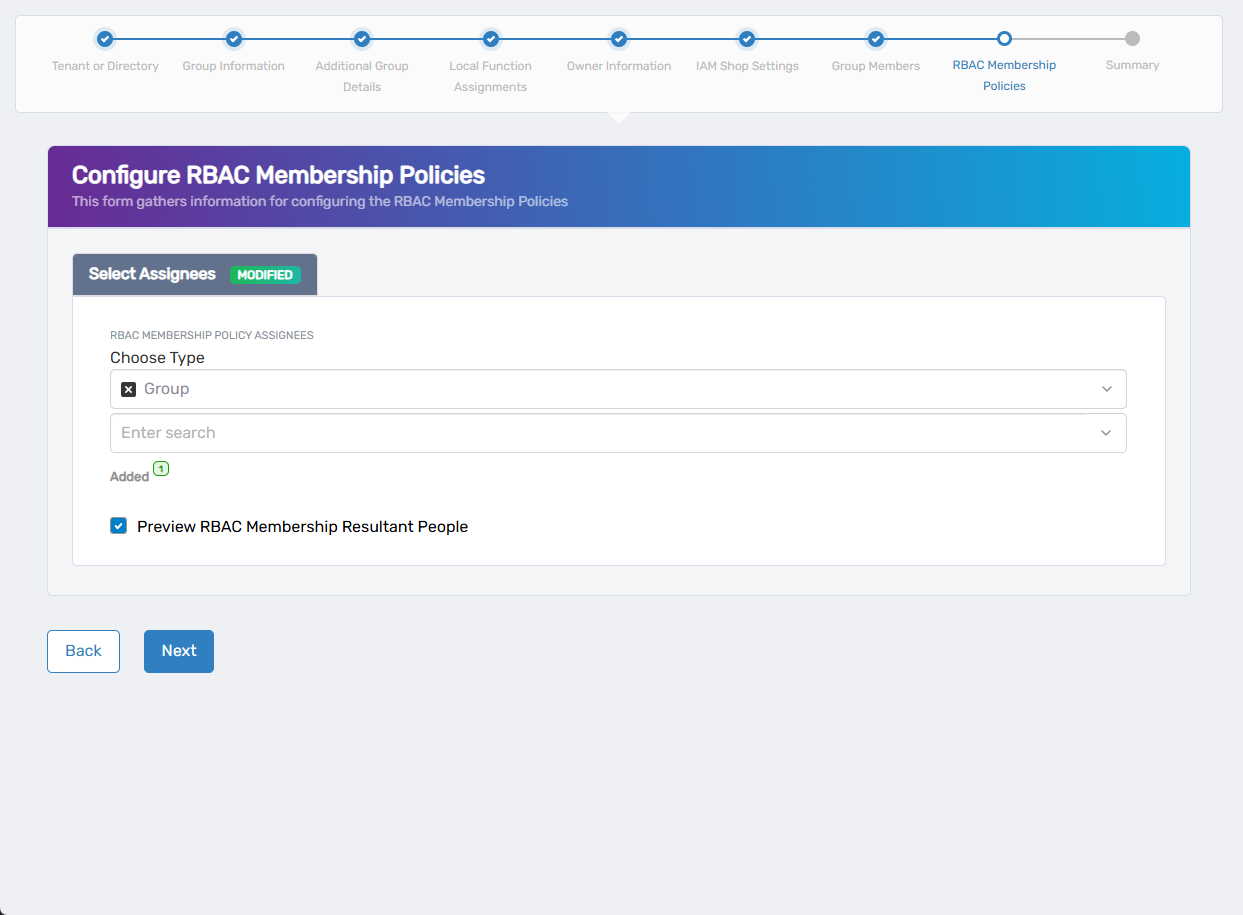
- Configure automatic membership rules (if you selected "Yes" for RBAC policies in Step 2):
- Choose assignee types from the dropdown (Person, Group, SetGroup, Management Role, Business Role, or Location).
- Search for and select specific people, groups, or roles that should automatically receive group membership.
- Add multiple policies to create comprehensive automatic assignment rules.
- Preview membership (optional):
- Check the preview option to see how many users will be affected by your policies before finalizing.
- Skip this section if you decide you do not want to configure RBAC Membership policies at this time, simply click Next to continue. You can always add these later.
- Click Next to continue to the summary
Step 9: Review and Complete
- Review the summary of all configuration settings to ensure accuracy
- Verify group details, ownership, function assignments, and membership settings
- Click Submit to create the group
- Review the Operation Execution Summary to confirm the group was created successfully.
What Happens Next
- The new group is immediately available in the system for membership assignments
- Owners and deputies can begin managing group membership using the Manage Group Wizard
- If published in IAM Shop, eligible users can discover and request membership in the group
- Any local function assignments grant immediate system access to group members
- The group appears in the Groups list and can be managed through Resource Admin
If You Run Into Problems
Can't find the right tenant or directory: Verify you have access to create groups in the desired location. Contact your administrator if the tenant or directory doesn't appear in search results.
Group name already exists: Choose a different, unique name for the group. Group names must be unique within the selected tenant or directory.
Can't find people to assign as owners: Verify the people exist in the system and you have access to assign them to group ownership roles.
IAM Shop settings don't work as expected: Ensure you properly configured the access request policy and eligible assignee settings. Test with an eligible user to verify the group appears correctly in the IAM Shop.
Related Actions
- To add users to the new group, see Add People to Group
- To modify group settings after creation, see Edit Group Attributes
- To configure automatic membership, see Edit RBAC Membership Policies