Setting up the Microsoft App ID
To establish a secure trust relationship between the EmpowerID Chatbot and the Microsoft identity platform, you must register the Bot as an application in Microsoft Entra ID (formerly Azure Active Directory). This registration enables the Bot to perform secure authentication and authorization operations using OAuth 2.0.
Upon completing this setup, you will obtain the Microsoft App ID (Client ID) and Client Secret, which are required to configure the Azure App Service hosting the EmpowerID Bot microservice.
🔐 Prerequisites
Ensure the following before proceeding:
- Administrative access to the Azure Portal
- Contributor or higher role in the Azure subscription
- Access to the target App Service (Linux Web App) hosting the EmpowerID Bot
- Familiarity with Microsoft Entra ID (Azure Active Directory) and App Registration concepts
🔧 Procedure Overview
This setup includes the following key tasks:
- Register the EmpowerID Bot in Microsoft Entra ID
- (Optional) Remove existing Service Principal
- Create a new Application Secret
- Configure the Bot’s Azure App Service with App ID and Secret
Step 1: Register the EmpowerID Bot in Entra ID
- Sign in to the Azure portal.
- Navigate to Azure Active Directory.
- In the left menu, under Manage, select App registrations.
- Click + New registration.
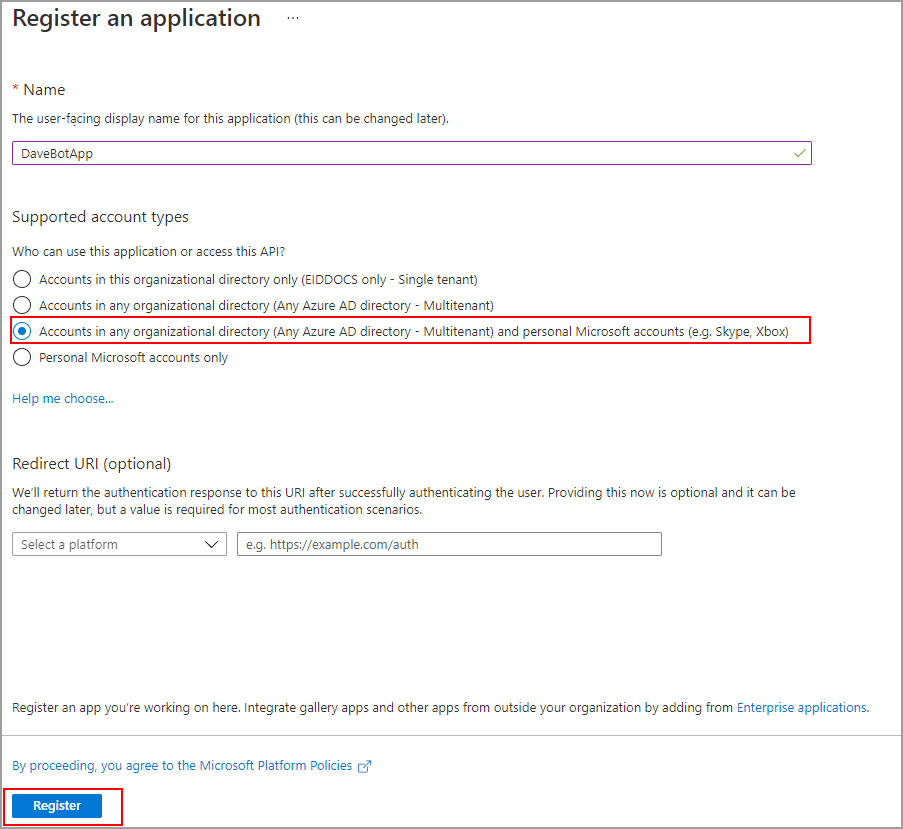
- In the Register an application page:
- Supported account types: Select
Accounts in any organizational directory (Any Azure AD directory - Multitenant) - Leave other settings as default or as appropriate for your deployment.
- Supported account types: Select
- Click Register.
Step 2: Delete Existing Service Principal (If Applicable)
If a Service Principal was previously created for this application, delete it to avoid configuration conflicts:
- In Azure Active Directory, go to Enterprise applications.
- Search for the application you just registered and click on it.
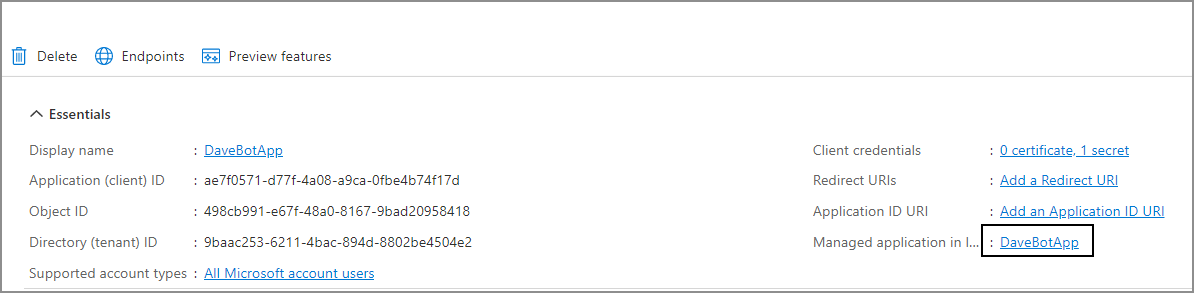
- Click on Managed application in local directory.
- Select the Properties tab.5. Click Delete to remove the Service Principal.
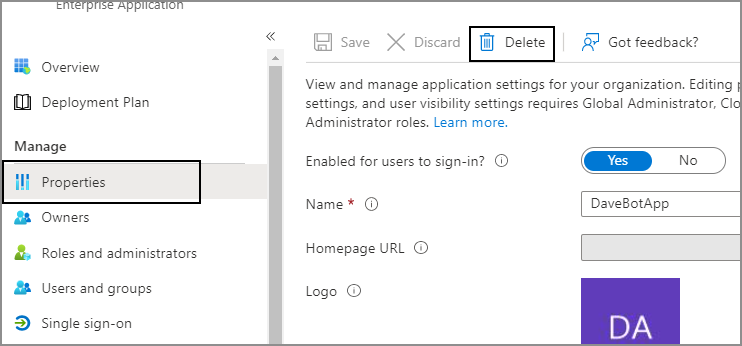
⚠️ Important: Only perform this step if an existing Service Principal is interfering with the current registration. This action is not always required and should be used with caution.
Step 3: Create an Application Secret
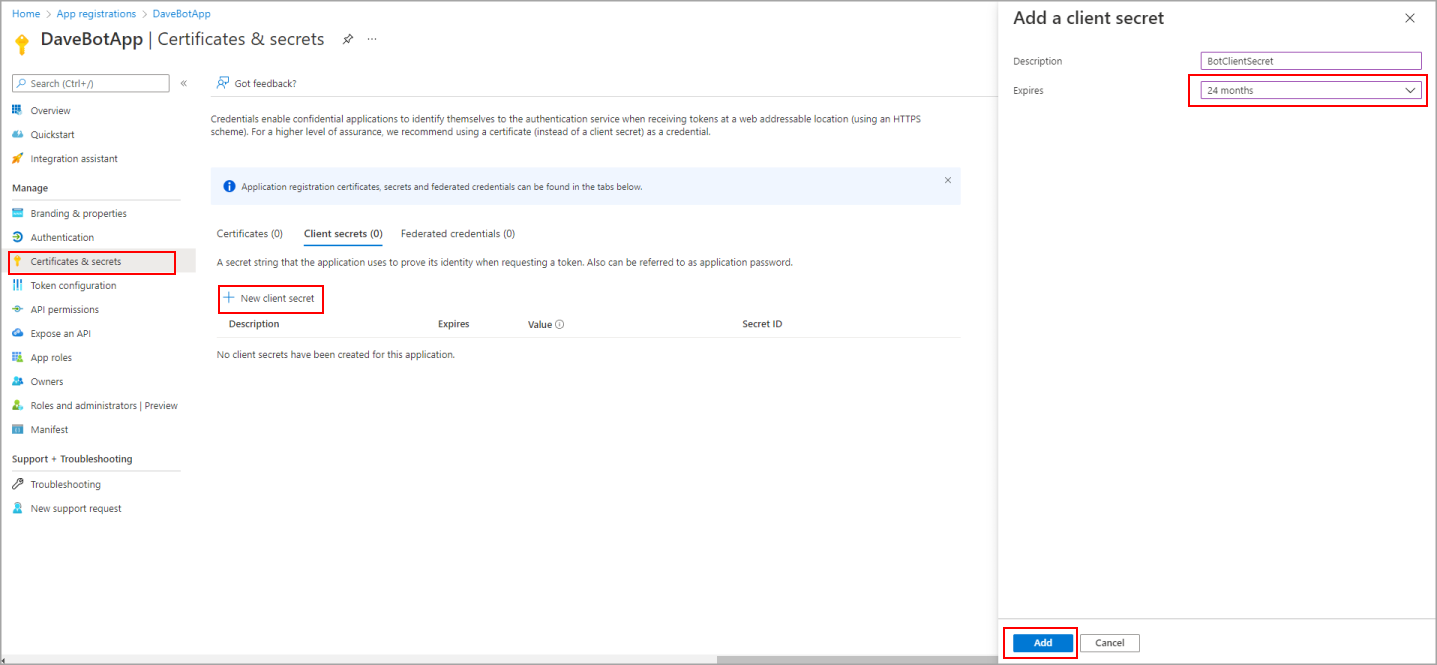
- In the App Registration for the Bot, navigate to Certificates & secrets.
- Under Client secrets, click + New client secret.
- Enter a description and set an expiration of 24 months or more (recommended for long-term deployments).
- Click Add.
- Copy the generated secret value immediately — you will not be able to retrieve it again later.
⚙️ Step 4: Configure the Azure App Service
-
Navigate to the App Service (Linux Web App) where the EmpowerID Bot is hosted.
-
In the App Service menu, go to Settings > Configuration.
-
Under Application settings, add the following key-value pairs:
Setting Key Value Description MicrosoftAppIdPaste the Application (Client) ID from registration MicrosoftAppPasswordPaste the Secret value you created earlier 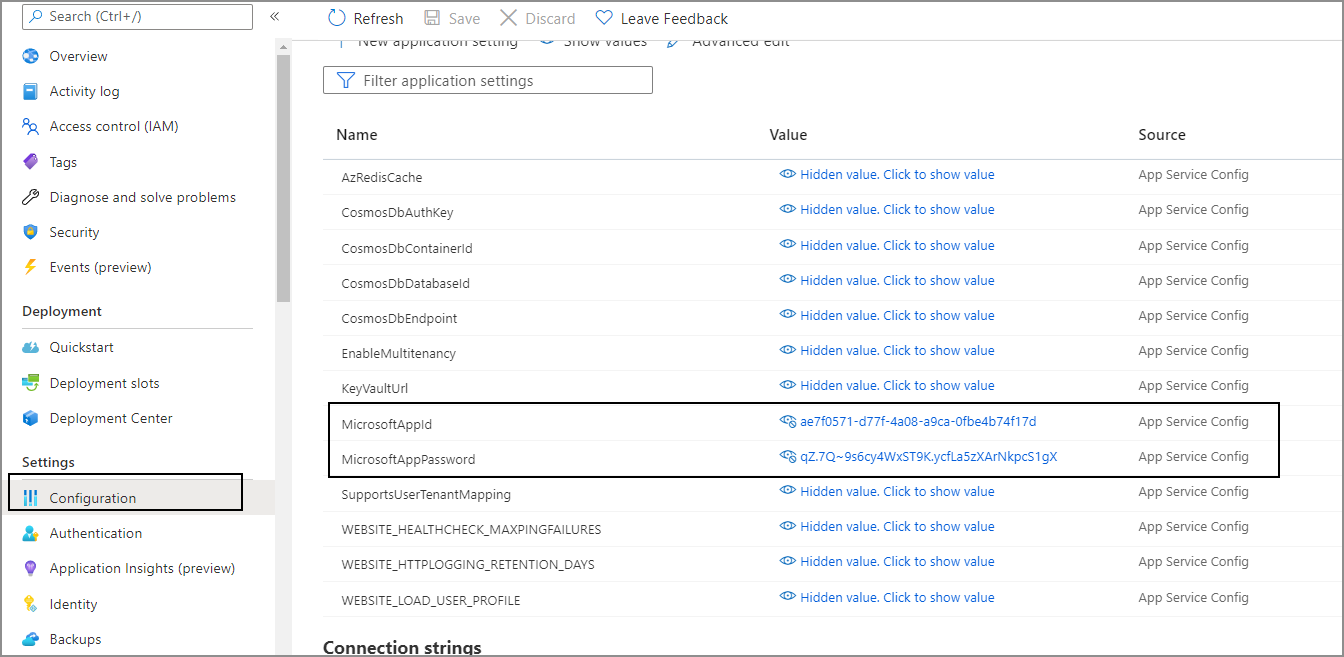
-
Click Save to apply the configuration settings.