Set up Azure Cache for Redis
The EmpowerID Chatbot uses Azure Cache for Redis as a high-throughput, low-latency messaging broker and caching mechanism to support bot state management and performance optimization. This document provides the step-by-step procedure for creating, configuring, and integrating Azure Cache for Redis with the EmpowerID Bot App Service.
Prerequisites
Before beginning, ensure you have the following:
- Azure portal access with permissions to:
- Create and configure Azure Cache for Redis
- Manage App Service application settings
- An existing EmpowerID Bot App Service instance
(see Set up App Service) - Network access to Redis endpoints (verify if using VNet Integration)
Use Case
The Redis cache is used by EmpowerID Bot to:
- Persist lightweight session data
- Enable scalable message brokering between components
- Improve bot response latency
Configuration Procedure
Step 1 – Log in to Azure Portal
- Go to https://portal.azure.com.
- Use an account with Contributor or Owner access to the target Azure subscription.
Step 2 – Create an Azure Cache for Redis Instance
-
In the Azure Portal, navigate to Create a resource > Databases > Azure Cache for Redis.
-
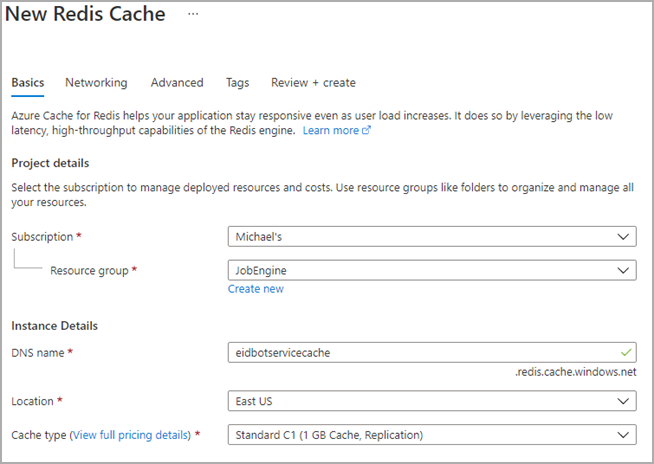
Provide the following required details:
- DNS name: A unique name for your cache
- Subscription: Select your billing subscription
- Resource Group: Use an existing one or create new
- Location: Select the same region as your Bot App Service
- Pricing Tier: Choose based on scale (see below)
-
Choose a cache size tier appropriate for your environment:
Environment Type Recommended Cache Size Single instance / Dev 1 GB (Basic or Standard) Standard multi-tenant 12 GB – 100 GB (Standard) High-throughput prod 384 GB – 1.5 TB (Enterprise) -
Click Review + create, then Create.
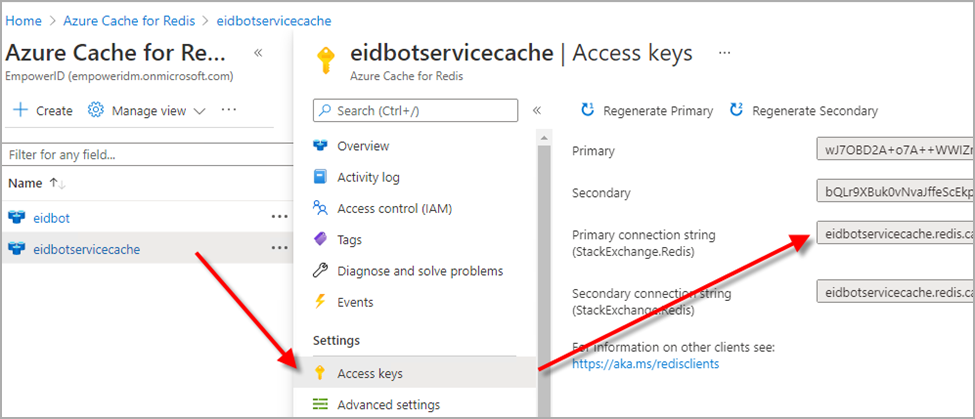
Step 3 – Retrieve the Primary Connection String
- Once the Redis cache is provisioned, navigate to the cache resource blade.
- In the left-hand menu, click Access keys.
- Copy the Primary connection string. You will use this to connect the Bot to Redis.
Step 4 – Add Redis Configuration to App Service
-
In the Azure Portal, go to App Services.
-
Select the App Service created during Set up App Service.
-
Under Settings, click Configuration.
-
In the Application settings tab, add the following key-value pair:
Setting Name Value AzRedisCache[Paste Primary Connection String] -
Click Save to apply changes. Restart the App Service if prompted.
Next Step
In the next step, you will configure Cosmos DB to store persistent bot state and templates.
See Set up the Cosmos DB for detailed instructions.