Creating Recertification Audits
A recertification audit is a systematic review of user access rights to ensure they align with the organization’s policies and compliance standards. EmpowerID facilitates this process by creating audit snapshots of user access, enabling auditors to review access permissions and address unauthorized access.
- Audit: The actual review process that checks user access against recertification policies.
- Policy: The set of rules and procedures defining how access is reviewed.
- Template: A reusable audit configuration that can be scheduled to run at specific intervals.
After creating an audit, you must add at least one Recertification Policy to the Audit to generate recertification tasks.
Procedure
Step 1: Navigate to the Create Audit Page
- From the EmpowerID navbar, go to Compliance > Recertification.
- Select the Audits tab.
- Click the Create Audit button.
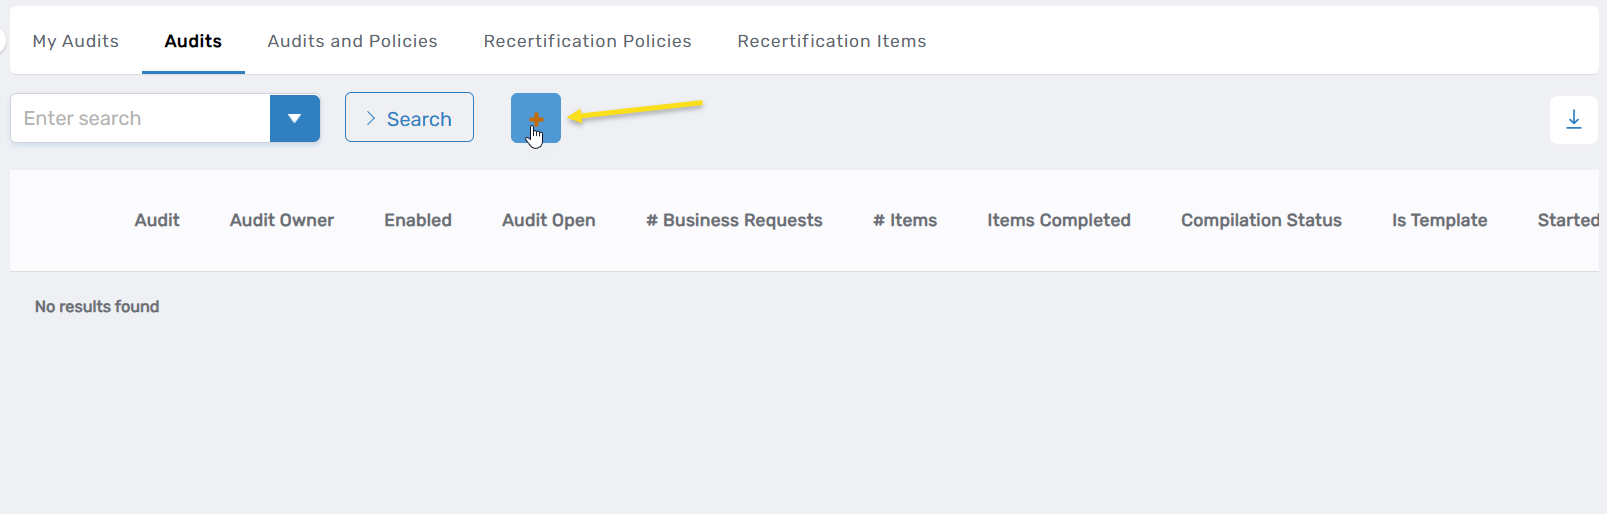
This opens the Create Audit form.
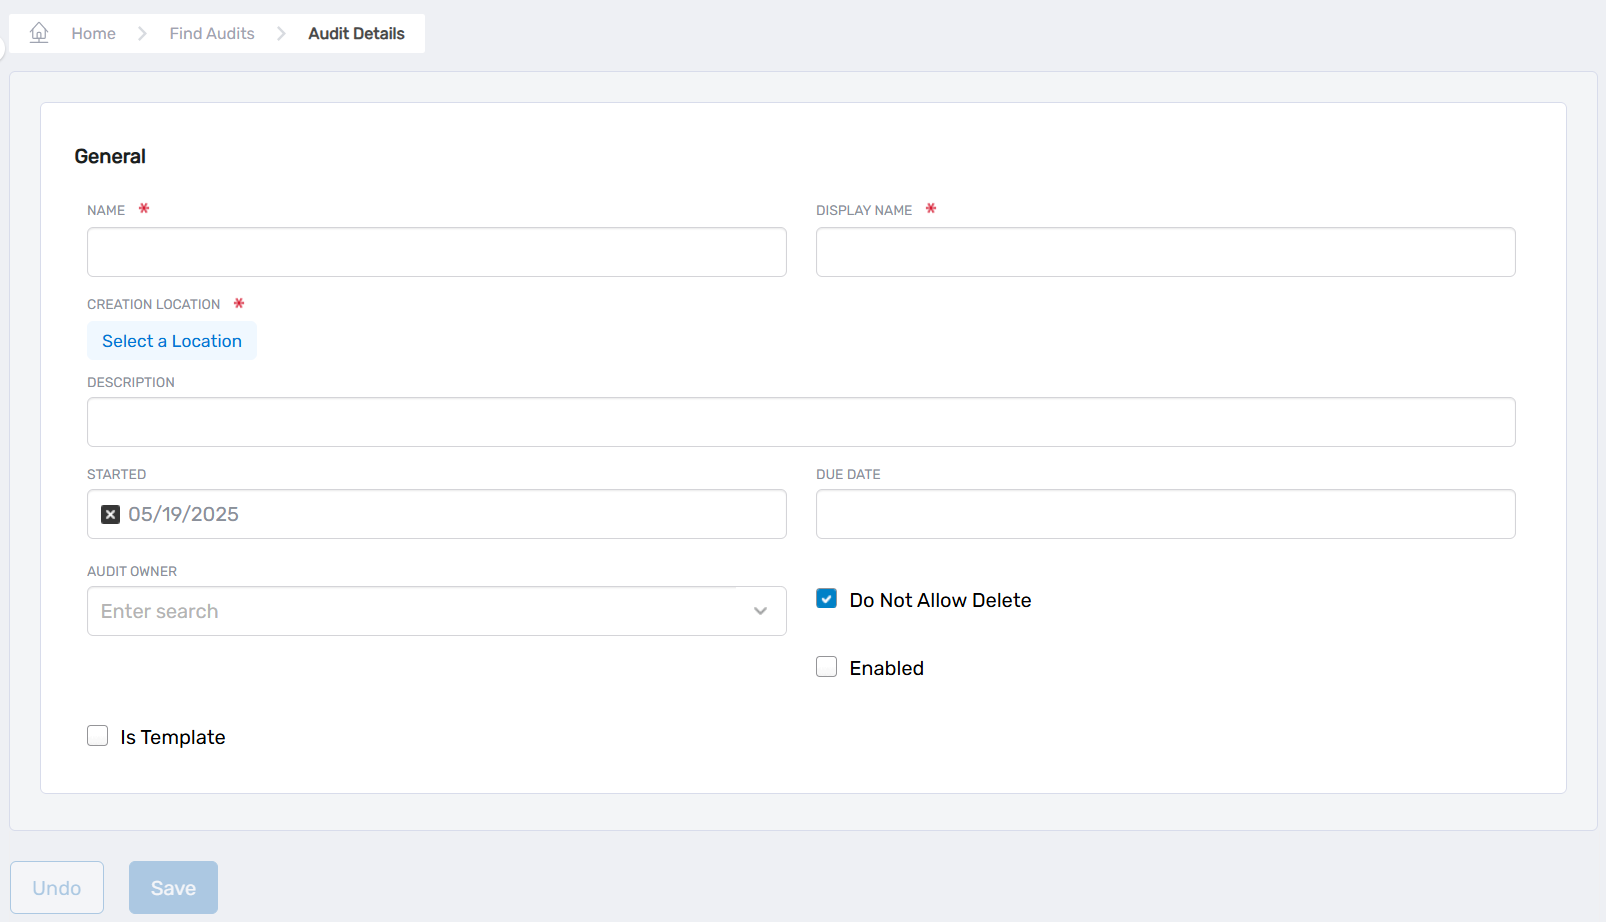
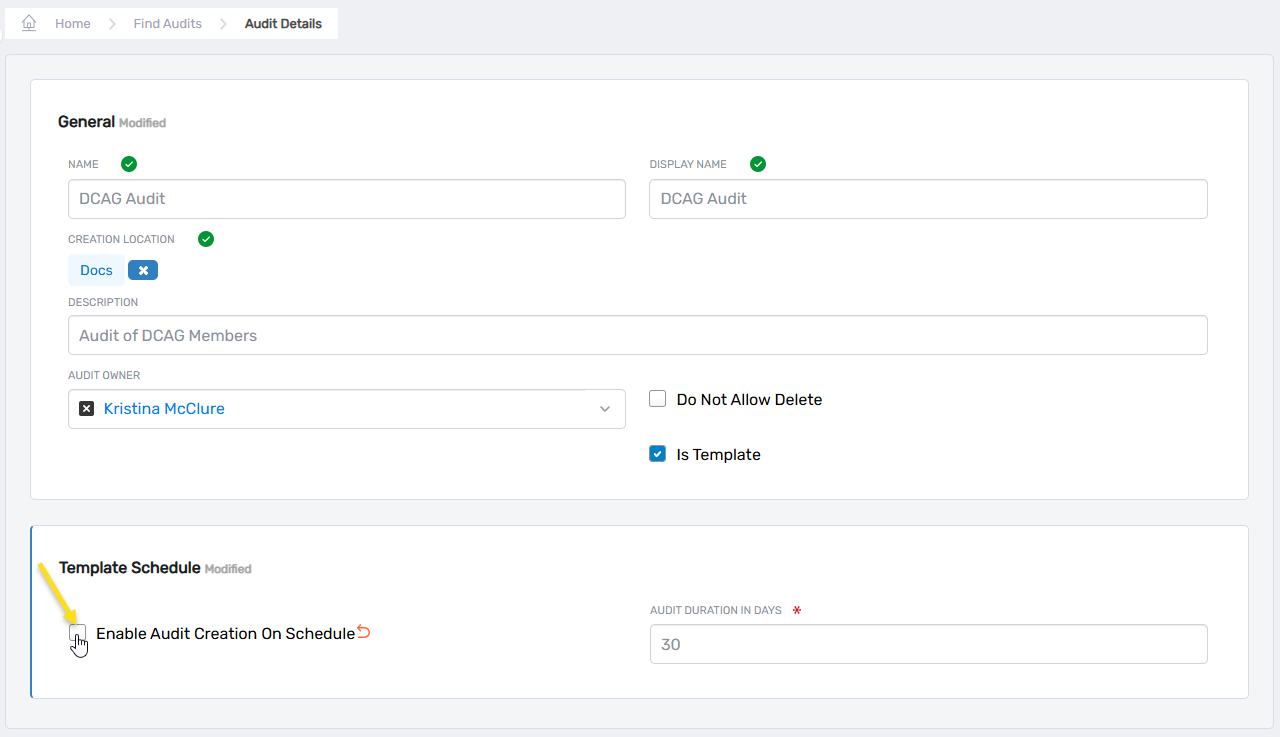
Step 2: Enter the General Audit Information
- Enter a unique identifier in the Name field (required).
- Provide a user-friendly name in the Display Name field (required).
- Click Select a Location and choose the appropriate location for the audit (required).
- Add a detailed Description of the audit's purpose (optional).
- Set the Started date for when the audit should begin.
- Set the Due Date for when the audit should be completed.
- In the Audit Owner field, search for and select the appropriate person to be the audit's owner.
- Check Do Not Allow Delete to prevent the audit from being deleted in the EmpowerID UI.
- Check Enabled to make the audit active and ready to run.
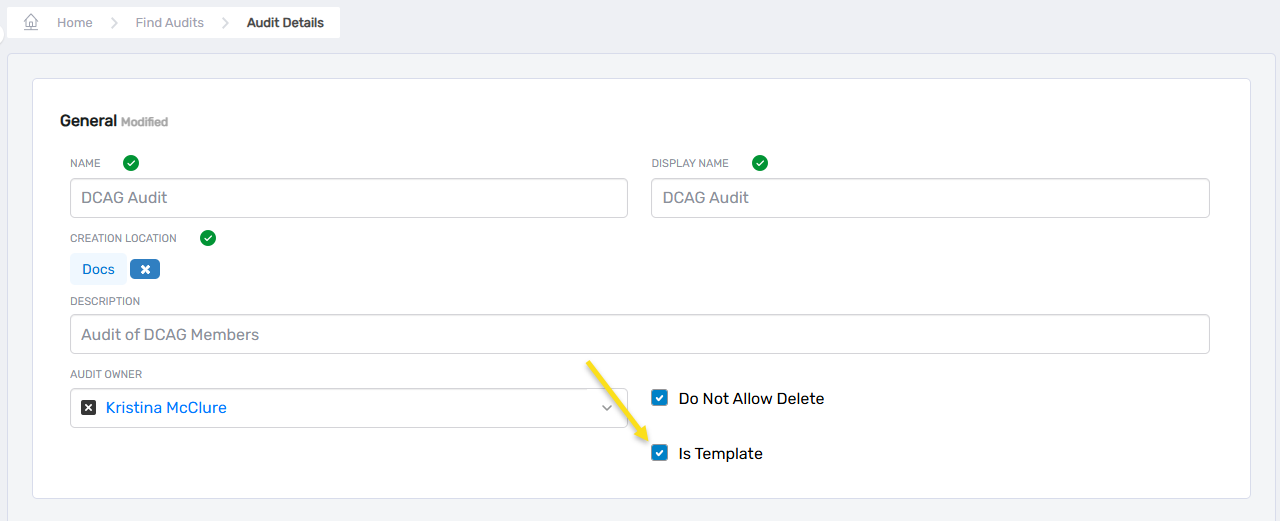
If you later decide to configure this audit as a template (in Step 3), the Started, Due Date, and Enabled fields will be hidden, as template audits use a different scheduling mechanism. Other general information such as Name, Display Name, and Audit Owner will still apply to the template configuration.
Step 3: (Optional) Configure the Audit as a Template
- Check the Is Template box in the General Audit Information section.
- In the newly displayed Template Schedule section, enter the number of days the audit should run in the Audit Duration In Days field (required).
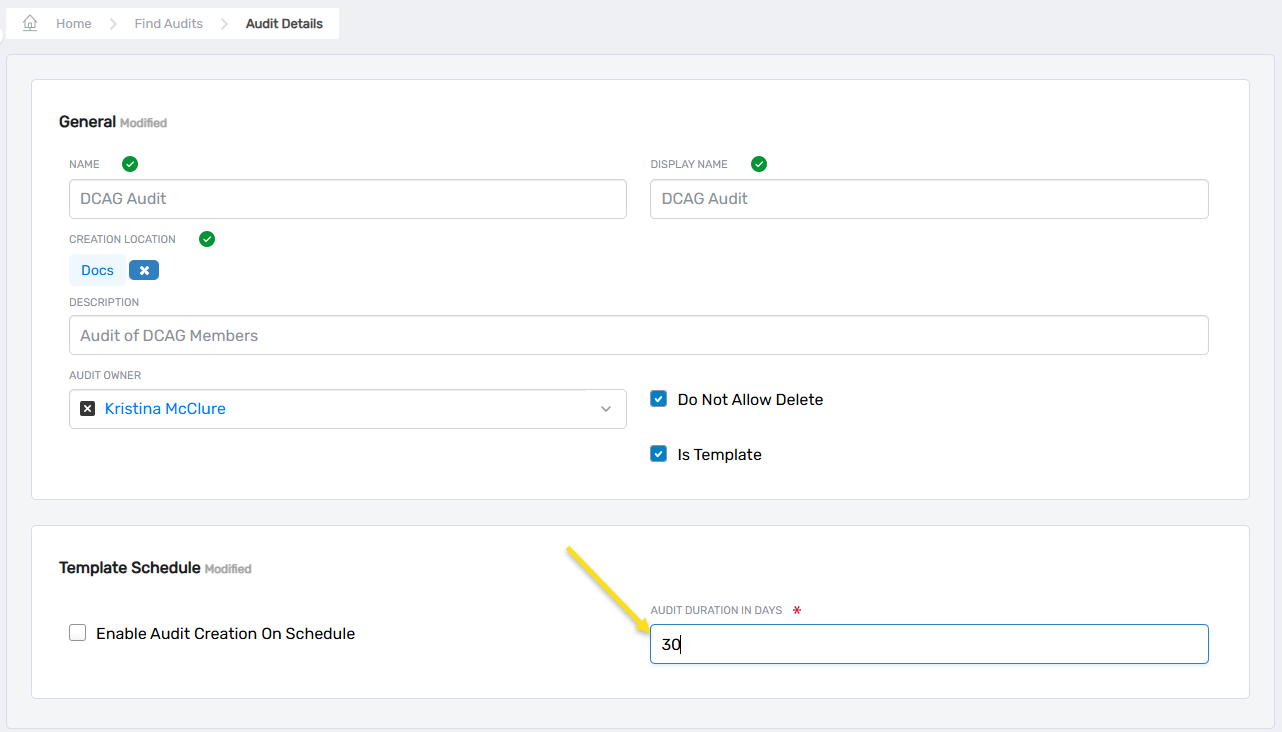
[!INFO] When you enable the template option, the template itself doesn't run as an audit. Instead, it serves as a blueprint that automatically generates new audit instances according to the schedule you define. Each new audit created from the template will be a separate entity that runs for the number of days specified in the Audit Duration In Days field.
Step 4: (Optional) Set up Automatic Scheduling
Do the following if you have configured the audit as a template and want automate audit creation:
- Check Enable Audit Creation On Schedule to show the Template Schedule section of the form.
- Configure the schedule timeframe:
- Set the Start Date when the template should begin creating new audits
- Set an End Date when the template should stop creating new audits
- Select whether to run for a specific number of iterations or continuously:
- Check Run Indefinitely to create audits continuously at the specified interval until the End Date
- Uncheck Run Indefinitely to specify a limited number of audit creations
- If Run Indefinitely is unchecked, enter the number of times (Iterations) the audit should be created
- Select a frequency option:
- Once: Creates a single audit on the start date at the specified time
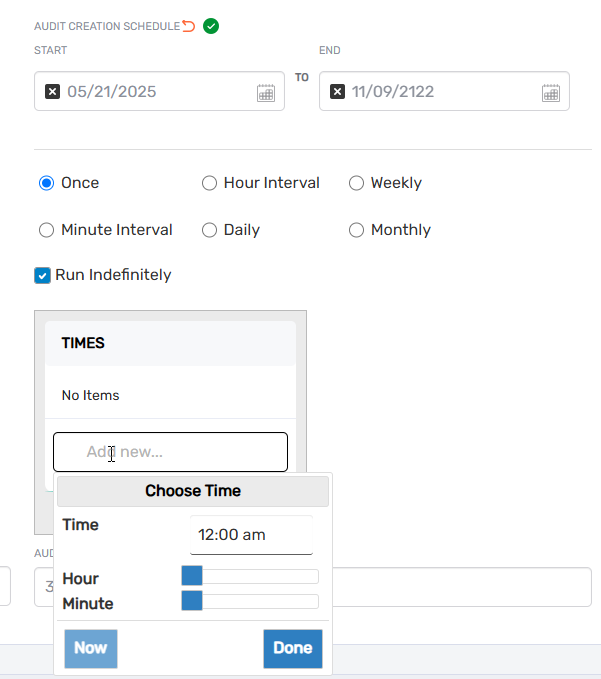
- Minute Interval: Creates audits at specified minute intervals
- Hour Interval: Creates audits at specified hour intervals.
- Daily: Creates audits every day at the specified time.
- Weekly: Creates audits on specified days of the week.
- Monthly: Creates audits on specified days of selected months.
- If you selected an interval option (Minute/Hour/etc.), enter the appropriate number in the Interval field:
- For example, for Hour Interval, entering "24" would create a new audit every 24 hours
- Depending on your frequency selection, additional options will appear:
-
If you selected Weekly:
-
In the Days section, check specific days of the week (Sunday, Monday, Tuesday, etc.) when audits should be created.
-
In the TIMES section, click the Add new field to open a time selection dialog and select specific times when audits should be created.
-
If you selected Monthly:
-
In the Months section, check which months the audit should run (January, February, March, etc.).
-
In the Day of Month section, check which days of the month the audit should run (1-31, or "Last" for the last day).
-
In the TIMES section, click the Add new field to open a time selection dialog and select specific times when audits should be created.
- The Audit Next Creation field will display the date when the next audit will be automatically generated based on your schedule settings.
Step 5: Save the Audit
- Review all information for accuracy.
- Click the Save button.