Create an App Service for the EntraID SCIM Microservice
EmpowerID uses the EntraID SCIM Microservice to make API calls to your Azure tenant in response to your actions in EmpowerID. As part of the deployment process for the microservice, an app service needs to be created to host the microservice and configured for EntraID authentication, as well as with a managed identity that can be granted permissions to access resources protected by EntraID.
To create and configure the app service, you need to complete the following tasks:
- Create the app service
- Configure the app service to authenticate to EntraID using the service principal you created earlier
- Create a managed identity for the app service
Create the app service
- In Azure, navigate to All Services > App services and click Create.
- Under Project Details, select a Subscription and Resource Group for the App Service. If desired, you can create a new Resource Group.
- Under Instance Details, do the following:
- Name – Enter a name for the Web App.
- Publish – Select Code.
- Runtime Stack – Select .NET 6.
- Operating System – Select Linux.
- Region – Select the appropriate region.
- Under App Service Plan, select an existing Linux Plan or create a new one.
- Click Review + Create.
- Click Create.
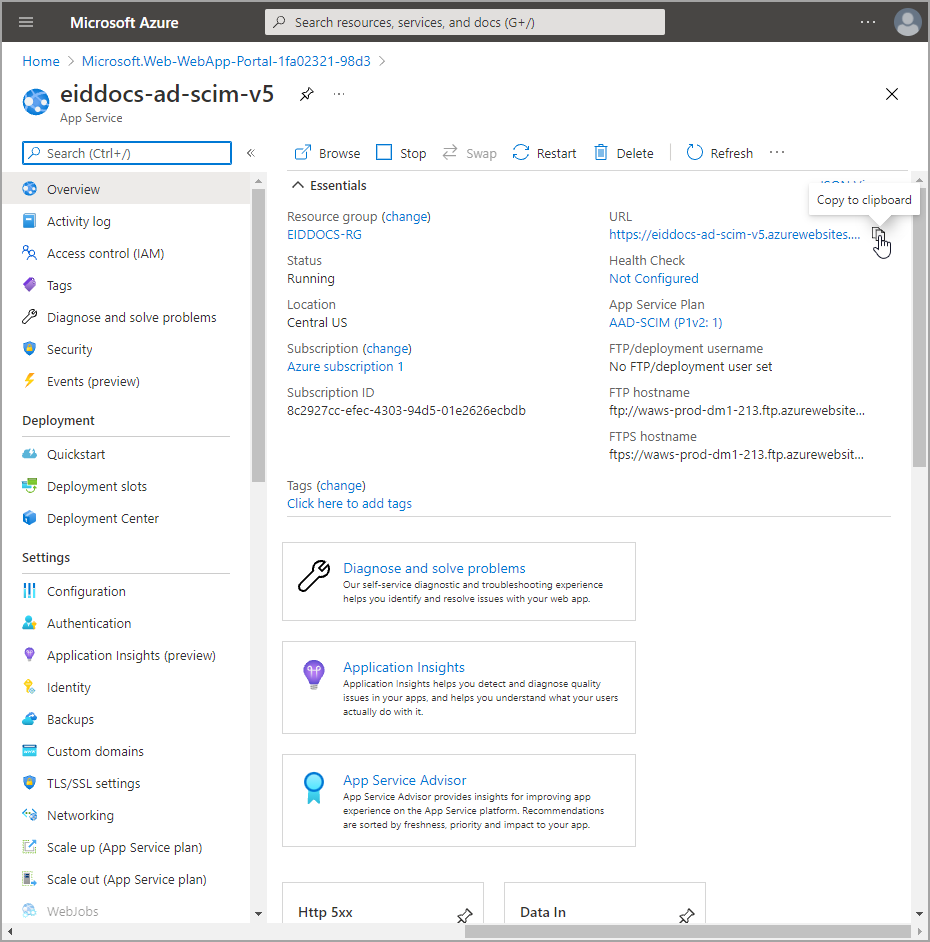
- After deployment completes, click Go to Resource and copy the URL from the Overview page. You will need this when you configure the app service for the EmpowerID EntraID SCIM Microservice.
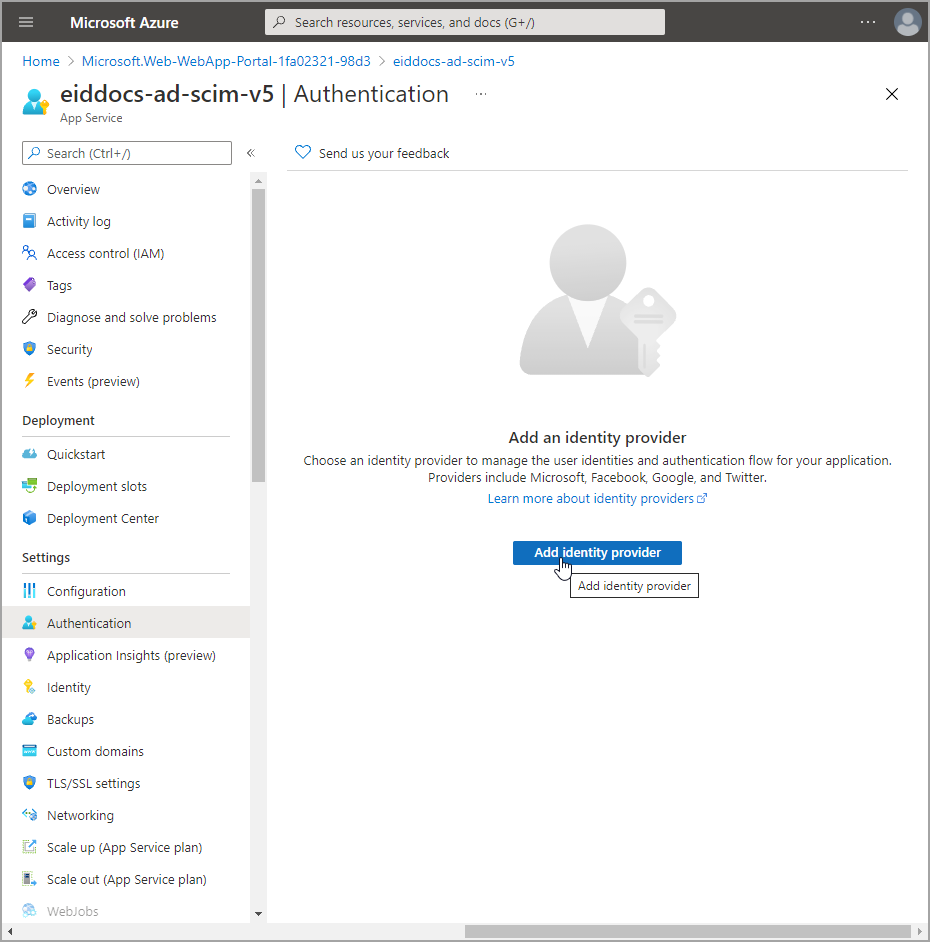
Configure authentication
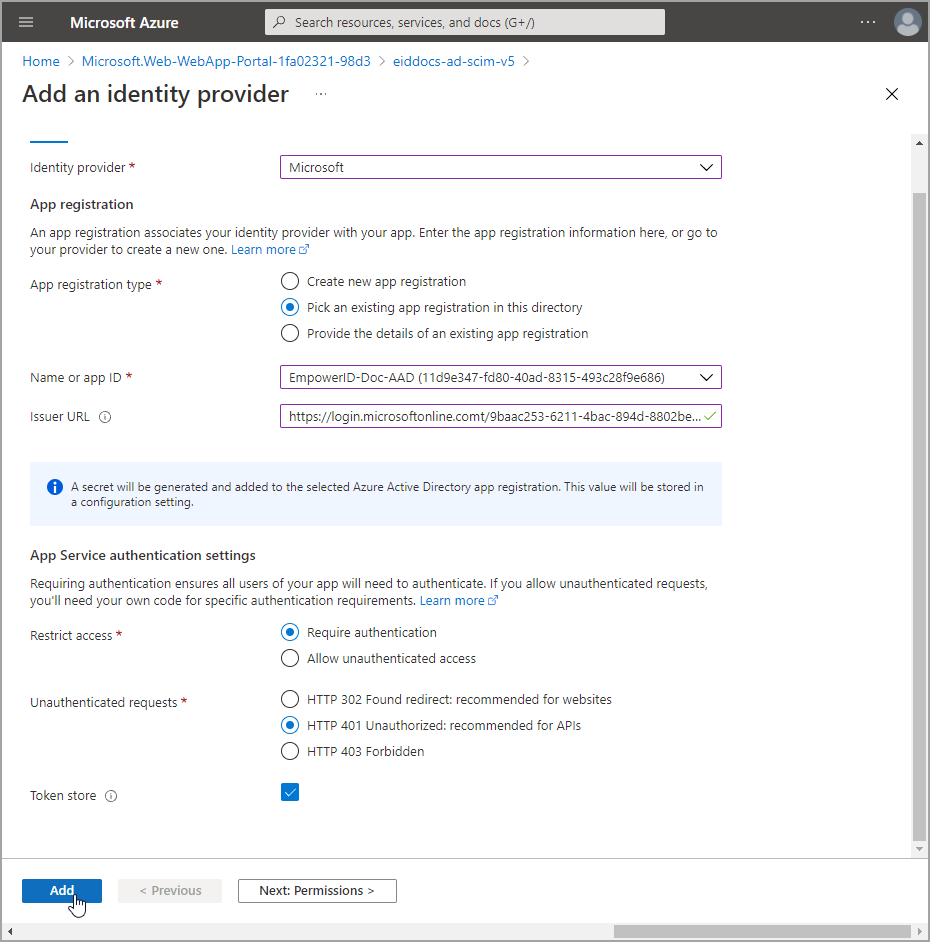
- Navigate to the Authentication blade for the app service and click Add identity provider.
- Select Microsoft.
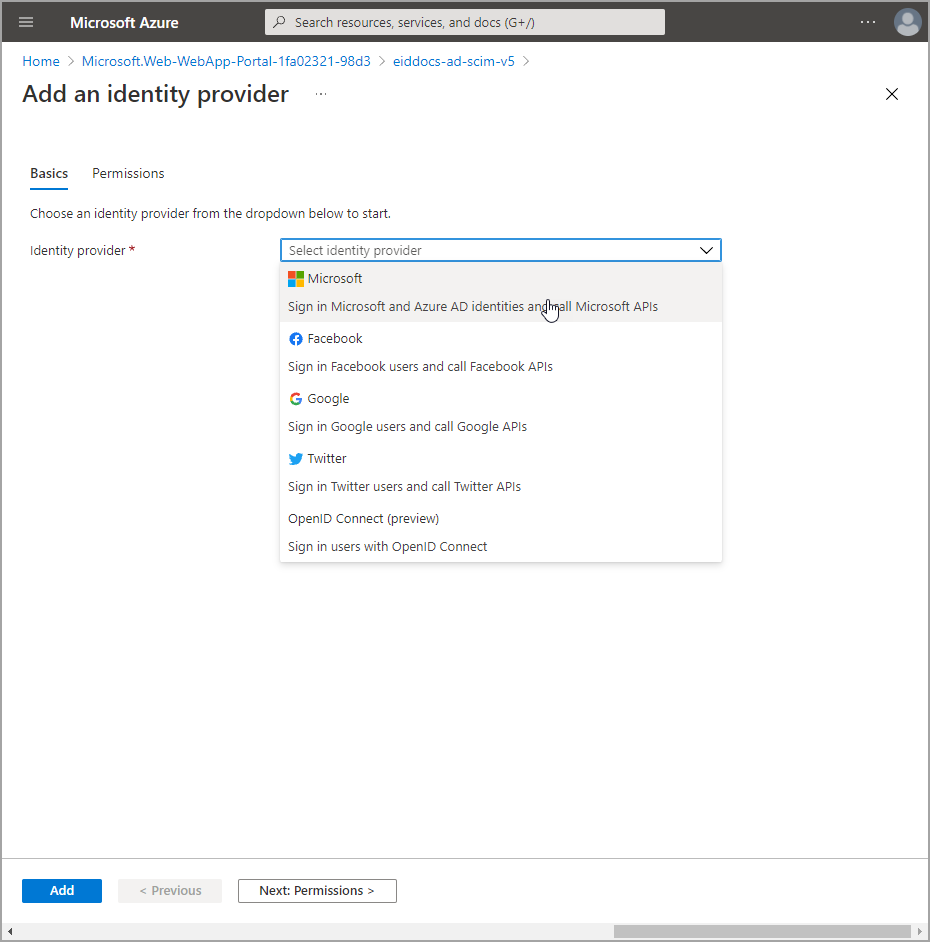
- Add the following identity provider information:
- App registration type – Select Pick an existing app registration in this directory.
- Name or app ID – Select the service principal you created to provide EntraID authentication for the microservice.
- Issuer URL – Enter
https://login.microsoftonline.com/<Your Tenant ID> - Restrict access – Select Require authentication.
- Unauthenticated requests – Select HTTP 401 Unauthorized: recommended for APIs.
- Token Store – Leave selected.
- Click Add.
- After adding the Identity provider, click the Edit link for it.

- Set the Issuer URL to
https://login.microsoftonline.com/<Your Tenant ID>. - Under Allowed token audiences enter the URL for the app service.
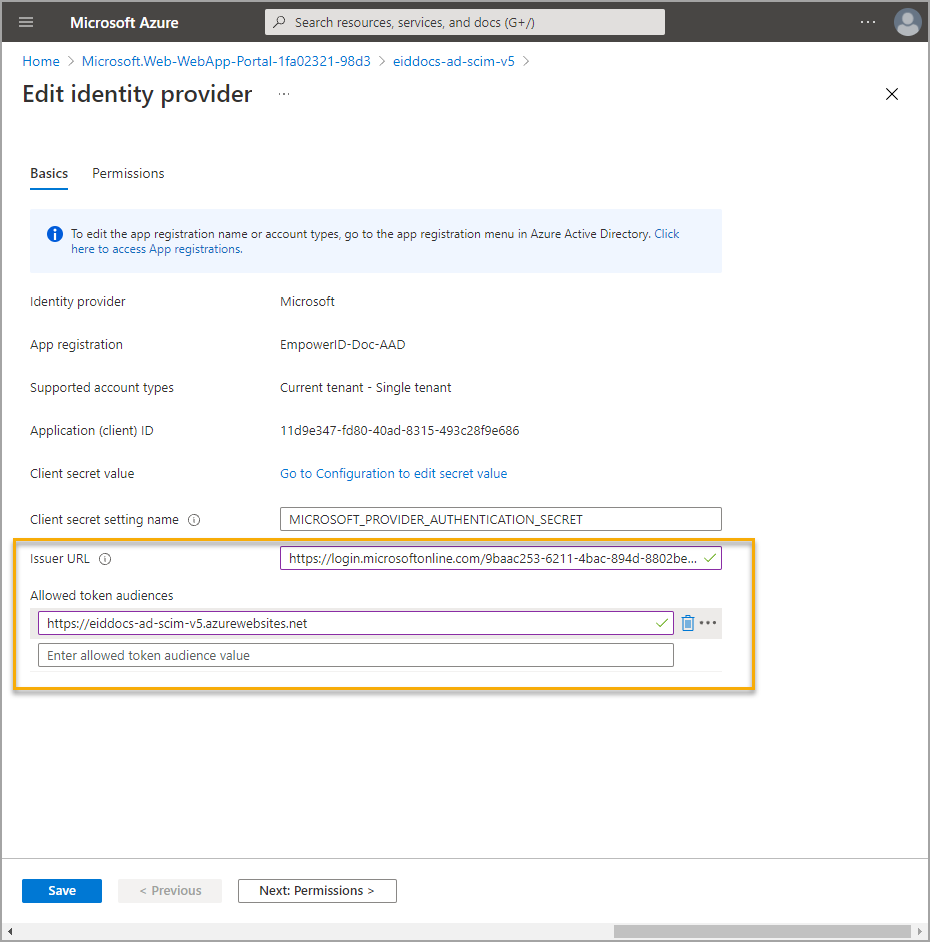
- Click Save.
Configure identity
Azure Managed Identities provide an automatically managed identity in Azure Active Directory for applications to use when connecting to resources that support Azure AD authentication. For the EntraID SCIM microservice, you can choose between two types of managed identities based on your organizational requirements and deployment architecture.
Managed Identity Selection Guide
System-Assigned Managed Identity (App Service lifecycle-bound, unique per resource)
- Single App Service Deployment: Standard single-instance deployment
- Simplified Management: Minimal administrative overhead, automatic cleanup
- Environment Isolation: Complete identity isolation between environments (dev, test, prod)
- Standard Deployments: Straightforward deployment path with least complexity
User-Assigned Managed Identity (Independent lifecycle, shareable across resources)
- Multi-Instance Deployments: Multiple SCIM connector instances across App Services or regions
- High Availability Scenarios: Active-passive or load-balanced configurations
- Shared Resource Access: Multiple Azure resources requiring identical EntraID permissions
- Blue-Green Deployments: Identity persistence across App Service replacements
- Cross-Environment Consistency: Same identity across deployment slots or environments
- Independent Permission Management: Permissions managed separately from App Service lifecycle
- Compliance Requirements: Explicit identity management and tracking needs
Create Managed Identity Options
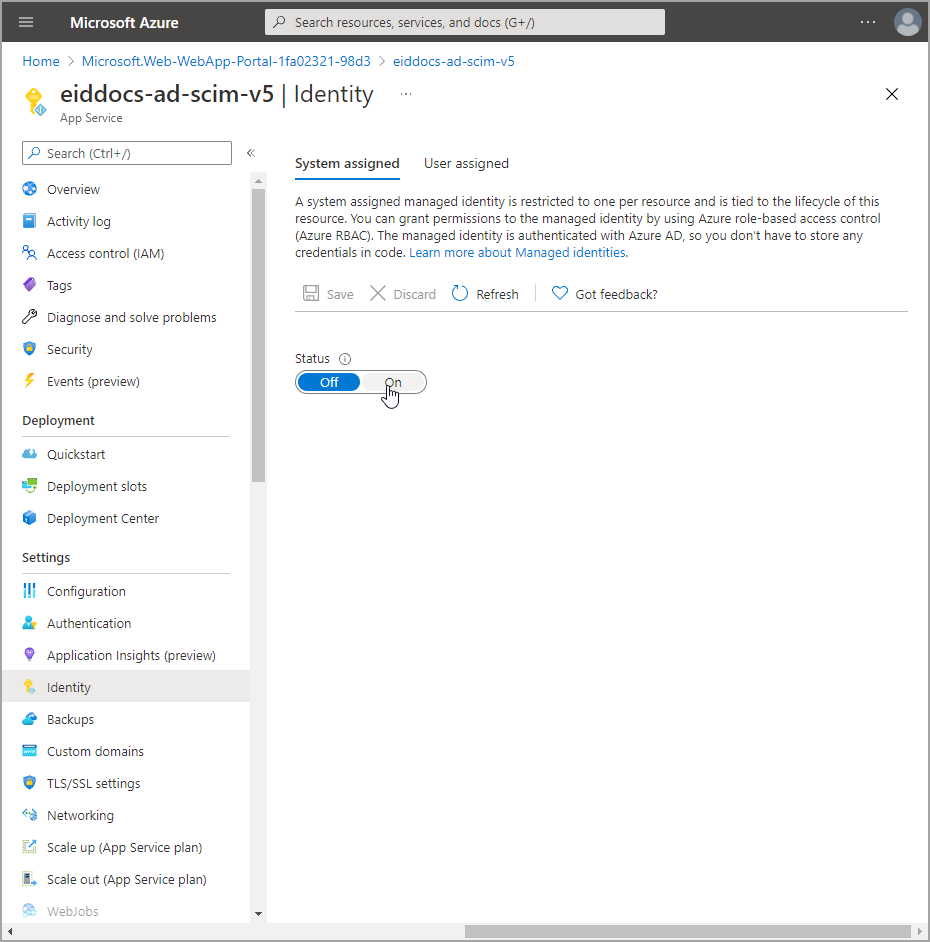
Option 1: System-Assigned Managed Identity (Recommended for most scenarios)
- Navigate to the Identity blade for the app service.
- Under the System assigned tab, turn on the Status toggle to create the managed identity.
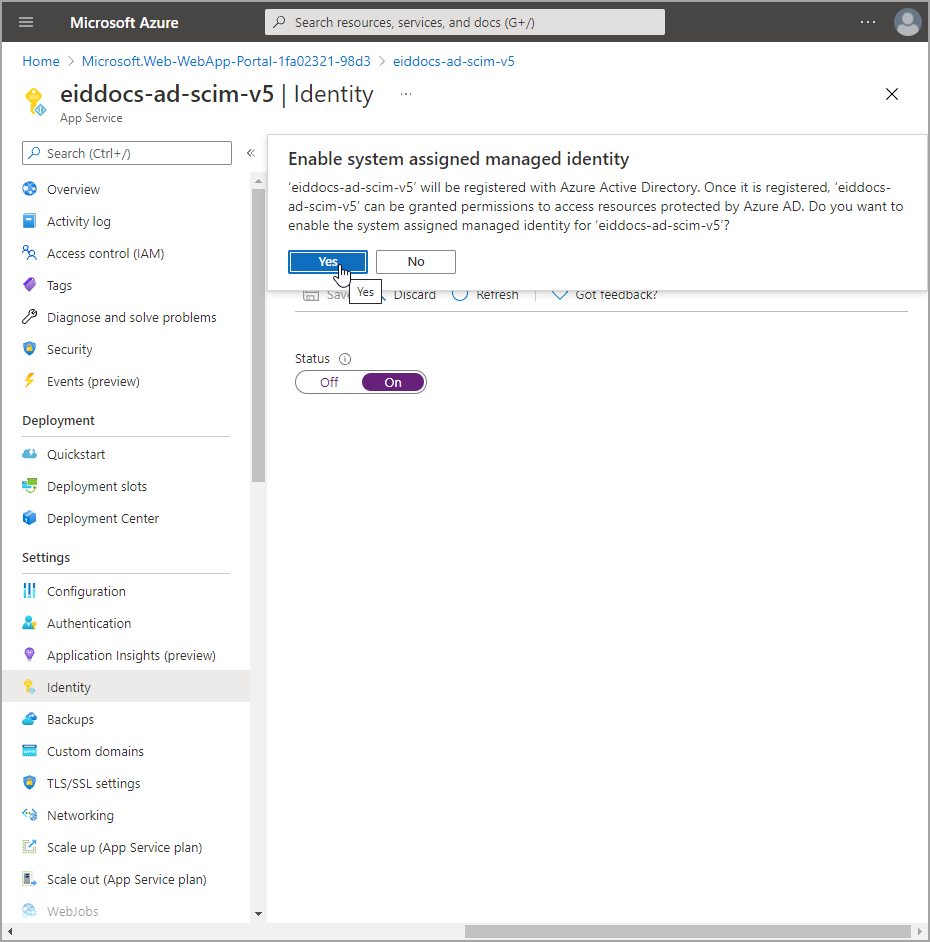
- Click Save and then click Yes to confirm that you want to enable system assigned managed identity.
Option 2: User-Assigned Managed Identity (For advanced scenarios)
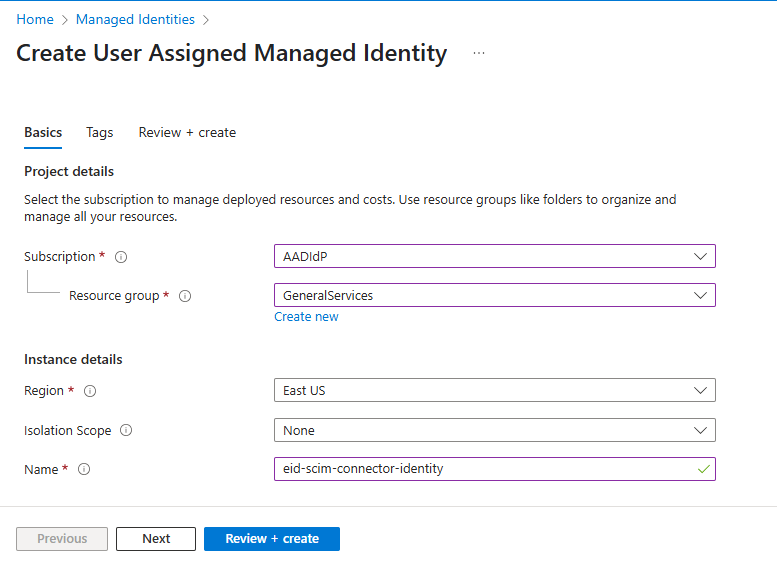
Step 1: Create the User-Assigned Managed Identity
-
In Azure, navigate to All Services > Managed Identities.
-
Click Create to create a new user-assigned managed identity.
-
Configure the following:
- Subscription: Select your target subscription
- Resource Group: Choose the same resource group as your App Service (recommended) or a dedicated identity resource group
- Region: Must be the same region as your App Service
- Name: Use a descriptive name like
eid-scim-connector-identityorempowerid-entraid-connector-mi
-
Click Review + Create and then Create.
-
After creation, copy the Client ID and Principal ID from the identity's overview page - you'll need these for permission assignments.
Step 2: Assign the User-Assigned Identity to the App Service
- Navigate to your App Service's Identity blade.
- Select the User assigned tab.
- Click Add to add a user-assigned managed identity.
- Select your subscription and choose the user-assigned managed identity you created.
- Click Add to associate the identity with your App Service.
Step 3: Configure Authentication to Use the User-Assigned Identity
When configuring authentication in the App Service, you'll need to specify which managed identity to use:
-
Navigate to your App Service's Configuration blade.
-
Under Application settings, click New application setting.
-
Add the following environment variable:
- Name:
AzureServicesAuthConnectionString - Value:
RunAs=App;AppId=<CLIENT_ID_OF_USER_MANAGED_IDENTITY>
Replace
<CLIENT_ID_OF_USER_MANAGED_IDENTITY>with the Client ID you copied from the user-assigned managed identity in Step 1.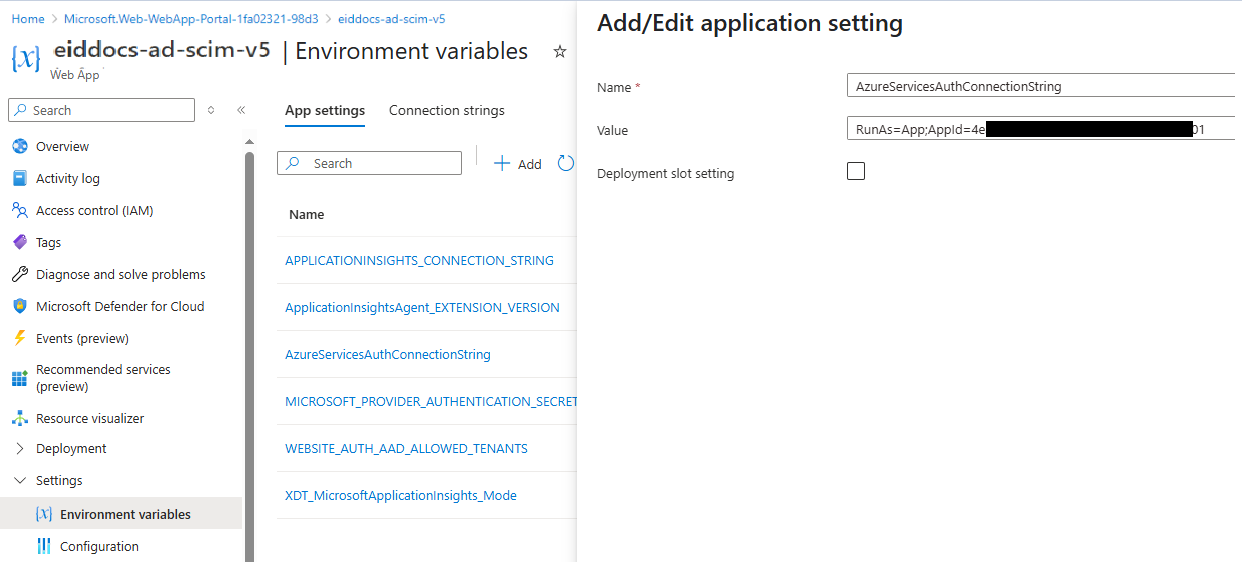
- Name:
-
Click OK to save the setting.
-
Click Save at the top of the Configuration blade to apply the changes.
-
The EmpowerID SCIM microservice will automatically detect and use the user-assigned managed identity when this connection string is configured.
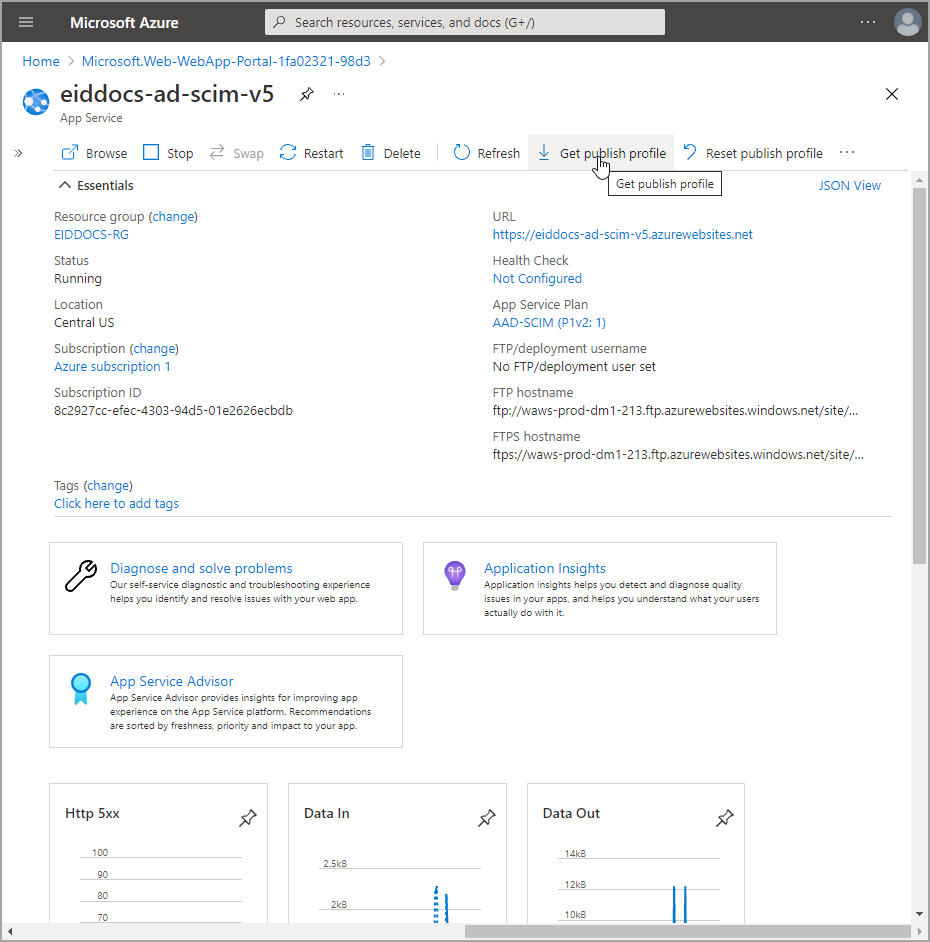
Download the publish profile for the app service
- Navigate to the Overview page for the app service.
- Click Get publish profile and save the file to your machine. You use this file when publishing the EmpowerID EntraID SCIM microservice to Azure.