Windows File Server Connector
EmpowerID streamlines the management of Windows Servers as a resource system for file share management, offering automated role-based access control, delegated permissions administration, and self-service access requests through workflows – all backed by a comprehensive audit trail. Once a server is added as a managed resource system, EmpowerID continuously inventories and monitors the server, detecting new shared folders and any changes to permissions. This ensures complete visibility into shared folder resources, including who has access and their level of access.
This article outlines the steps for setting up a Windows File Server as a managed resource system, including creating a file share resource system and configuring it with PowerShell user account credentials.
Prerequisites
Before adding a Windows File Server to EmpowerID as a managed resource system, ensure that EmpowerID is connected to Active Directory. For guidance, refer to the article on Connecting to Active Directory. Additionally, the PowerShell user account configured for the resource system must have the necessary NTFS permissions on each file server.
Procedure
Step 1 – Create file share resource system
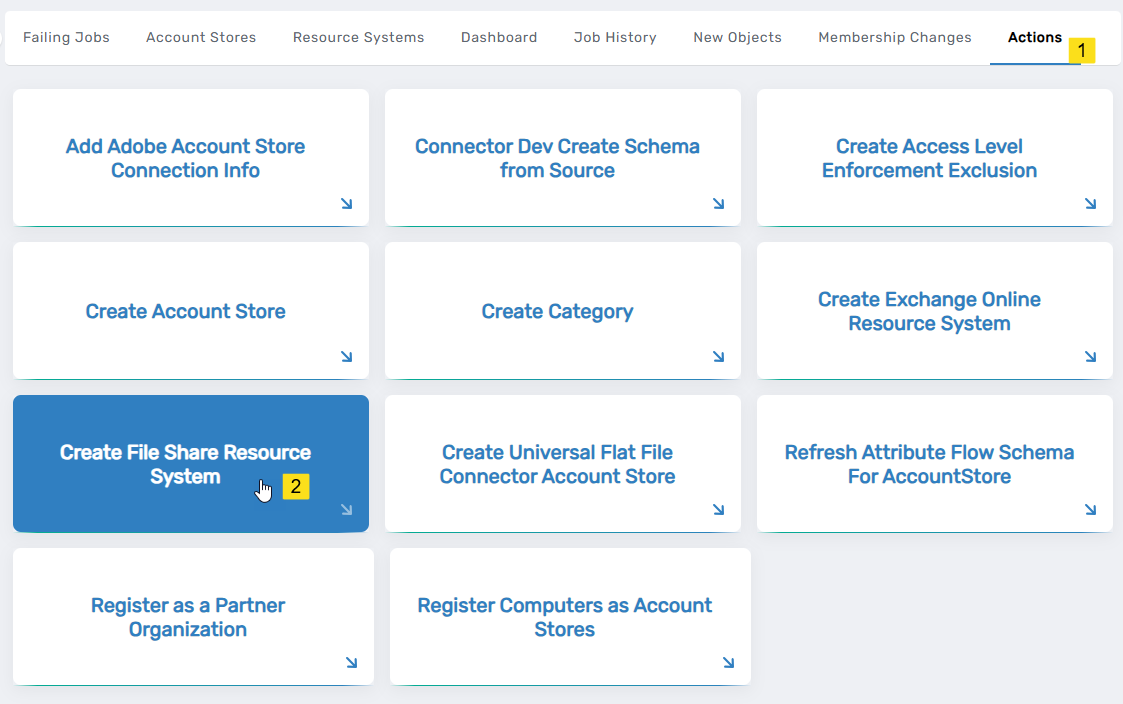
- On the navbar, expand Admin > Applications and Directories and click Account Stores and Systems.
- On the Account Stores page, click the Actions tab and then click Create File Share Resource System.
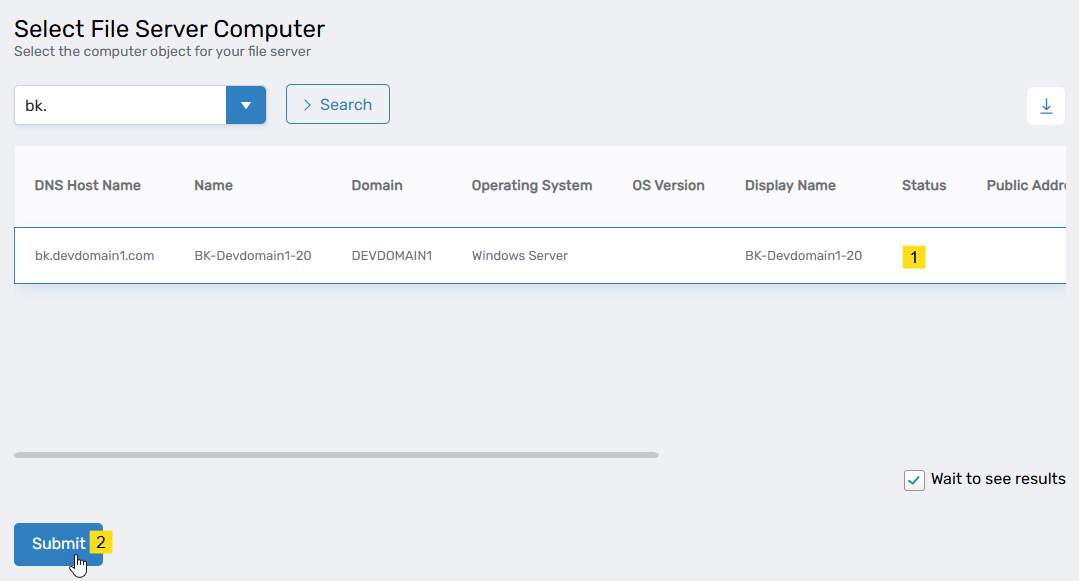
- On the Select File Server Computer page, search for your file server by entering at least three characters.
- Click the record for that server to select it, and then click Submit.
- EmpowerID creates the Windows File Server resource system.
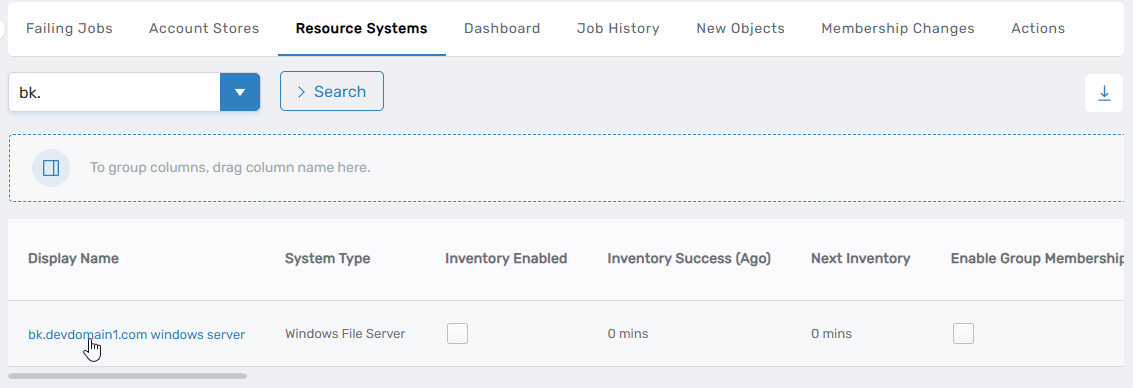
- Return to the Find Account Store page and click the Resource Systems tab.
- Search for the Windows File Server you just created and click the Display Name link.
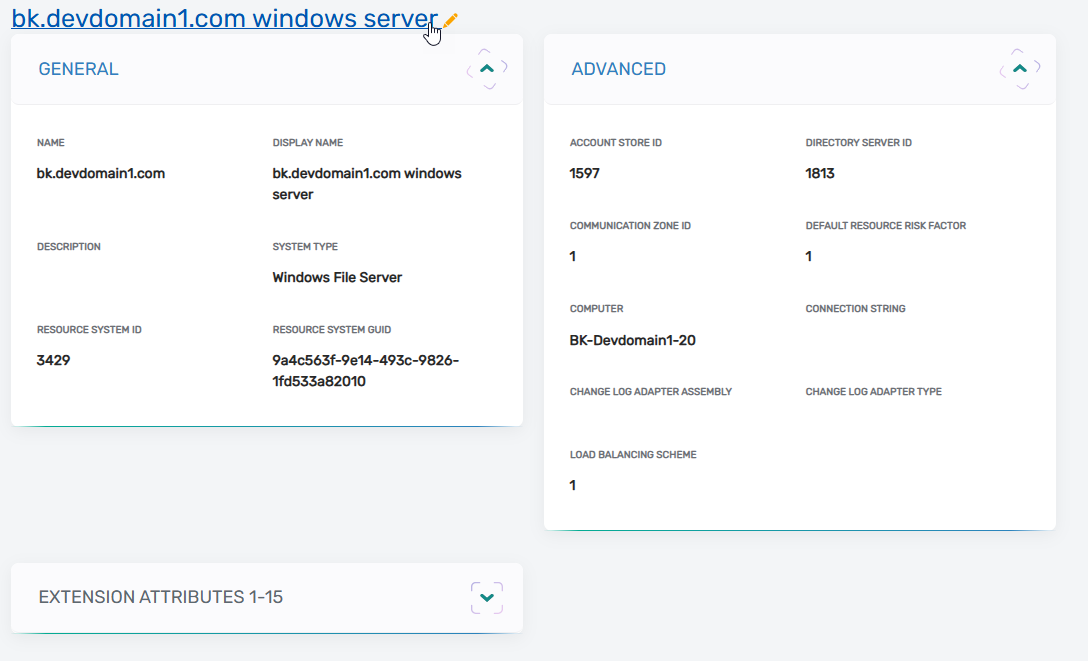
- From the Resource System > Resource System Info tabs of the Account Store Details page that appears click the Edit link for the file server resource system to put it in edit mode.
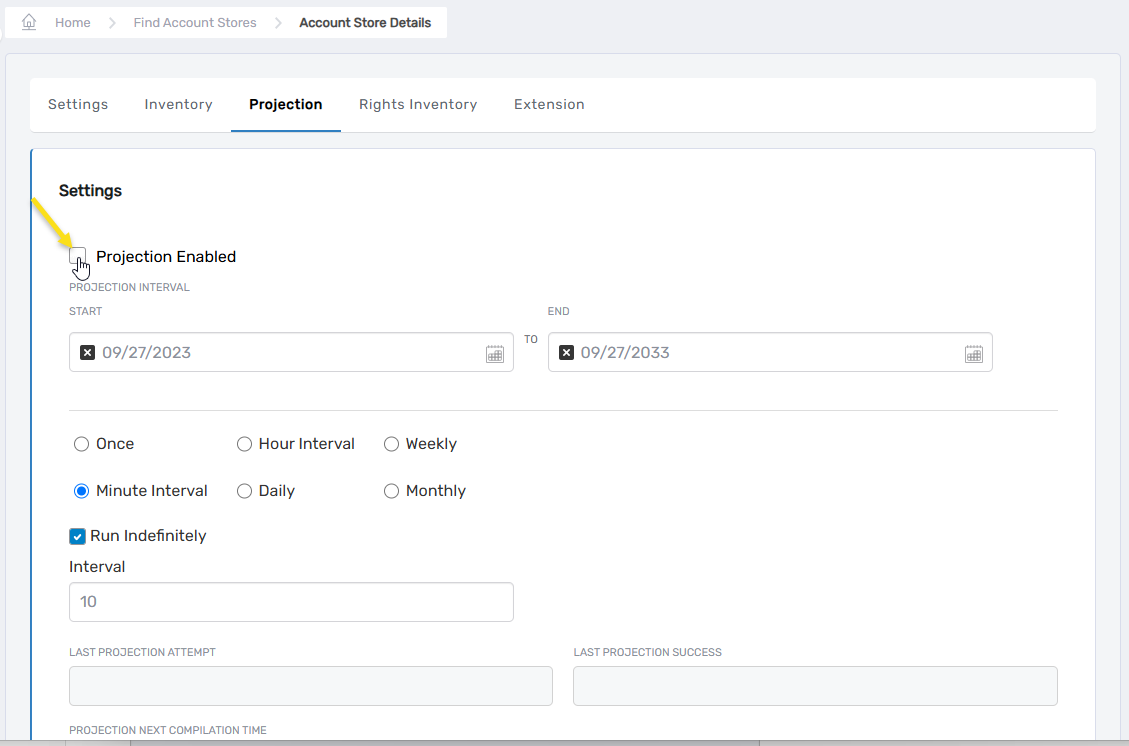
- On the edit page, select the Projection tab and then select Projection Enabled. This ensures that EmpowerID evaluates who should be members of what Resource Role groups regularly.
- Select the Rights Inventory tab and select Rights Inventory Is Enabled to inventory local rights and set the inventory schedule and interval as desired.
- Schedule – Click the Start and End fields and select the desired start and end date for enforcement.
- Interval – Select how often you want the enforcement job to run against the file server.
- Click Save.
Step 2 – Add the PowerShell username and password as configuration parameters
The PowerShell User account specified here must have permissions to manage shared folders on the file server.
- Return to the Find Account Store page and click the Resource Systems tab.
- Search for the Windows File Server you just created and click the Display Name link.
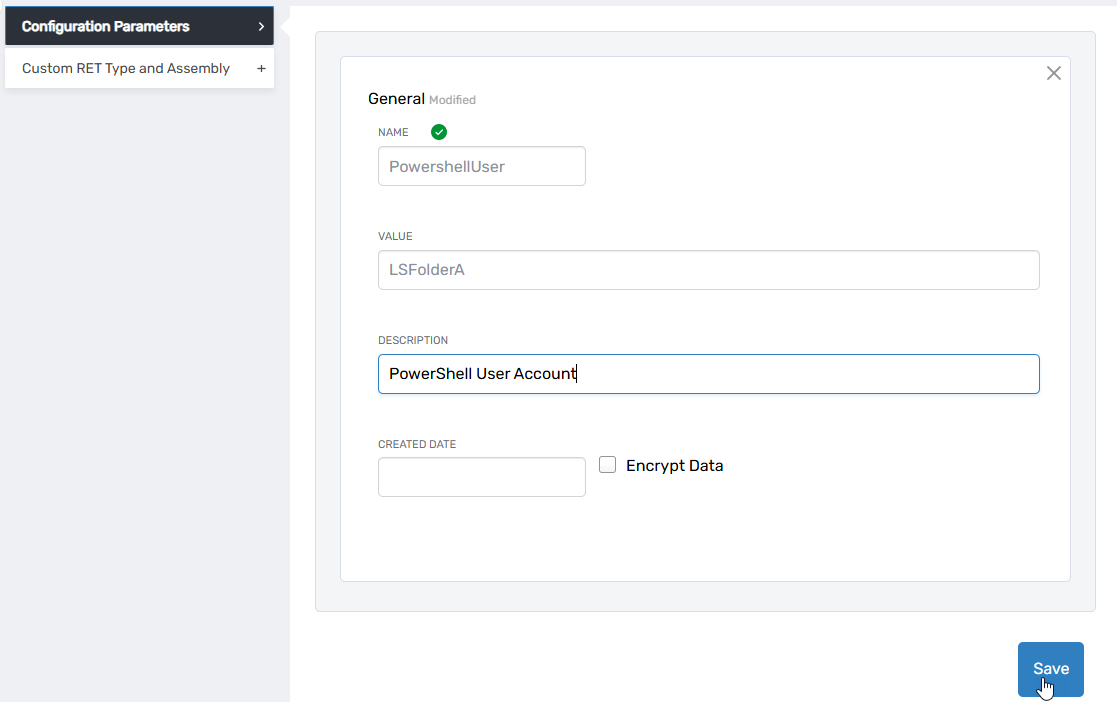
- Select the Resource System tab and then expand the Configuration Parameters accordion at the bottom of the page.
- In the accordion, click the Add button above the grid and then enter the following information in the General pane for the PowerShell user account:
- Name – Enter PowershellUser
- Value – Enter the user name of the account making the PowerShell calls
- Description - Enter a brief characterization of the parameter
- Click Save.
- Click the Add button above the grid again and then enter the following information in the General pane for the PowerShell user password:
- Name – Enter PowershellPassword
- Value – The password of the account making the PowerShell calls
- Encrypt Data – Select this to encrypt and hide the password
- Click Save.