Linux Connector
The EmpowerID Linux connector enables organizations to integrate user and group data from their Linux systems into EmpowerID. Once connected, administrators can manage and synchronize this data with other connected directories. This integration allows for efficient identity and access management through EmpowerID.
Capabilities
With EmpowerID, you can manage Linux user and group data by performing the following actions:
- Create, edit, and delete users
- Create, manage, and delete groups
- Synchronize attributes between Linux and EmpowerID
- Configure authentication and provisioning policies
Steps to Connect EmpowerID to Linux
The process for integrating a Linux system with EmpowerID consists of the following steps:
- Create a Linux account store in EmpowerID
- Configure attribute flow
- Set account store settings
- Enable the Account Inbox permanent workflow
- Monitor inventory
Procedure
Step 1: Create a Linux Account Store
- Navigate to Admin > Applications and Directories on the EmpowerID navbar and select Account Stores and Systems.
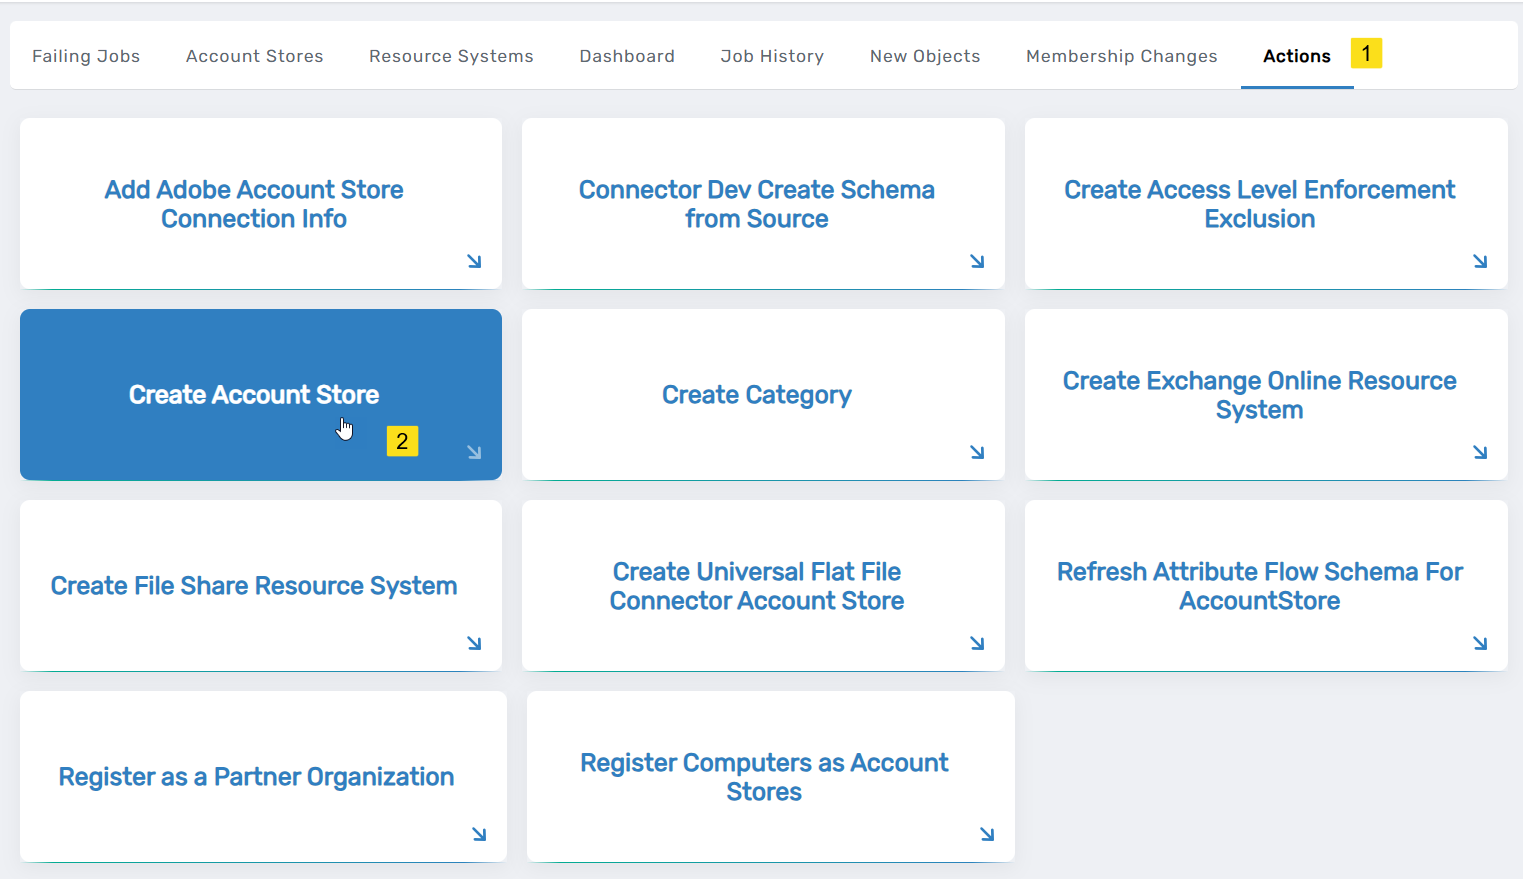
- Click the Actions tab and select Create Account Store.

- Search for Linux under System Types and select the appropriate entry.
- Click Submit to open the Linux configuration form.
- Enter the required details:
- Server: IP address or FQDN of the Linux server.
- Name: A descriptive name for the account store.
- User Name: A super user account EmpowerID will use for the connection.
- Password: (If using password authentication) Enter the password for the above user.
- Use Certificate: (Optional) If using certificate authentication, upload the certificate and enter its password.
- Is Remote (Requires Cloud Gateway): Enable this option if the account store requires a Cloud Gateway connection.
- Click Submit to create the account store.
EmpowerID will now establish the account store and its associated resource system. The next step is to configure attribute synchronization.
Step 2: Configure Attribute Flow
EmpowerID allows configuring attribute synchronization rules between the Linux system and the EmpowerID Identity Warehouse. Attribute flow rules define how attributes are synchronized and can be weighted for prioritization across multiple sources.
Attribute Flow Options
- No Sync: No synchronization occurs between EmpowerID and the Linux system.
- Bidirectional Flow: Changes in either system are reflected in the other.
- Account Store Changes Only: Changes made in Linux sync to EmpowerID but not vice versa.
- EmpowerID Changes Only: Changes made in EmpowerID sync to Linux but not vice versa.
CRUD Operations
- Create: Creates an attribute if it does not exist.
- Update: Updates an existing attribute.
- Delete: Removes an attribute value.
Configuring Attribute Flow
- Navigate to Account Stores and Systems and locate the newly created Linux account store.
- Click on the Account Store link.
- Select the Attribute Flow Rules tab.
- Adjust the synchronization direction using the Attribute Flow dropdown.
- Modify CRUD operation scores as needed to prioritize attribute sources.
- Save your changes.
Step 3: Configure Account Store Settings
After defining attribute flow, additional configuration is needed for authentication, provisioning, and inventory settings.
-
Open the Account Store and Resource System page.
-
Select the Account Store tab and click the pencil icon to edit settings.
-
Modify the necessary settings, including:
General Settings
- IT Environment Type: Specifies the type of environment for the account store.
- Specify an Account Proxy: Defines the credentials EmpowerID uses to connect.
- Select a Vaulted Credential as Account Proxy: Allows the use of a vaulted credential.
Authentication and Password Settings
- Use for Authentication: Enables authentication using Linux credentials.
- Allow Search for User Name in Authentication: Allows searching for usernames across account stores.
- Allow Password Sync: Enables or disables password synchronization.
- Queue Password Changes: Specifies whether password changes should be queued.
- Password Manager Policy for Accounts without Person: Sets a policy for unmanaged accounts.
Provisioning and Deprovisioning Settings
- Allow Person Provisioning (Joiner Source): Determines if persons can be provisioned.
- Allow Attribute Flow: Enables or disables attribute synchronization.
- Allow Provisioning (By RET): Controls whether accounts can be auto-provisioned.
- Allow Deprovisioning (By RET): Controls whether accounts can be auto-deprovisioned.
- Max Accounts per Person: Limits the number of linked accounts per person.
- Allow Account Creation on Membership Request: Determines if accounts are created upon membership requests.
Directory Cleanup Settings
- Directory Clean Up Enabled: Enables the automated account termination process.
- Report Only Mode (No Changes): Logs cleanup actions without executing them.
Special Use Settings
- Automatically Join Account to a Person on Inventory (Skip Account Inbox): Automatically joins accounts to existing persons.
- Automatically Create a Person on Inventory (Skip Account Inbox): Automatically creates persons from discovered accounts.
- Queue Password Changes on Failure: Queues password changes if they fail.
Inventory Settings
- Inventory Enabled: Enables inventory synchronization.
- Inventory Schedule Interval: Defines the frequency of inventory synchronization.
- Enable Group Membership Reconciliation: Enables reconciliation of group memberships.
- Membership Schedule Interval: Defines the frequency of group membership reconciliation.
-
Click Save to apply changes.
Step 4: Enable the Account Inbox Permanent Workflow
The Account Inbox workflow is essential for processing user accounts discovered during inventory.
- Navigate to Infrastructure Admin > EmpowerID Server and Settings > Permanent Workflows.
- Locate Account Inbox and click its Display Name link.
- Click the pencil icon to enter edit mode.
- Check Enabled.
- Click Save to activate the workflow.
Step 5: Monitor Inventory
EmpowerID continuously inventories the Linux account store, identifying new, updated, or orphaned accounts.
- Navigate to Identity Lifecycle > Account Inbox.
- Use the tabbed views to monitor inventory:
- All: Lists all discovered user accounts and their statuses.
- Dashboard: Displays an overview of account inventory activities.
- Orphans: Highlights user accounts without an associated EmpowerID Person.
Regular monitoring ensures that newly discovered accounts are processed correctly and remain synchronized with EmpowerID policies.
By following these steps, organizations can effectively integrate and manage their Linux user and group data in EmpowerID, ensuring seamless identity synchronization and access control.