Update API Permissions
As an owner of a Microsoft Entra application, you can add or remove delegated and application permissions directly in Resource Admin. EmpowerID handles the API updates in Entra ID on your behalf.
In this article, you’ll learn how to:
- Remove outdated API permissions
- Add new delegated or application permissions
- Review and submit changes
What You’ll Need
| Requirement | Description |
|---|---|
| Access to Resource Admin | You must be signed in to the EmpowerID Resource Admin portal. |
| Application Ownership | You must be the owner or a delegated administrator of the application. |
Steps to Update API Permissions
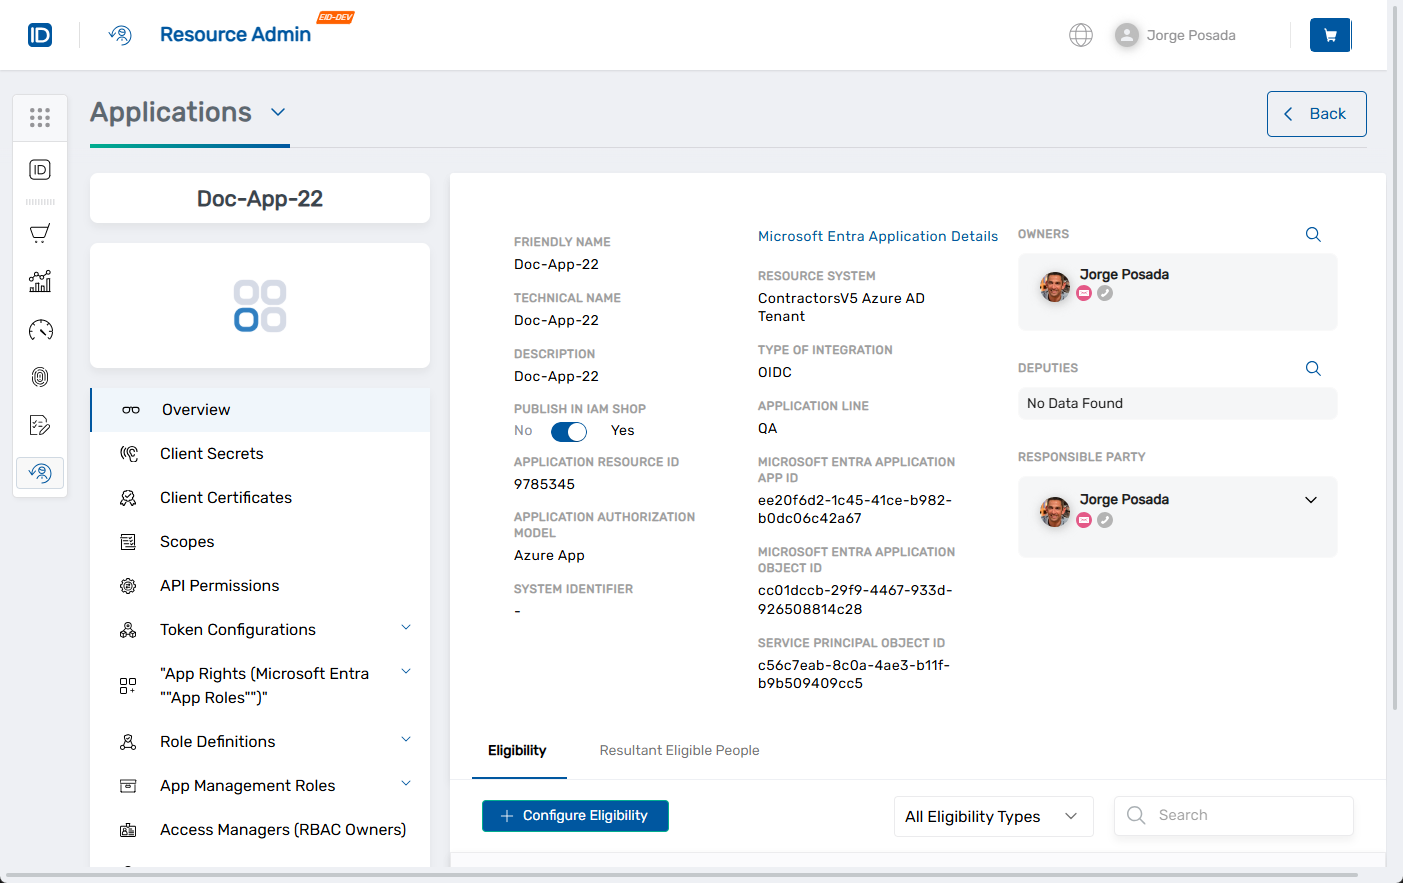
1. Open the Application Overview Page
- Log in to Resource Admin.
- In the Resource Type menu, select Applications.
- Search for and select the Microsoft Entra application you want to update.
- Click the Details button for the application.

This opens the application Overview page.
2. Remove Existing API Permissions from the Grid (Optional)
You can quickly remove individual permissions directly from the API Permissions grid.
- In the left application menu, click API Permissions.
- Locate the permission you want to remove.
- Click the Delete button.
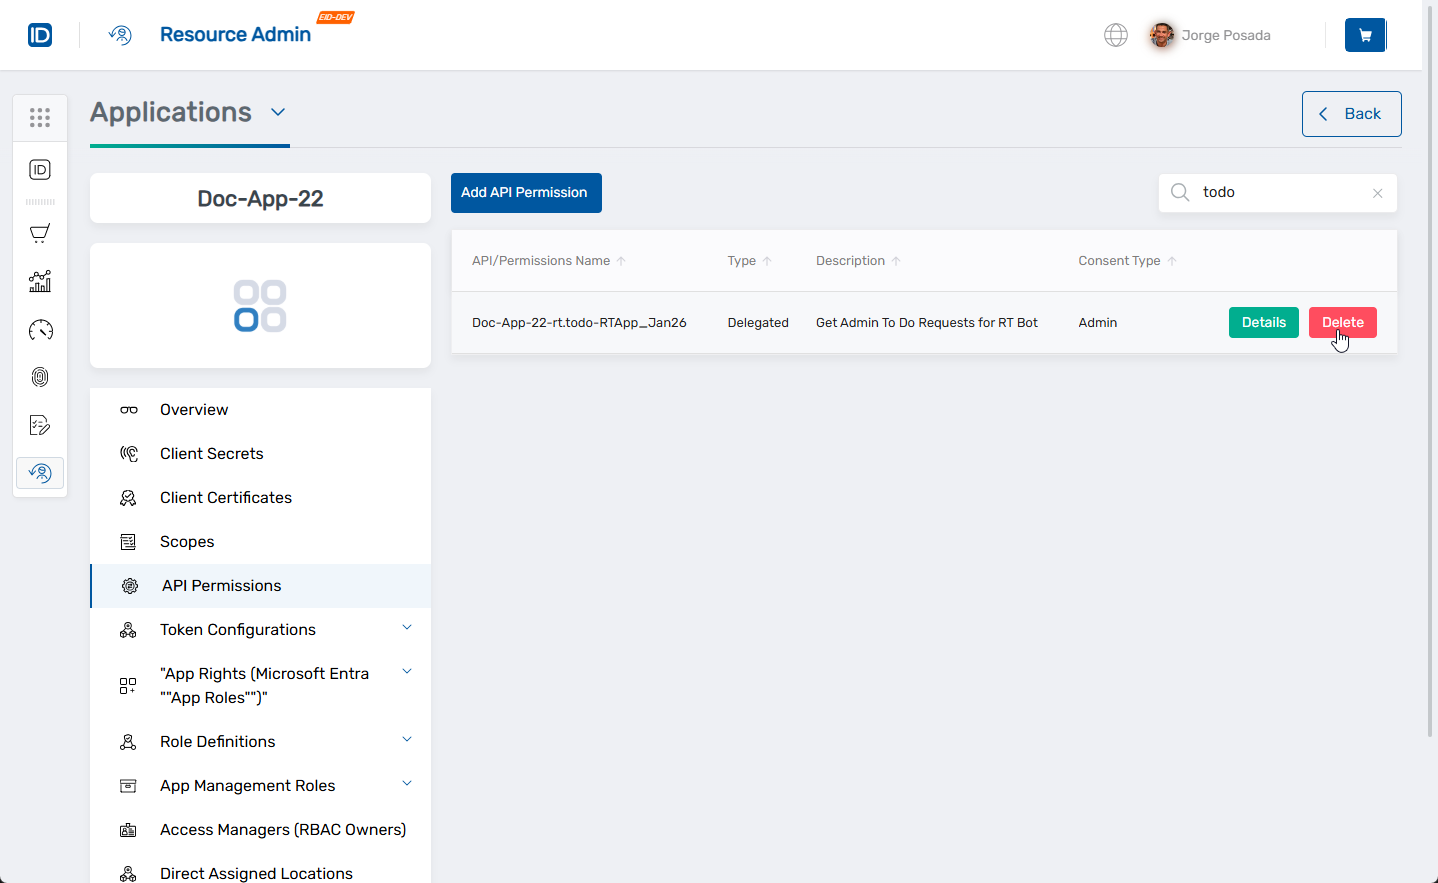
- Click Delete to confirm.

This method is useful for removing individual permissions without launching the full update workflow.
3. Launch the Update API Permissions Workflow
- On the API Permissions tab, click the Add API Permission button at the top of the grid.
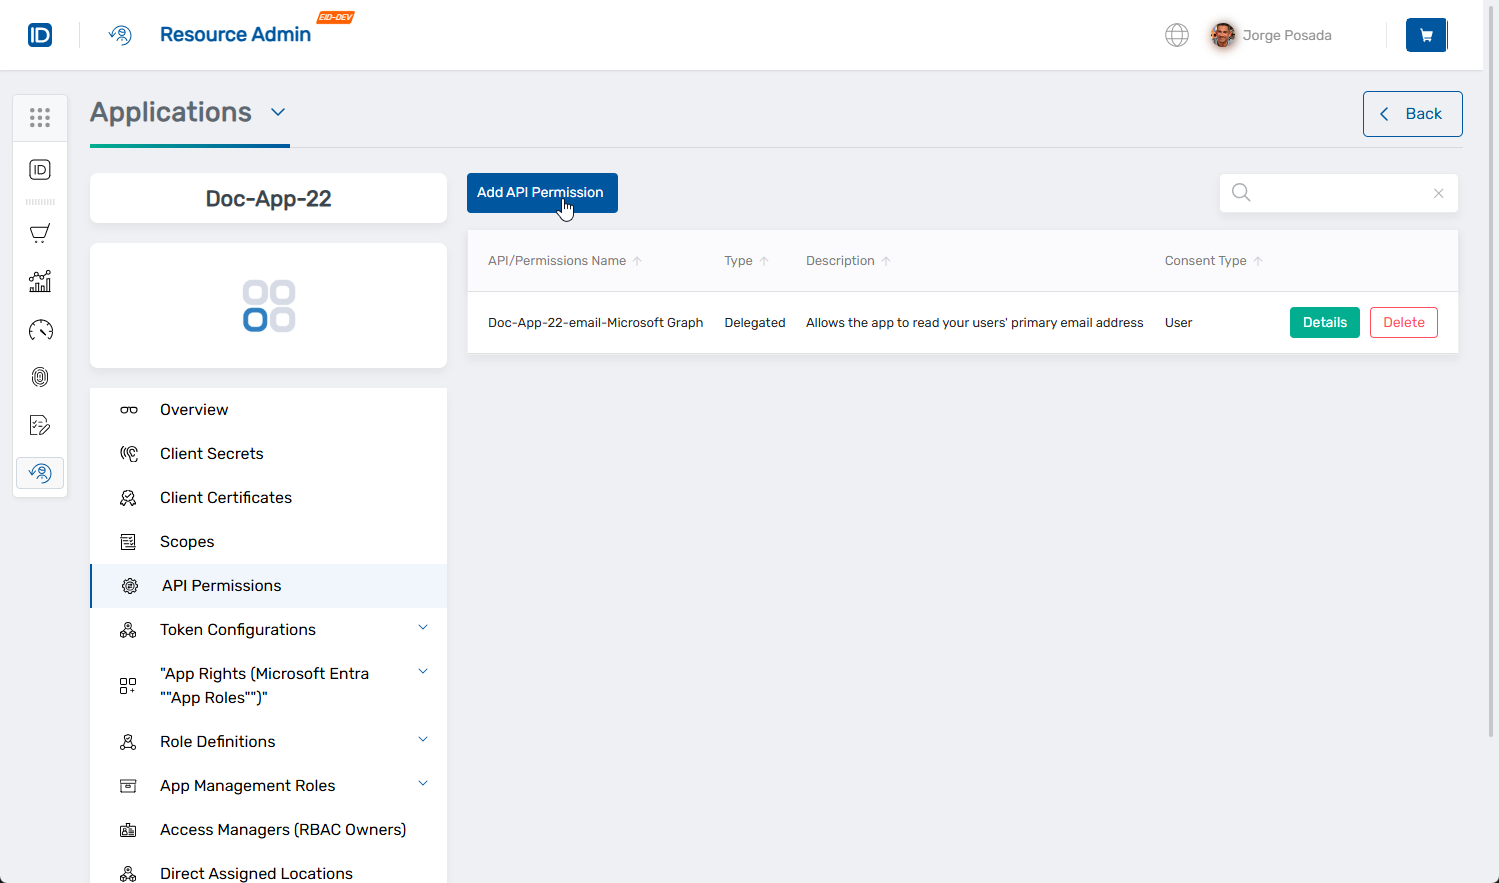
This opens the Update Azure App API Permissions workflow with the application pre-selected.
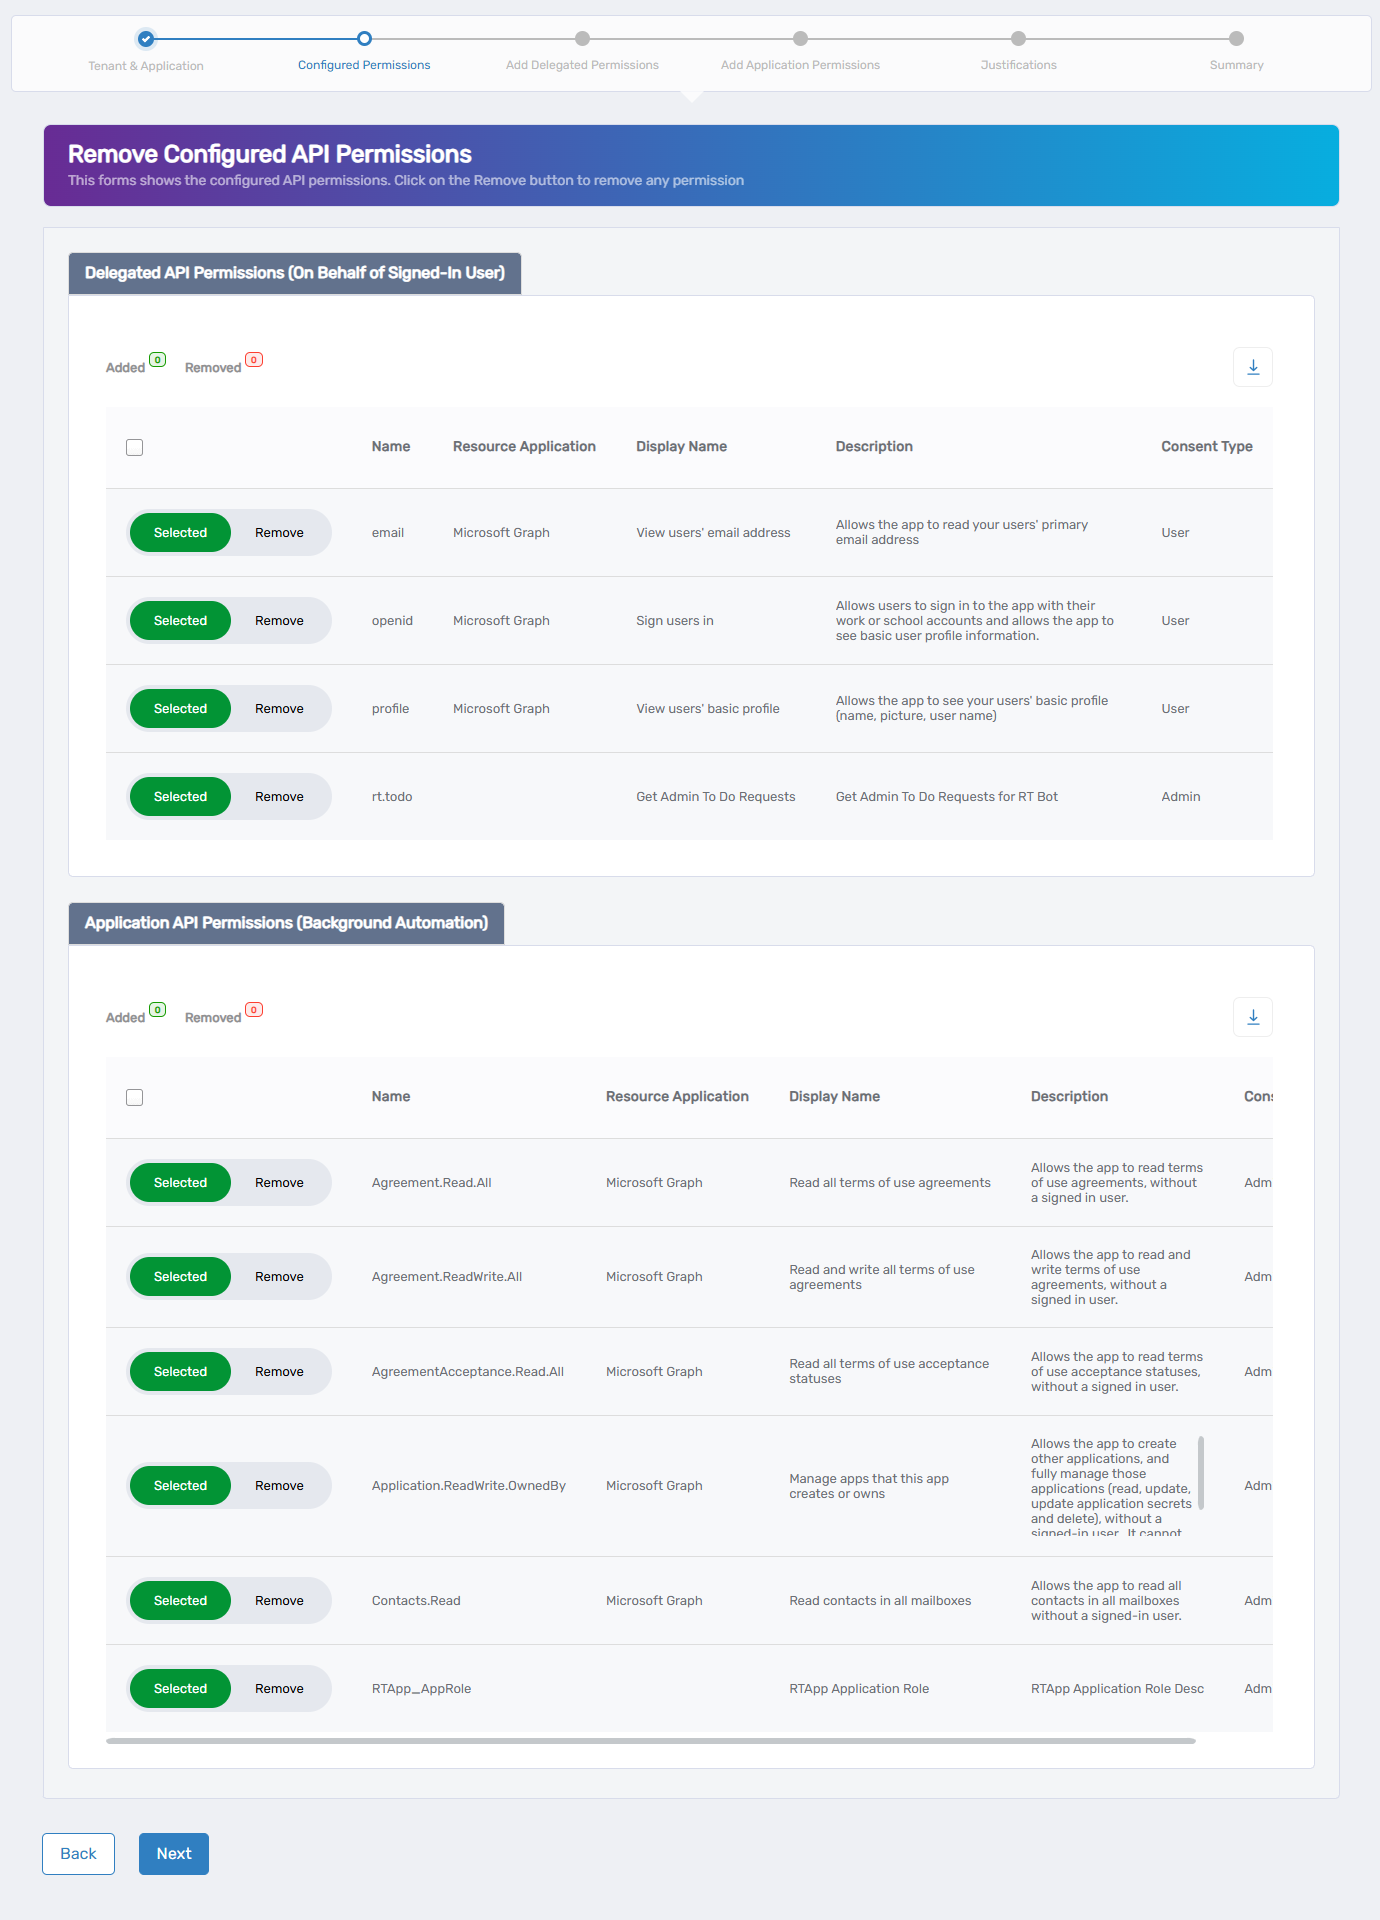
4. Remove Permissions via the Workflow
If the application has existing permissions, the workflow displays them for removal.
- For each permission you want to remove, toggle the button from Selected to Remove.
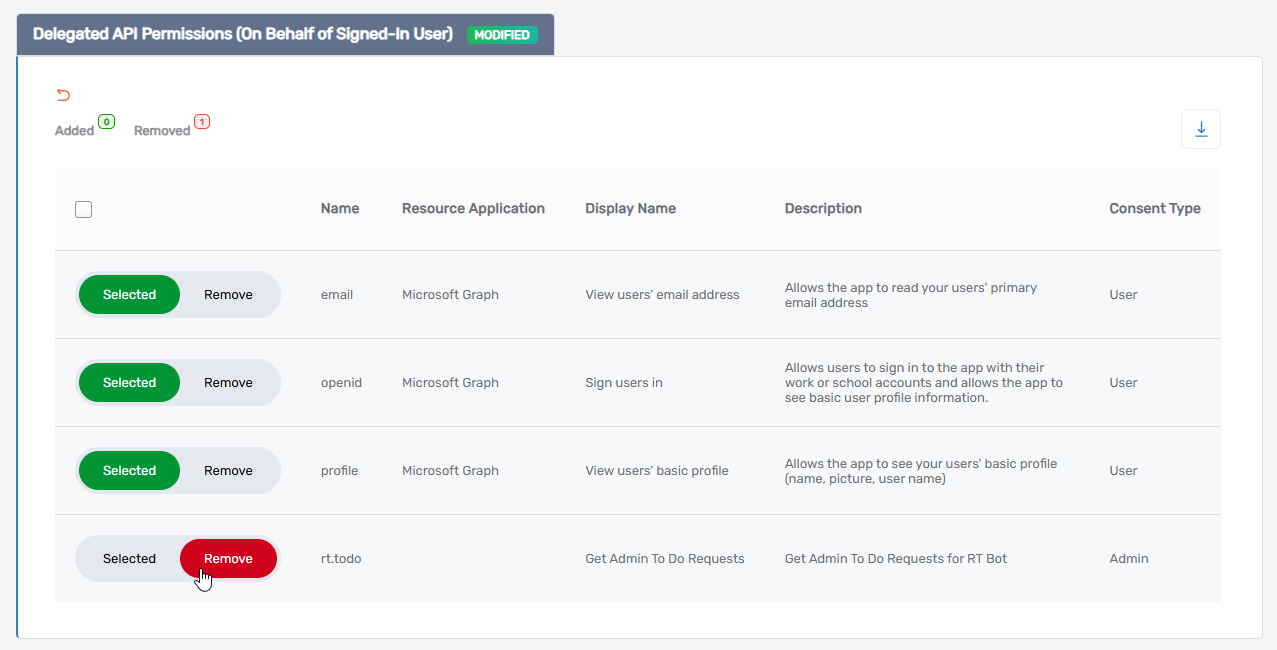
- Click Next to proceed.
If the application has no existing permissions, this step is skipped automatically.
5. Add Delegated API Permissions (Optional)
Delegated permissions allow access on behalf of signed-in users.
- In the Application APIs pane, search or browse for the API (e.g., Microsoft Graph).
- Select the API to load its delegated permissions.

- Select the permissions you want to add.
- Click Next to continue.
You may click Next without selecting any permissions to skip this step.
6. Add Application API Permissions (Optional)
Application permissions allow non-interactive background access.
- In the Application APIs pane, search or browse for the API (e.g., Microsoft Graph).
- Select the API to load its application permissions.
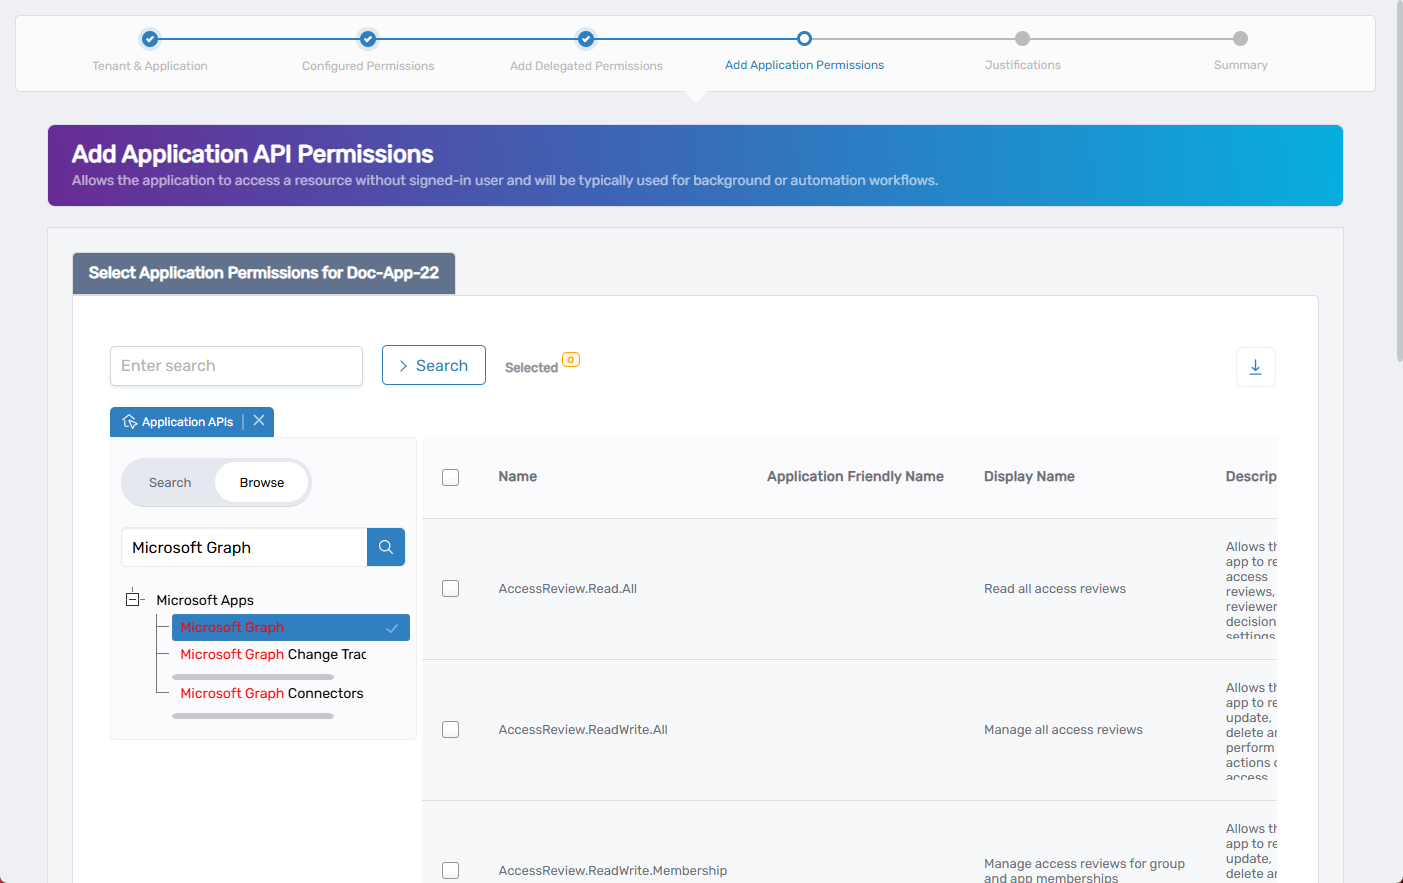
- Select the permissions you want to add.
- Click Next to continue.
This step is optional. Click Next if no application permissions are needed.
7. Provide Justifications (If Required)
Depending on your organization's configuration, you may be prompted to provide a justification.
- Fill out any required fields.
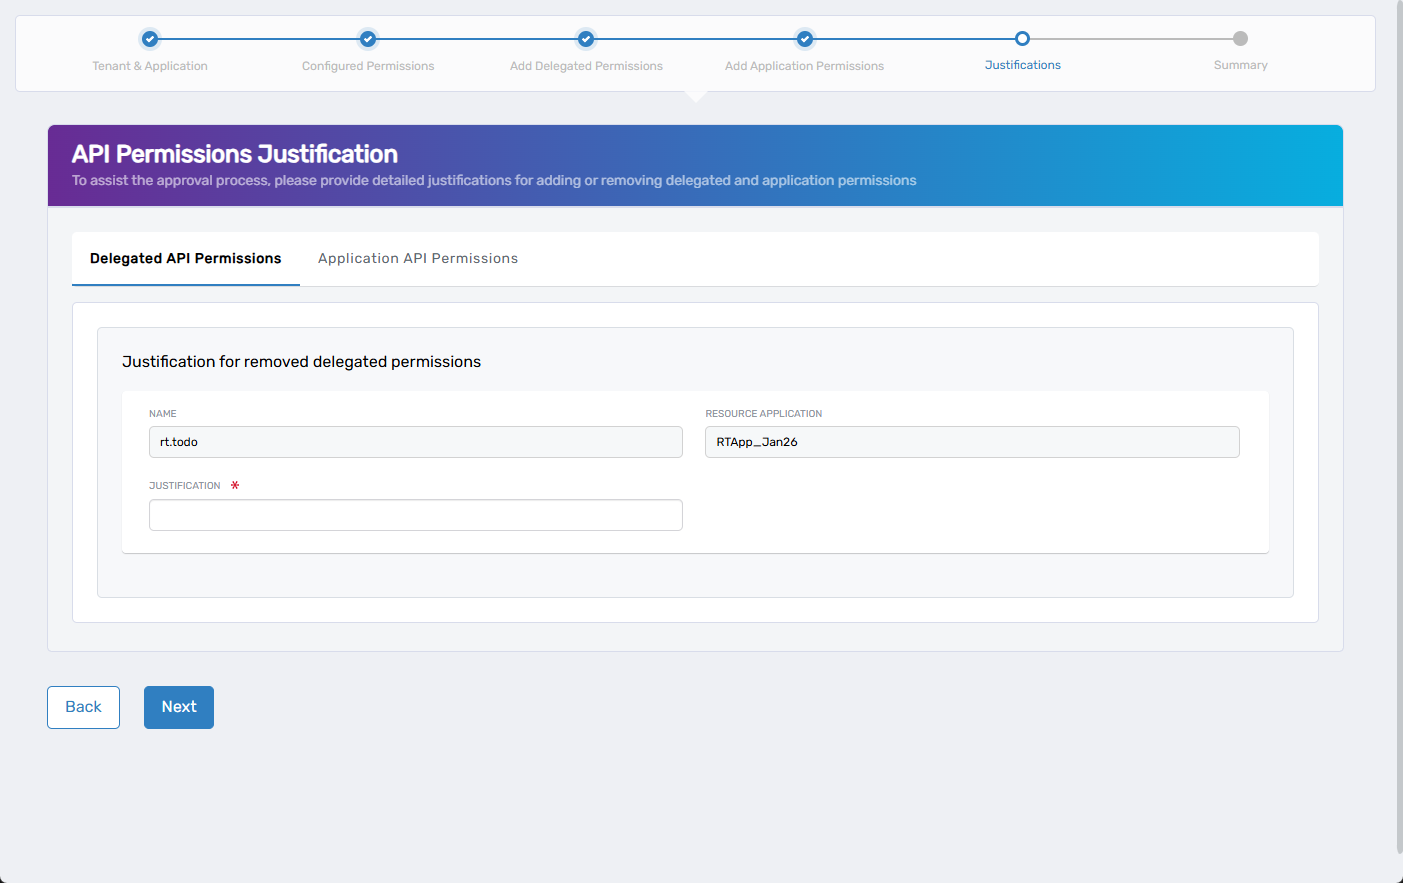
- Click Next to continue.
8. Review and Submit
- On the Summary screen, review all selected changes.
- Click Submit to finalize the updates in Microsoft Entra ID.
What Happens Next
- EmpowerID applies all selected changes to Microsoft Entra ID.
- Permissions are added or removed as defined.
- All actions are logged in the EmpowerID audit trail for auditing and compliance.