Create User Accounts for People
Create user accounts in external directories (Active Directory, Azure AD, etc.) for existing EmpowerID Person objects. This procedure links the new account to the Person and synchronizes attributes based on the account store's Attribute Flow rules.
Prerequisites
- Access to Identity Administration in EmpowerID
- Permissions to create accounts in the target account store
- Existing Person object in EmpowerID
- Understanding of the target account store's naming conventions and requirements
Create a User Account for a Person
- On the navbar, expand Identity Administration and click People.
- In the Actions pane, click Create User (Person Optional).
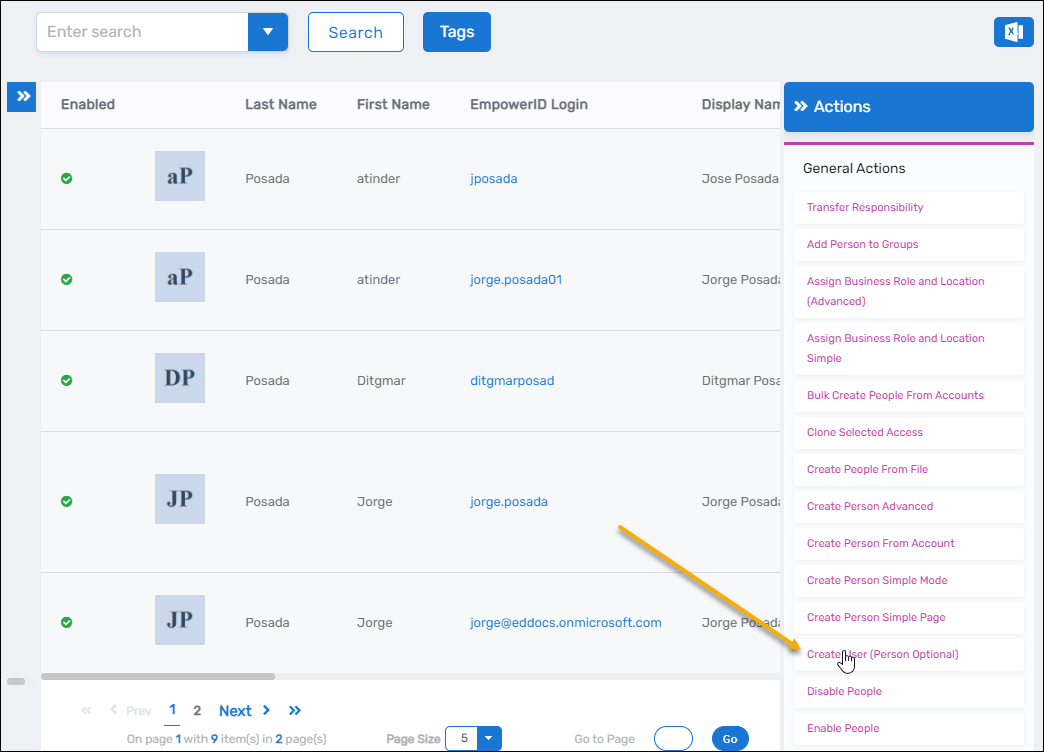
This opens the Create User form with multiple tabs for configuring account attributes.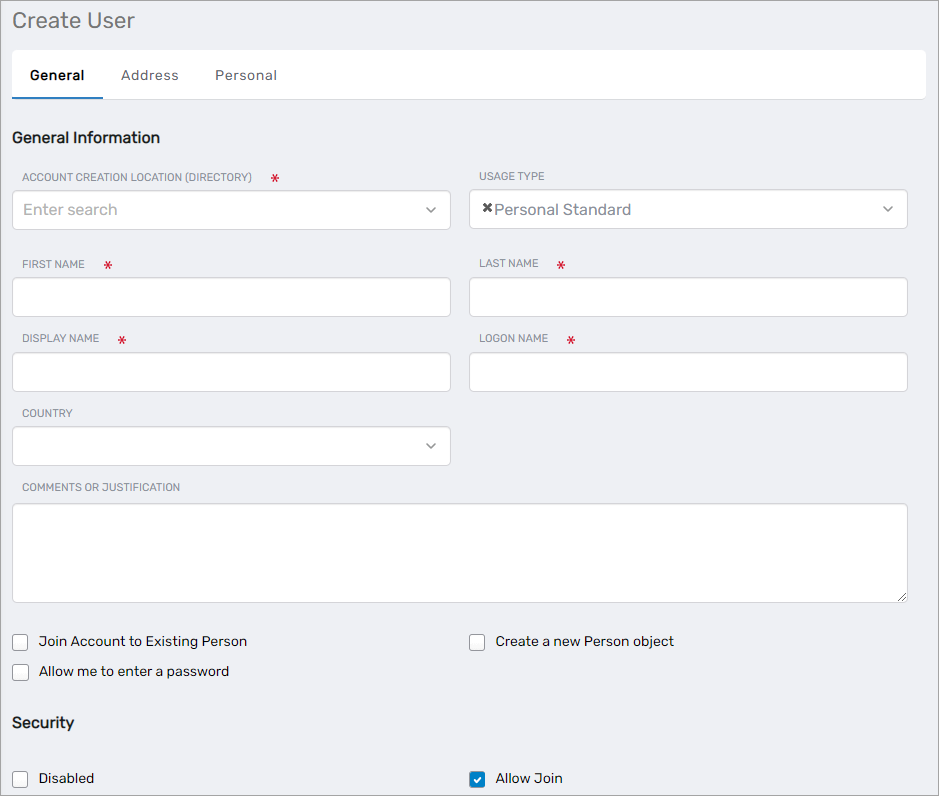
General Tab Configuration
-
In the Account Creation Location field, select the account store where the account will be created.
-
Select an account type from the Account Type drop-down:
- Personal Standard (default) - Basic user account for everyday tasks
- Personal Privileged - Highly privileged user account
- Application - Account used by applications
- Contact - Email contact account
- Emergency - "Break glass" account
- Service - Service account for automated processes
- Shared Mailbox - Disabled account for shared mailboxes
- Shared Privileged - Non-personal administrative account
- Test User - Account for testing
-
Under Location, search for and select the location within the account store where the account will be created.
-
Enter the user account information:
- First Name - User's first name
- Last Name - User's last name
- Display Name - How the name appears in directories
- Logon Name - Username for authentication
-
Select the UPN Suffix from the available domain options.
-
Select the appropriate Country.
-
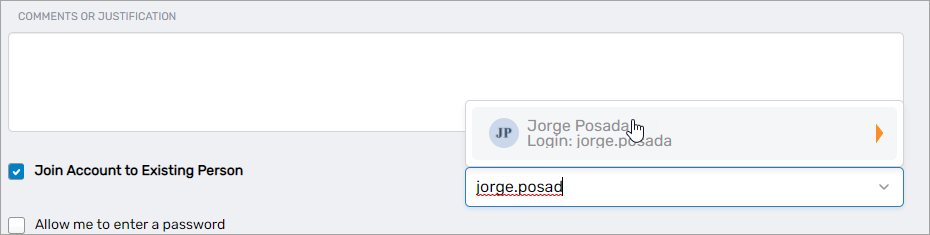
Select Join Account to an Existing Person.
-
In the Account Owner field, type the Person's name and click the tile for that Person.
-
In the Security section, configure account settings:
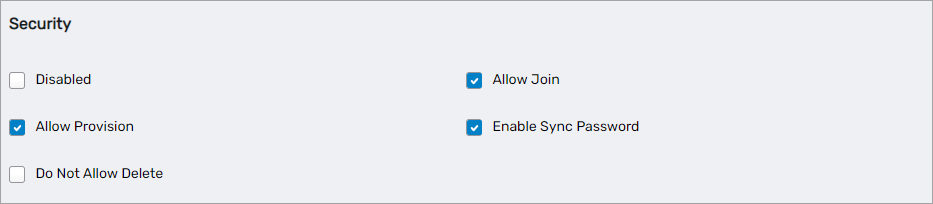
- Allow Join - Enables linking the account to an EmpowerID Person (selected by default)
- Allow Provision - Enables provisioning a Person for the account if none exists (selected by default)
noteWhen creating an account for an existing Person, EmpowerID joins the account to the Person and synchronizes attributes based on the Attribute Flow rules configured for the account store.
Optional Configuration Tabs
- Optionally, click the Address tab and enter address information for the account.
- Optionally, click the Personal tab and enter personal information for the account.
Save the Account
- Click Save.
- The account's View page appears, displaying account information and management options.
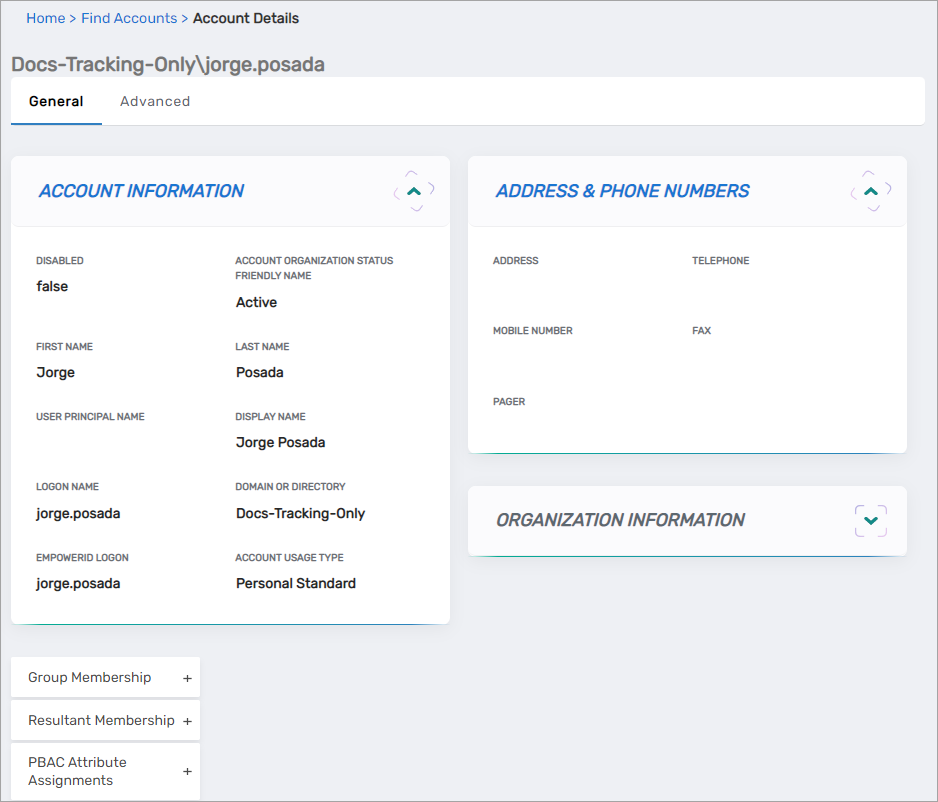
The EmpowerID Logon attribute indicates the linked Person's logon name. If this attribute is empty, the account is not linked to an EmpowerID Person.
Results
- User account is created in the selected external directory
- Account is linked to the specified EmpowerID Person
- Attributes synchronize between the account and Person based on Attribute Flow rules
- Account appears on the Person's View page under linked accounts
- Person can authenticate using the new account credentials