Create a Claims Mapping Policy in EmpowerID
As an administrator, you can create reusable claims mapping policies that control what user information—such as roles, departments, or group membership—is sent to Azure applications after sign-in. Applications use this data to determine what authenticated users are allowed to do.
Claims added to a policy are reused across applications. To configure claims for a single app, use the Manage Azure App Wizard instead.
What You'll Need
| Requirement | Description |
|---|---|
| Tenant Access | The Azure tenant must already be registered in EmpowerID. |
Steps to Create a Claims Mapping Policy
- Navigate to the portal for the Resource Admin app in your environment.
- Log in using your credentials.
If you don't know the direct URL to Resource Admin, contact your EmpowerID administrator.
- From the dropdown menu, select Applications, then click the Workflows tab.
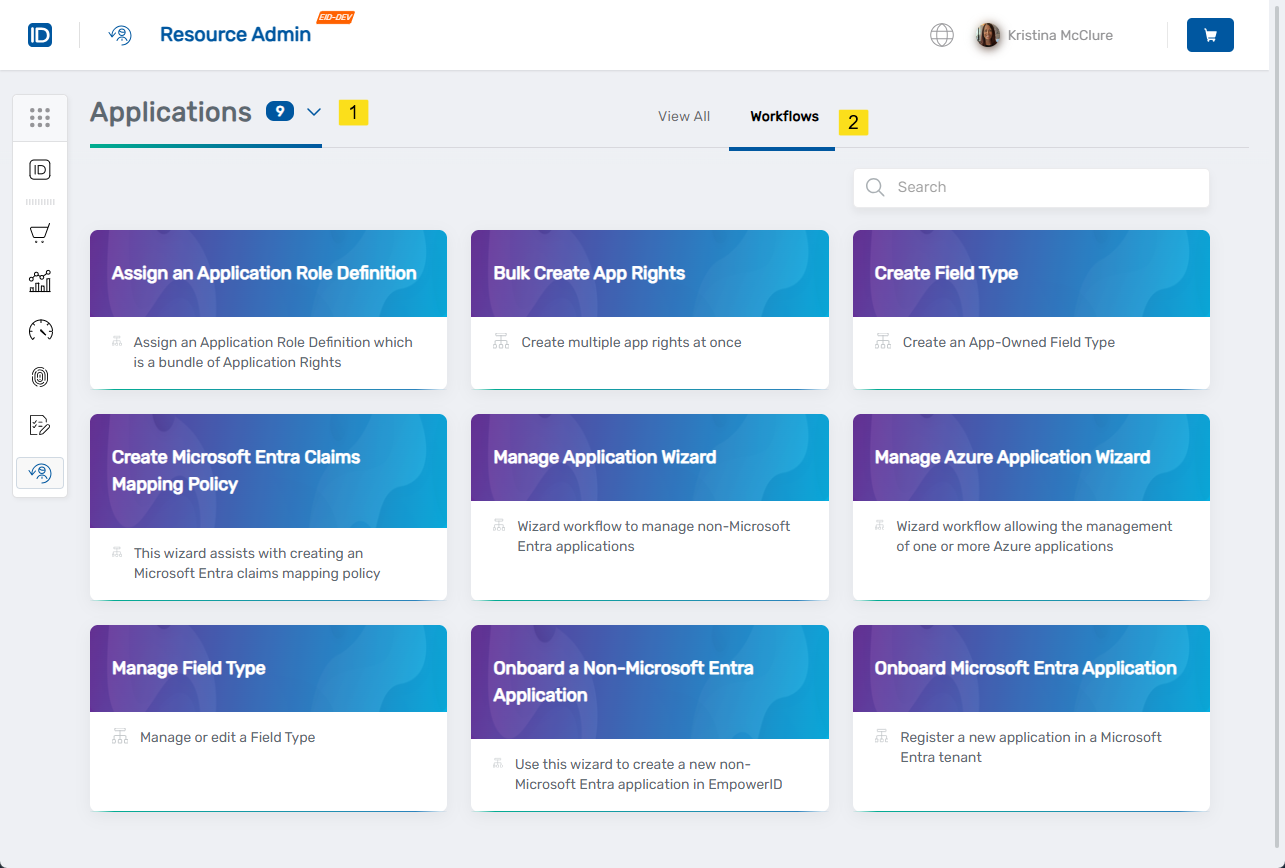
- Search for
CreateAzureClaims, then click the Create Microsoft Entra Claims Mapping Policy workflow tile.
The workflow opens to the Tenant & Policy Details screen.
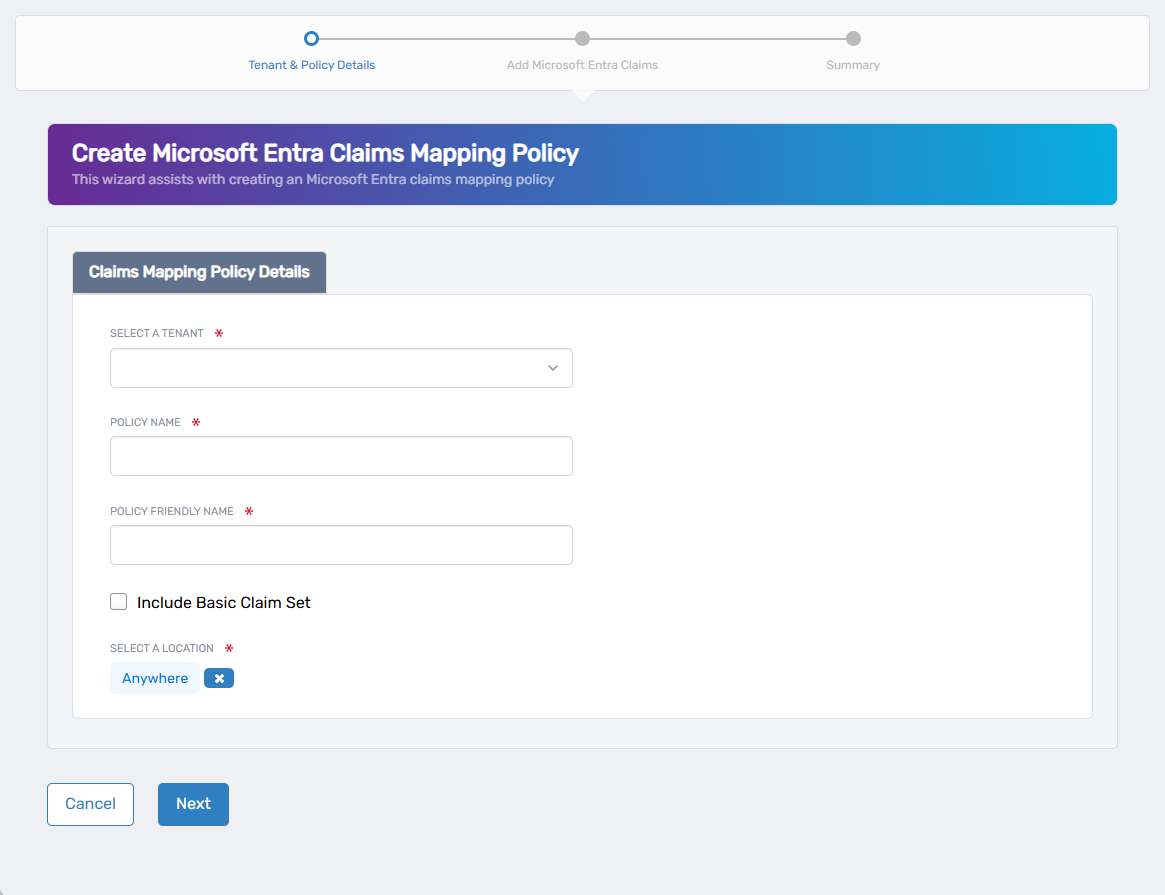
- Complete the following fields:
- Select a Tenant – Choose the Azure tenant the policy applies to.
- Policy Name – Enter a unique internal identifier.
- Policy Friendly Name – Enter a display name for the UI.
- Include Basic Claim Set – Check to automatically include standard claims like user ID, email, and display name.
- Select a Location – Choose an RBAC location for policy delegation.
If a default location is pre-filled and needs to be changed, click the (X) next to the field and then click Select a Location to search.
- Click Next to proceed.
If you click Back before clicking Next, your changes on this step will be lost.
The wizard continues to the Add Microsoft Entra Claims screen with the Source Claims tab open.
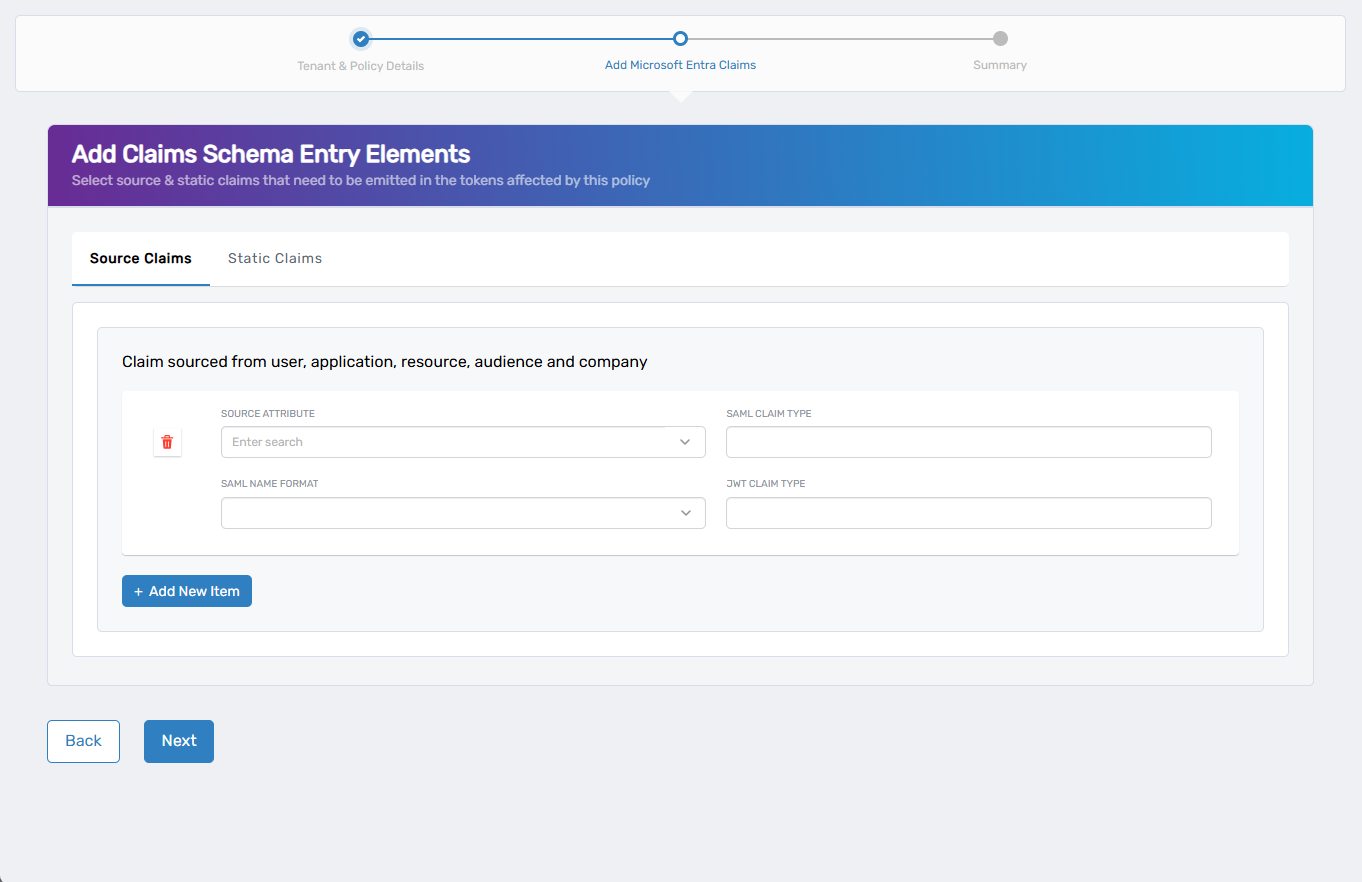
Use this step to add dynamic claims based on user, application, or resource attributes.
- Click + Add New Item to add a new row.
- Complete the following fields:
| Field | Description |
|---|---|
| Source Attribute | Azure attribute to use as the value (e.g., user.mail) |
| SAML Claim Type | Claim type expected by SAML applications |
| SAML Name Format | Name format such as emailAddress or unspecified |
| JWT Claim Type | Claim name for JWT tokens (e.g., email) |
- Repeat to add more claims as needed.
- When finished, either:
- Click the Static Claims tab to add static values, or
- Click Next to skip static claims and continue.
If you click Back before clicking Next, your changes on this step will be lost.
- To add static (hardcoded) claims, click the Static Claims tab.
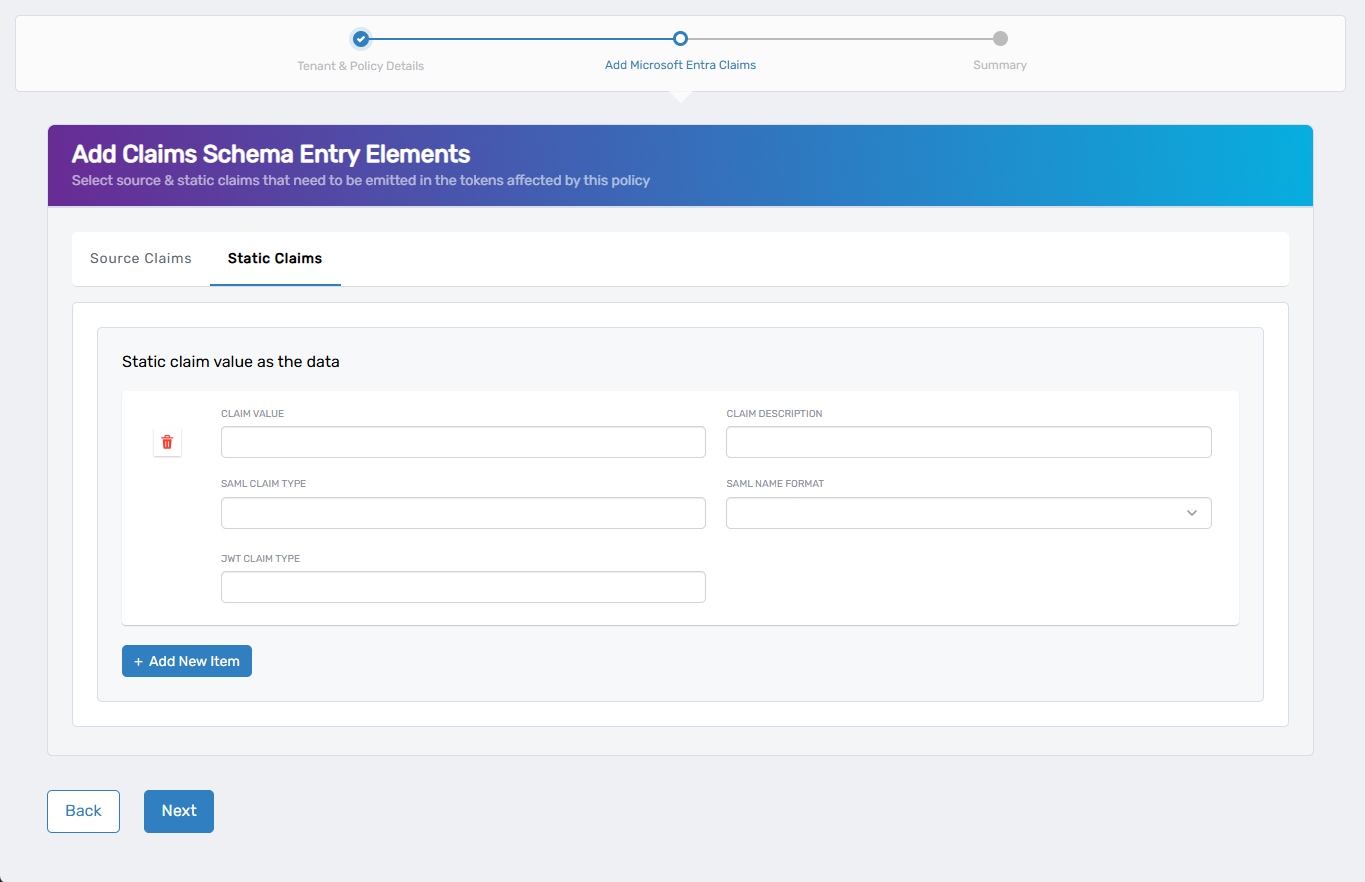
- Click + Add New Item.
- Complete the following fields:
| Field | Description |
|---|---|
| Claim Value | The static value to include (e.g., true, Engineering) |
| Claim Description | (Optional) Friendly label to help identify the claim |
| SAML Claim Type | SAML claim type used by apps expecting SAML tokens |
| SAML Name Format | Format such as emailAddress, unspecified, etc. |
| JWT Claim Type | JWT claim name for token output |
- Repeat to add more static claims if needed.
- Click Next to proceed.
If you click Back before clicking Next, your changes on this step will be lost.
- Review your selections and claims for accuracy on the Summary screen.
- If changes are needed, click Back.
- When ready, click Submit to create the policy.
- From the Applications dropdown, select Claims Mapping Policies.
- Search for the policy name and click Details to confirm the configuration.
What Happens Next
- Your new policy can now be assigned to one or more Microsoft Entra applications.
- Claims in the policy will be emitted to tokens for those apps once assigned.