Edit Application IAM Shop Settings
As an application owner, you can configure how your Microsoft Entra application appears in the IAM Shop and control who can request access to it. These settings determine whether the application is requestable, how requests are approved, and which users see it in the self-service portal.
Steps to Edit IAM Shop Settings
-
Log in to the Resource Admin portal.
-
From the Resource Type dropdown, select Applications.
-
Search for the application you want to update.
-
Click the gear icon on the application record and select Manage Application Wizard.
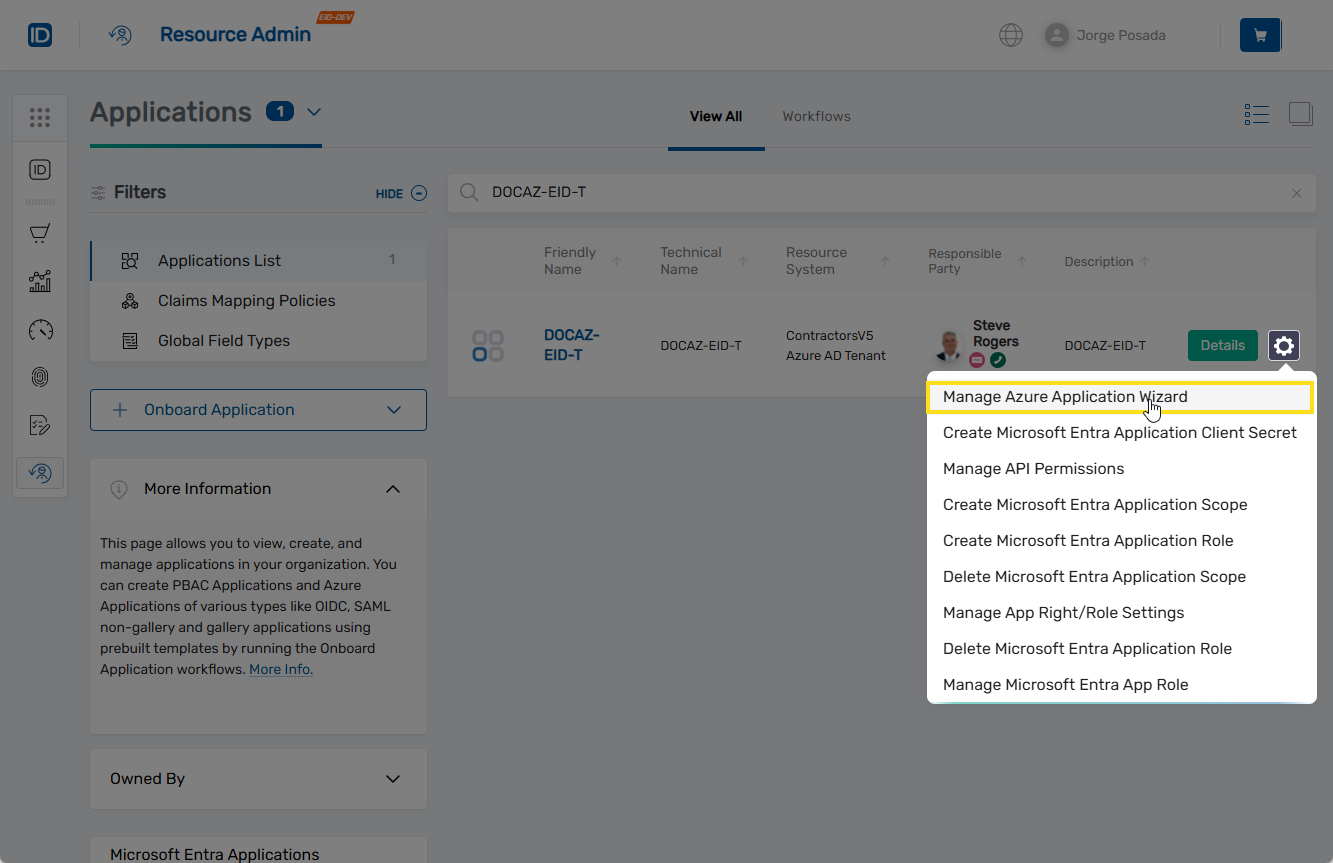
-
Under Select Options, choose Edit IAM Shop settings.
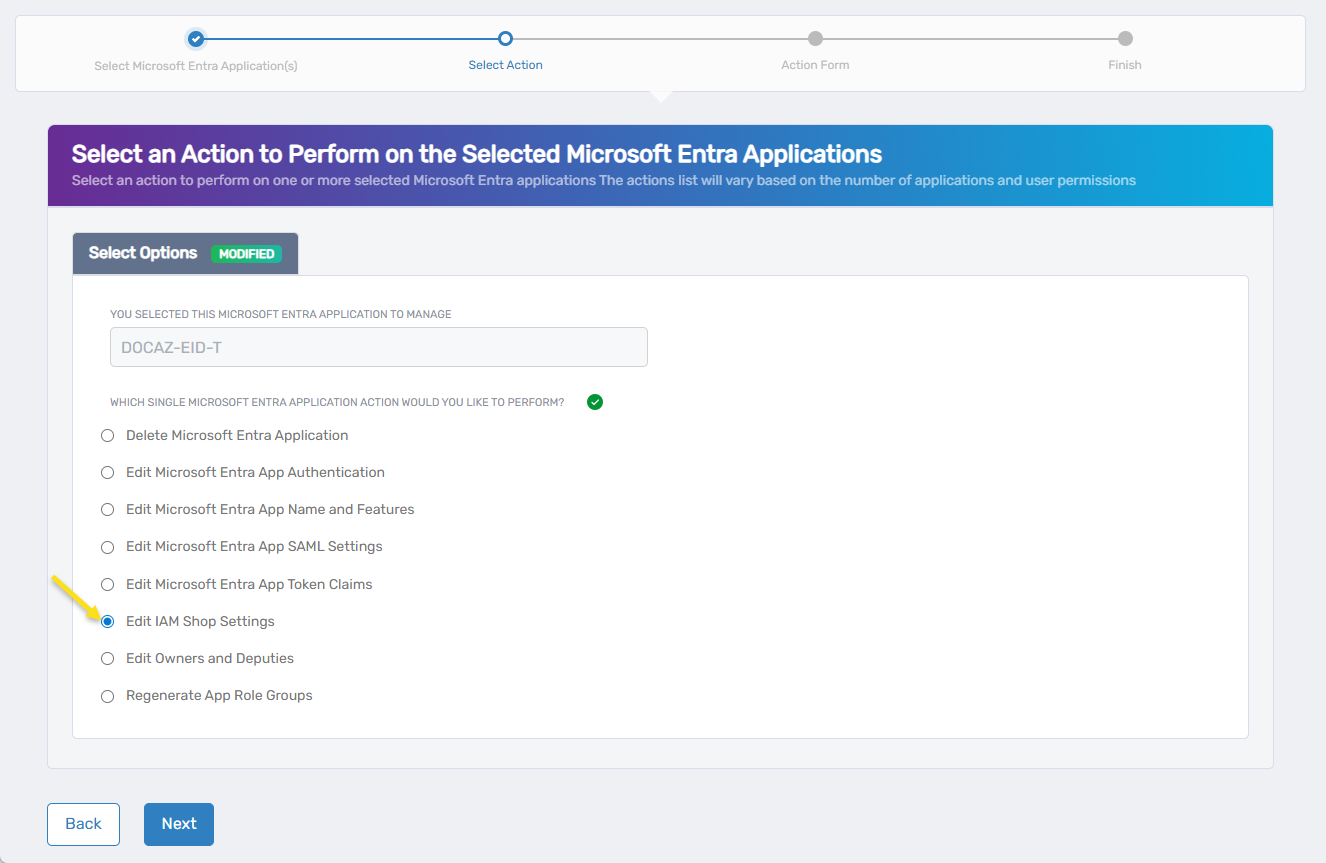
-
Click Next.
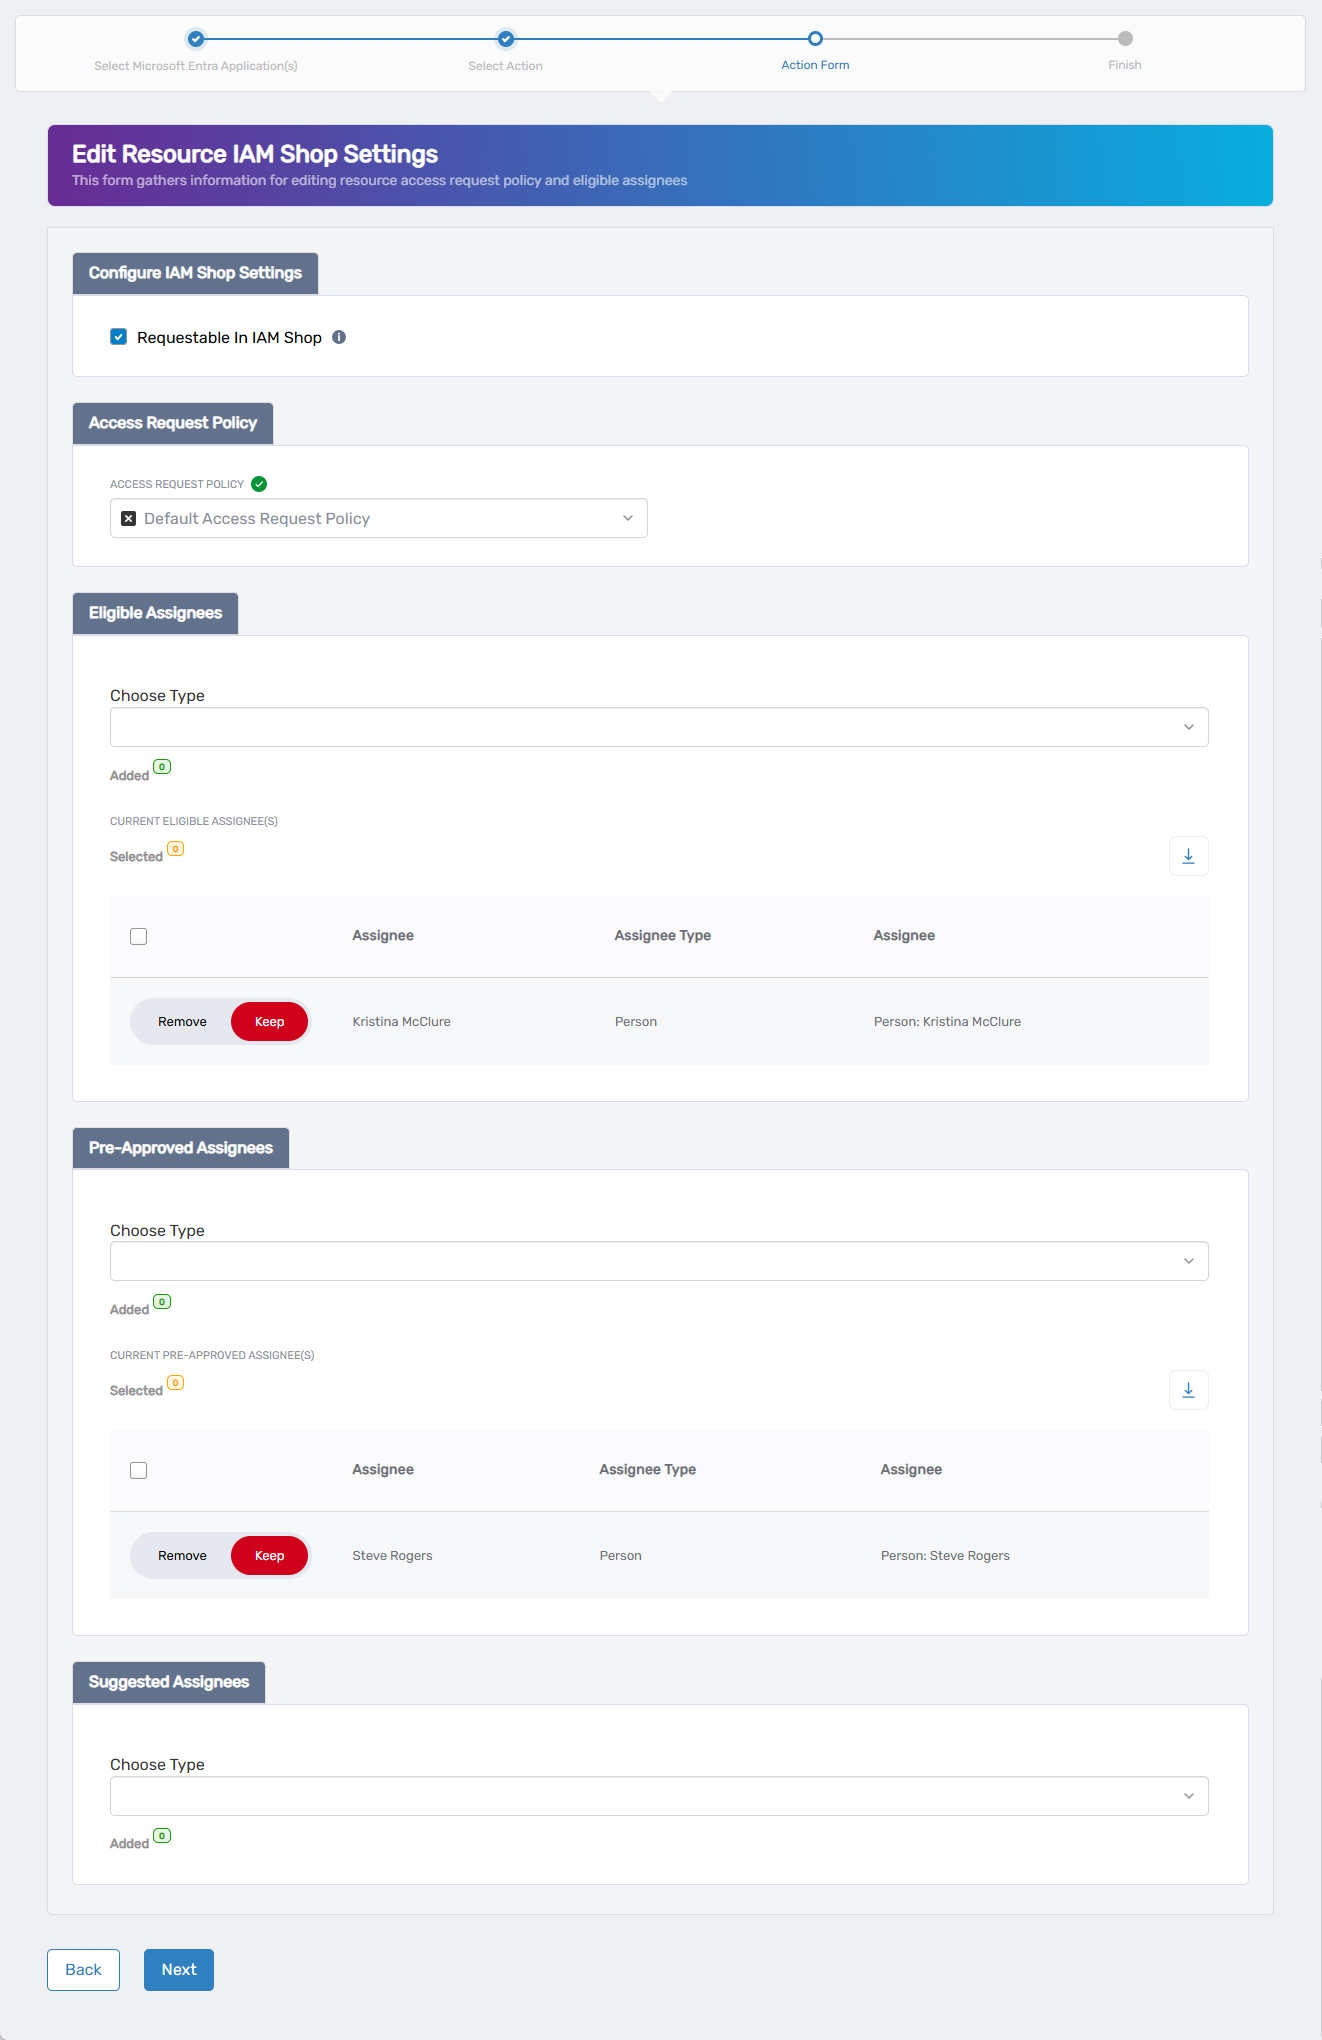
The Edit Resource IAM Shop Settings form opens, where you can control access governance settings for the application in the IAM Shop.
-
Select or deselect the Requestable in IAM Shop checkbox to enable or disable the application's availability in the IAM Shop.
- Checked – The application is available in the IAM Shop.
- Unchecked – The application is not requestable, and all other IAM Shop settings will be hidden and ignored.
If this setting is deselected, the configuration process ends here. The remaining IAM Shop settings will not appear or apply.
-
Under Access Request Policy, click the X to remove the current policy (if any), then search for and select a new policy that defines the appropriate access workflow for this application.
-
Under Eligible Assignees, define who can see and request access to this application. Requests from eligible assignees are routed through the Access Request Policy for approval.
- To add: choose an assignee type from the Choose Type dropdown, search for and select the appropriate assignee, click Add, and repeat to add others as needed.
- To remove: locate the assignee in the list and toggle the Keep switch to Remove.
Assignee types include: Person, Group, Set Group, Management Role, Management Role Definition, Business Role and Location.
-
Under Pre-Approved Assignees, define who is automatically granted access without going through an approval process.
- To add: choose an assignee type from the Choose Type dropdown, search for and select the appropriate assignee, click Add, and repeat as needed.
- To remove: locate the assignee in the list and toggle the Keep switch to Remove.
-
Under Suggested Assignees, define who sees this application highlighted as a recommendation in the IAM Shop. Their access requests still follow the Access Request Policy.
- To add: choose an assignee type from the Choose Type dropdown, search for and select the appropriate assignee, click Add, and repeat to add more if necessary.
- To remove: locate the record you want to remove and toggle Keep to Remove.
-
After configuring all applicable IAM Shop settings, click Next.
-
You will see the Operation Execution Summary indicating the request completed successfully.
-
Click Next to continue.
-
On the Finish or Start Over Workflow screen, choose one of the following:
- Manage the same Microsoft Entra application(s)
- Manage different Microsoft Entra application(s)
- Finish the workflow
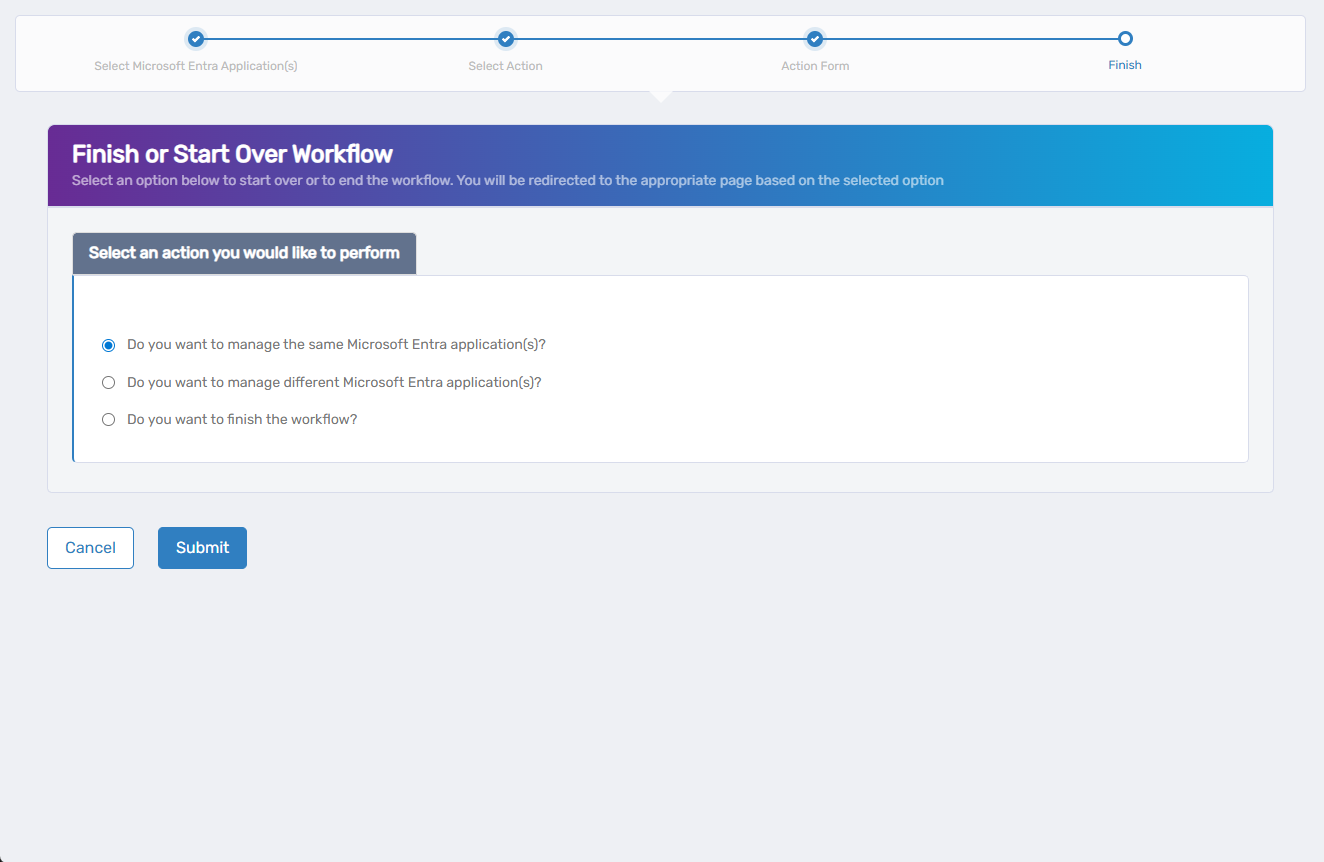
- Click Submit to confirm your selection and proceed.
What Happens Next
- The application's IAM Shop availability is updated immediately.
- Eligible users can now see and request access to the application.
- Pre-approved assignees are automatically granted access without requiring approval.
- All changes are logged in EmpowerID's audit trail for compliance and visibility.