Configure Claims for Microsoft Entra Applications in EmpowerID
As an application owner or administrator, you can configure custom claims for Microsoft Entra applications, controlling what user attributes are included in authentication tokens.
Claims configured through this workflow overwrite any claims set in the Microsoft Entra admin center.
Overview
EmpowerID's Manage Azure App Wizard workflow allows you to configure:
- Source claims from user or application attributes
- Static (hardcoded) claims
- Optional claims such as
emailorauth_time - Group membership claims for access control
Once configured, these claims are added to ID or Access tokens issued to the selected Microsoft Entra application(s).
What You'll Need
| Requirement | Description |
|---|---|
| Application Access | You must have permission to access the Azure application in EmpowerID. |
| Workflow Access | You must be authorized to run the Manage Azure App Wizard workflow. |
Before You Begin
Before configuring claims, make sure to review the following:
- Know which token types (Access or ID) your application requires.
- Determine whether your application expects roles, groups, or both.
- Identify the attributes you want to include as source claims (e.g.,
user.mail,user.displayName). - Understand that any claims currently configured in Microsoft Entra will be overwritten.
Steps to Add or Remove Claims for an Application
Clicking Back before clicking Next on any step discards your changes for that step.
- Navigate to the portal for the Resource Admin app in your environment.
- Log in using your credentials.
If you don't know the direct URL to Resource Admin, contact your EmpowerID administrator.
-
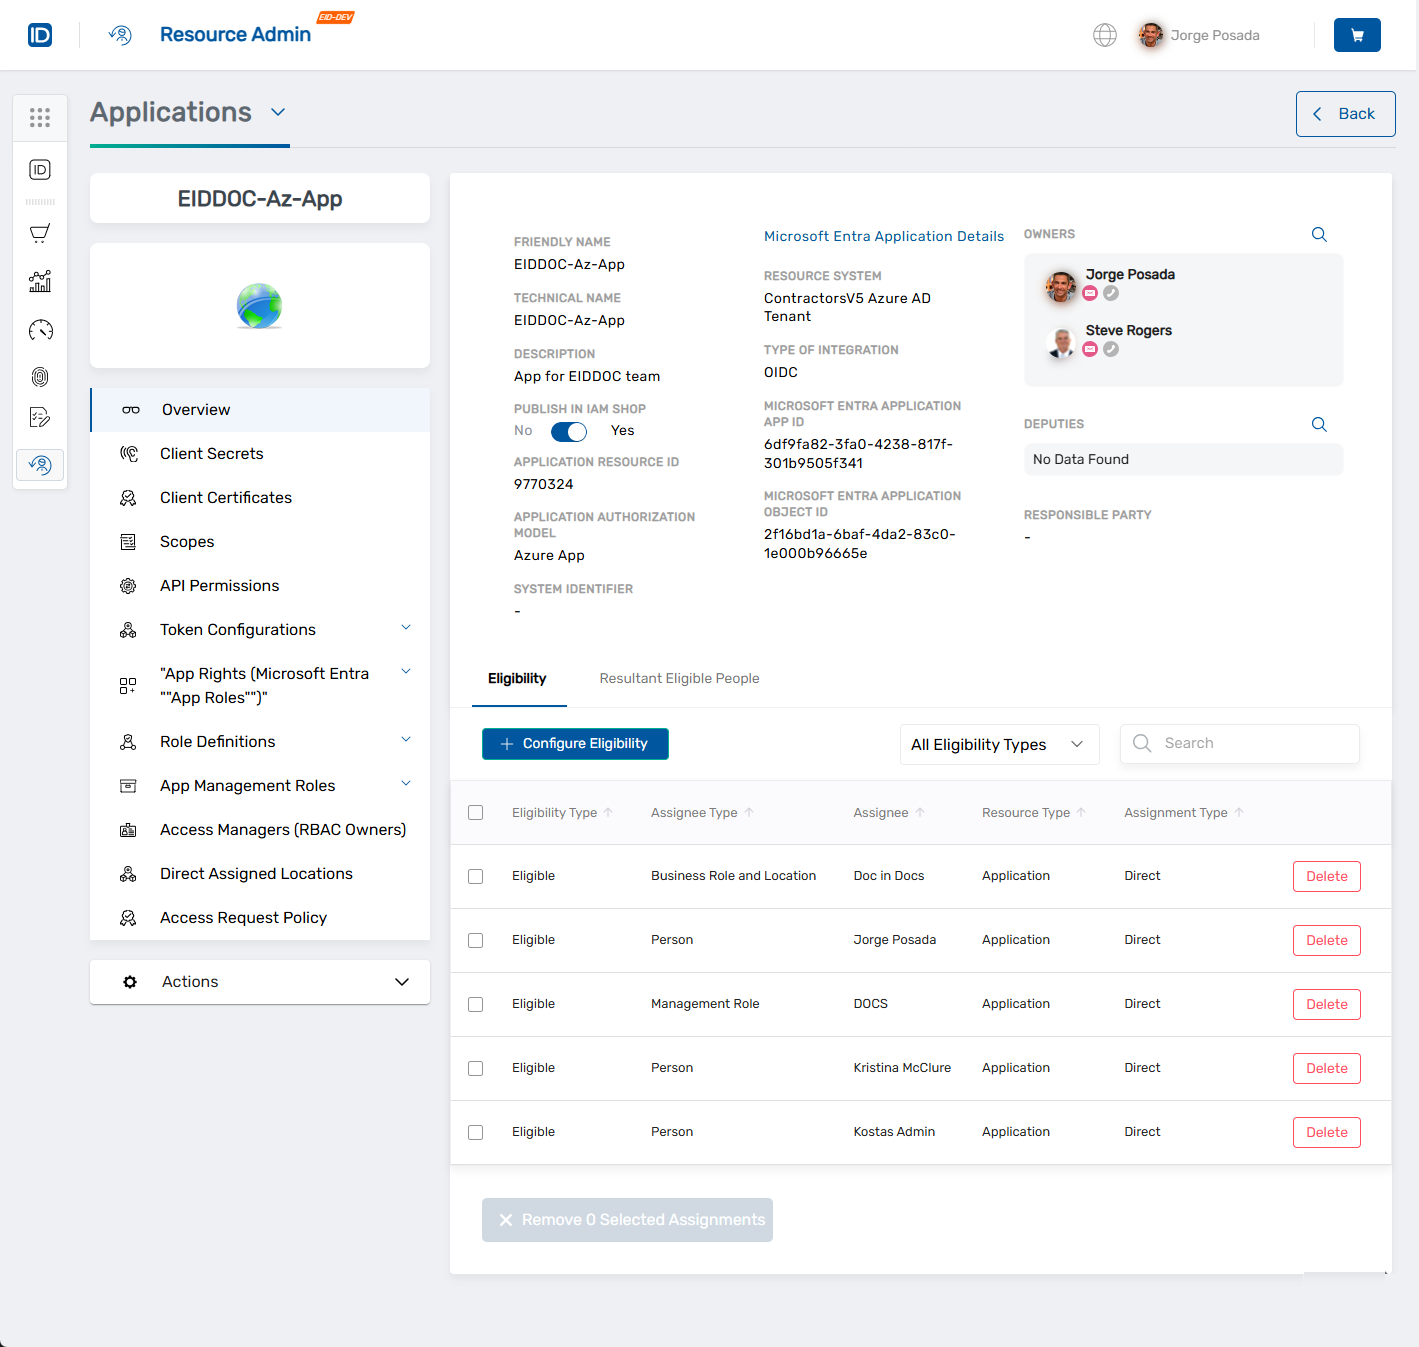
From the dropdown menu, choose Applications.
-
Search for the target application.
-
Click the Details button on the record returned for the application.

This opens the Overview screen for the application.
-
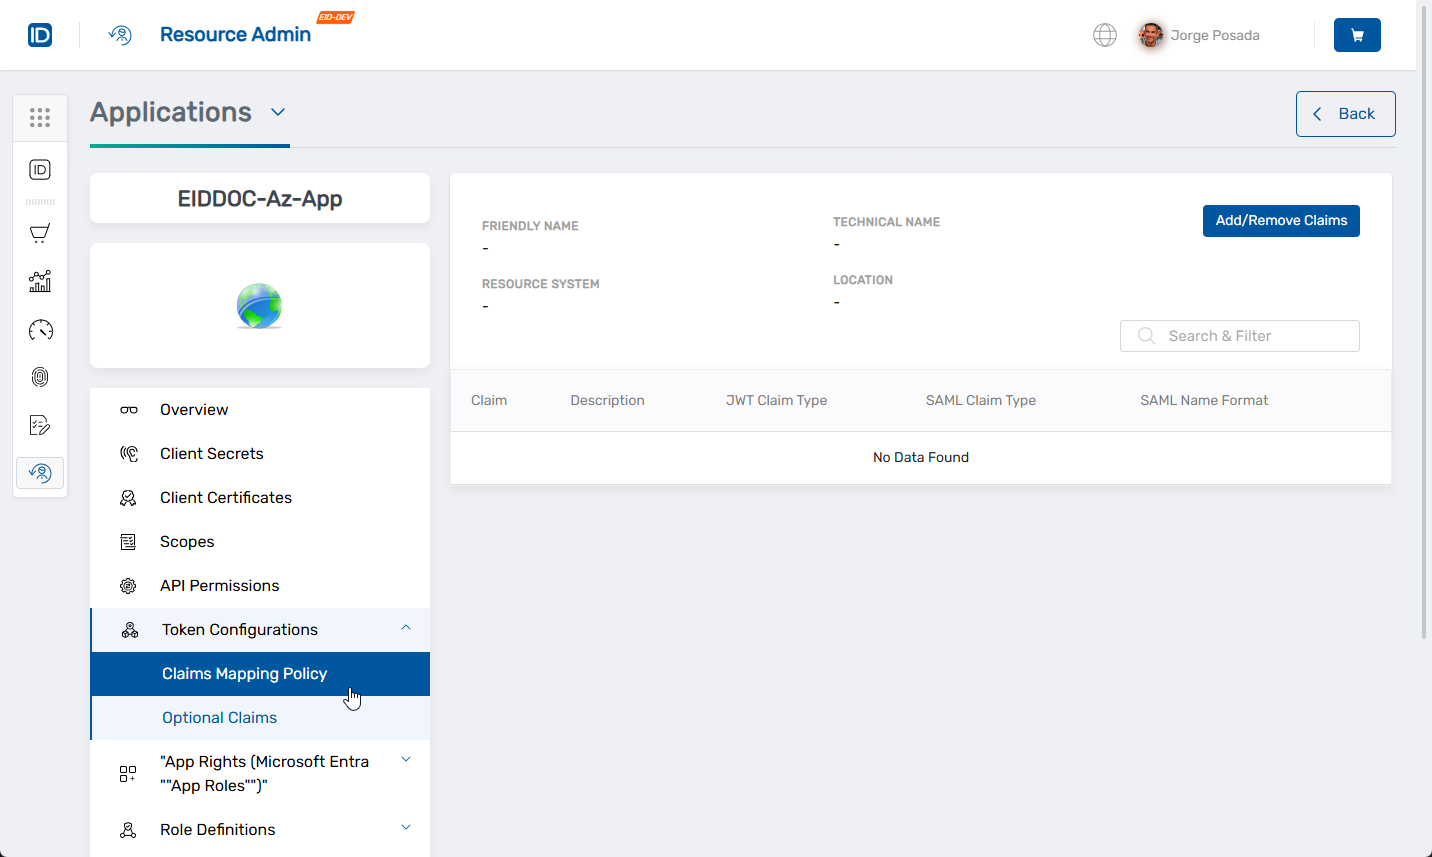
In the left menu, expand Token Configurations and click Claims Mapping Policy.
-
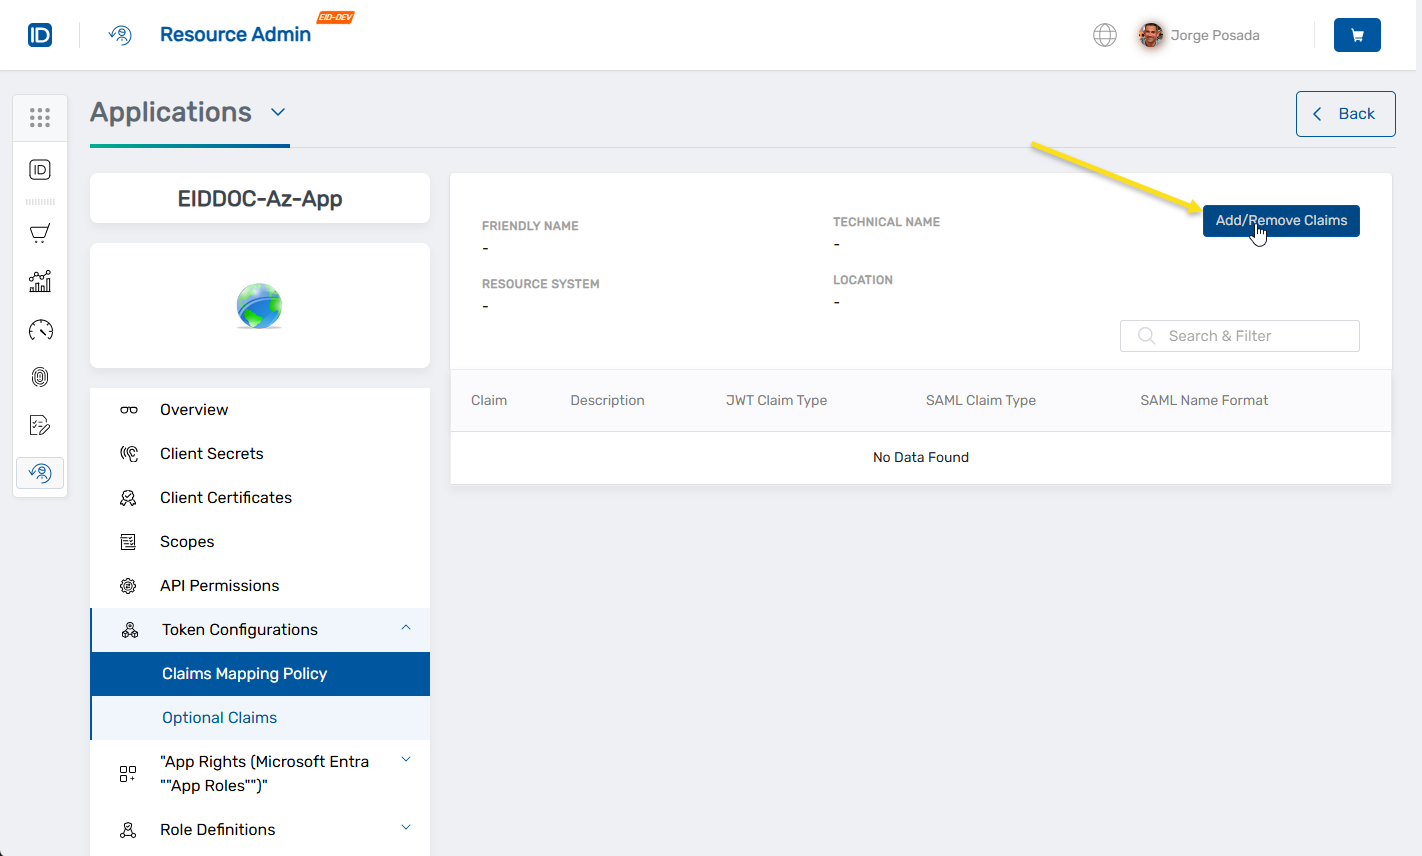
On the claims view, click Add/Remove Claims to launch the configuration workflow.
-
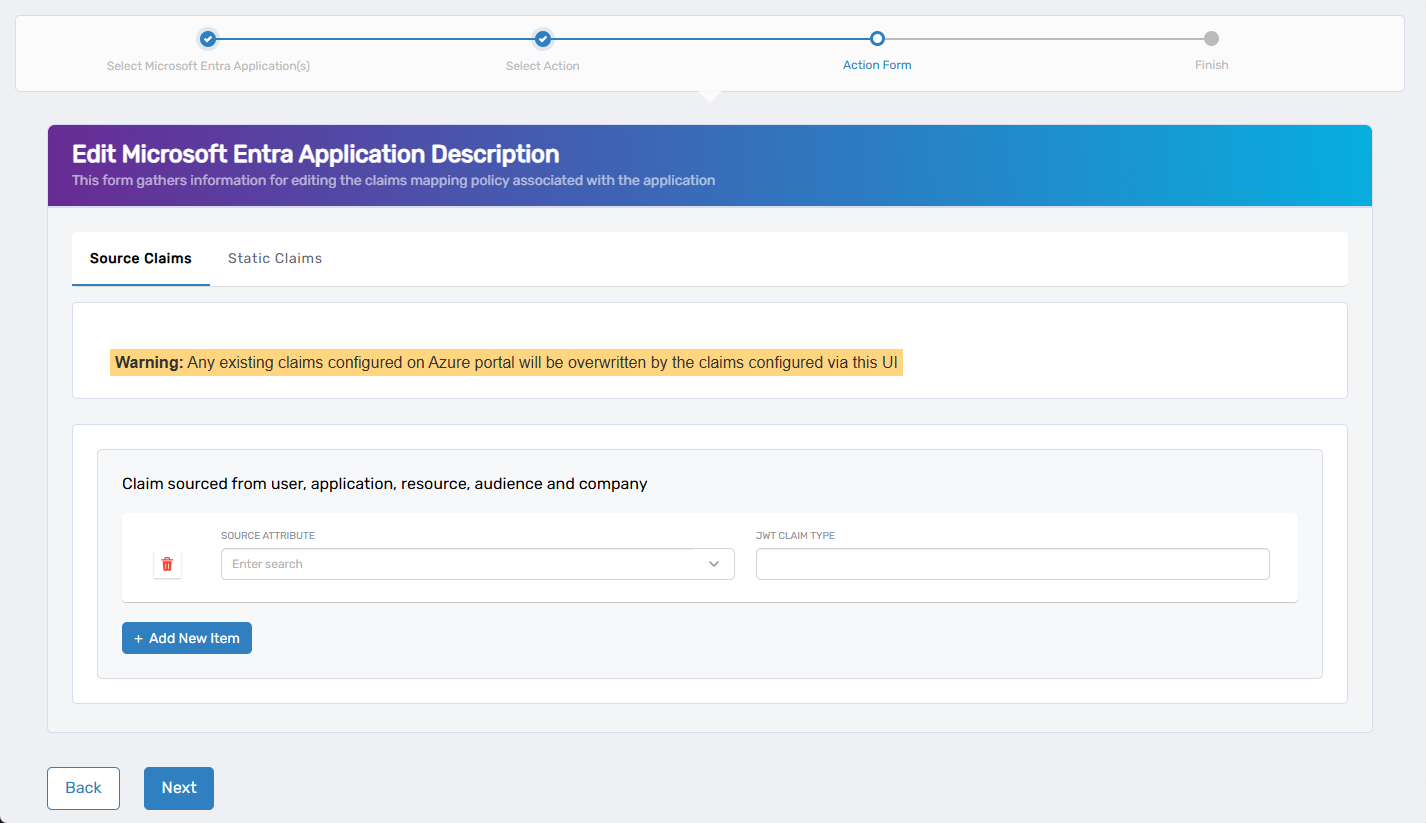
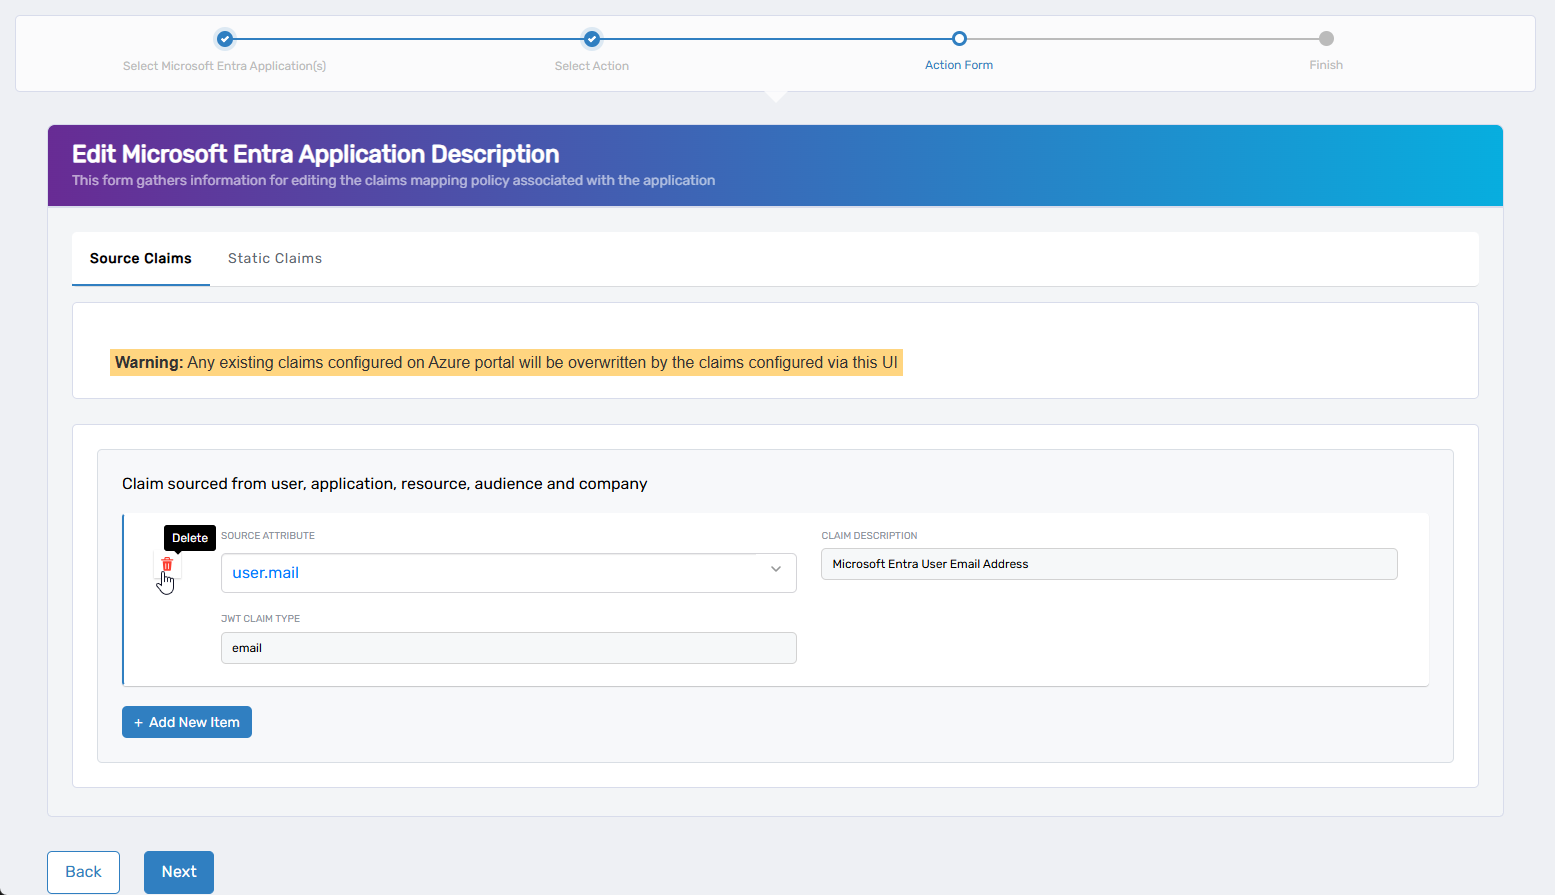
Select the tab for the type of claim you need to add:
- Source Claims – Define dynamic claims sourced from user, application, resource, audience, or company attributes.
- Static Claims – Define static (hardcoded) claims with fixed values.
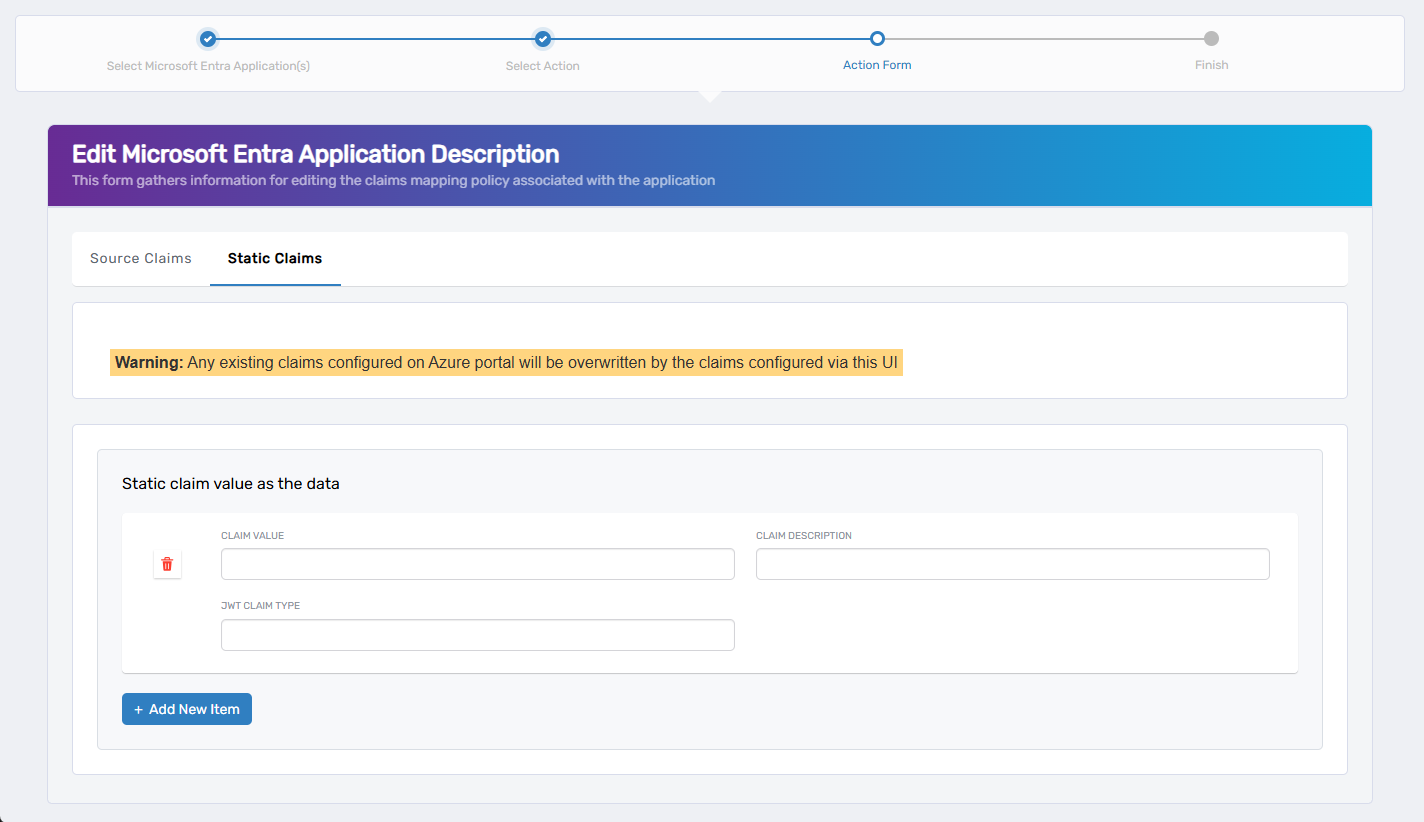
- Source Claims – Define dynamic claims sourced from user, application, resource, audience, or company attributes.
If no claims currently exist, an empty row appears automatically. Otherwise, click + Add New Item to define a new claim.
- Fill in the fields appropriate to the claim type:
| Field | Applies To | Description |
|---|---|---|
| Source Attribute | Source Claims | Attribute to source the value (e.g., user.mail) |
| Claim Value | Static Claims | Static value to include in the token |
| Claim Description | Both | (Optional) A friendly label for the claim |
| JWT Claim Type | Both | Name of the claim in the token (e.g., email) |
- Repeat for any additional claims by clicking + Add New Item.
- If needed, switch to the other tab and repeat steps 1–3.
To remove an existing claim, click the Trash Can icon beside it.
To remove claims from a reusable policy (not specific to an app), see Update Claims Mapping Policy.
-
When finished, click Next to proceed, or click Back to return to the previous step.
-
(Optional) Configure optional claims for Access Tokens and/or ID Tokens. If not needed, click Next to skip.
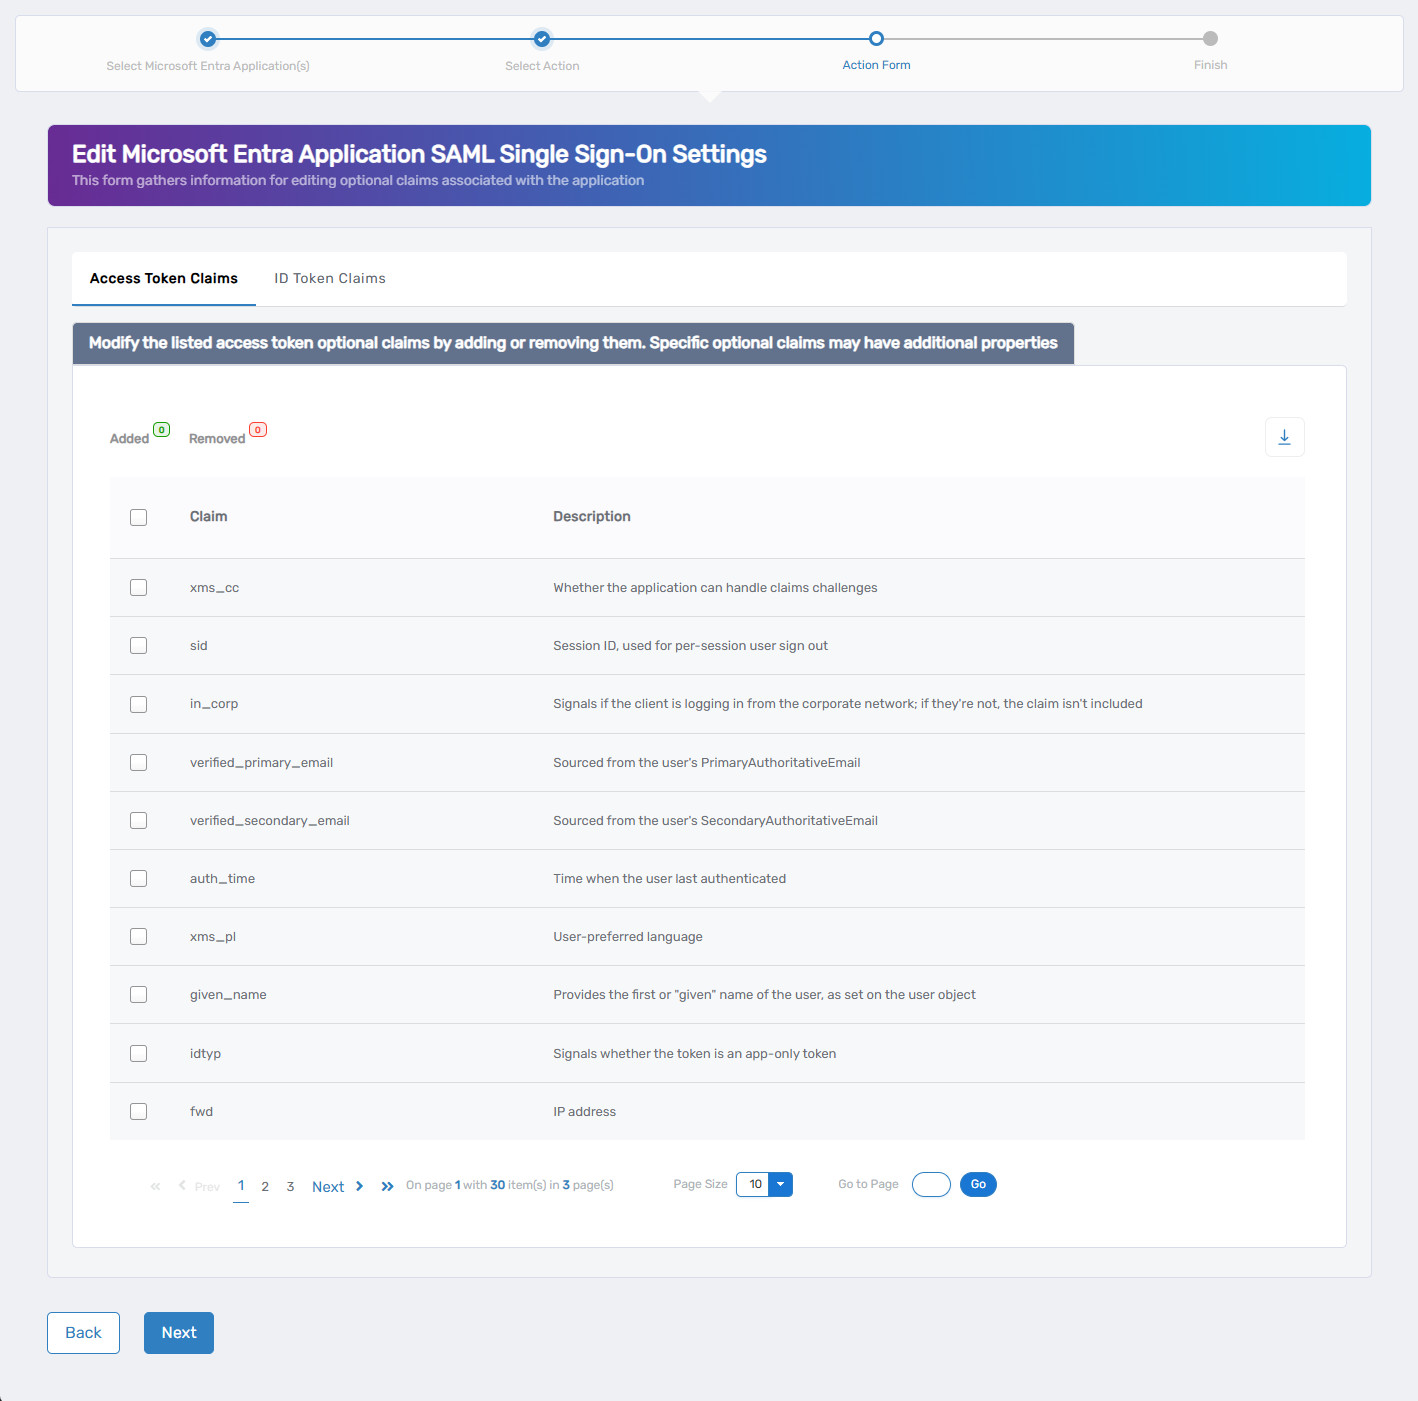
-
Select the Access Token or ID Token tab.
-
Use the checkboxes to enable or disable specific optional claims. Common optional claims include:
auth_time,email,in_corp,verified_primary_email. -
When finished, click Next to continue, or click Back to return to the previous step.
-
(Optional) Configure group claims to control how group membership is included in the token. If not needed, click Next to skip.
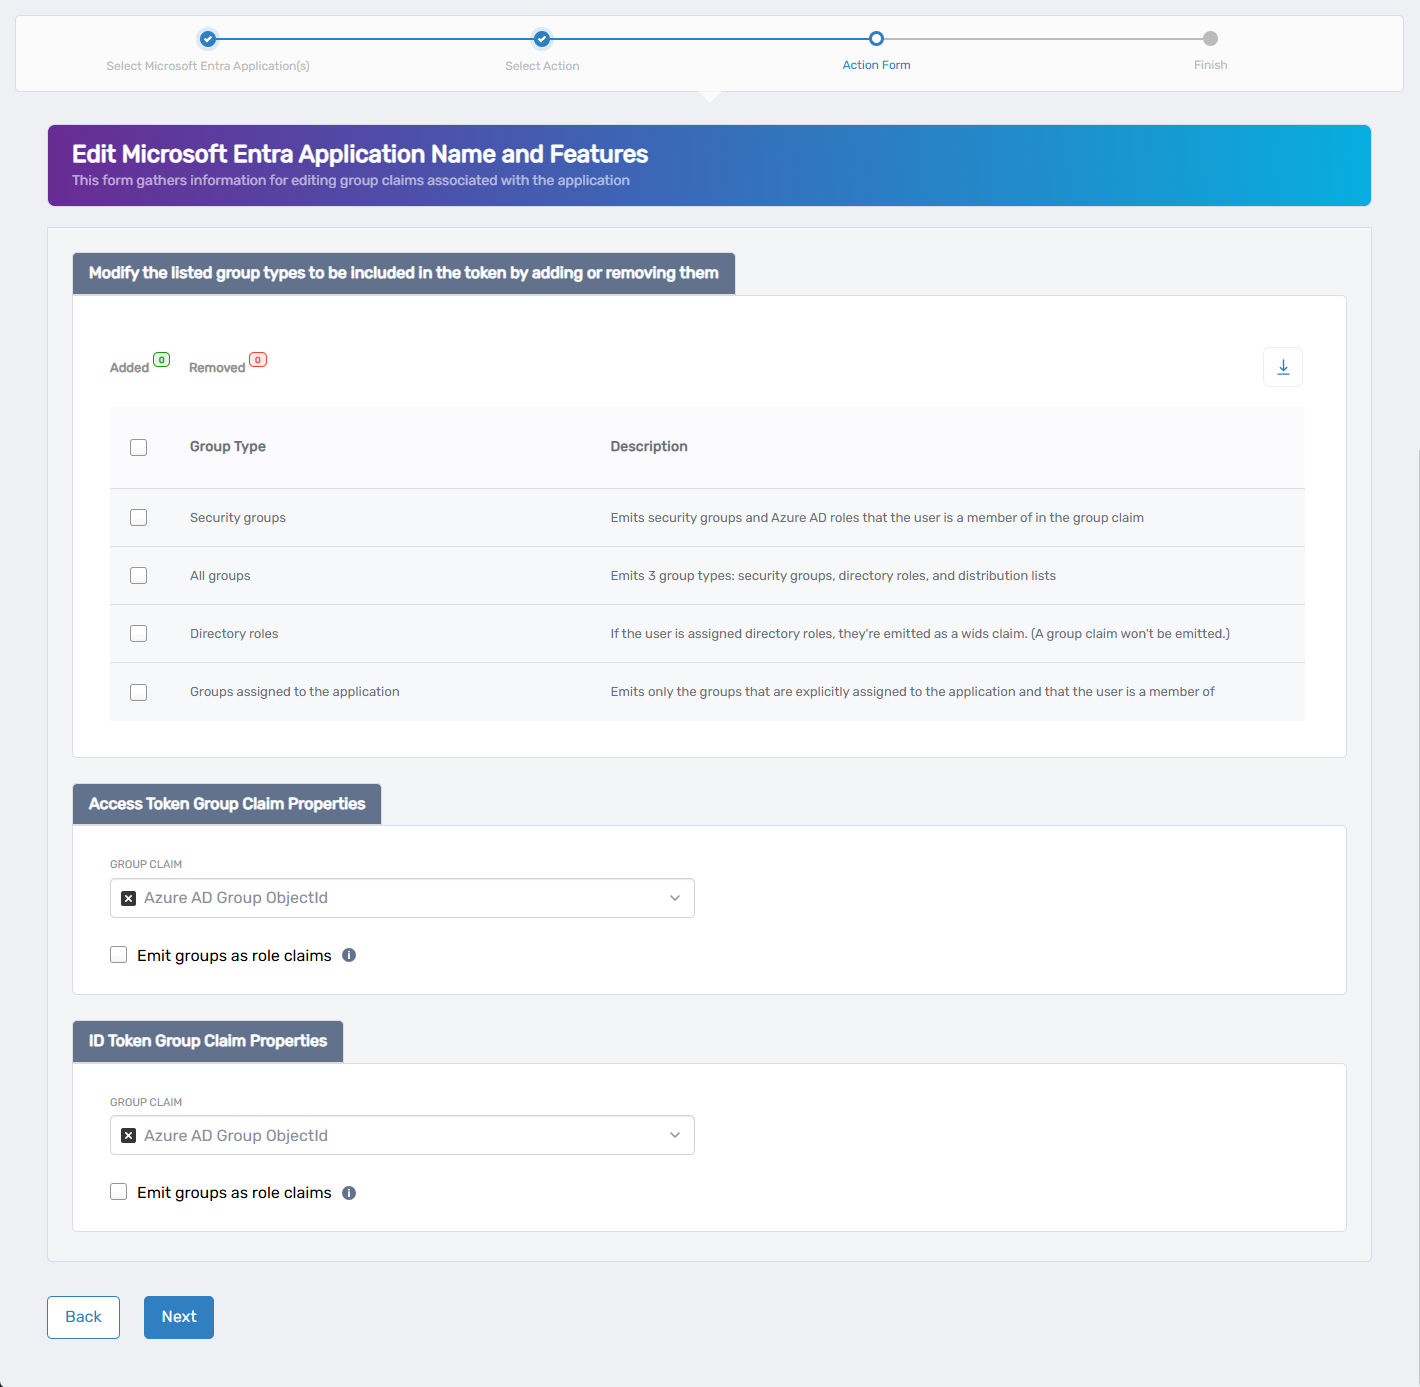
-
Select the desired Group Type:
| Group Type | Description |
|---|---|
| Security groups | Includes security groups and Azure AD roles |
| All groups | Includes security groups, directory roles, and distribution lists |
| Directory roles | Emits roles only if assigned |
| Groups assigned to the app | Emits only groups explicitly assigned to the application |
- Choose the Group Claim Format for each token type (Access and/or ID):
| Group Claim Format | Description |
|---|---|
| Azure AD Group ObjectId | Emits each group as its Azure AD object GUID |
| DNSDomainName\sAMAccountName | Uses the domain's FQDN and the group's SAM account name |
| NetbiosDomain\sAMAccountName | Uses the legacy NetBIOS domain and SAM account name |
| On-Premises Group Security Identifier | Emits the group's SID from on-premises Active Directory |
| sAMAccountName | Emits just the group's SAM account name |
-
(Optional) Enable Emit groups as role claims if your app expects group claims to be interpreted as roles.
-
When finished, click Next to continue, or click Back to return to the previous step.
-
Review the Microsoft Entra Application Operation Execution Summary to confirm each step succeeded.
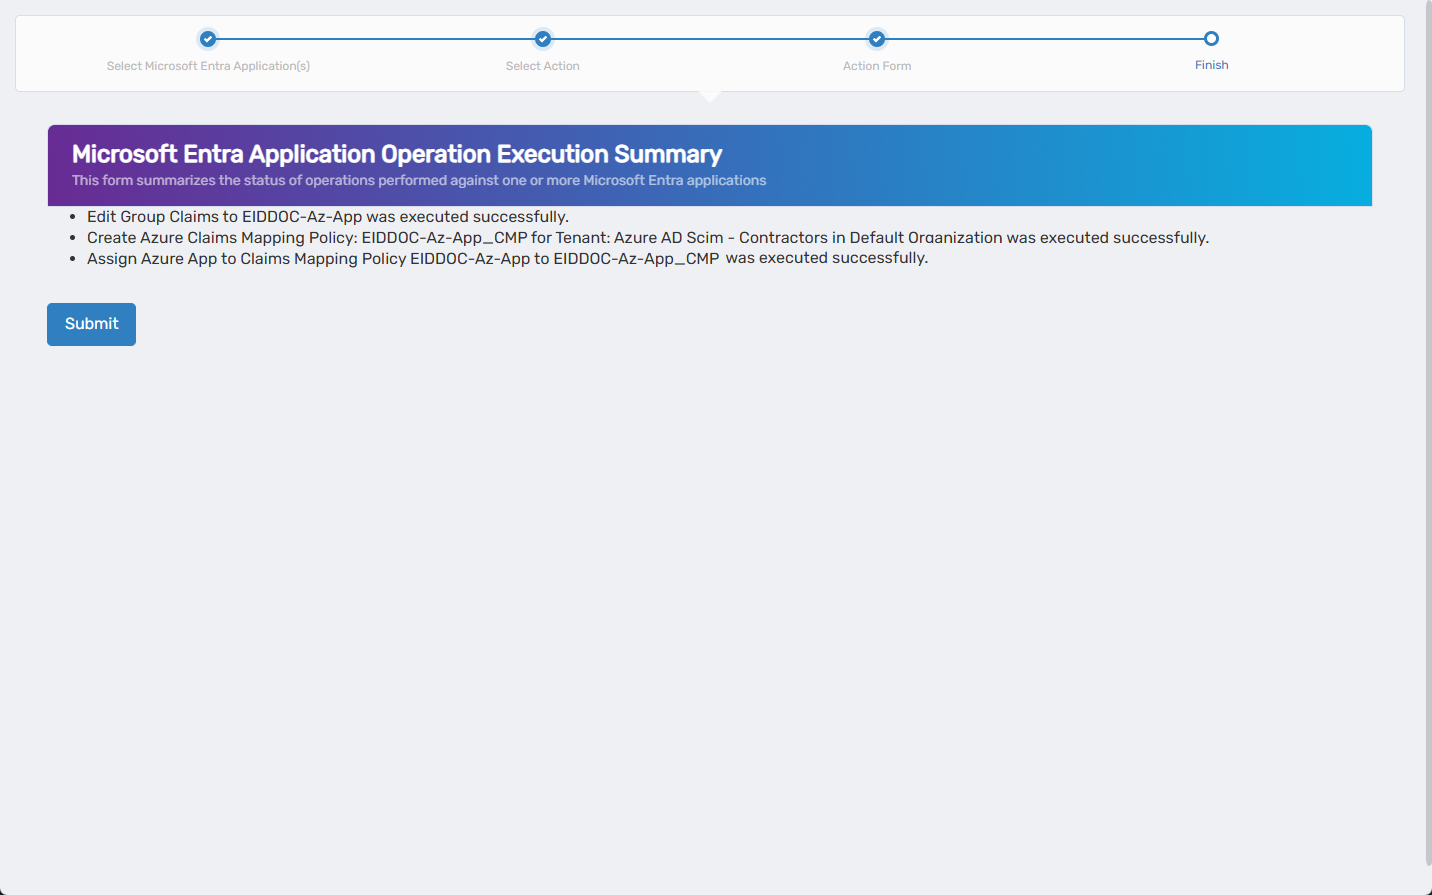
-
Click Submit to continue.
-
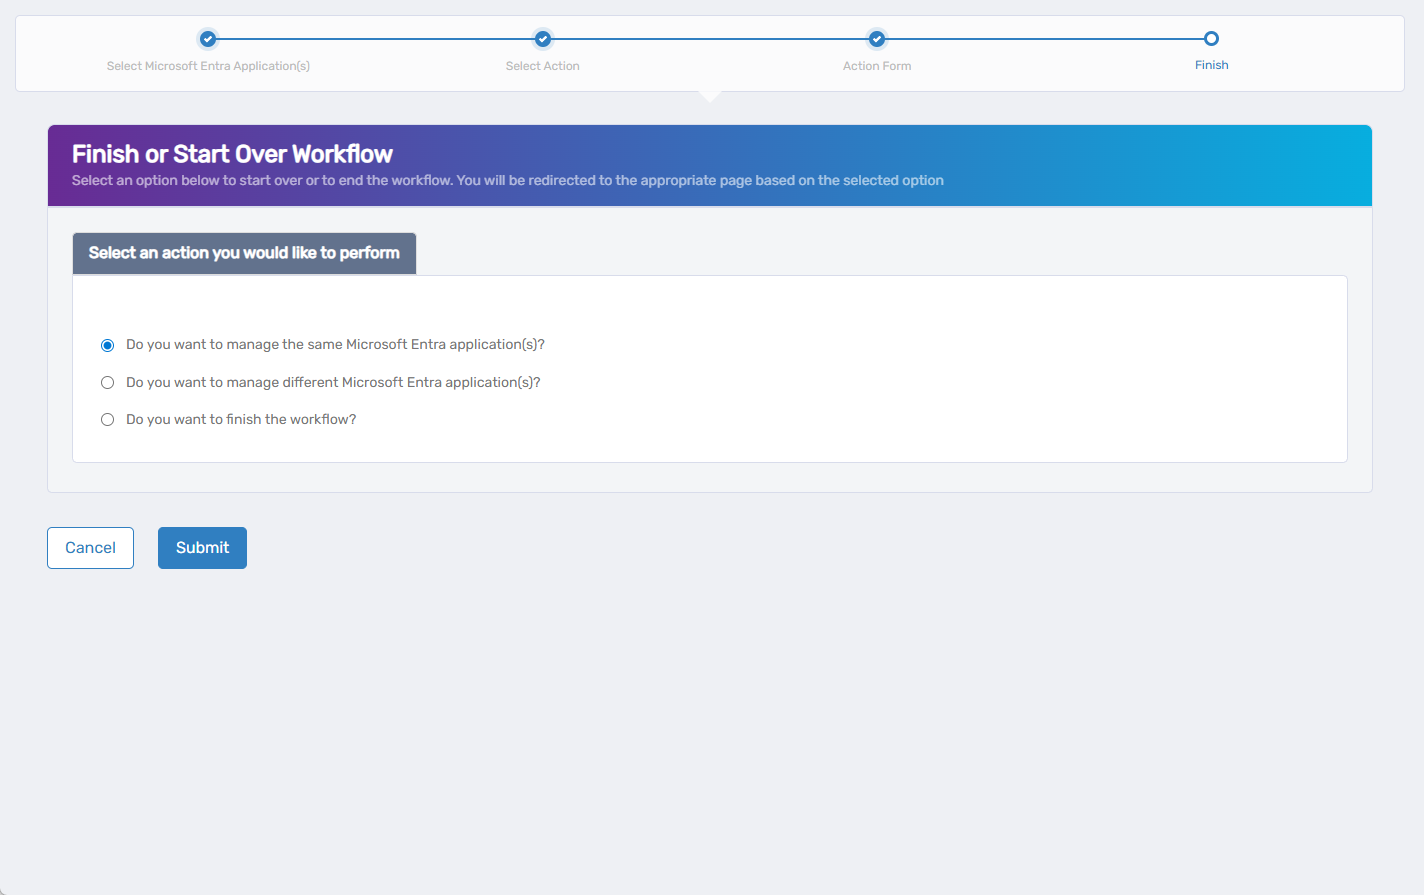
Select what you want to do next:
- Manage the same Microsoft Entra application(s)
- Manage different Microsoft Entra application(s)
- Finish and exit the wizard
- Click Submit.
What Happens Next
After completing the wizard:
- EmpowerID creates or updates the claims mapping policy.
- The policy is assigned to the selected Microsoft Entra application(s).
- Claims are included in issued tokens according to your configuration.
- Changes take effect the next time a token is issued.