Connecting to Google Cloud Platform
This article provides step-by-step instructions for setting up the Google Cloud Platform (GCP) Connector in EmpowerID. It explains key configuration attributes, walks through creating an account store to connect to GCP, and outlines verification steps to establish integration between the platforms.
Understanding Key Configuration
Before creating the account store, familiarize yourself with the key configuration attributes required for connecting to GCP. Ensure you have the necessary configuration values by consulting with the deployment team or EmpowerID to streamline the setup process. For detailed technical deployment information, refer to the Deployment of the GCP Connector Environment documentation.
Required Attributes
| Attribute | Description |
|---|---|
| App Service Base URL | The URL where the microservices for GCP are deployed on the Google Cloud Platform. |
| OAUTH2 Token Target Audience | The Audience parameter for the Google Auth Token in GCP. |
| Certificate Name | The certificate name created or uploaded for the IAP Service Account. |
| Service Account Email | The IAP Service Account used for OAuth2 authentication between EmpowerID and the microservice. |
Step 1: Create a GCP Account Store
To connect Google Cloud Platform with EmpowerID, you need to create an account store. This allows EmpowerID to import and manage user and group information from GCP, synchronizing it with connected back-end directories.
Creating the Account Store
-
Log in to the EmpowerID portal.
-
Navigate to Admin → Applications and Directories and click Account Stores and Systems.
-
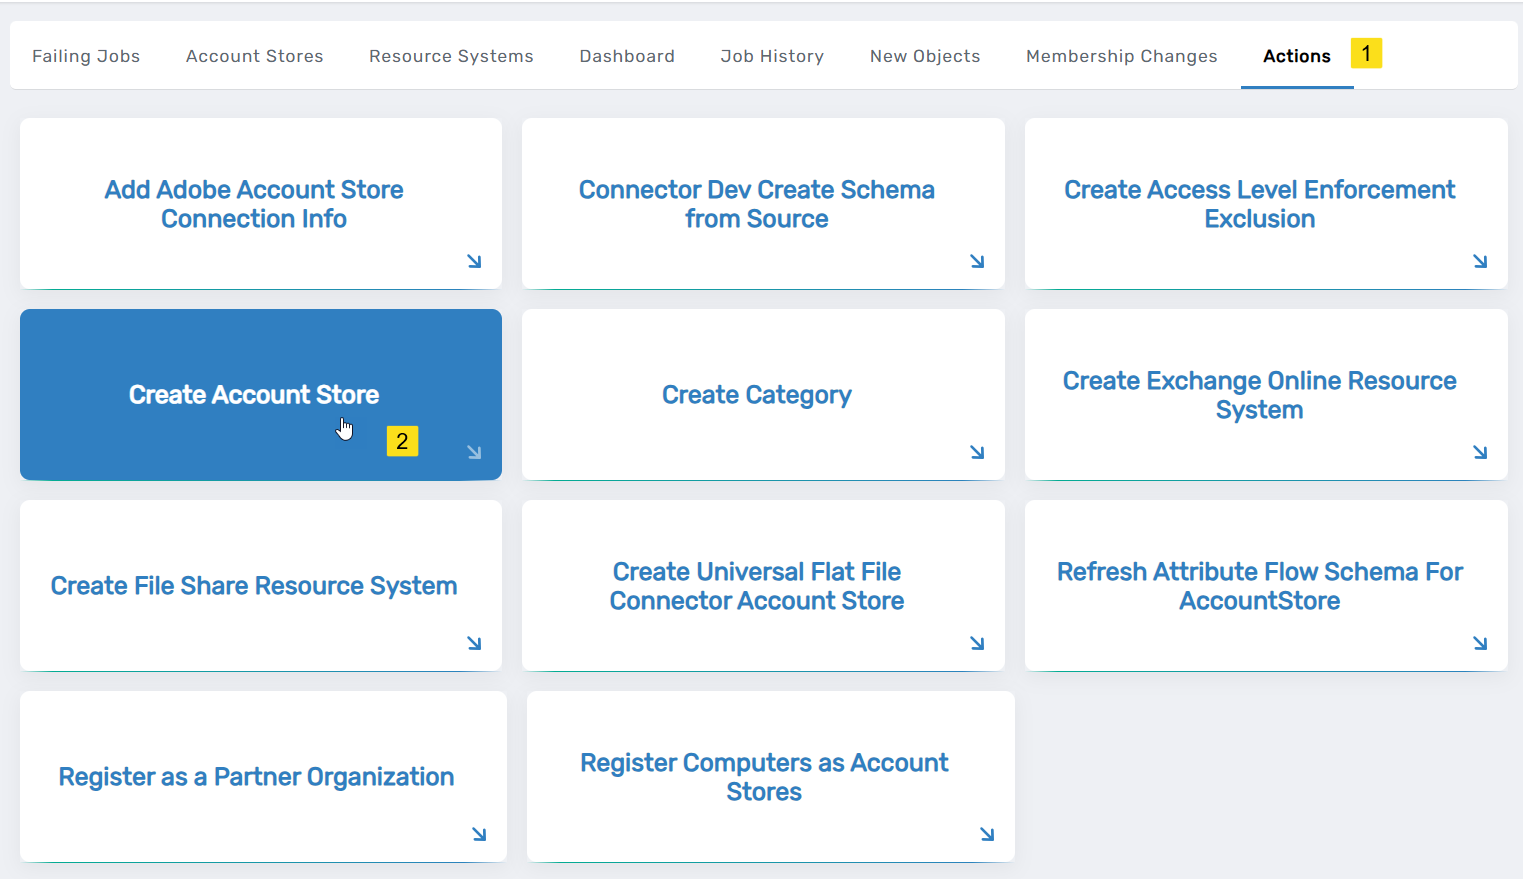
On the Account Stores page, click the Actions tab and then click Create Account Store.
-
Under System Types, search for Google Cloud Platform SCIM, select the corresponding record, and click Submit.
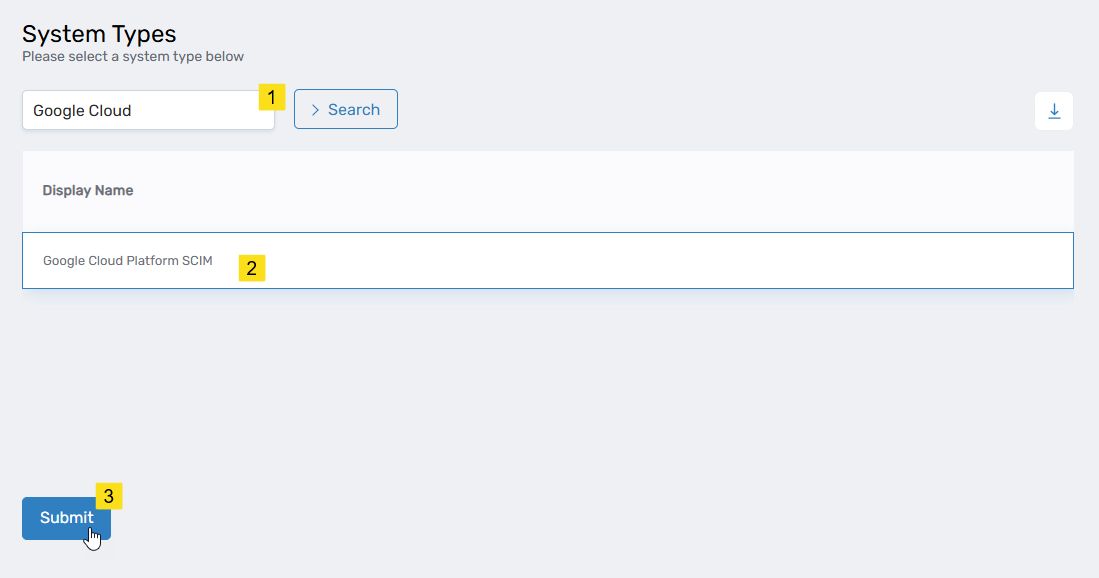
This opens the Google Cloud Platform SCIM form, which is where you enter the information needed to connect EmpowerID.
-
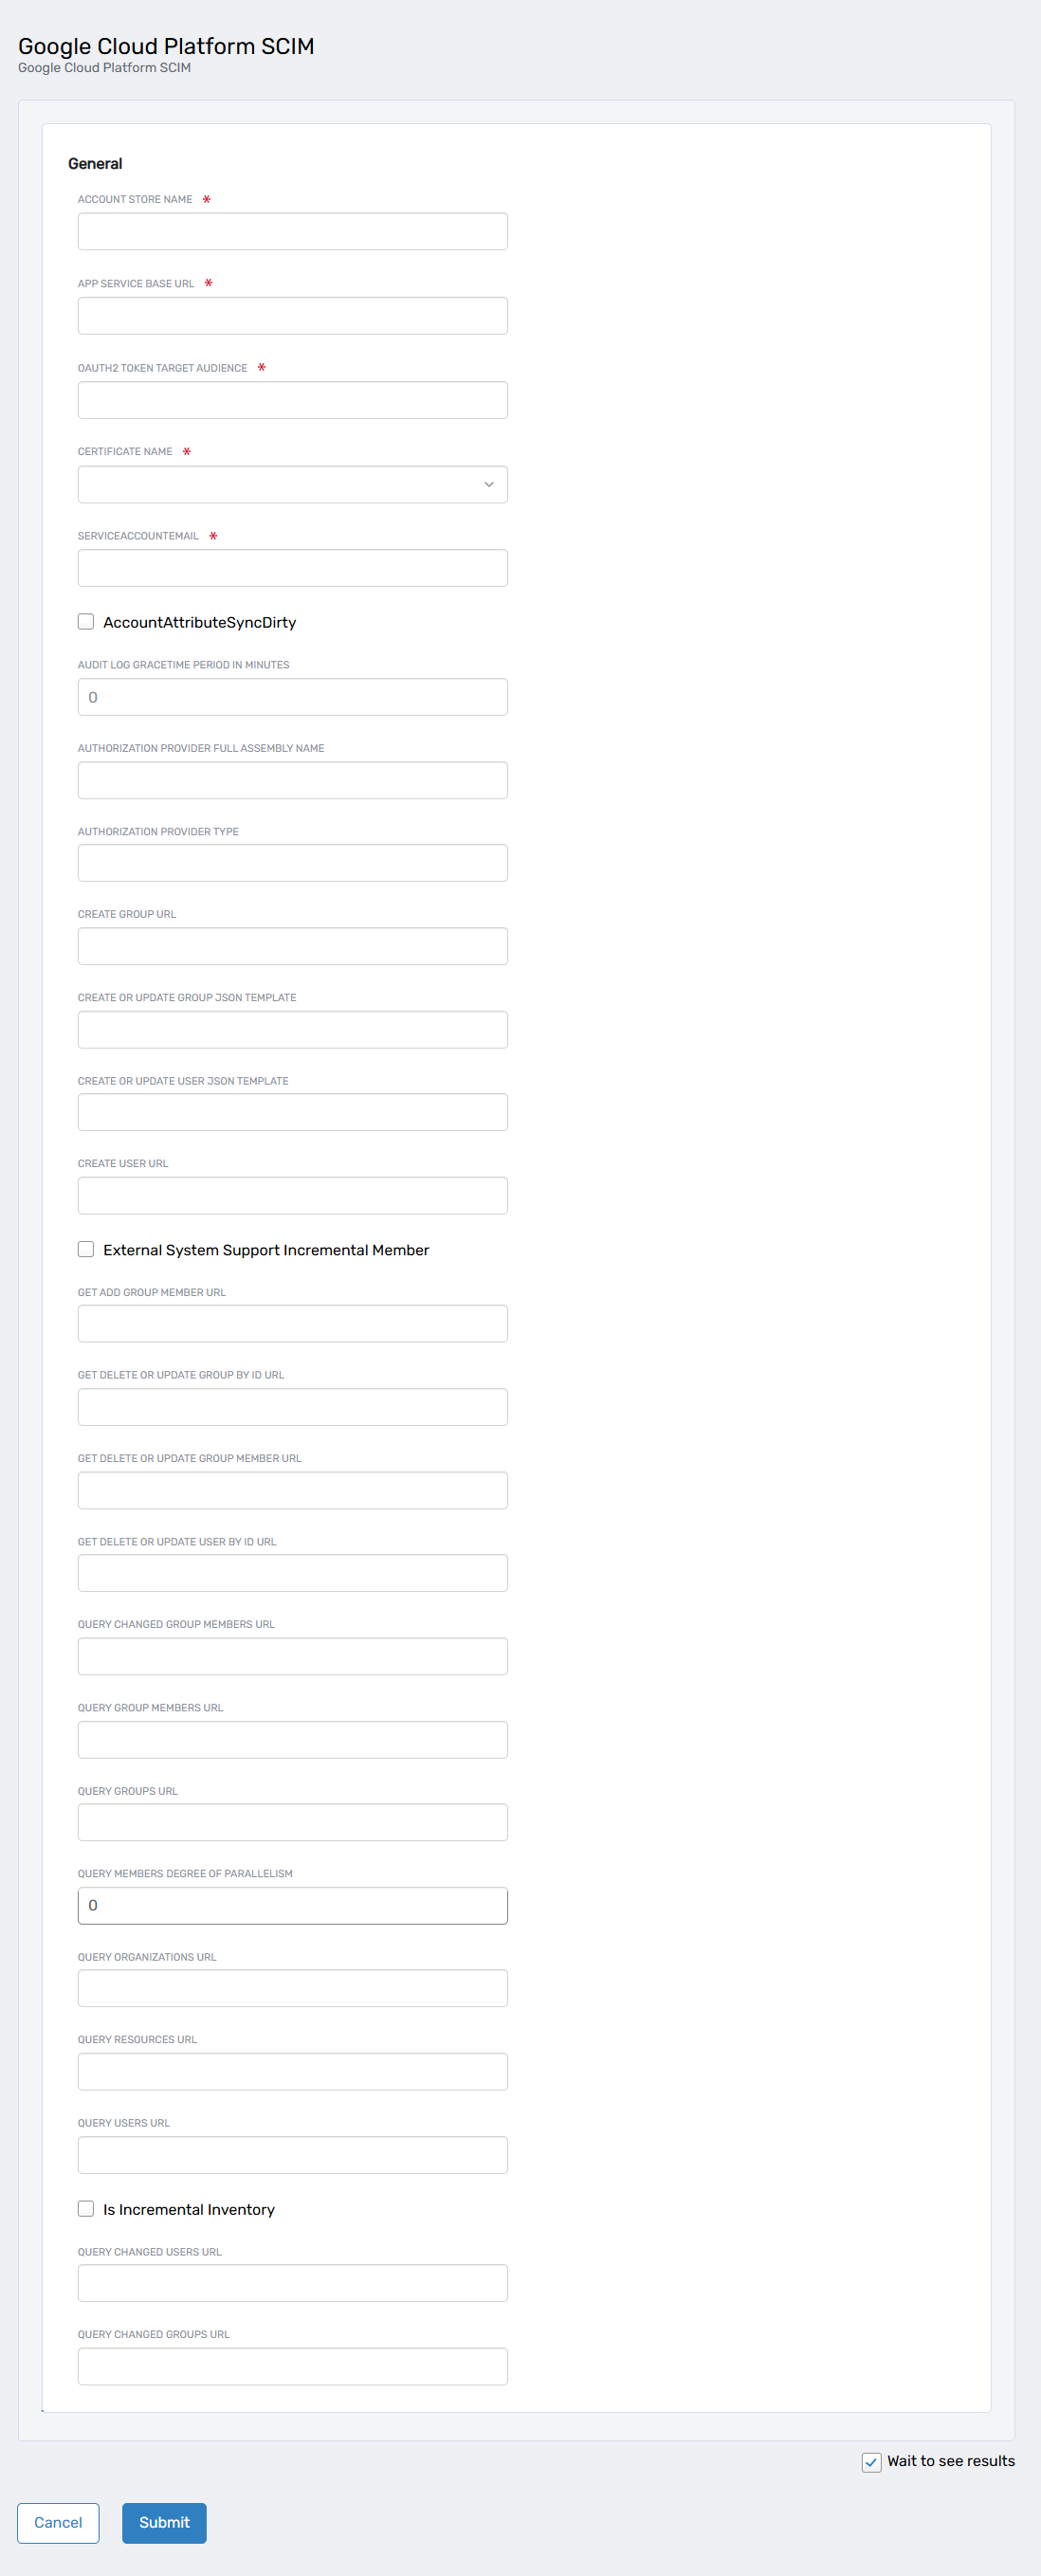
Provide the required information:
- Account Store Name: Enter a unique, descriptive name.
- App Service Base URL: Provide the deployment URL of the GCP microservices (must start with
https://and end with/). - OAUTH2 Token Target Audience: Specify the Audience parameter for the Google Auth Token created in GCP.
- Certificate Name: Select the certificate configured for the IAP Service Account.
- Service Account Email: Enter the IAP Service Account email used for OAuth2 authentication.
-
Click Submit to create the account store.
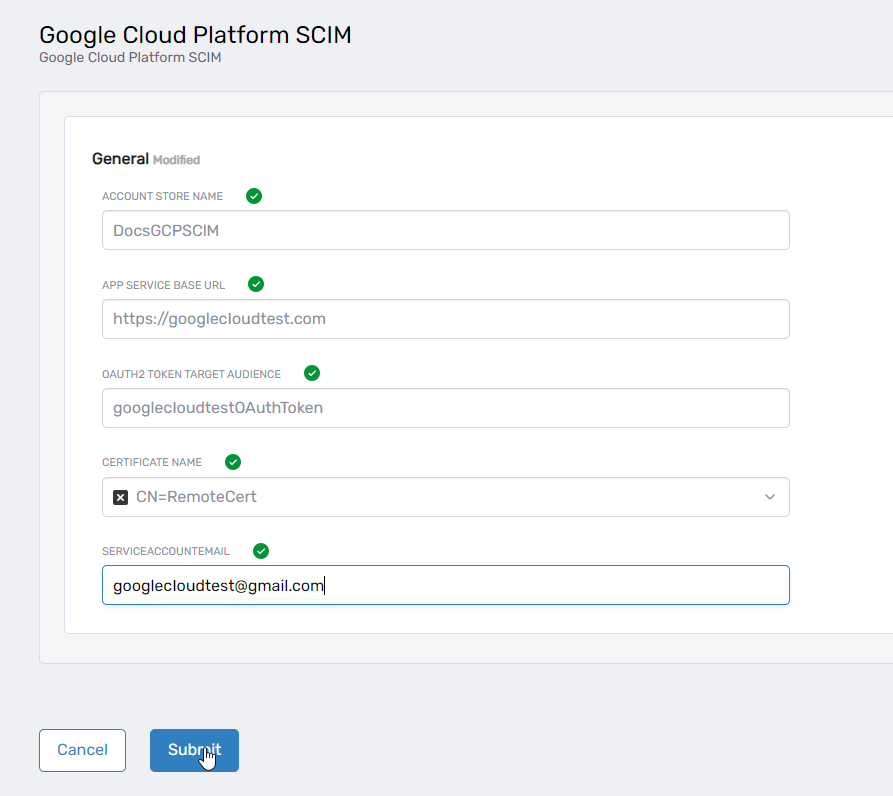
Once completed, your Google Cloud Platform account store is successfully created.
Step 2: Verify Resource System Parameters
After creating the account store, default resource system parameters are configured. Verify these settings to ensure they meet your requirements.
-
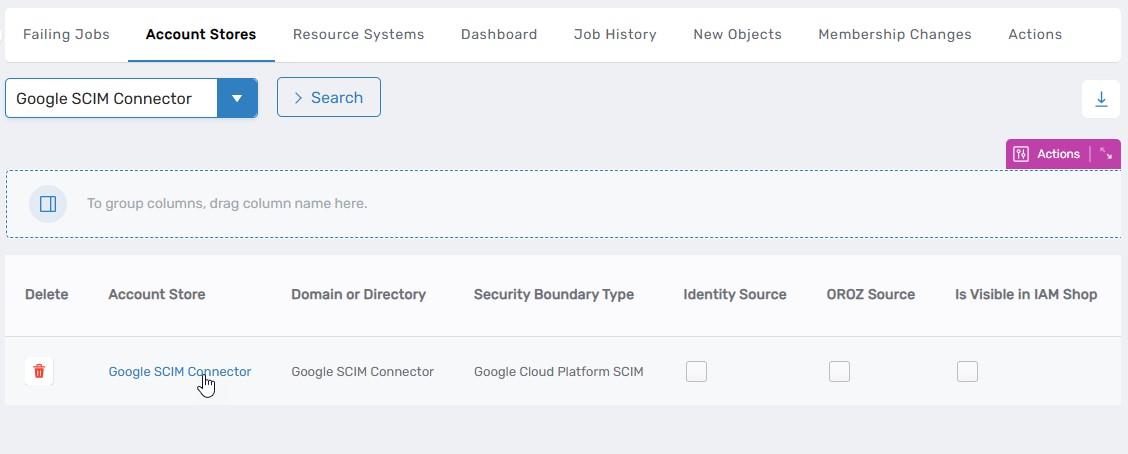
Navigate to Admin → Applications and Directories → Account Stores and Systems.
-
Select the Account Stores tab.
-
Search for the GCP account store and click the Account Store link.
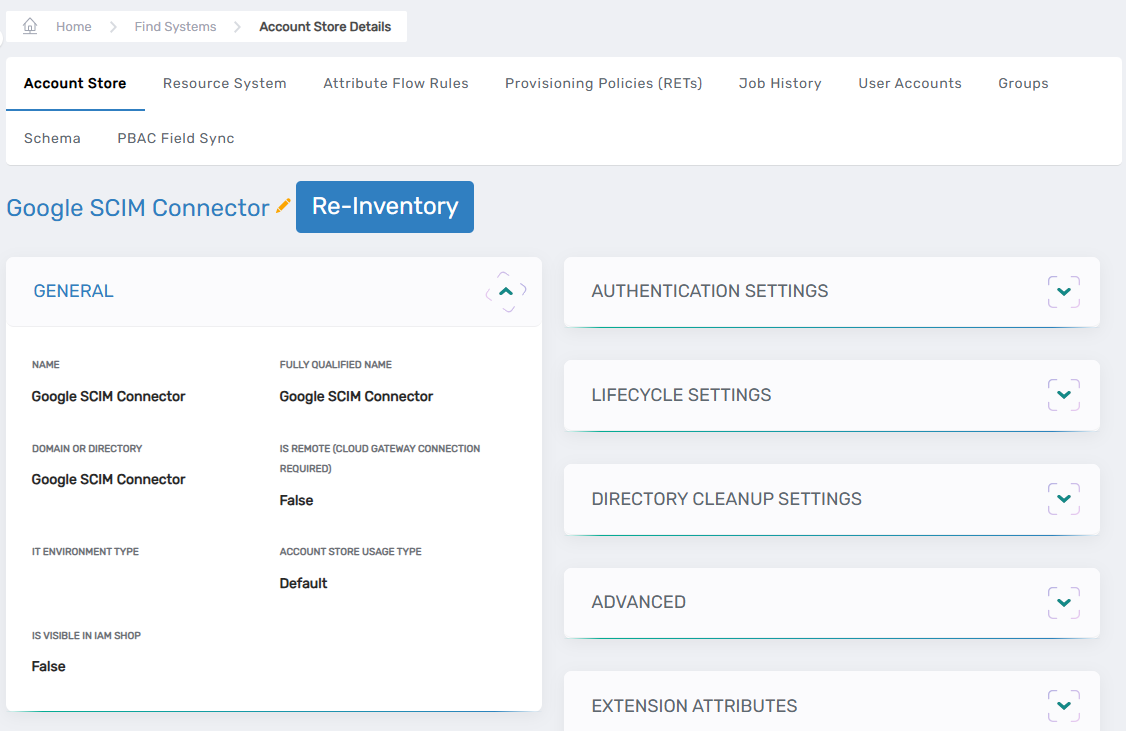
This directs you to the Account Store and Resource System page for the Google SCIM connector.
-
On the Account Store and Resource System page, select the Resource System tab.
-
Expand the Configuration Parameters section.
-
Review the listed parameters and modify them as needed:
- Click the Edit button next to a parameter.
- Enter the new value in the Value field.
- Click Save.
Ensure all required configurations are correctly set before proceeding.
Details
| Attribute Name | Description |
|---|---|
| AccountAttributeSyncDirty | Indicates whether the account attribute synchronization is marked as dirty. The default value is false. |
| AppServiceBaseUrl | The microservices for GCP are deployed on the Google Cloud platform and have a specific URL, which is the app service base URL. The URL starts with the protocol HTTPS and ends with a leading slash (/). |
| AuditLogGraceTimePeriodInMinutes | Time period in minutes for grace period in audit logs. The default value is 120. |
| AuthorizationProviderFullAssemblyName | Full assembly name of the authorization provider. |
| AuthorizationProviderType | Type of the authorization provider used. |
| CreateGroupUrl | URL endpoint to create a group. The default value is /v1/Groups. |
| CreateOrUpdateGroupJsonTemplate | JSON template for creating or updating a group. The default value is {"displayName":null, "description": null, "email": null}. |
| CreateOrUpdateUserJsonTemplate | JSON template for creating or updating a user. |
| CreateUserUrl | URL endpoint to create a user. Default value is /v1/users. |
| ExternalSystemSupportIncrementalMember | Indicates if the external system supports incremental member updates. The default value is false. |
| GetAddGroupMemberUrl | URL endpoint to query group members to add. The default value is /EIDExtension/MemberQuery. |
| GetDeleteorUpdateGroupByIdUrl | URL endpoint to delete or update a group by its ID. The default value is /v1/Groups/{0}. |
| GetDeleteOrUpdateGroupMemberUrl | URL endpoint to delete or update a group member. The default value is /EIDExtension/MemberQuery/{0}/{1}. |
| GetDeleteorUpdateUserByIdUrl | URL endpoint to delete or update a user by its ID. The default value is /v1/Users/{0}. |
| IsIncrementalInventory | Indicates if the inventory is incremental. The default value is true. |
| OAuth2PrivateKey | The certificate's thumbprint created or uploaded for SA2 or the IAP Service Account. |
| OauthTargetAudience | Target audience for OAuth2 authentication. |
| QueryChangedGroupMembersUrl | URL endpoint to query changed group members. The default value is /EIDExtension/ChangedMemberQuery. |
| QueryChangedGroupsUrl | URL endpoint to query changed groups. |
| QueryChangedUsersUrl | URL endpoint to query changed users. |
| QueryGroupMembersUrl | URL endpoint to query group members. |
| QueryGroupsUrl | URL endpoint to query groups. |
| QueryOrganizationsUrl | URL endpoint to query organizations. |
| QueryResourcesUrl | URL endpoint to query resources. |
| QueryUsersUrl | URL endpoint to query users. |
| ServiceAccountEmail | The SA2 Service account, responsible for OAuth2 authentication between EID and the microservice. |
Step 3: Verify the GCP Account Store Integration
To confirm that the GCP Connector is operational, check if users and groups are successfully inventoried into EmpowerID.
- Navigate to Admin → Applications and Directories → Account Stores and Systems.
- Select the Account Stores tab.
- Search for the newly created GCP Account Store and click its name.
- Click on the User Accounts tab.
- Ensure that user accounts have been added. Note that results will only be available after the inventory job has run.
With these steps, you have successfully integrated EmpowerID with Google Cloud Platform. You can now manage user and group information within EmpowerID, leveraging its advanced identity and access management features.