Create a Shared Folder
When you need to provide collaborative file access and storage for teams, projects, or departments, you can create new shared folders in EmpowerID. This establishes centralized storage locations with controlled access for multiple users who need to share and collaborate on files.
Access Requirements: You must have appropriate access to create shared folders.
Use this workflow when setting up collaborative storage for new projects, establishing departmental file sharing, or creating organized storage locations for team collaboration.
Before You Start
Make sure you have:
- Knowledge of the target computer where the shared folder will be created
- Understanding of the folder path and naming requirements
- Decisions about folder sharing and visibility settings
- Information about the folder's intended purpose and description
Get Started
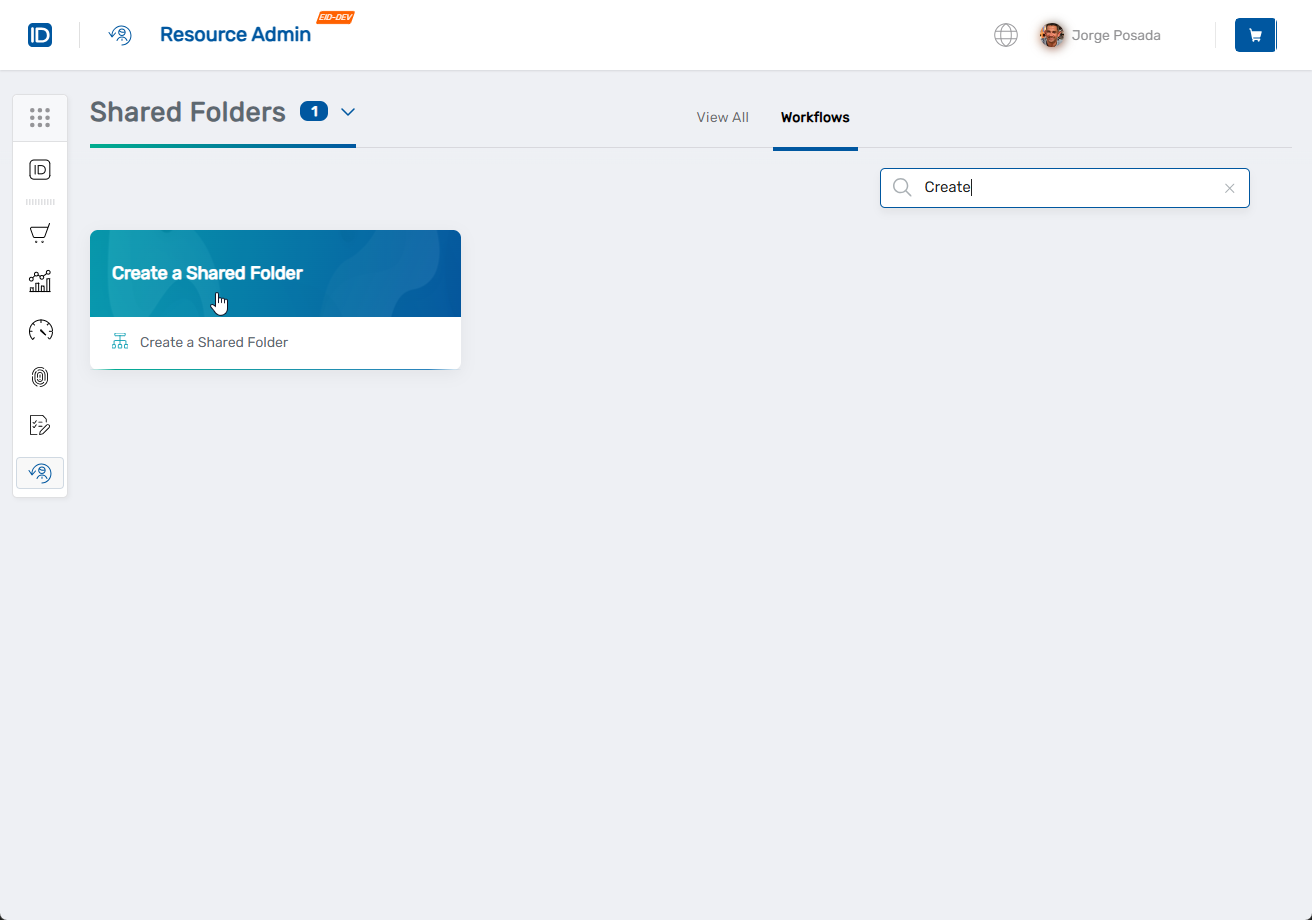
- Navigate to the Resource Admin portal.
- Select Shared Folders from the resource type menu.
- Click the Workflows tab.
- Find and click Create a Shared Folder.
Step 1: Select Computer for Shared Folder
Select the computer where you want to create the shared folder.
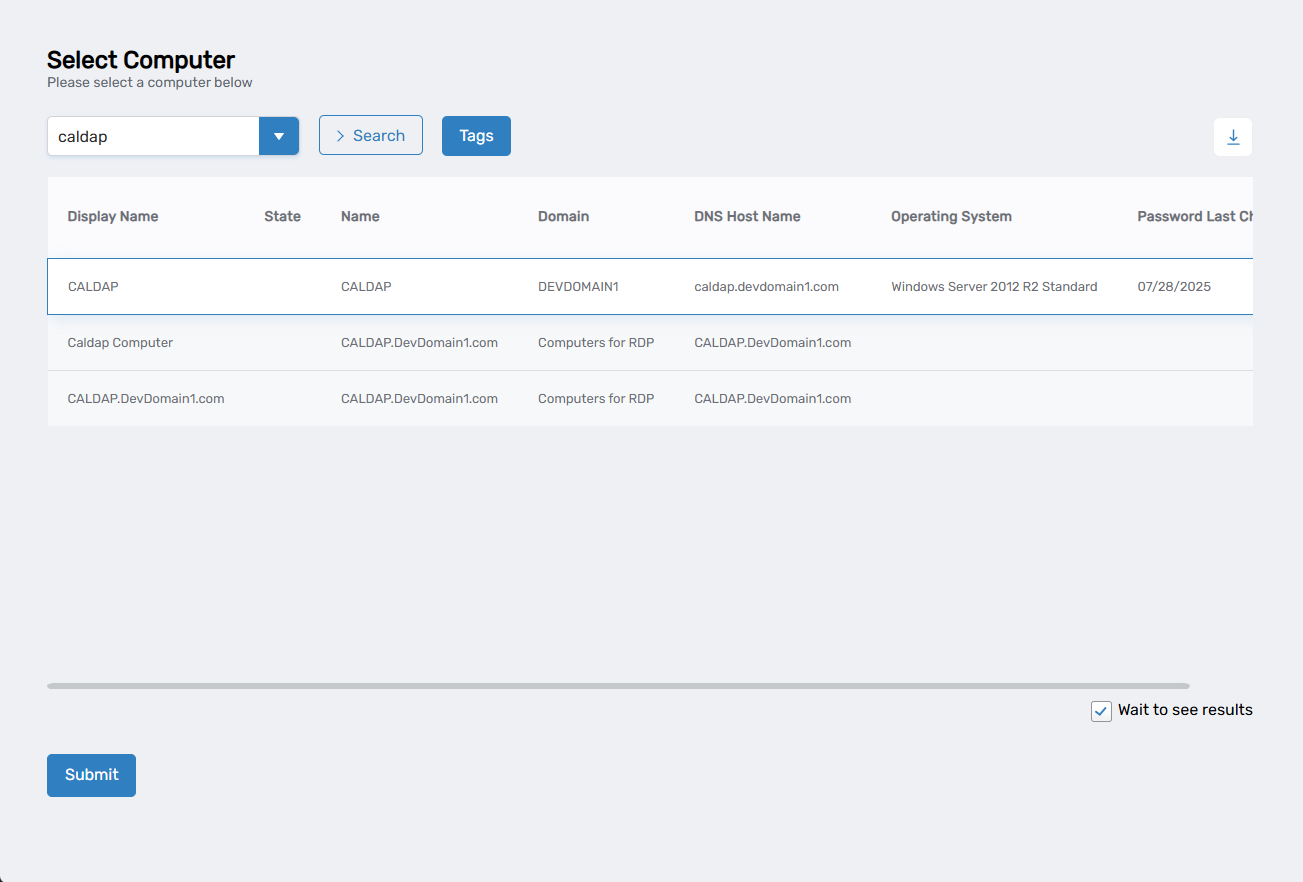
- Search for and select the target computer:
- Enter search criteria in the search field.
- Click Search to load available computers.
- Select the computer where you want to create the shared folder by checking the record for it.
- Uncheck Wait to see results to create a collaboration task in My Tasks that you can complete later. This will end the current workflow session.
- Click Submit to proceed to folder configuration.
Step 2: Create the Shared Folder
- Fill in the file share details.
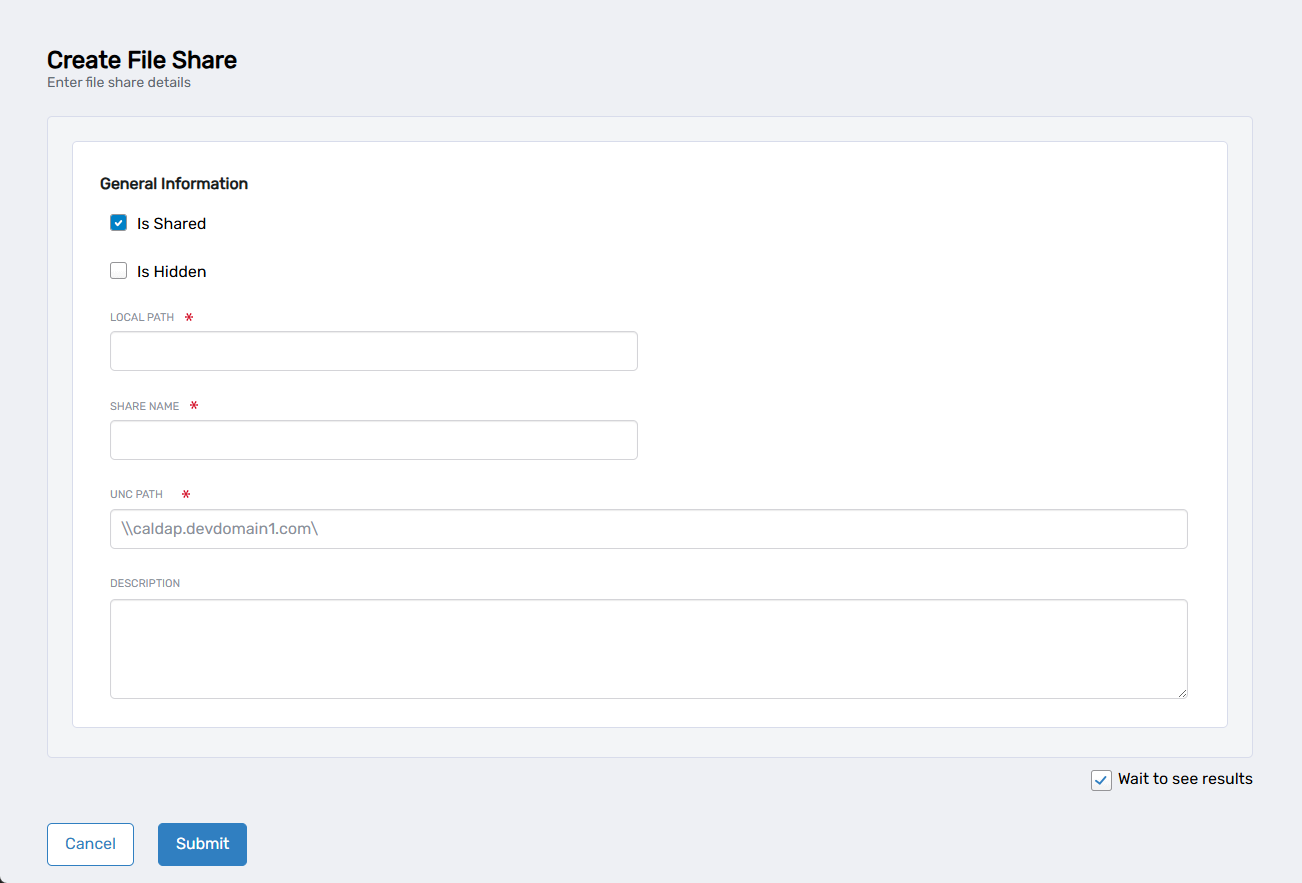
- Is Shared: Check this box to make the folder available as a network share (checked by default).
- Is Hidden: Check this box to hide the share from network browsing.
- Local Path: Enter the complete local path where the shared folder should be created on the selected computer.
- Share Name: Provide the network share name that users will see when accessing the folder.
- UNC Path: The Universal Naming Convention path is automatically generated from the selected computer (shows as \caldap.devdomain1.com\ in the example).
- Description: Add details about the folder's intended use, contents, or purpose.
- Uncheck Wait to see results to create a collaboration task in My Tasks that you can complete later. This will end the current workflow session.
- Click Submit to finish the folder creation process.
What Happens Next
- The shared folder is created at the specified local path on the target computer.
- The folder becomes available as a network share using the configured share name.
- Users can access the folder through the UNC path or by browsing network shares.
- The folder appears in Resource Admin for ongoing management and access control configuration.
- Additional access controls can be configured through related workflows.
If You Run Into Problems
Local path already exists: Choose a different path or folder name. Folder paths must be unique on the target computer.
Can't access the target computer: Verify the computer is online and accessible. Check that you have administrative permissions on the target system.
Share name conflicts: Choose a different share name. Share names must be unique on the target computer.
Related Actions
- To bring existing shared folders under EmpowerID management, see Register Shared Folder.
- To remove shared folders that are no longer needed, see Delete Shared Folders.