Provide Login Assistance
When someone calls saying they can't log in to EmpowerID or Microsoft Entra ID, you can use this workflow to diagnose their login issues and guide them through solutions. The wizard walks through common problems and provides step-by-step assistance for resolving access issues.
Access Requirements: The Login Assistance Wizard workflow tile appears only if you have the appropriate access to assist with login issues.
Use this workflow when users report login failures, password issues, account lockouts, or other authentication problems with EmpowerID or Microsoft Entra ID systems.
Before You Start
You need access to the Resource Admin portal to provide login assistance.
Make sure you have the name or username of the person who needs help logging in.
Get Started
- Navigate to the Resource Admin portal
- Select People from the resource type menu
- Click the Workflows tab
- Find and click Login Assistance Wizard
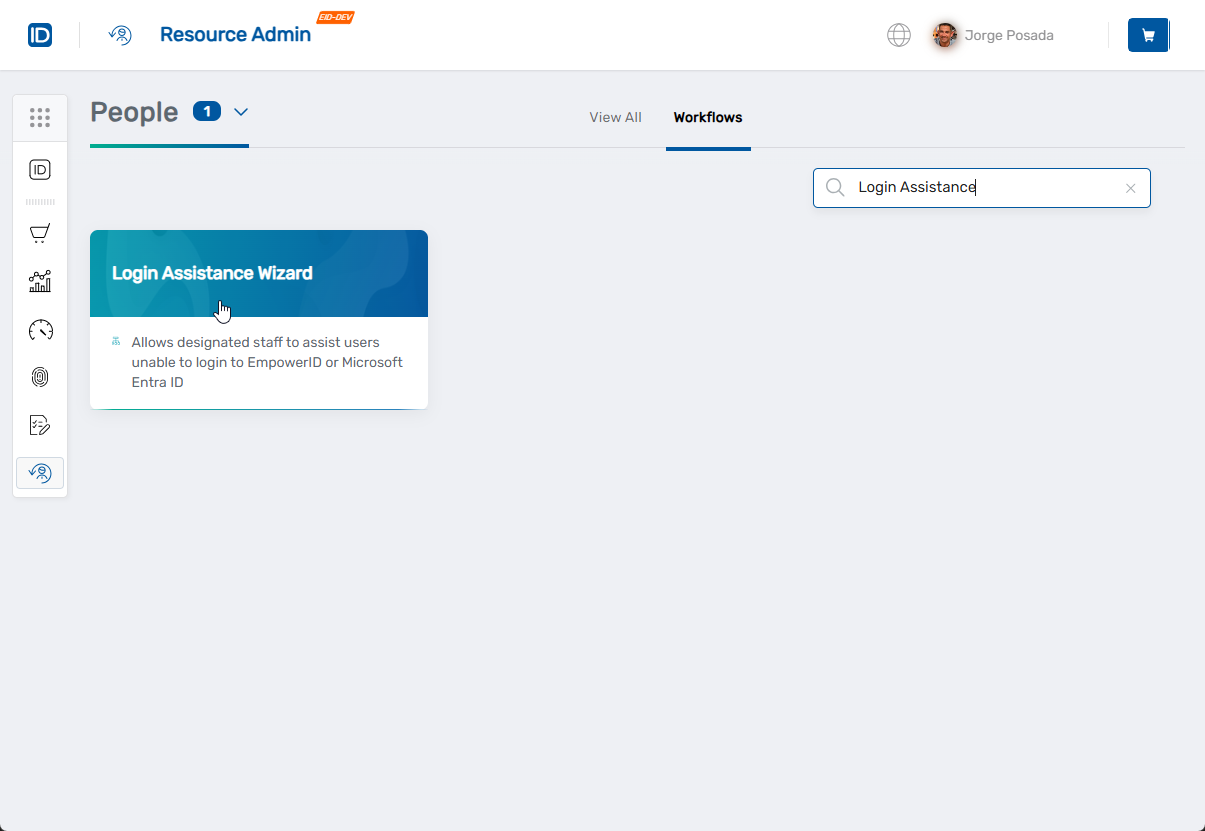
The workflow will open showing the Login Assistance options screen where you can choose the type of help needed.
Provide Login Assistance
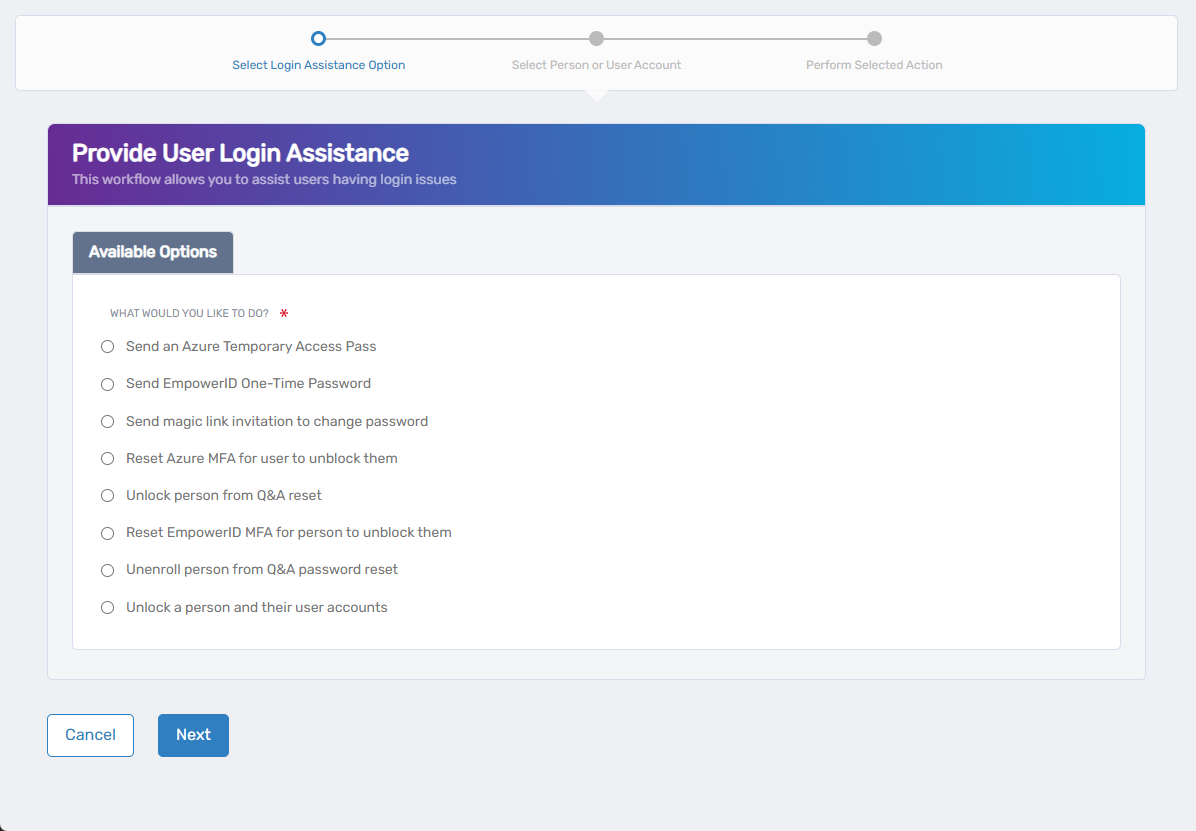
Step 1: Select Assistance Option
- Choose the appropriate assistance option based on the user's issue:
- Send an Azure Temporary Access Pass - For Azure AD login issues requiring temporary access
- Send EmpowerID One-Time Password - For EmpowerID login when password is forgotten
- Send magic link invitation to change password - For secure password reset via email
- Reset Azure MFA for user to unblock them - When Azure multi-factor authentication is blocking access
- Unlock person from Q&A reset - When locked out from security question attempts
- Reset EmpowerID MFA for person to unblock them - When EmpowerID MFA is causing issues
- Unenroll person from Q&A password reset - To remove security question enrollment
- Unlock a person and their user accounts - For general account lockout issues
- Click Next to proceed
Step 2: Select Person or User Account
- The system will display the appropriate lookup interface based on your assistance option selection
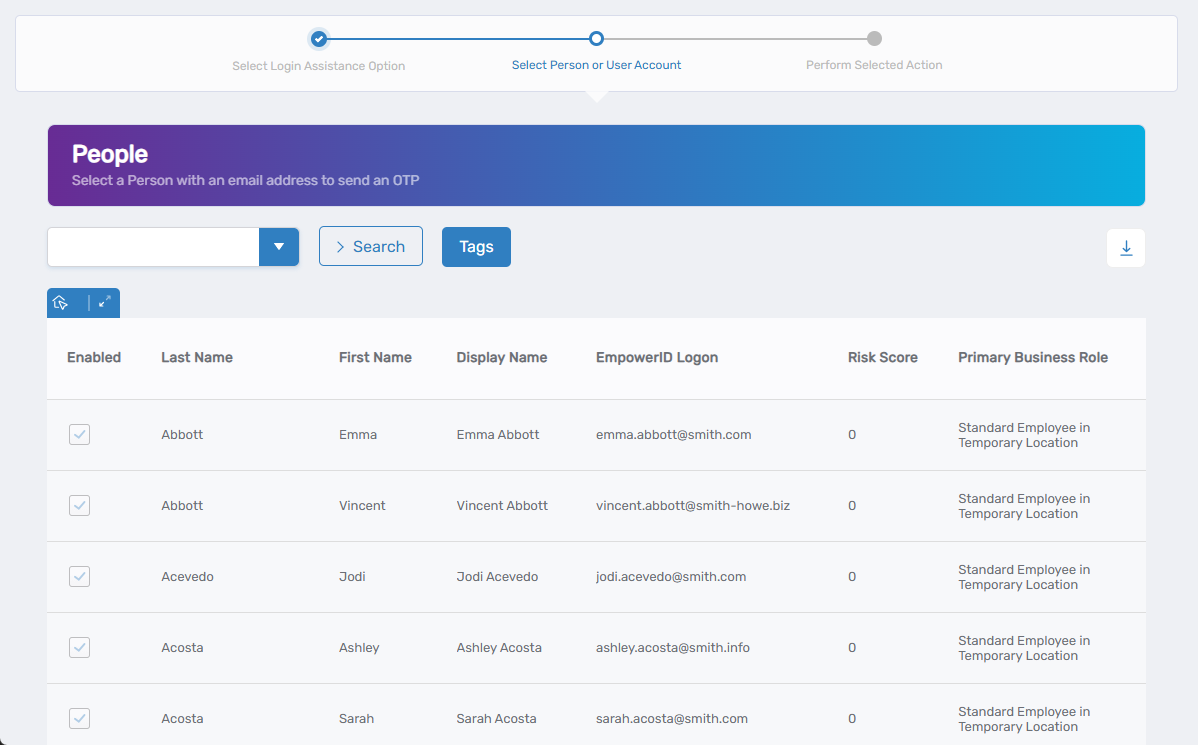
- Search for the person who needs assistance
- Click on the person's record to select them
- Click Next to proceed
Step 3: Perform Selected Action
- The system will execute the chosen assistance option
- Follow any additional prompts or confirmations
- The system will process the request and provide results
What Happens Next
- The user can attempt to log in again using the provided guidance
- Any account-level issues that can be resolved automatically will be processed
Related Actions
For password-specific issues, see Reset Password.
To enable disabled accounts, see Enable People.