Create Custom Adaptive Authentication Rules
EmpowerID adaptive authentication allows organizations to execute rules during initial login or single sign-on into a service provider to determine if additional steps must be taken before users can login. Examples include rules to check whether specific attributes are missing or whether users need to go through a workflow process to gain additional level of assurance points before gaining access. While EmpowerID provides several of these out of the box, you can develop your own custom rules and workflows in Workflow Studio.
What You'll Learn
In this tutorial, you'll create a custom adaptive authentication system by:
- Creating an Adaptive Authentication rule in Workflow Studio
- Implementing custom rule logic to evaluate user attributes
- Building and publishing the rule to EmpowerID
- Creating a workflow that executes when the rule is triggered
- Deploying both components to the EmpowerID Web application
- Configuring the rule in the administrative interface
Create Adaptive Authentication Rules
Step 1: Create the Rule Project
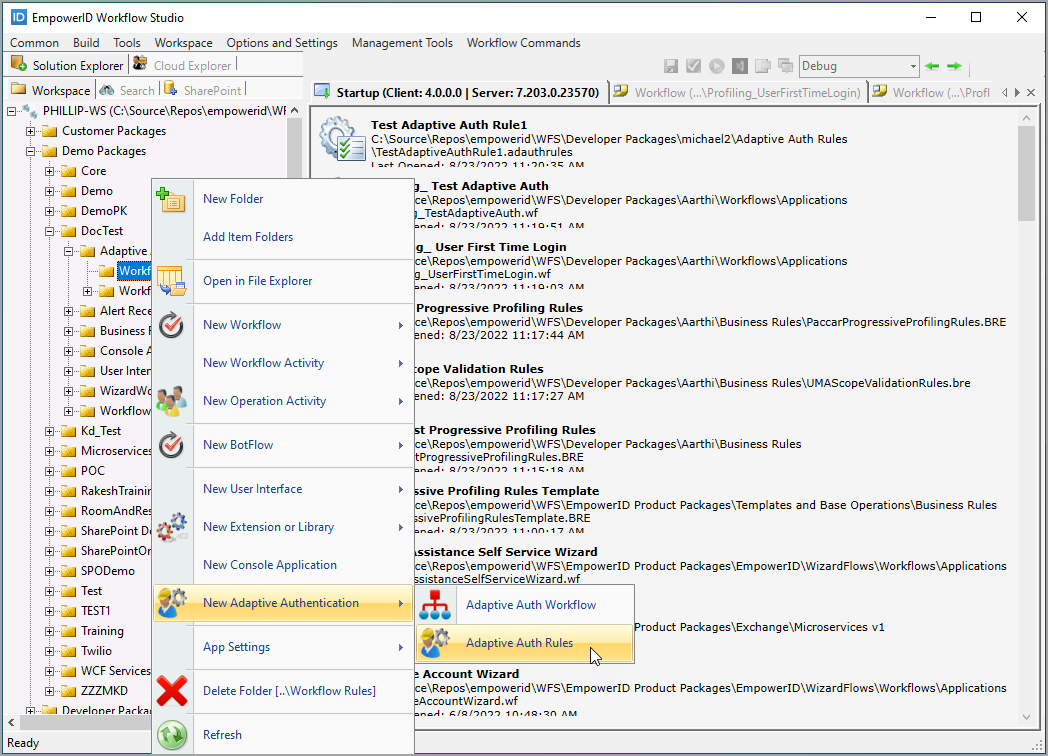
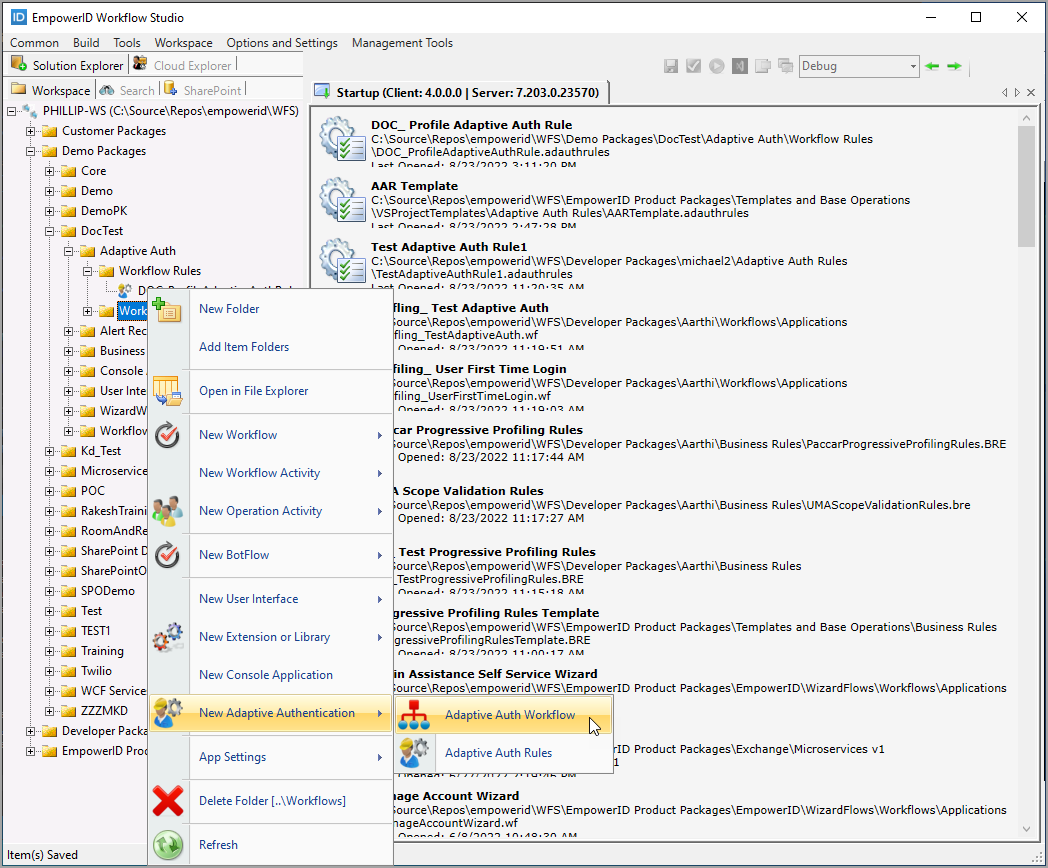
- In Workflow Studio, right-click on the desired folder for the rule and select New Adaptive Authentication > Adaptive Auth Rules from the context menu.
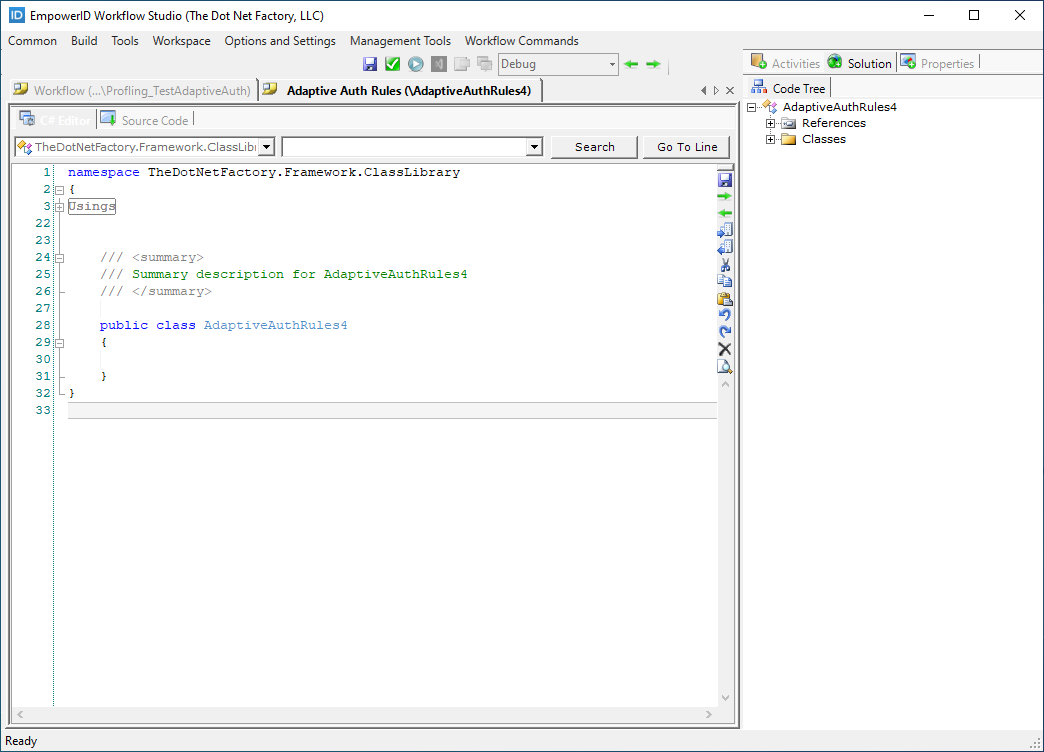
 Workflow Studio creates the rule and opens the stub in the C# Editor.
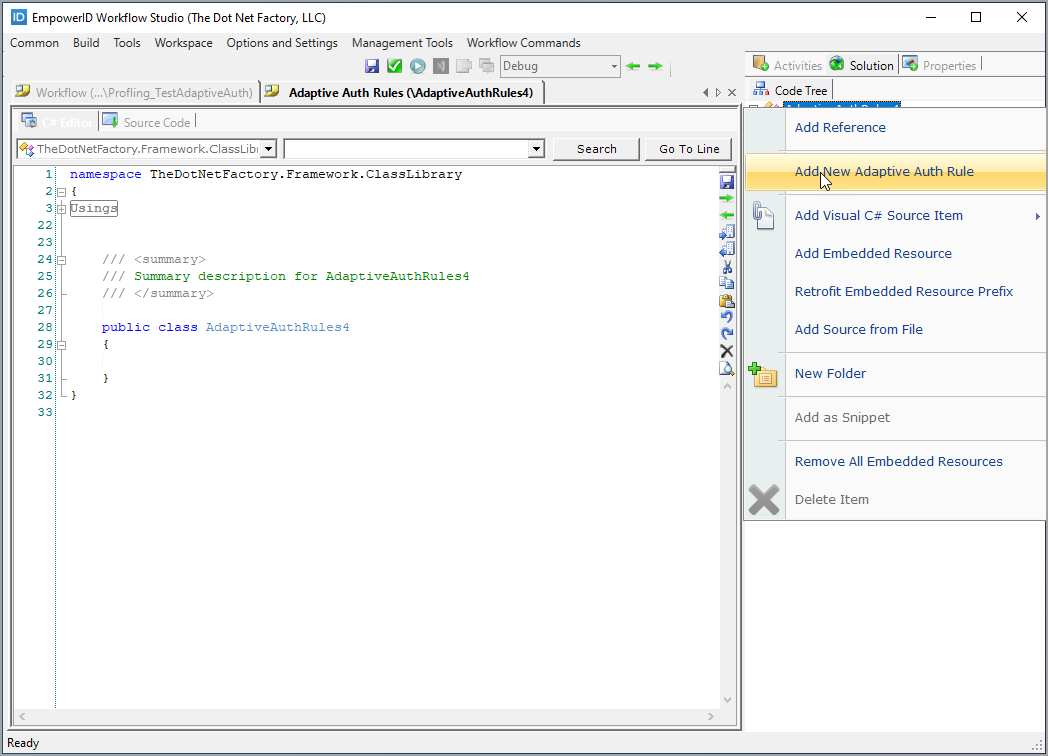
- In the Code Tree to the right of the C# Editor, right-click on the main node and select Add New Adaptive Auth Rule.
- Enter an appropriate name for the rule and click OK.
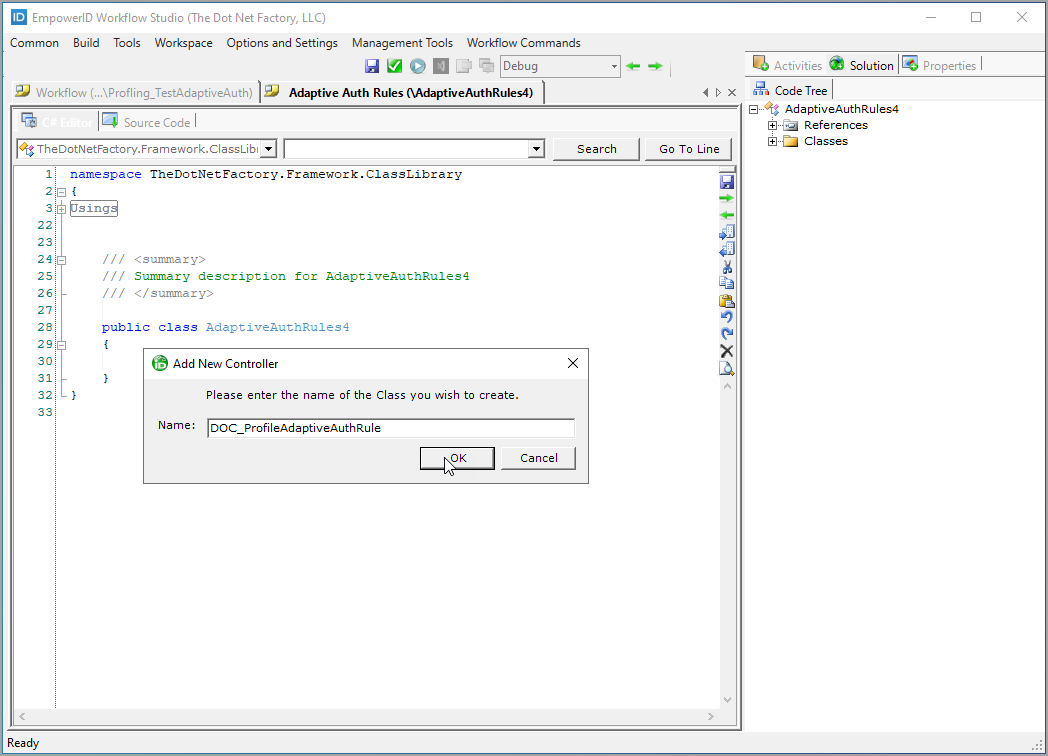 Workflow Studio stubs out the Adaptive Auth Rule with the prerequisite namespaces, attribute decorations and classes and opens it in the C# Editor.
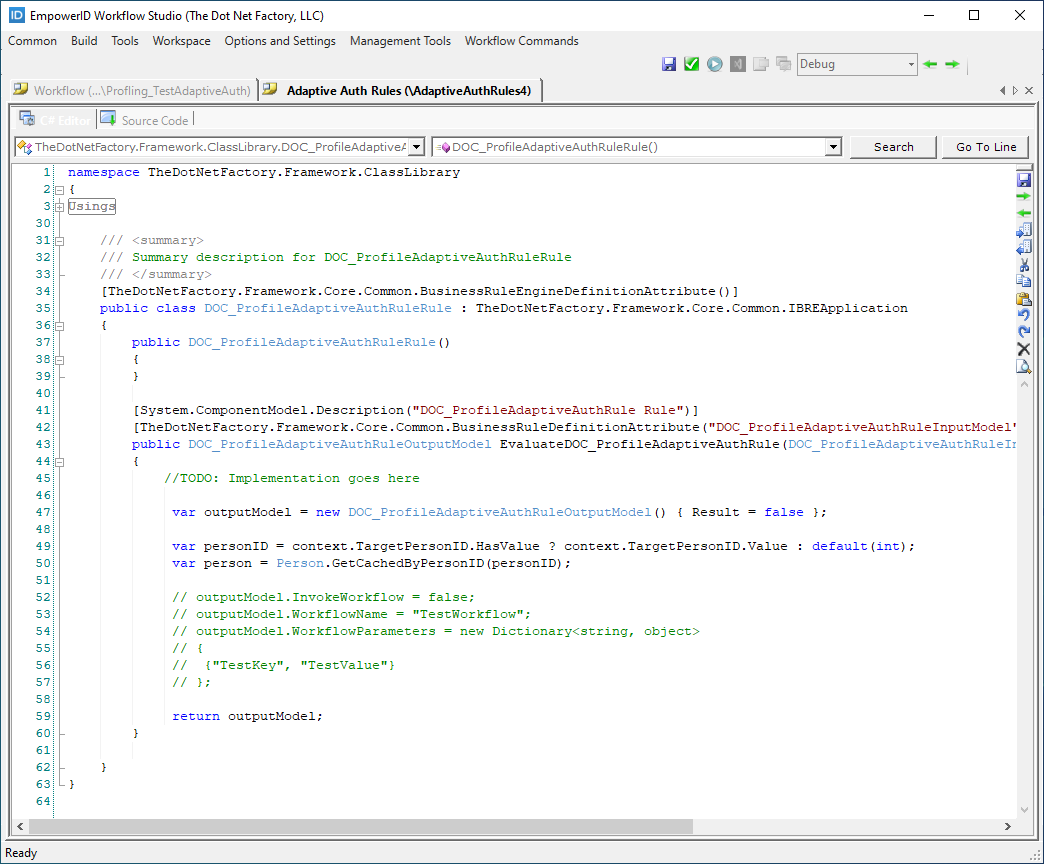
Step 2: Implement Rule Logic
- Locate the
//TODOline of code in the Editor and write the logic for the rule there. You can uncomment the code underneathTODOand replace the values for the output parameters with the appropriate values. Parameters include the following:
| Parameter | Description | Type |
|---|---|---|
InvokeWorkflow | Boolean that specifies whether to run the Adaptive Authentication workflow | Boolean |
WorkflowName | String that specifies the name of the Adaptive Authentication workflow to run | String |
WorkflowParameters | Provides additional context information that can be passed to the workflow as parameters | Dictionary<string, object> |
- The below code fragment provides an example of an Adaptive Authentication Rule that could be used to run a specific workflow when a person missing the specified attribute information logs in or attempts to access a protected application.
//TODO: Implementation goes here
var outputModel = new DOC_ProfileAdaptiveAuthRuleOutputModel() { Result = false };
var personID = context.TargetPersonID.HasValue ? context.TargetPersonID.Value : default(int);
var person = Person.GetCachedByPersonID(personID);
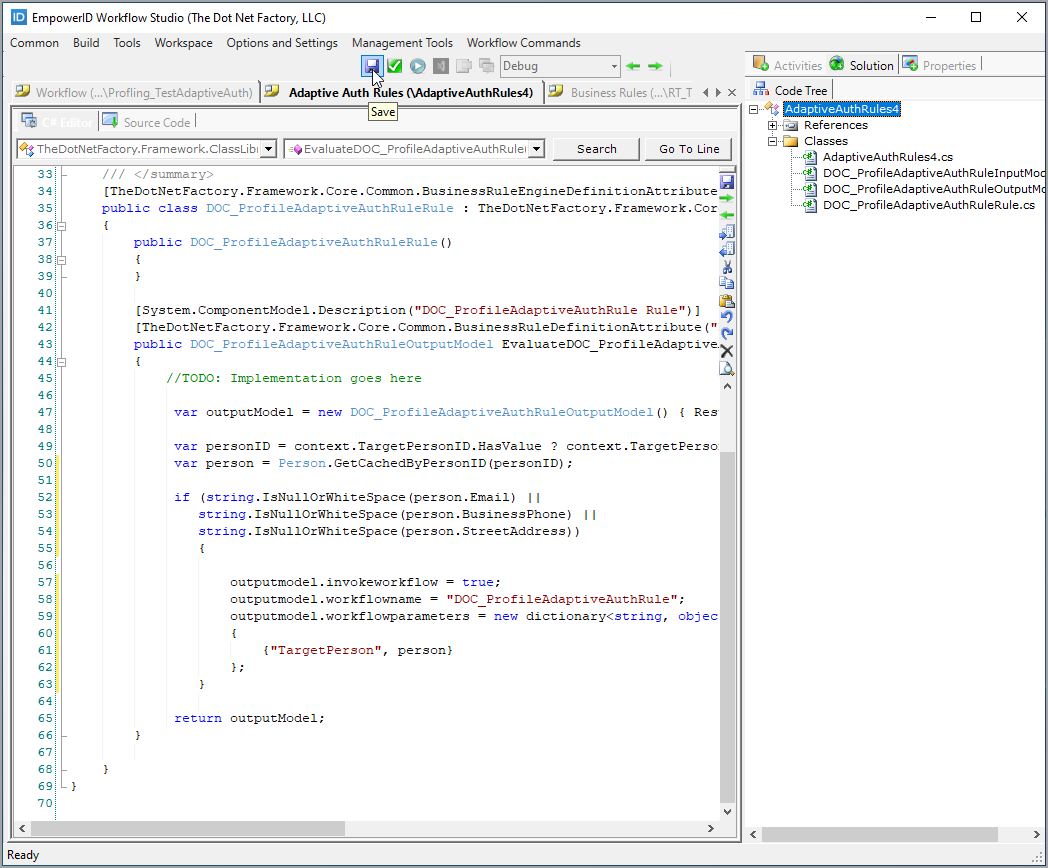
if (string.IsNullOrWhiteSpace(person.Email) ||
string.IsNullOrWhiteSpace(person.BusinessPhone) ||
string.IsNullOrWhiteSpace(person.StreetAddress))
{
outputModel.InvokeWorkflow = true;
outputModel.workflowname = "DOC_ProfileAdaptiveAuthRuleWF";
outputModel.workflowparameters = new Dictionary<string, object>
{
{"TargetPerson", person}
};
}
return outputModel;
This example checks if a person is missing email, phone, or address information. If any of these attributes are missing, the rule triggers the specified workflow.
- After adding your code, click the Save button above the C# Editor and save the Adaptive Auth Rule in your working directory.
Step 3: Build and Publish the Rule
- Close the Adaptive Auth Rule and then locate it in your Workspace tree.
- Double-click the rule to open it in Visual Studio.
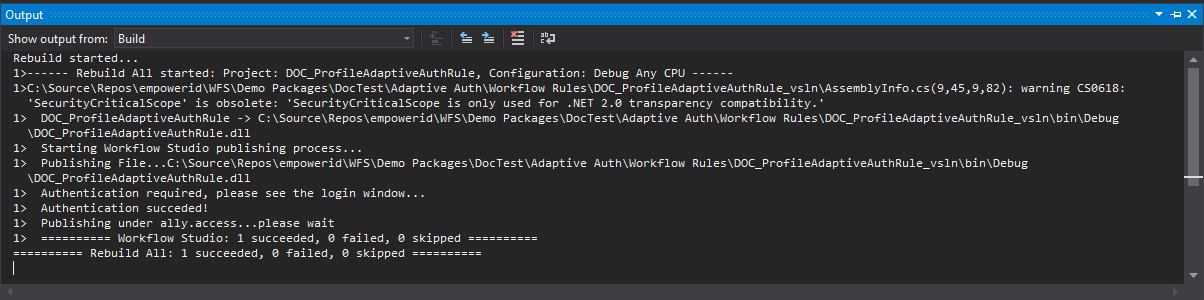
- Review the rule and when ready build the solution.
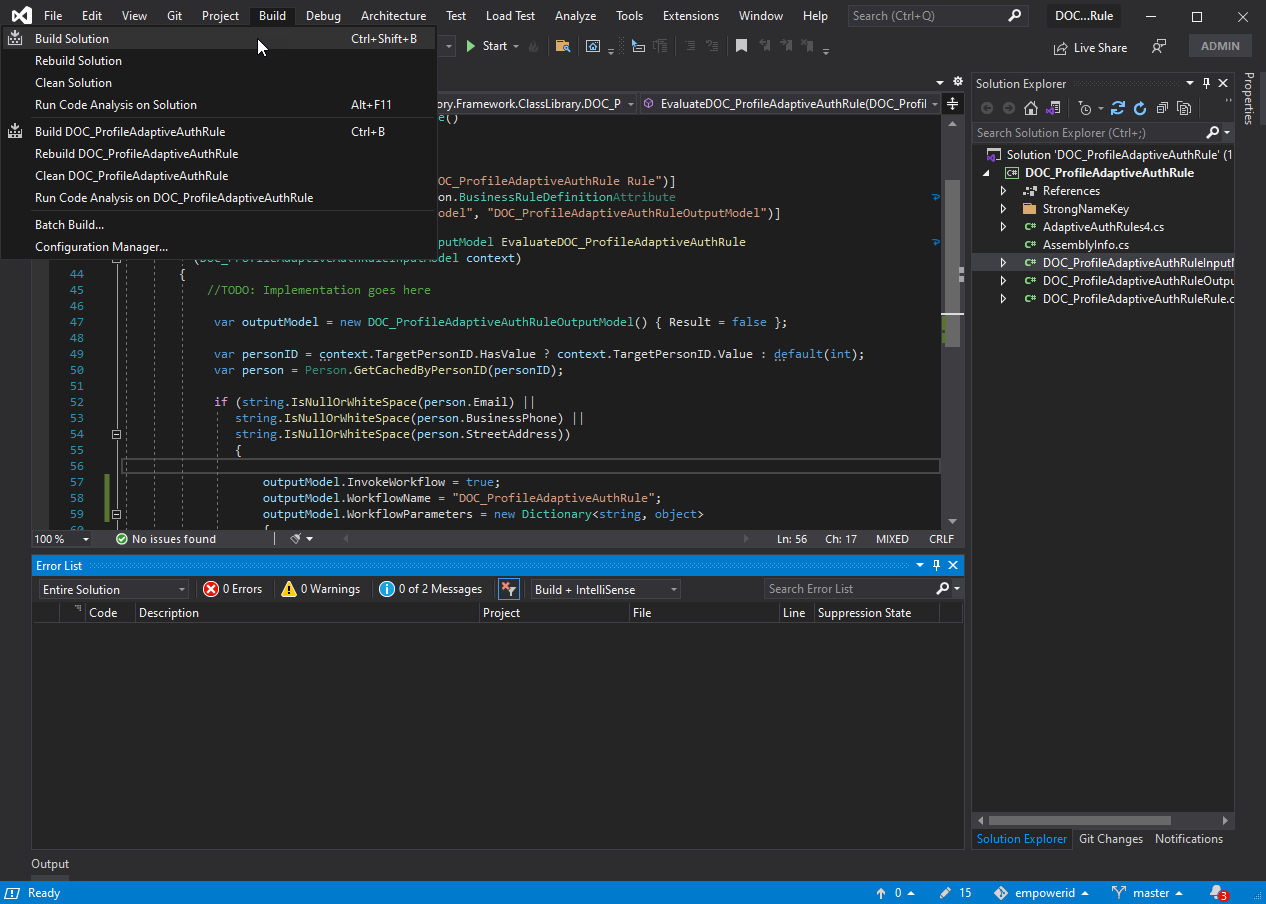
- If prompted, enter your credentials to authenticate to EmpowerID.
Building the solution in Visual Studio publishes the rule in EmpowerID. If successful, you should see something similar to the below output message:
Now that you have created the Adaptive Authentication Rule, the next step is to create the workflow that runs when the logic for the rule is initiated via a Password Manager Policy or application with the rule.
Create the Adaptive Auth Workflow
Step 1: Create the Workflow Project
- In Workflow Studio, right-click on the desired folder for the workflow and select New Adaptive Authentication > Adaptive Auth Workflow from the context menu.
 This opens the workflow in the Workflow Designer.
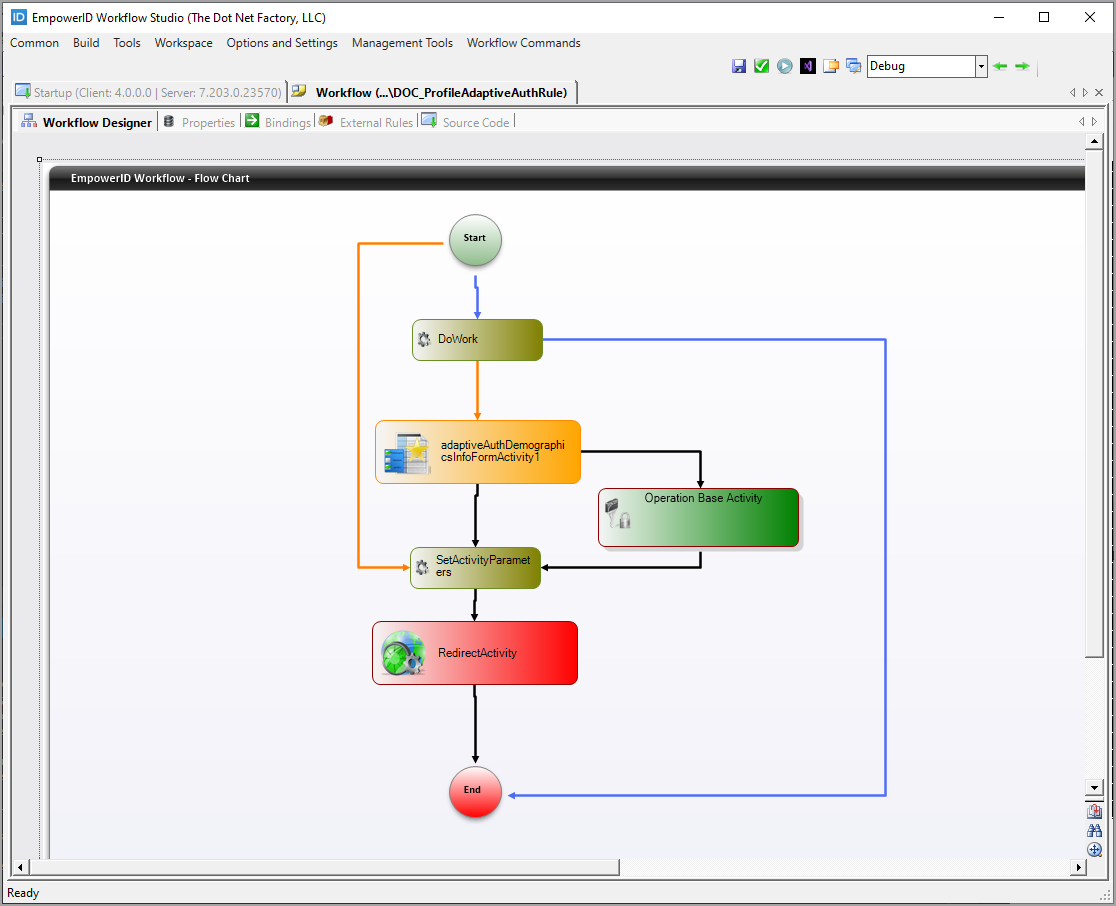
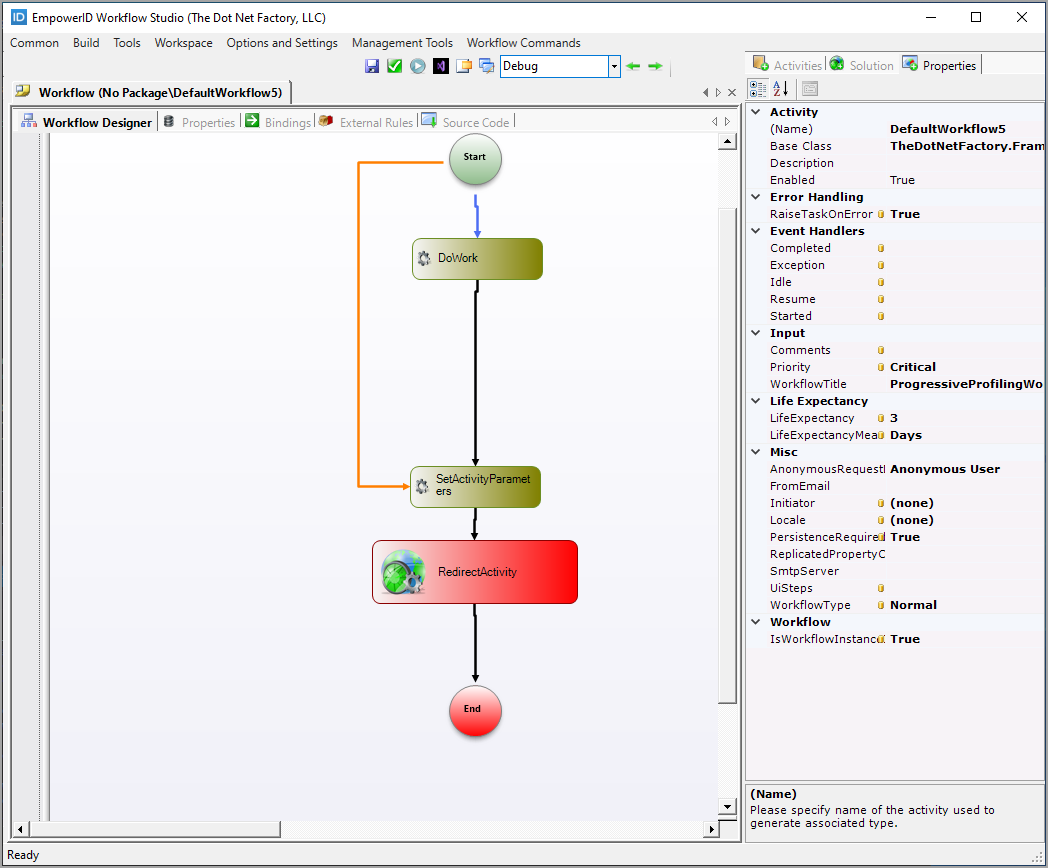 Note the
 DoWork()andSetActivityParameters()activities. These activities are where you can add additional logic used by the workflow, if needed. Additionally, you place any additional activities, Business Rules, etc., needed by the workflow between theDoWork()and theSetActivityParameters()activities.

Step 2: Configure Workflow Properties and Activities
- Save the workflow, naming it appropriately.
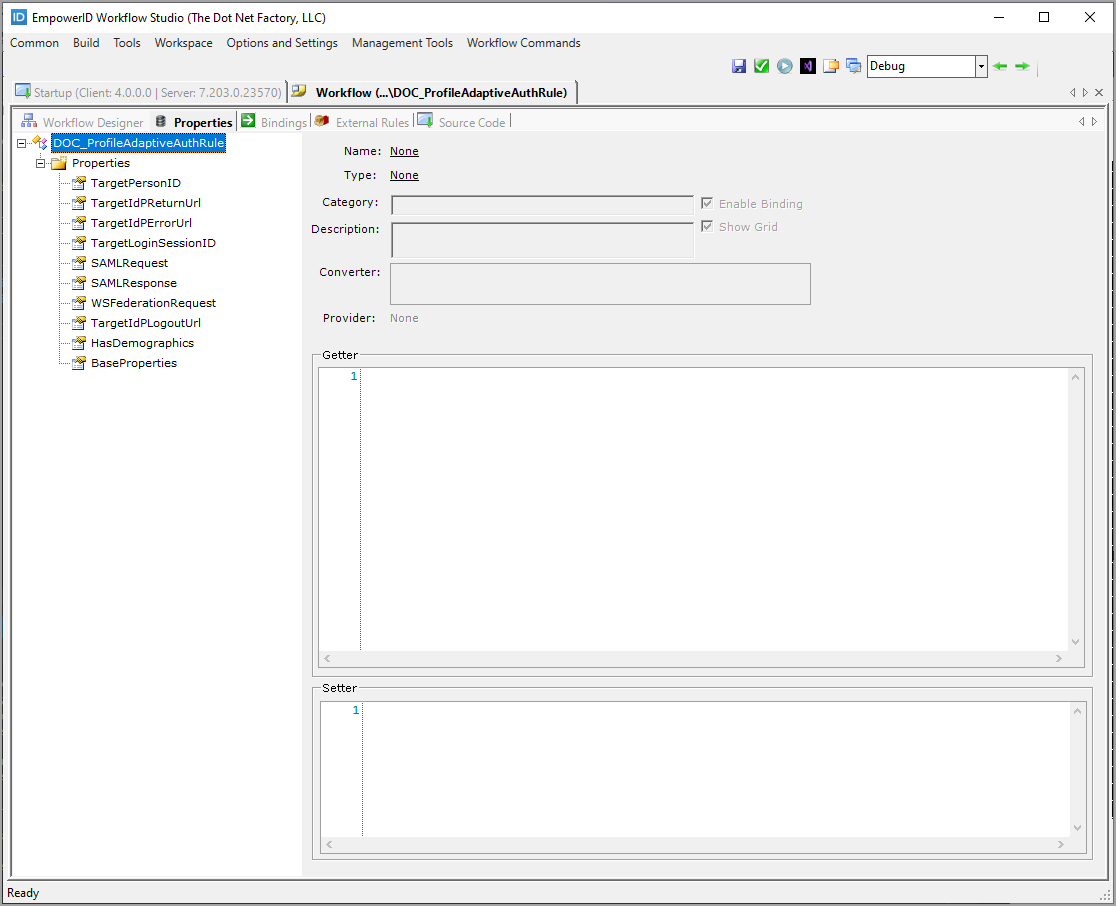
- If your workflow needs any additional properties, add them in the Properties tab.
- If your workflow needs additional activities, such as forms, Business Rules or operation activities, add them to the workflow as indicated above, connecting them within the workflow to ensure the logic flows from activity to activity appropriately.
- Double-click the DoWork activity to open the code editor for it.
- Add any needed code to the activity.
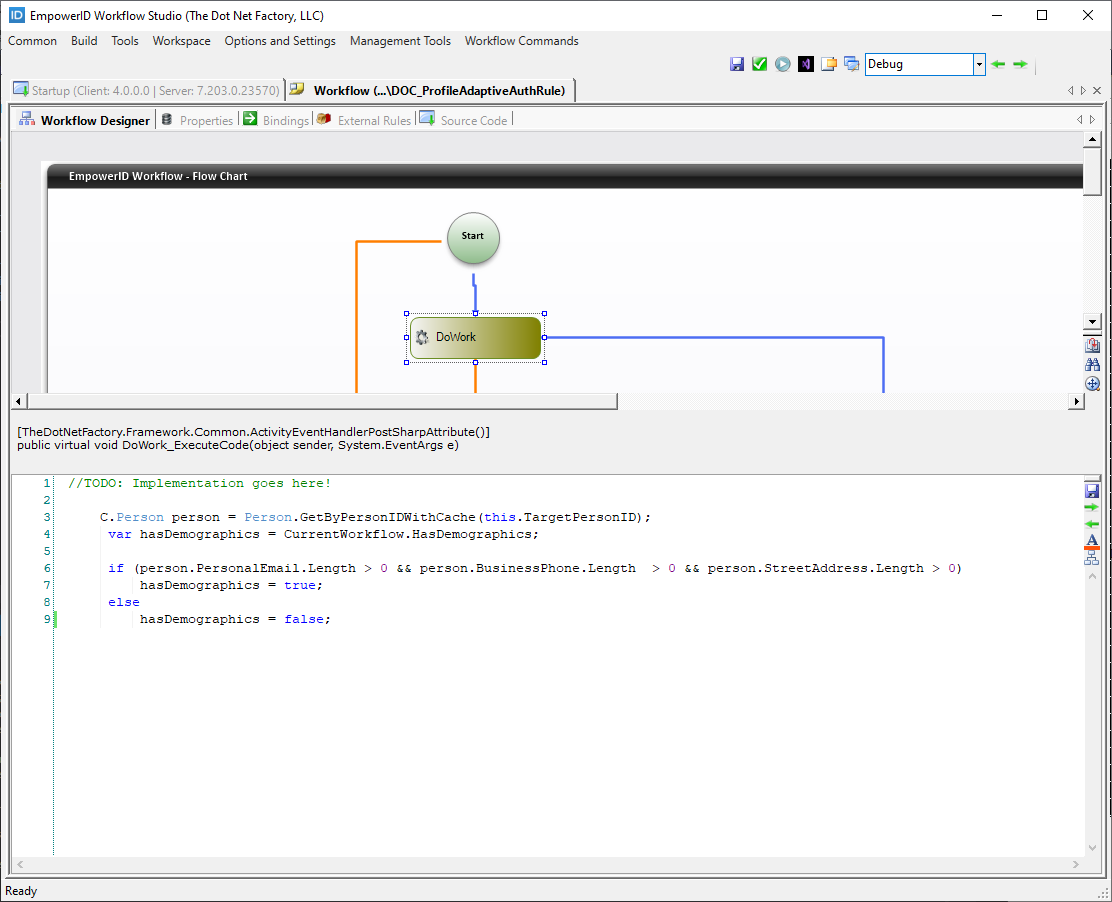
- Add any logic to any other activities or Business Rules used as needed.
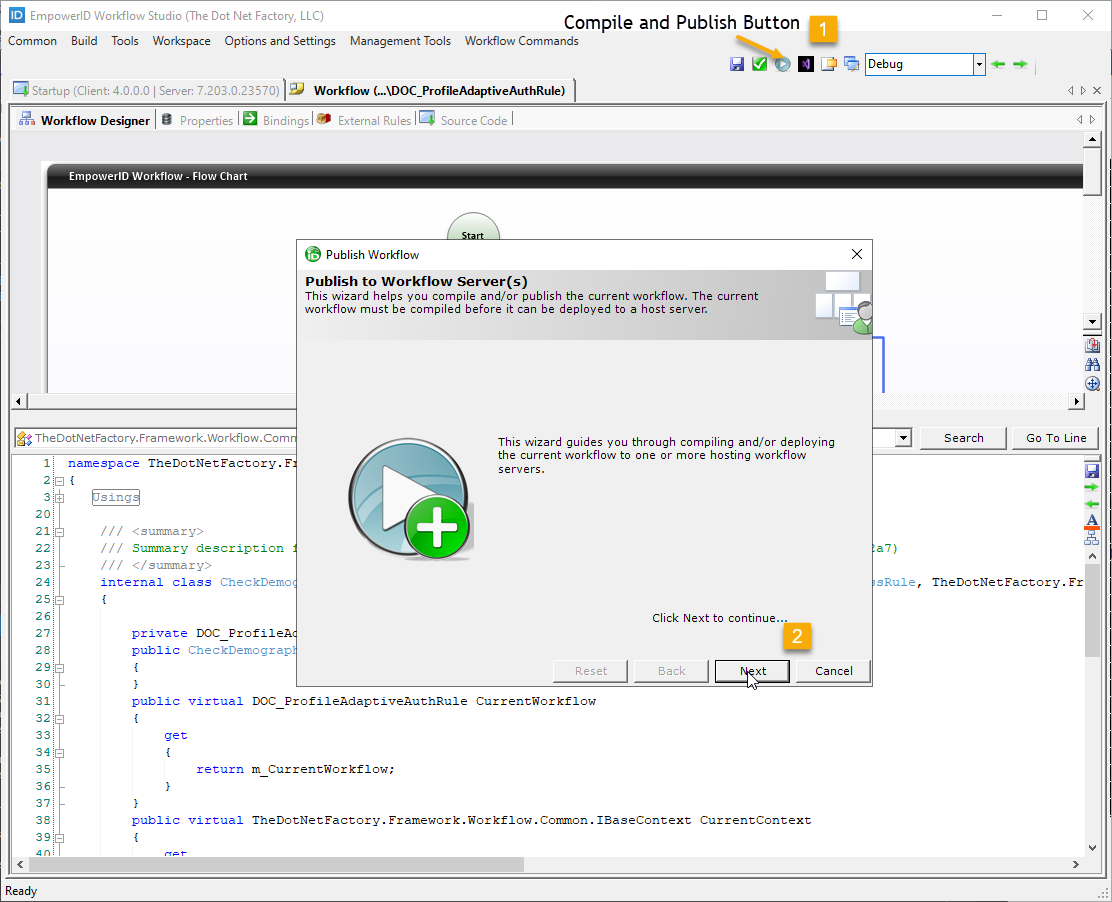
Step 3: Compile and Publish the Workflow
- When ready, click the Compile and Publish button at the top of the Workflow Designer and follow the wizard to publish the workflow in your environment.
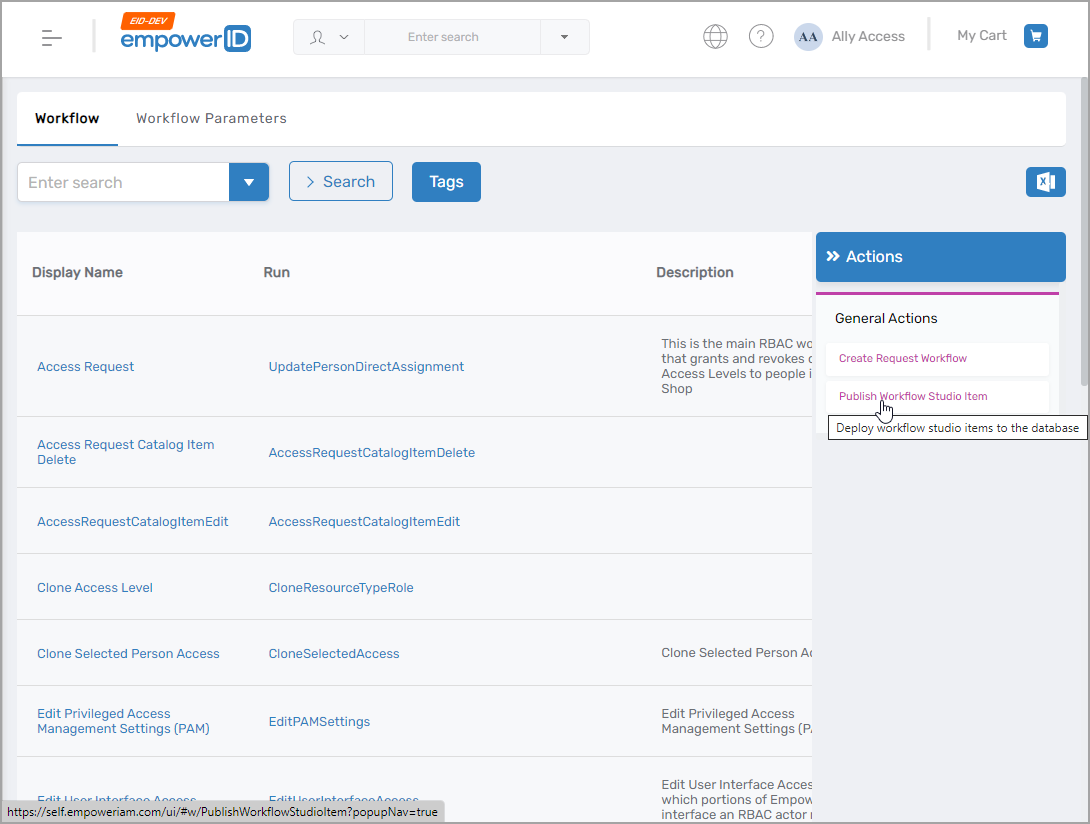
At this point, the workflow is simply published to your local file system. In order to make it available to users in the EmpowerID Web application, you need to run the PublishWorkflowStudioItem workflow in the Web application.
Step 4: Deploy to EmpowerID Web Application
- Log in to the EmpowerID web application as a user with the appropriate access to run the PublishWorkflowStudioItem workflow.
- On the navbar, expand Object Administration > Workflows and click the Publish Workflow Studio Item action link.
- Click Choose File, navigate to the _PublishedItems folder, and select the .pub file for the workflow.
- Click Submit.
- After the workflow has been deployed, click Publish Workflow Studio Item again and follow the same process, this time deploying the rule created earlier.
Now that the Adaptive Auth Rule and workflow have been developed, published and deployed, the next step is to create the Adaptive Auth Rule in the EmpowerID Web app.
Create the Adaptive Auth Rule in EmpowerID
Step 1: Configure the Rule in Web Interface
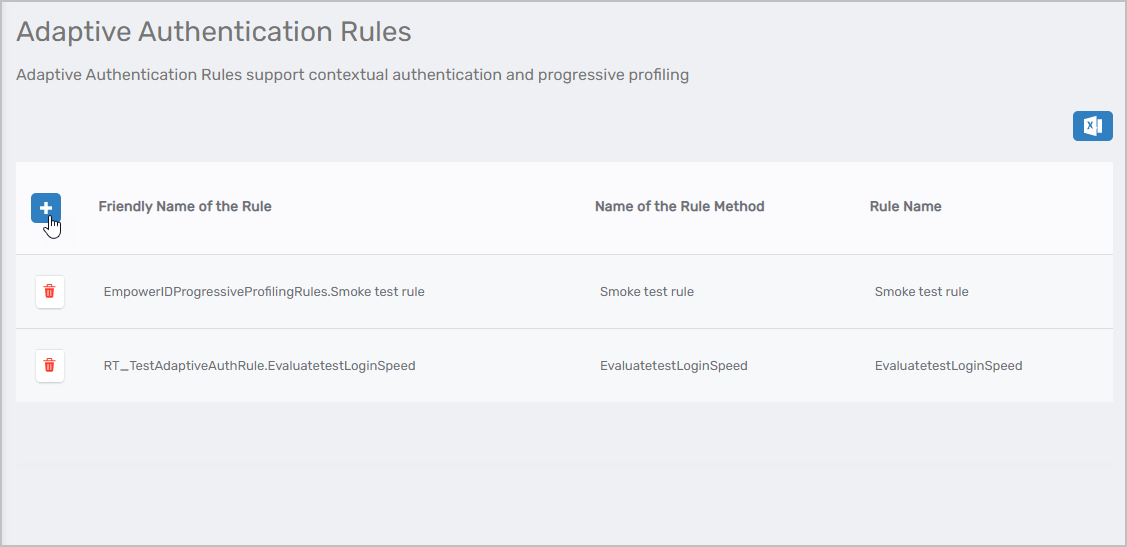
- Log in to EmpowerID as an administrator and navigate to Apps and Authentication > SSO Connections > Adaptive Authentication Rules.
- Click the Add New button.
 This opens the Add Rule panel.
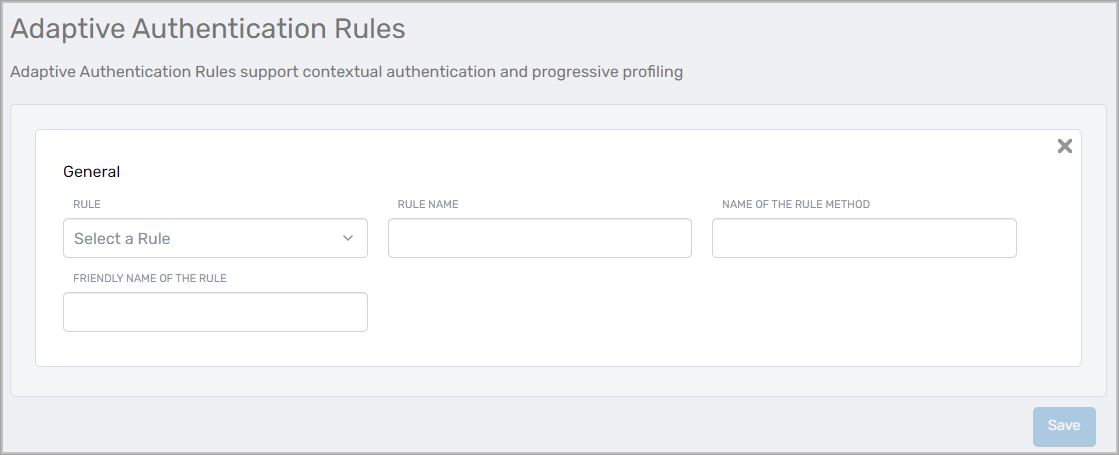
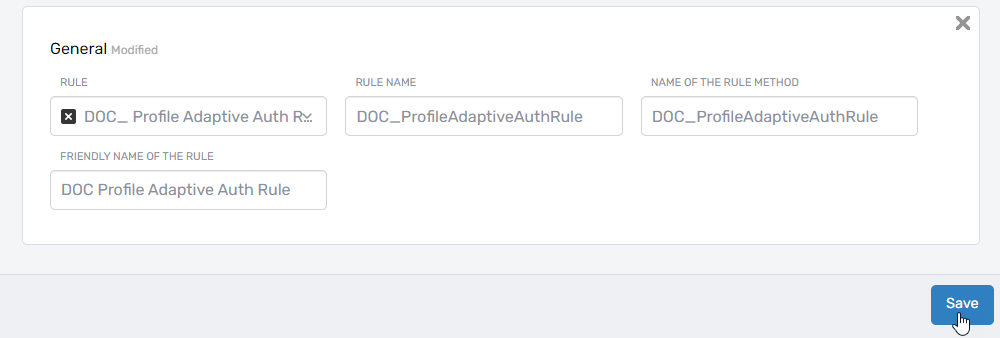
- Fill in the fields in the Add Rule panel:
| Field | Description |
|---|---|
| Rule | Select EmpowerID Progressive Profiling Rules |
| Rule Name | Name of the rule created in Workflow Studio |
| Name of the Rule Method | Name of the rule created in Workflow Studio |
| Friendly Name of the Rule | Name of the rule that appears to users in the Web interfaces |
- Fill in the fields and then click Save.
Now that the rule has been added to EmpowerID, administrators can apply the rule to Password Manager policies and managed applications.
Summary
In this tutorial, you created a custom Adaptive Authentication rule system by:
- Creating the rule logic in Workflow Studio with custom business conditions
- Implementing the rule code to evaluate user attributes and trigger workflows
- Building and publishing the rule to make it available in EmpowerID
- Creating the workflow that executes when the rule conditions are met
- Deploying both components to the EmpowerID Web application
- Configuring the rule in the administrative interface for use with policies and applications
The adaptive authentication rule is now ready to be applied to Password Manager policies and applications to enhance security based on your custom business logic.