Add Multifactor Authentication to Workflow Processes
Adding multi-factor authentication (MFA) to workflows provides an extra layer of security for sensitive operations. Workflow Studio includes a RunMultifactorAuthentication activity that you can drag and drop onto the design surface of any stock or custom workflow. This activity forces the person using the workflow to undergo multi-factor authentication before the workflow continues—useful when additional caution is warranted, such as when a Person account is being deleted from EmpowerID.
What You'll Learn
In this tutorial, you'll enhance a workflow with multi-factor authentication by:
- Adding the RunMultifactorAuthentication activity to an existing workflow
- Adding the required assembly reference
- Creating workflow properties to control MFA behavior
- Binding properties to pass authentication requirements to the MFA activity
- Publishing the MFA-enabled workflow
- Configuring request workflow parameters for administrator control
Overview
To inject MFA into a workflow, you need to:
- Add the RunMultifactorAuthentication activity to the workflow
- Add a reference to the
MultiFactorAuthenticator.dllassembly - Create new properties on the workflow and bind those to the corresponding properties of the activity
These properties are dynamic workflow parameters whose values can be set in the UI by EmpowerID administrators.
Activity Properties
The RunMultifactorAuthentication activity supports the following properties:
| Property | Description | Type |
|---|---|---|
TargetUsePolicyMultifactor | Specifies whether to use the MFA options of the Password Manager Policy associated with the workflow initiator. | Boolean |
TargetUsePersonMultifactor | Specifies whether to use the MFA options preferred by the workflow initiator (set on the Person object). | Boolean |
TargetMinimumMultiFactorPoints | Specifies the minimum points required for the person to complete MFA. | Int32 |
TargetMultiFactorAuthTypeIDs | Collection of IDs for the MFA options. | List<Int32> |
Understanding MFA Property Configuration
These properties work together to determine how MFA is enforced:
- Use Policy Settings: When
TargetUsePolicyMultifactoris true, the system uses MFA options defined in the user's Password Manager Policy. - Use Personal Preferences: When
TargetUsePersonMultifactoris true, the system uses the MFA methods the user has configured on their Person object. - Point-Based Requirements:
TargetMinimumMultiFactorPointsallows you to require multiple forms of authentication. - Specific Methods:
TargetMultiFactorAuthTypeIDslets you restrict which MFA methods are acceptable for this workflow.
Tutorial: Adding MFA to DeleteMultiplePeopleWithOptions Workflow
This section demonstrates adding MFA to a workflow by adding the RunMultifactorAuthentication activity to a copy of the stock DeleteMultiplePeopleWithOptions workflow.
When altering a stock workflow, make a copy and modify the copy rather than the original.
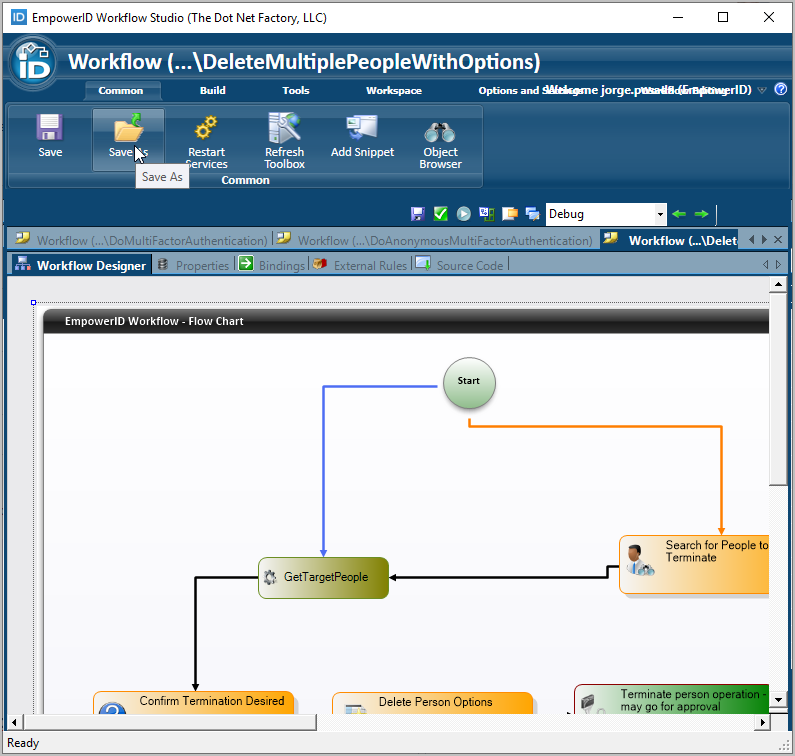
Step 1: Create a Copy of the Workflow
- In Workflow Studio, search for and open the DeleteMultiplePeopleWithOptions workflow.
- From the Common toolbar, click Save As and save a copy of the workflow in the folder of your choice, naming it DeletePeopleWithOptionsMFA.
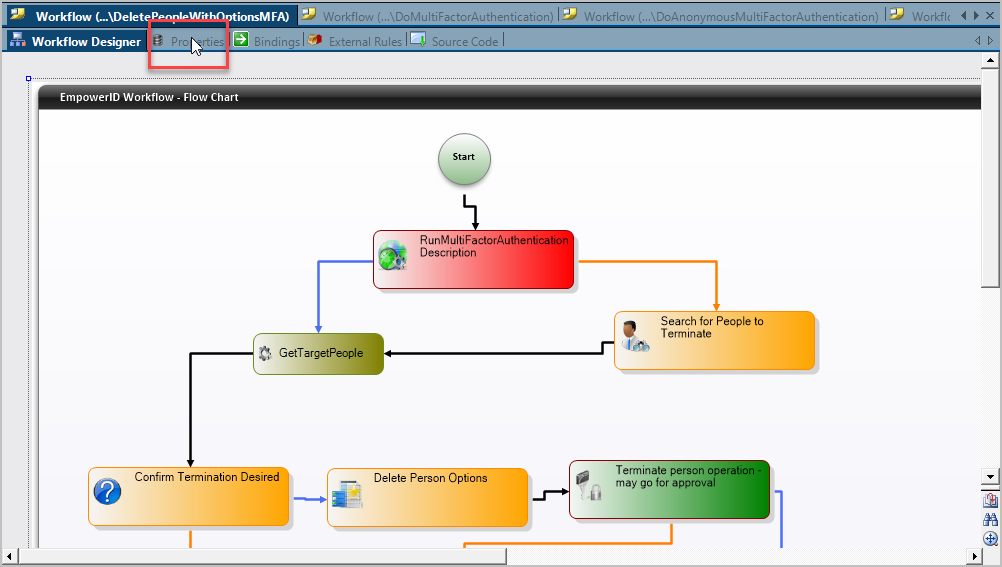
Step 2: Add the RunMultifactorAuthentication Activity
Place the MFA activity early in the workflow to authenticate users before sensitive operations.
- Search for the RunMultifactorAuthentication activity and drag it onto the design surface of your workflow.
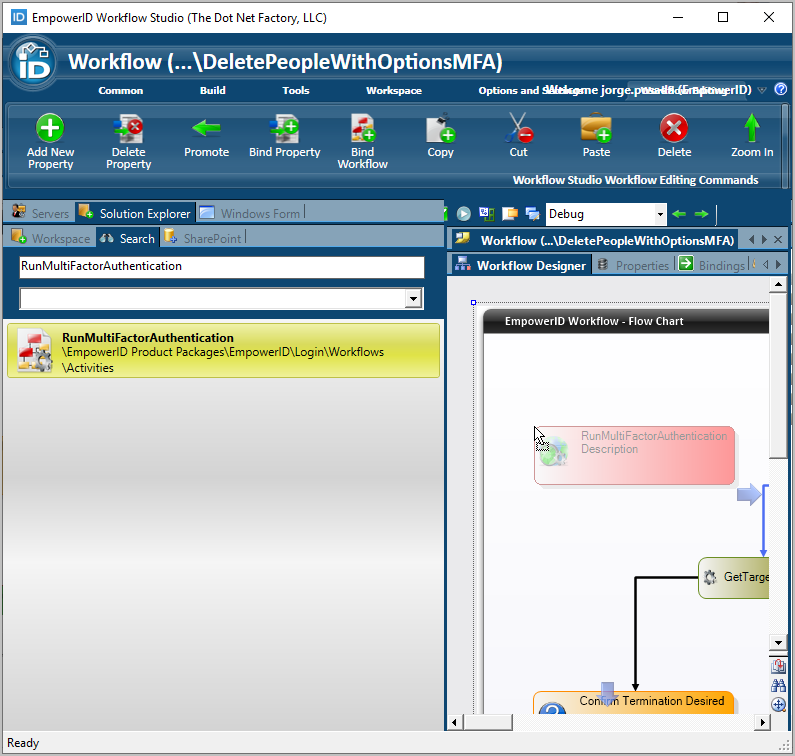
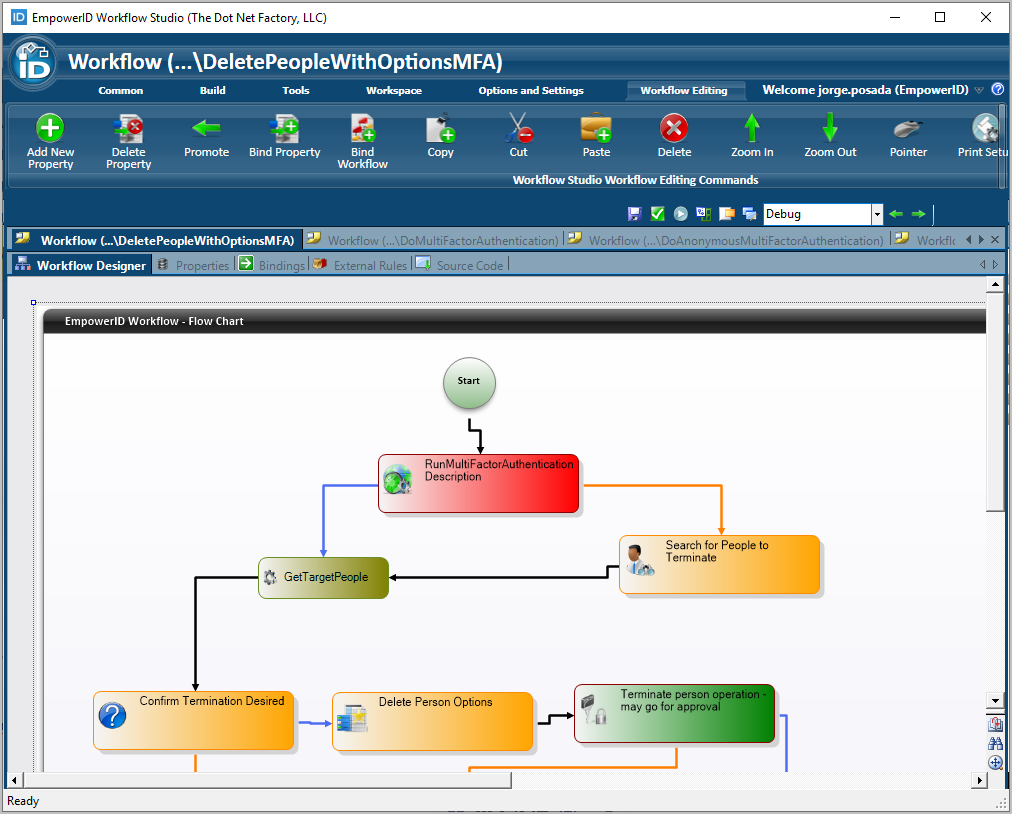
- Rearrange the workflow so that RunMultifactorAuthentication is the first activity.
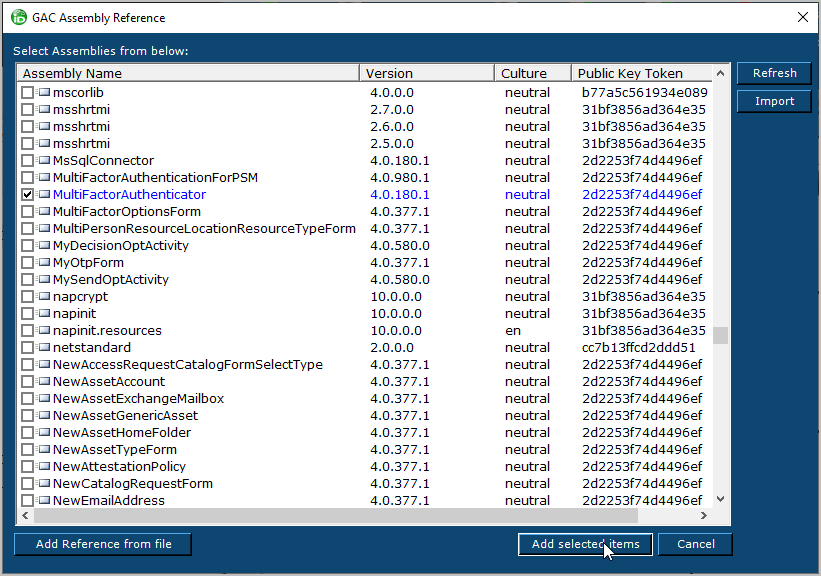
Step 3: Add Assembly Reference
To use the RunMultifactorAuthentication activity in your workflow, add a reference to the MultiFactorAuthenticator assembly.
- From the Code Tree pane of the Workflow Solution, right-click References and select Add Reference > Add Assembly Reference.
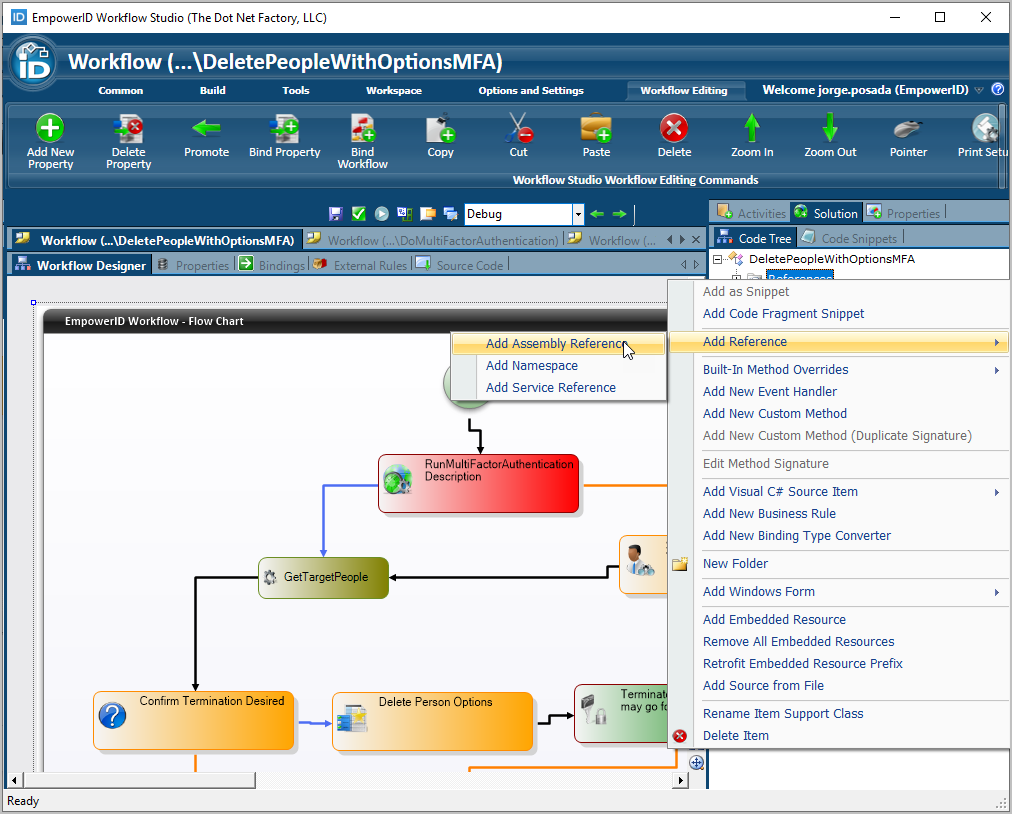
- Select MultiFactorAuthenticator and click Add selected items.
Step 4: Create Workflow Properties
Workflow properties act as parameters that can be configured by administrators without modifying workflow code. Create properties that correspond to each MFA activity input.
- In the workflow designer, click the Properties tab for the workflow.
- Right-click the top-level workflow node and select Add New Property.

- In the Add New Property dialog, add the
TargetUsePolicyMultifactorproperty of typeBoolean.
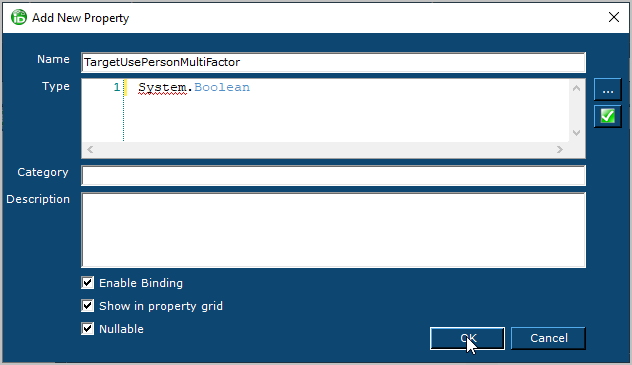
- Repeat to add the remaining required properties:
TargetUsePersonMultifactor(Boolean)TargetMinimumMultiFactorPoints(Int32)TargetMultiFactorAuthTypeIDs(System.Collections.Generic.List<Int32>)
Property names are case-sensitive and must match exactly when creating request workflow parameters later.
Step 5: Bind Properties to the Activity
Property binding passes data values between workflow components. Bind the workflow properties you created to their corresponding properties on the MFA activity.
- Click the Bindings tab above the workflow.
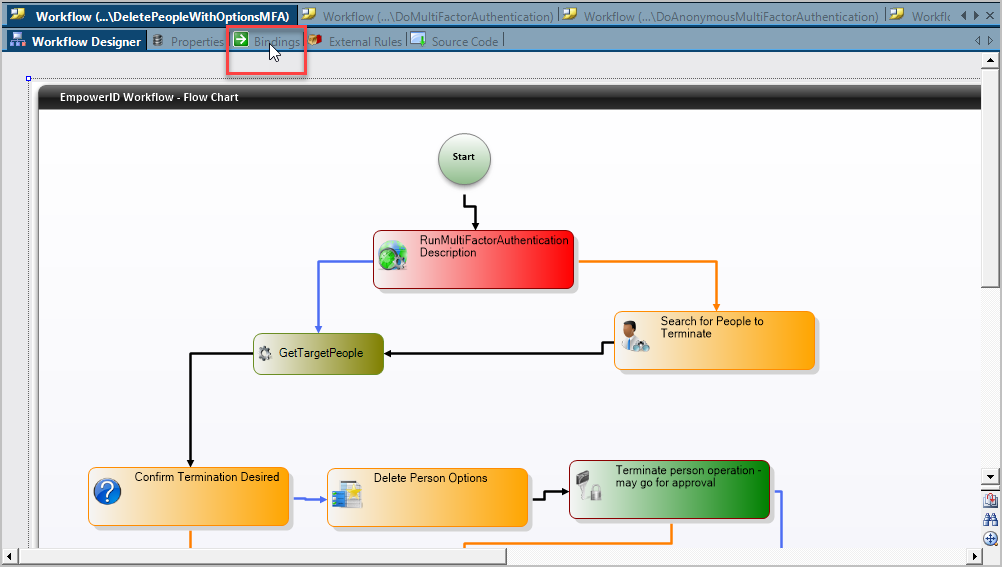
- In the Workflow properties tree (left), locate the properties you created. In the MFA activity tree (right), locate the matching properties.
- Drag each workflow property onto its corresponding MFA activity property.
- From the Workflow properties tree, expand Base Properties > Workflow and locate the Initiator property.
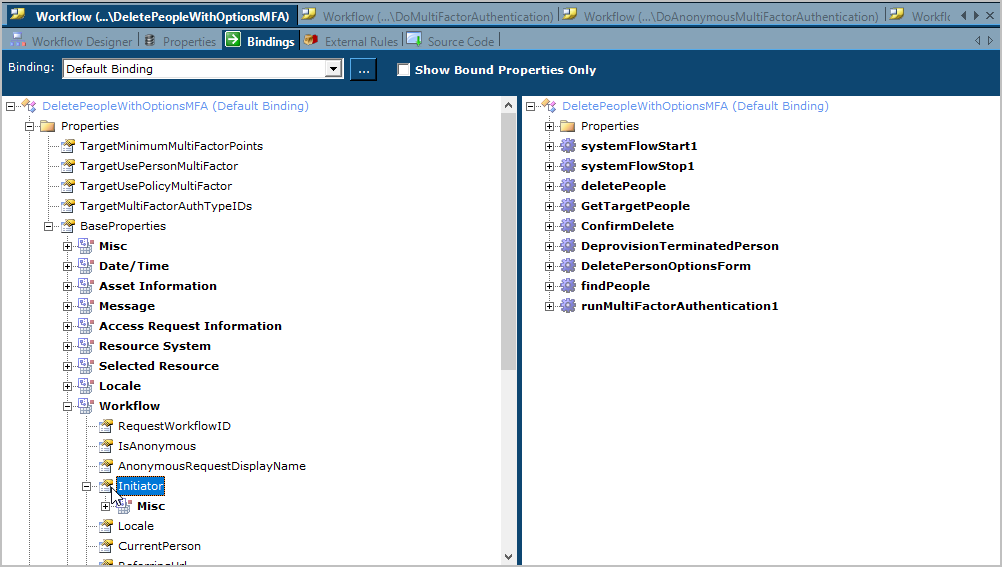
- Drag Initiator onto the TargetPerson property of the MFA activity. This specifies that MFA runs against the person initiating the workflow.
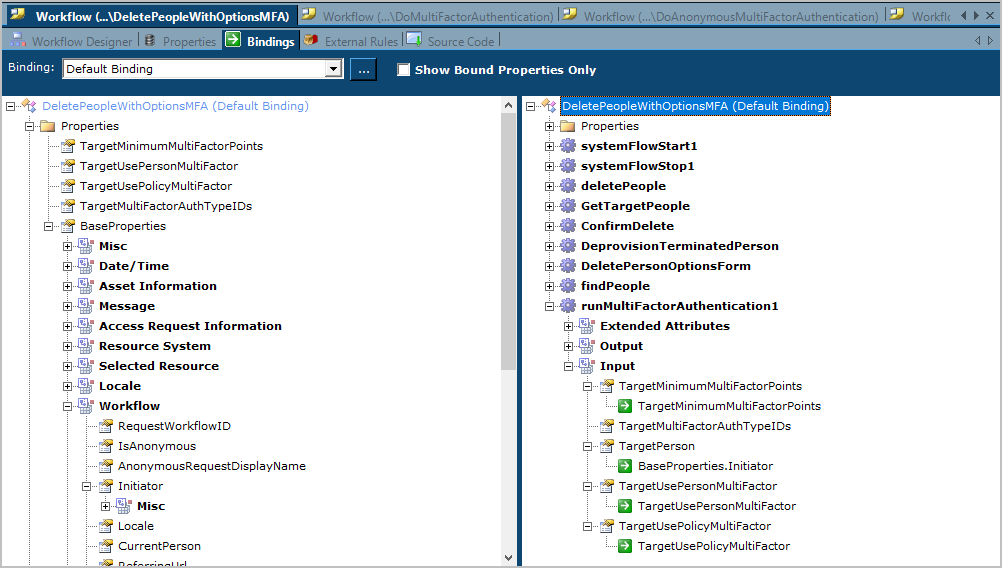
When you have completed binding the workflow and activity properties, the trees should look like the image below.
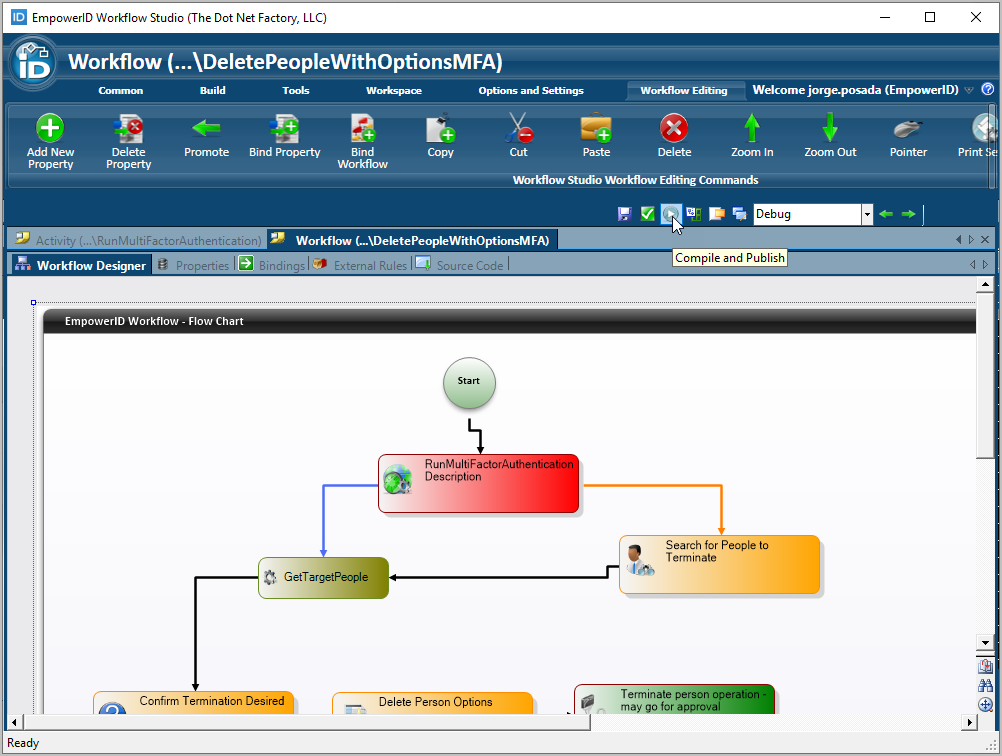
Step 6: Compile and Publish the Workflow
- Return to the workflow designer and click Compile to check for any errors.

- Click Close to close the Operations log.
 If you have errors, fix them and compile the workflow again before proceeding.
 - Click Compile and Publish to publish the workflow.
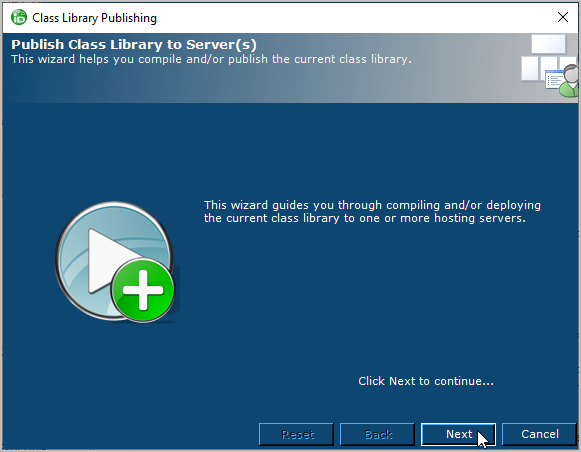
- In the Publishing Wizard, click Next.
- Click Yes when prompted about creating a request workflow.
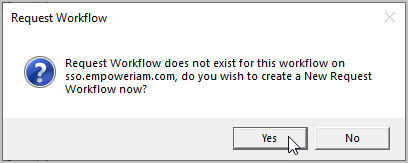
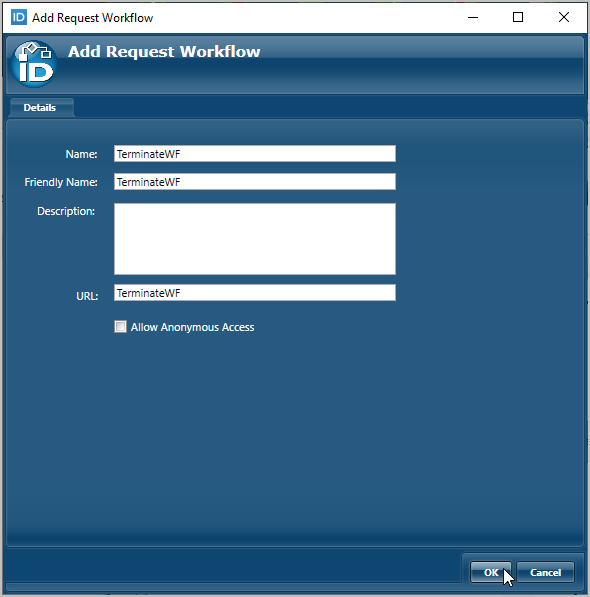
- Click OK to accept defaults in the Request Workflow dialog and note the URL.
- When prompted to restart services, click No.
- Reset IIS.
For the workflow to execute with MFA, you must add Request Workflow Parameters that match the properties you created. The parameters set the values passed from the request workflow to the MFA activity.
Adding Parameters to the Request Workflow
After publishing your workflow, configure request workflow parameters in the EmpowerID Web interface. These parameters control MFA behavior and must match the workflow properties exactly.
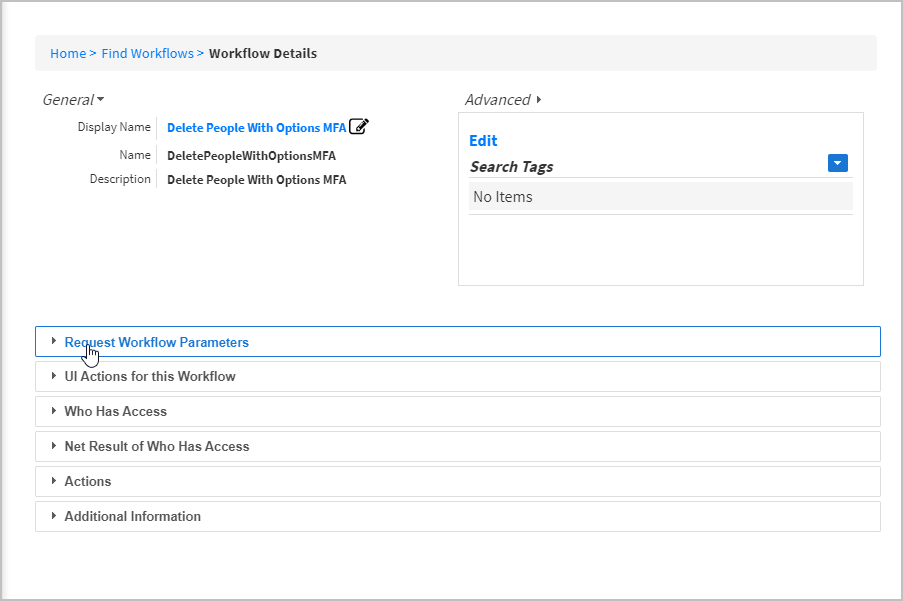
Step 1: Access the Workflow Configuration
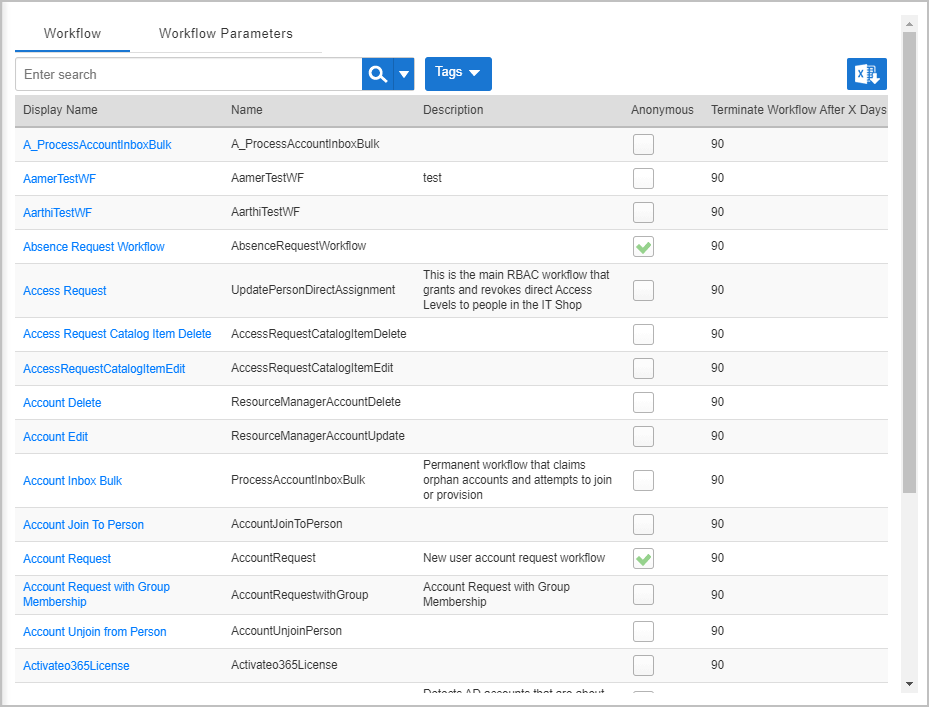
- From the navbar of the Web interface, expand Object Administration and click Workflows.
This opens the Workflows page, where you can search for and manage settings for all published workflows.
- Search for the workflow and click its Display Name link.
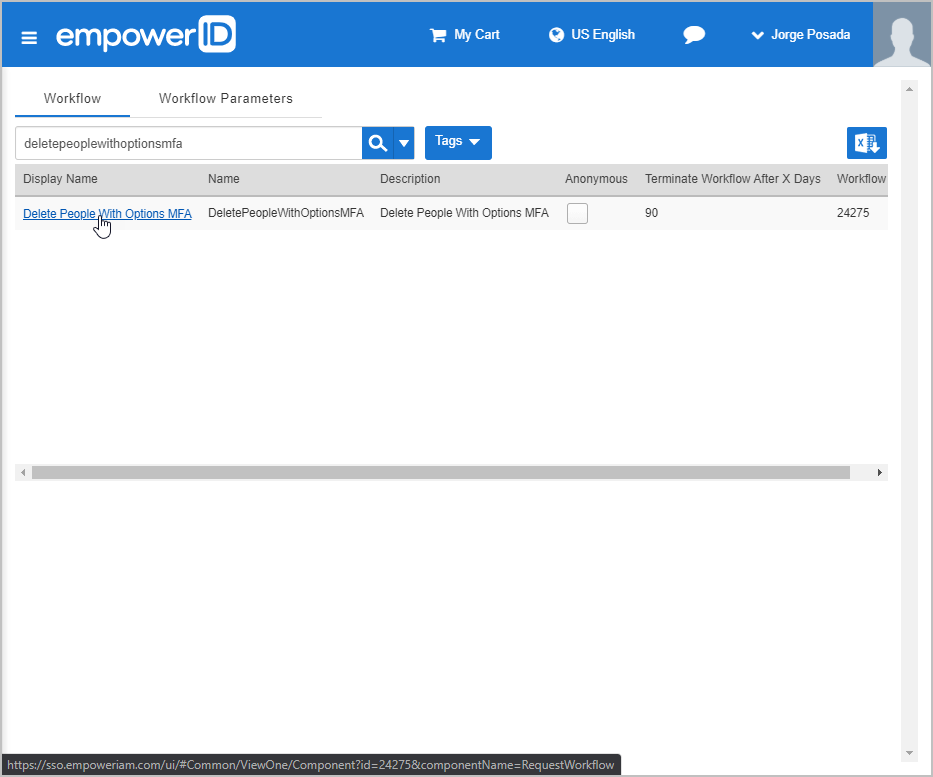
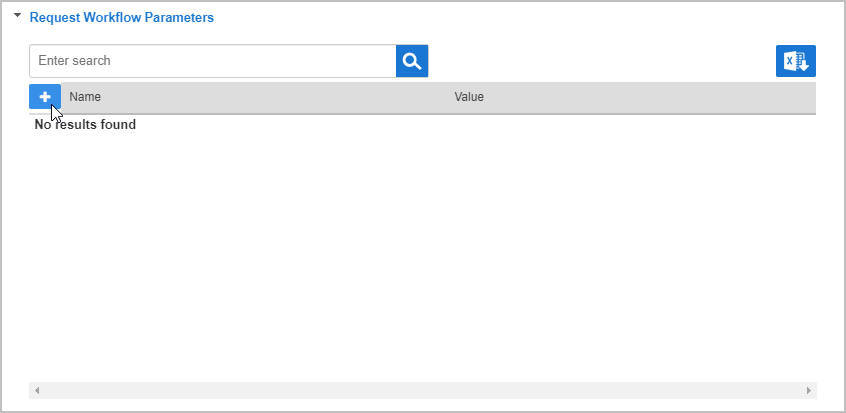
- On the Workflow Details page, expand Request Workflow Parameters.
Step 2: Add Required Parameters
- Click Add New Parameter.
- Enter the Name and Value for the parameter and click SAVE.
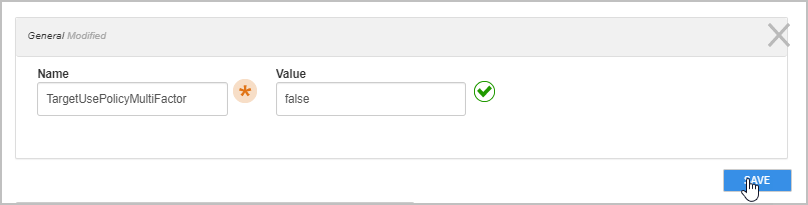
- Add each required parameter (names must match exactly):
TargetUsePolicyMultifactor— Boolean valueTargetUsePersonMultifactor— Boolean valueTargetMinimumMultiFactorPoints— Integer valueTargetMultiFactorAuthTypeIDs— List of integers
- When finished adding parameters, recycle the EmpowerID app pools.