Email Flow Items
Email Flow Items send automated notifications when Flow Definitions execute. These Flow Items use fulfillment workflows (FWSendEmail or FWSendEmailToDistributionList) to deliver templated emails to target persons, managers, or management role members. Email templates support dynamic content through object property wildcards, enabling personalized notifications based on the triggering event and target resource.
This article demonstrates configuring Email Flow Items for common notification scenarios, such as notifying managers when employees terminate or sending welcome emails to new hires.
Prerequisites
This article assumes you know how to create Flow Items and add them to Flow Definitions. If you need to review these procedures, see Create Flow Items.
Create an Email Template
Before configuring an Email Flow Item, create the email template that defines the notification content.
-
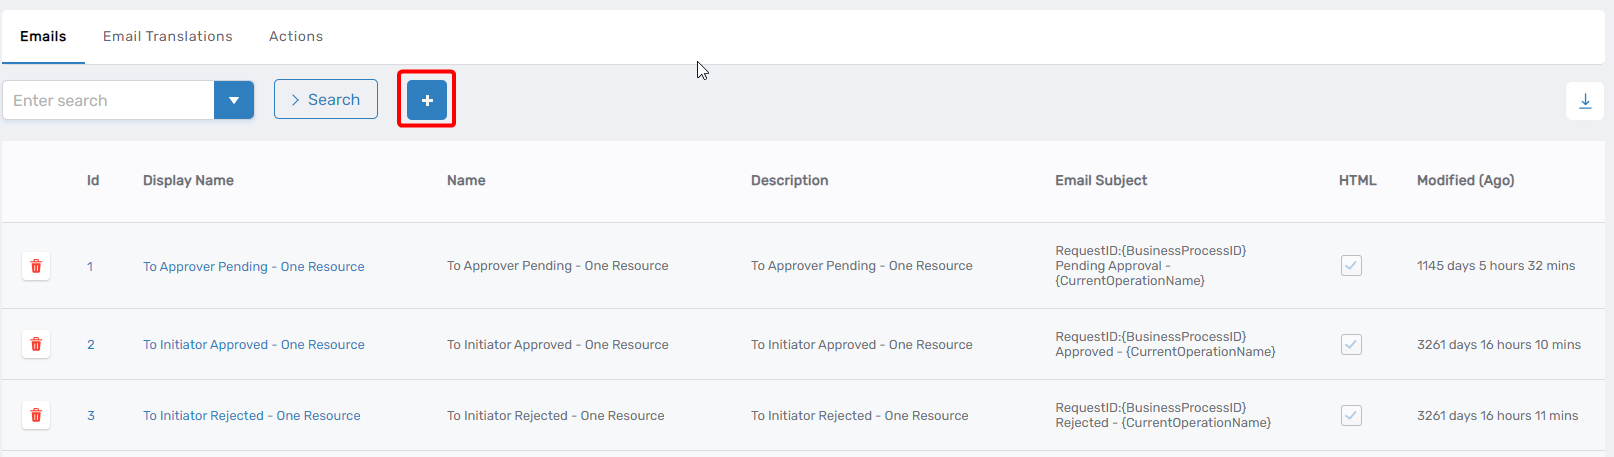
Expand Admin > Miscellaneous and click Localized Emails.
-
Click the Add button above the grid.
-
On the Email Template Details page, configure the template:
Field Description Name Internal name for the template (e.g., "Employee_Offboarding_Manager_Notification") Display Name Name displayed in the EmpowerID UI Description Description of when and how this template should be used Email Subject Subject line for the email. Can include object property wildcards such as {TargetPerson.FirstName}.Email Body Body content for the email. Use object property wildcards to insert dynamic values. See Configuration Reference for available object parameters. 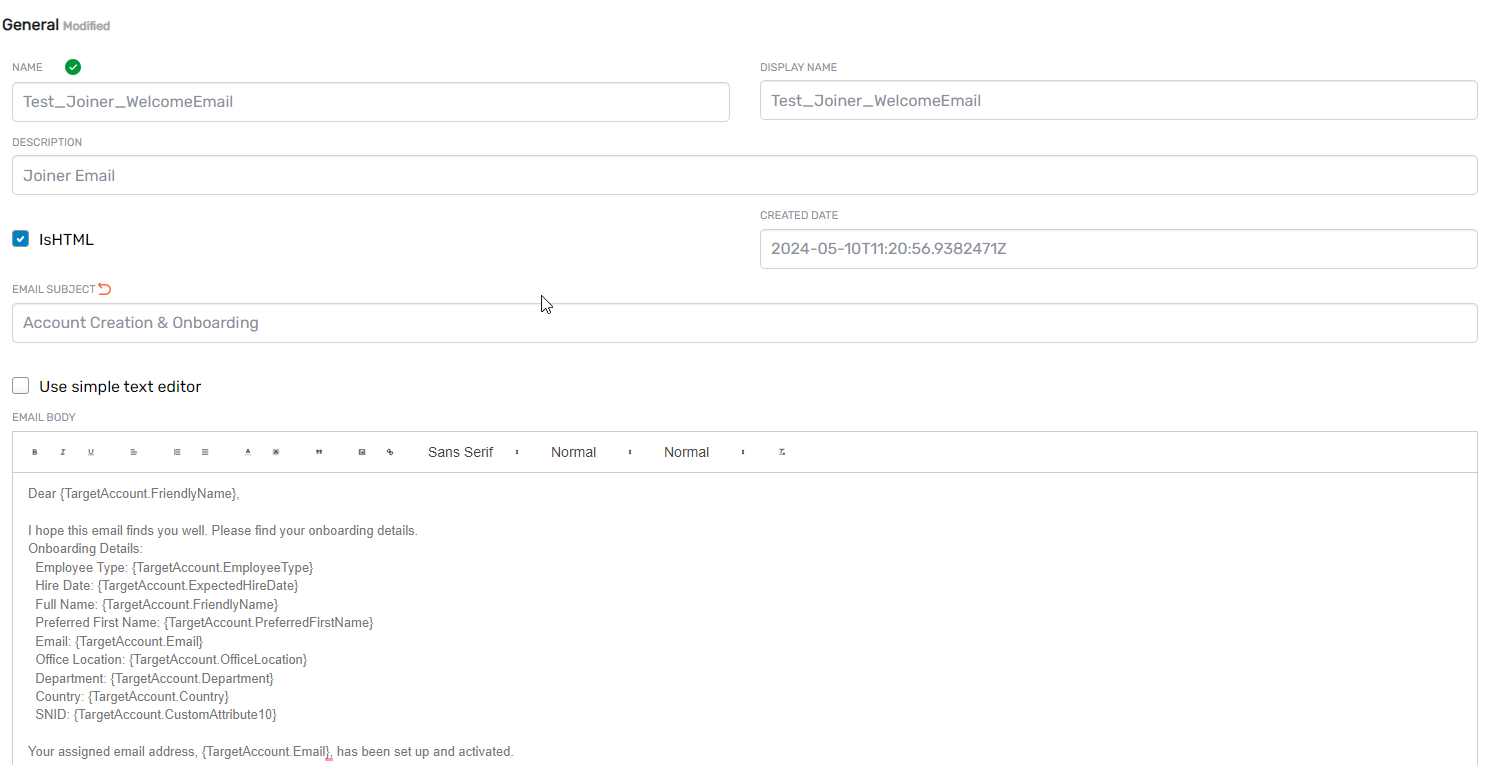
-
Click Save.
Configure an Email Flow Item
With the email template created, configure a Flow Item that uses the template to send notifications.
-
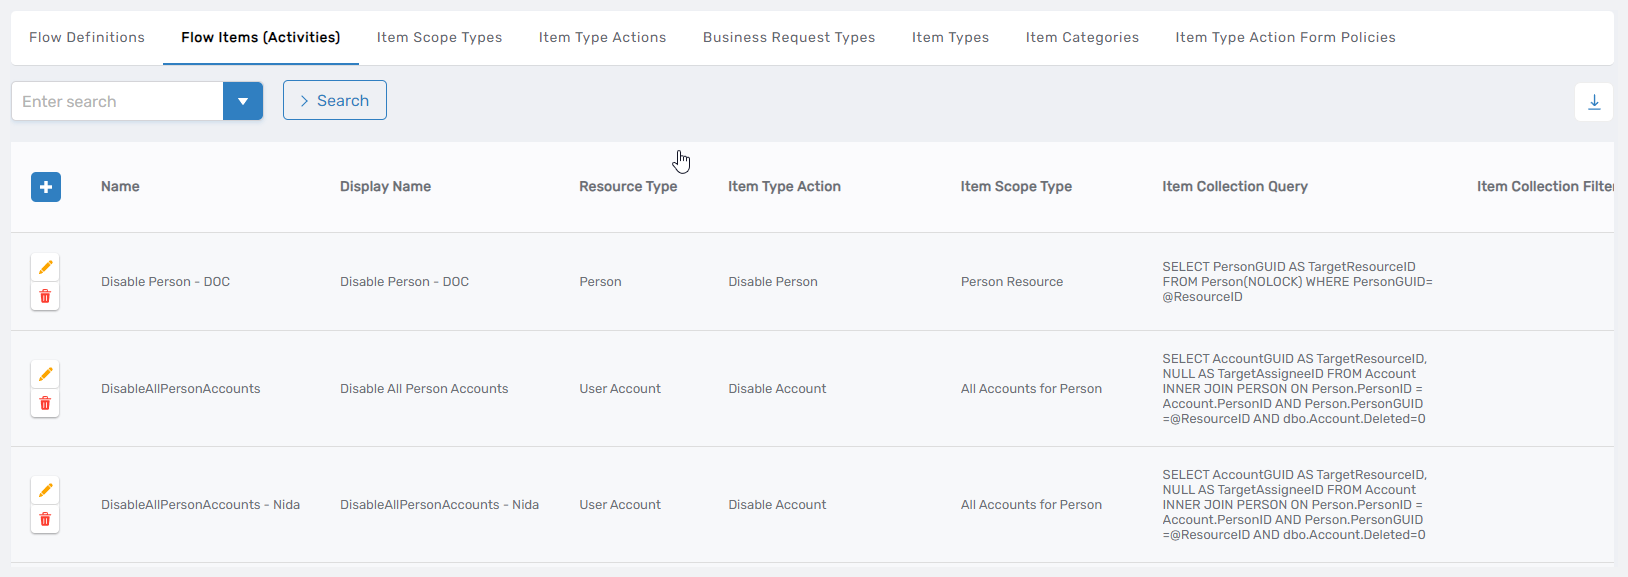
Expand Low Code/No Code Workflow and click No Code Flows.
-
Select the Flow Items (Activities) tab and click the Add button.
-
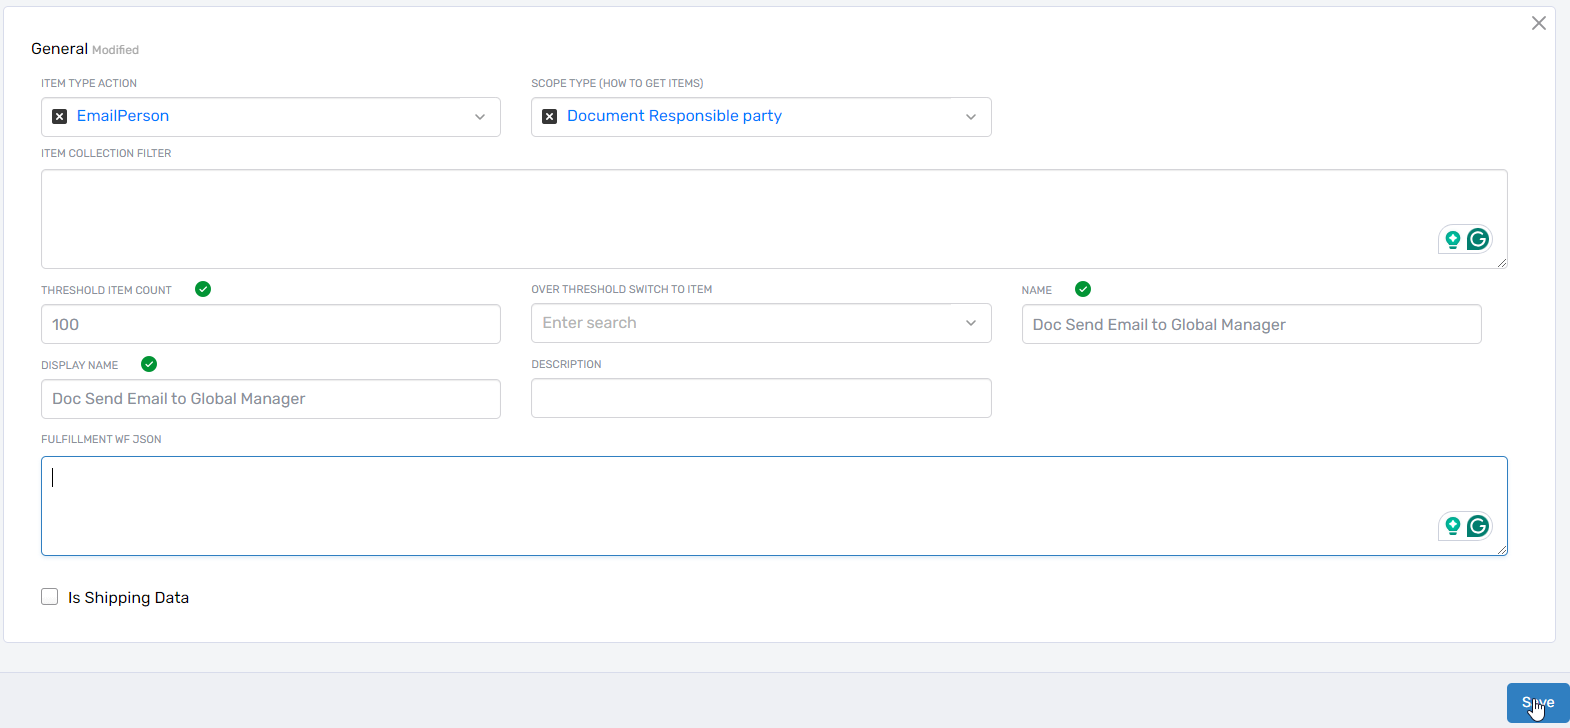
Configure the Flow Item with email-specific settings:
Field Value/Description Item Type Action Select an email-sending action such as "EmailPerson" (sends to target person) or "EmailPersonsManager" (sends to target person's manager) Scope Type (How to Get Items) Select "Person Resource" for person-based emails or the appropriate resource type for your scenario Name Descriptive name for the Flow Item (e.g., "Notify Manager of Termination") Display Name Name displayed in the EmpowerID UI Description Description of what this notification does and when it executes Fulfillment WF JSON JSON configuration specifying which email template to use and how to deliver it. At minimum, specify EmailTemplateName. See Configuration Reference for additional parameters and examples.Example Fulfillment WF JSON for sending to a manager:
{
    "EmailTemplateName": "Employee_Offboarding_Manager_Notification"
}
Example Fulfillment WF JSON for sending to a management role instead of the target person:
{
    "EmailTemplateName": "Termination_Admin_Alert",
    "DoNotSendEmailToTargetPerson": "true",
    "ManagementRoleIDToNotify": "064f430e-49e5-4568-94ad-7aecd702bd79"
}
-
Click Save.
The Email Flow Item is now ready to add to Flow Definitions. When the Flow Definition executes, the Email Flow Item sends notifications according to the configured template and parameters.
Configuration Reference
Object Parameters for Email Templates
Use these object parameters as wildcards in email templates to insert dynamic values. The fulfillment workflow populates these properties based on the Business Request's target resource.
| Parameter | Description | Example Usage |
|---|---|---|
| TargetPerson | Target Person object when the event targets a person | {TargetPerson.FirstName}, {TargetPerson.Email} |
| TargetAccount | Target Account object when the event targets an account | {TargetAccount.AccountName}, {TargetAccount.EmployeeType} |
| TargetPersonManager | Manager of the target person | {TargetPersonManager.FirstName}, {TargetPersonManager.Email} |
| TargetAccountManager | Manager of the target account | {TargetAccountManager.FirstName} |
| TargetBusinessRequest | Business Request object associated with the Flow | {TargetBusinessRequest.FriendlyName} |
| TargetBusinessRequestItem | Business Request Item object within the Business Request | {TargetBusinessRequestItem.FriendlyName} |
Email Template Example:
Dear {TargetPersonManager.FirstName},

This notification is to inform you that {TargetPerson.FriendlyName} ({TargetPerson.Email})
has been processed for offboarding as of {TargetBusinessRequest.SubmittedDate}.

The following actions have been completed:
- Person account disabled
- System accounts disabled
- Group memberships removed

If you have questions, please contact the IT Service Desk.
Fulfillment Workflows
FWSendEmail
Sends emails to a target person or management role members. The Business Request's target object populates the email template. The Business Request Item's target resource determines the recipient. To send email to a person's manager, set the Item Scope Type to "Person's manager."
FWSendEmailToDistributionList
Sends emails to distribution lists or management role members. The Business Request Item's target resource is the object displayed in the email template (e.g., TargetPerson).
Fulfillment Workflow Parameters
Configure these parameters in the Fulfillment WF JSON field to control email delivery.
| Parameter | Description | Required? | Supporting Workflows |
|---|---|---|---|
| EmailTemplateName | Name of the email template to use. The template must exist in EmpowerID. | Yes | FWSendEmail, FWSendEmailToDistributionList |
| EmailAddressToNotify | Specific email address to notify. Can be combined with ManagementRoleIDToNotify to send to multiple recipients. | No | FWSendEmailToDistributionList |
| DoNotSendEmailToTargetPerson | When set to "true", prevents sending email to the target person (Business Request's target resource). Use when notifying administrators or managers instead of the affected person. | No | FWSendEmail |
| ManagementRoleIDToNotify | GUID of a management role. Sends email to all members of the role. | No | FWSendEmail, FWSendEmailToDistributionList |
JSON Configuration Examples
Basic notification to target person:
{
    "EmailTemplateName": "Welcome_New_Employee"
}
Notification to management role members (not target person):
{
    "EmailTemplateName": "Termination_Alert",
    "DoNotSendEmailToTargetPerson": "true",
    "ManagementRoleIDToNotify": "a1b2c3d4-e5f6-7890-abcd-ef1234567890"
}
Notification to multiple recipients:
{
    "EmailTemplateName": "Joiner_Notification",
    "EmailAddressToNotify": "hr-team@company.com",
    "ManagementRoleIDToNotify": "a1b2c3d4-e5f6-7890-abcd-ef1234567890"
}