Create Announcements
EmpowerID allows administrators to create and manage announcements to provide important notifications to users across different applications. These announcements serve various purposes, from general information to urgent alerts, and can be scheduled for specific time periods. Administrators can also target specific audiences and track user interactions, ensuring critical messages are seen and acknowledged when necessary.
Procedure
Step 1: Launch the Create Announcement Wizard Workflow
- Log in to the EmpowerID portal as an administrator.
- Navigate to Admin > Miscellaneous > Announcements.
- Click Create Announcement to start the Create Announcement Wizard workflow.
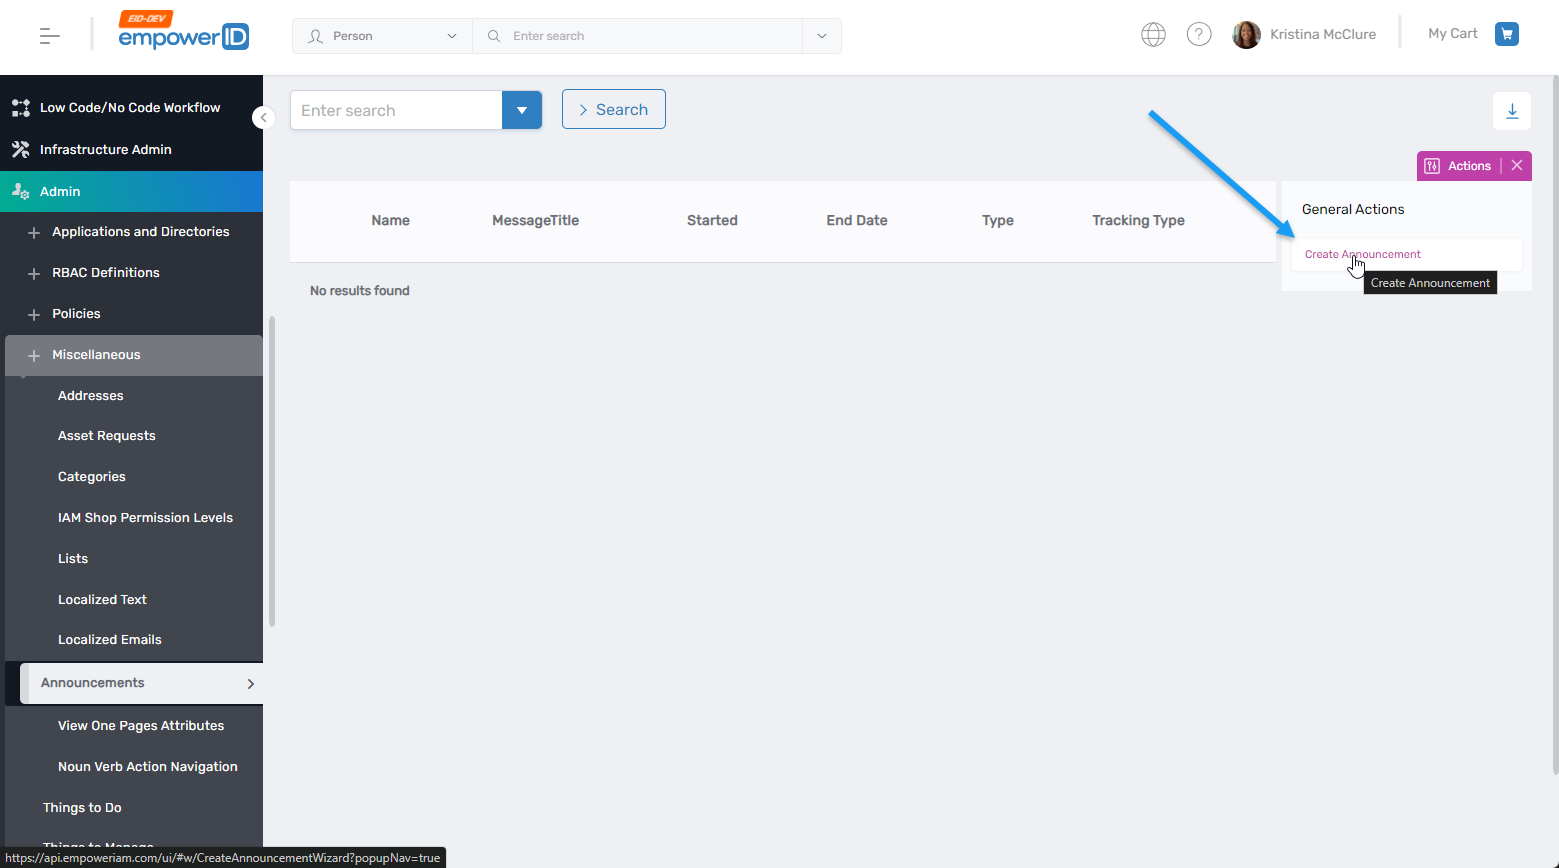
- Follow each step of the wizard to create the announcement.
Step 2: Add Announcement Name Information
- Fill in the required fields:
- Announcement Name – Provide a unique name for the announcement.
- Announcement Friendly Name – Enter a display name for the announcement.
- Announcement Tracking – Choose one of the following tracking options:
- Announce Only – Displays the announcement to the user each time they log in to the target application.
- One Time Show – Displays the announcement once before the user logs in to the target application.
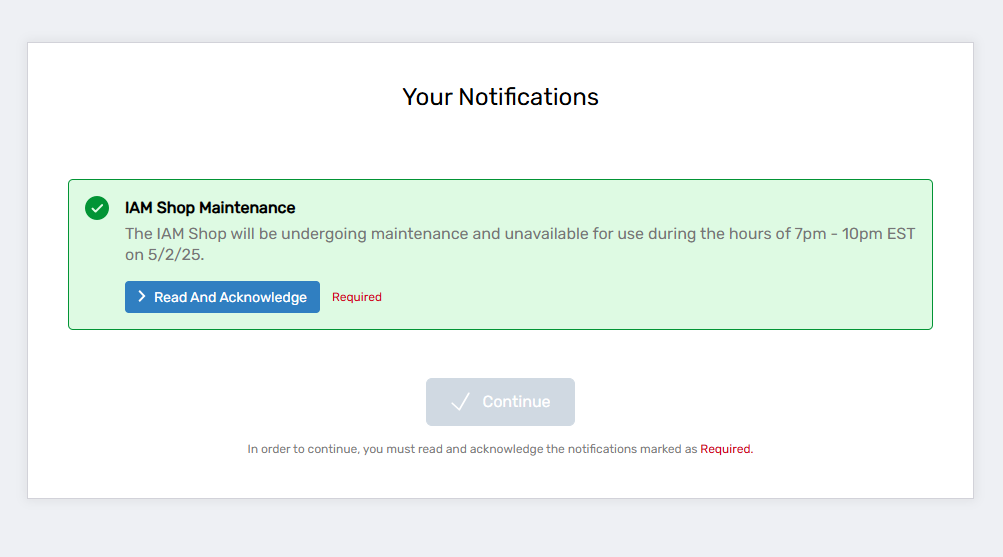
- Acknowledge Required – Requires the user to acknowledge they have read the announcement before accessing the application.
- Start Date – Set the start date for the announcement (default is the current date).
- End Date – Optionally, specify an expiration date after which the announcement will no longer appear.
- Active – Select this option to make the announcement active.
- Priority – Enter a priority value for the announcement. Lower values indicate higher priority.
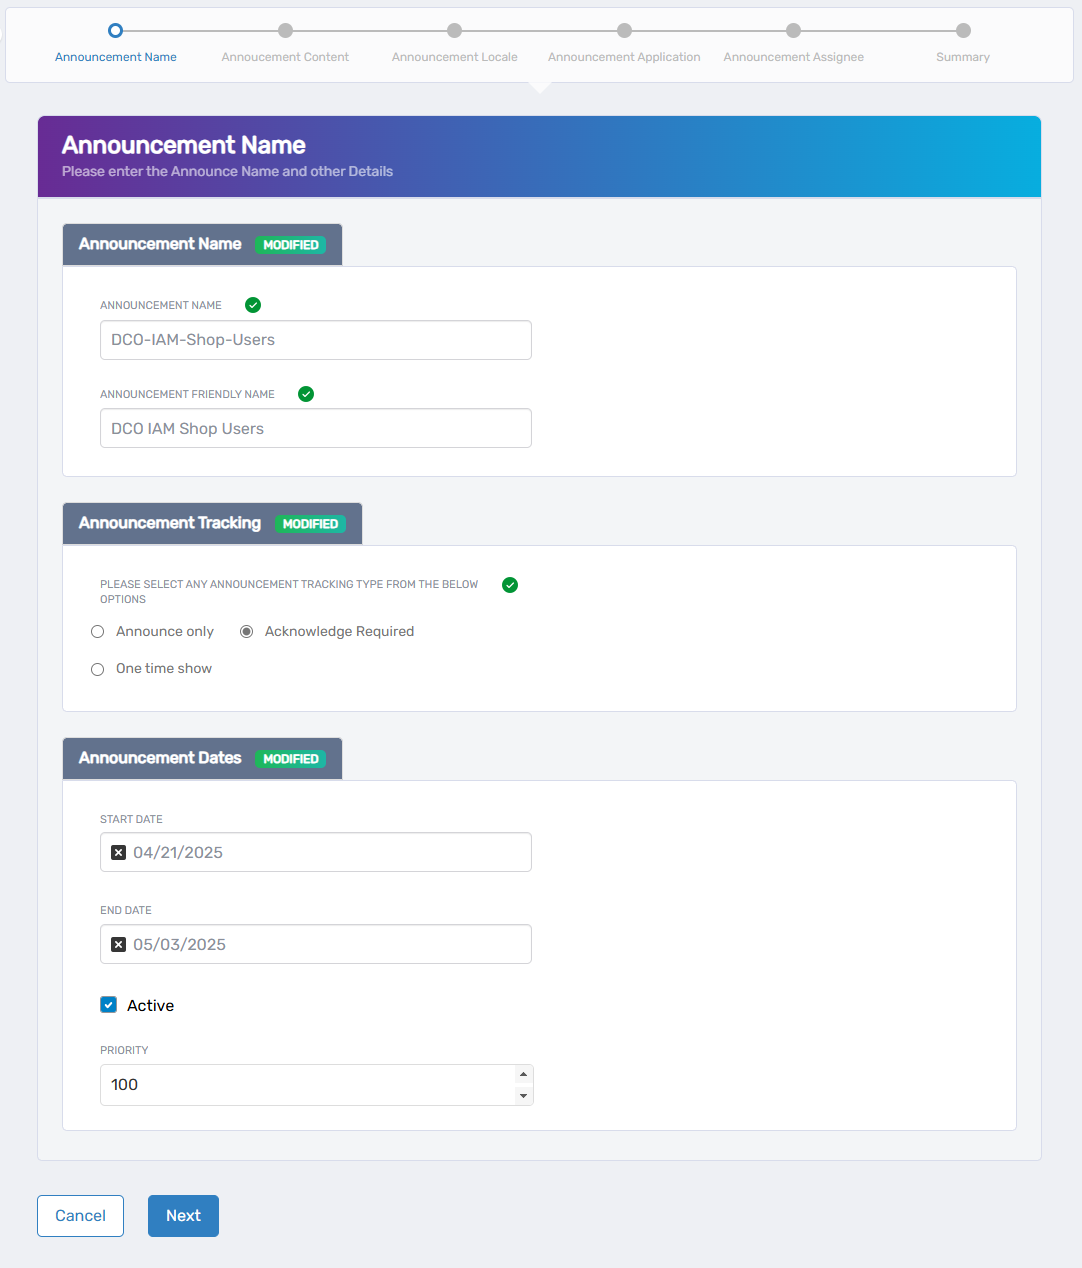
- Click Next to proceed.
Step 3: Add Announcement Content
- Announcement Title – Enter a title for the announcement.
- Announcement Message – Enter the body of the announcement.
- Announcement Type – Select one of the following announcement types, which will determine the icon and background color:
- Alert
- General
- Maintenance - Green background with checkmark
- Warning
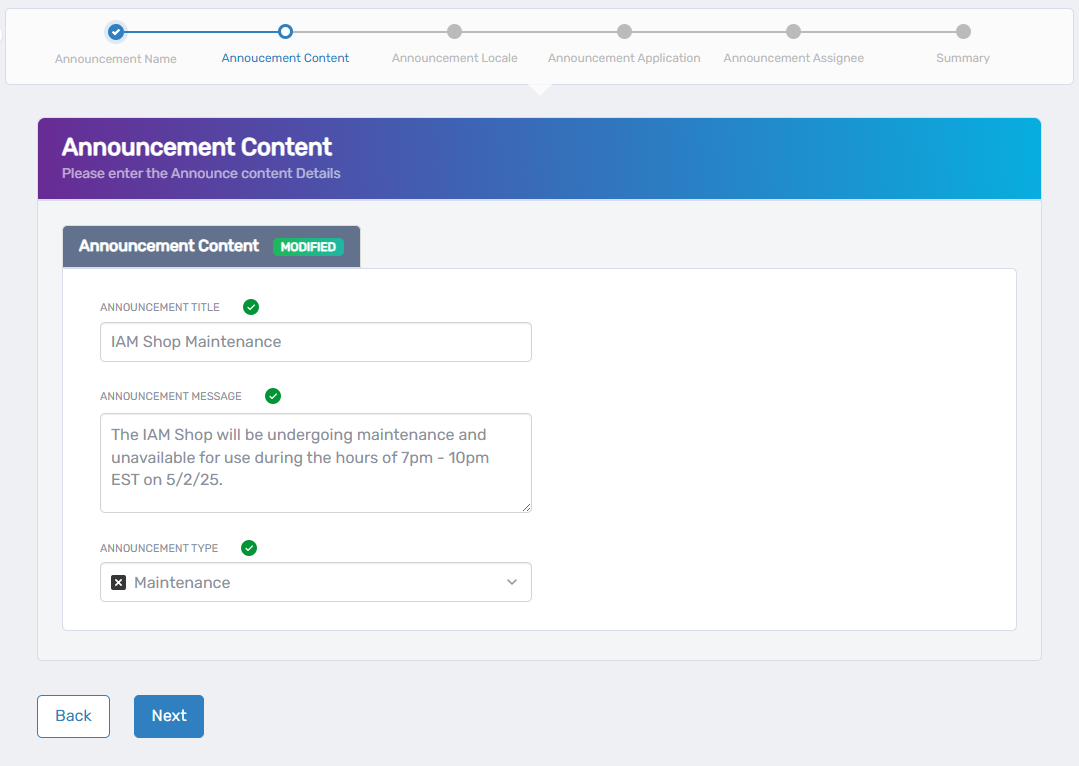
- Click Next to proceed.
Step 4: Announcement Locale
- Select Language – Choose the language for the locale.
- Announcement Locale Key for Title – Enter a locale key for the announcement title.
- Announcement Locale Key for Message – Enter a locale key for the body of the announcement.

- Optionally, click Add New Item to repeat this process for additional locales.
- Click Next to proceed.
Step 5: Select Announcement Application(s)
- Search for the application that the announcement targets.
- Check the box to select the application.
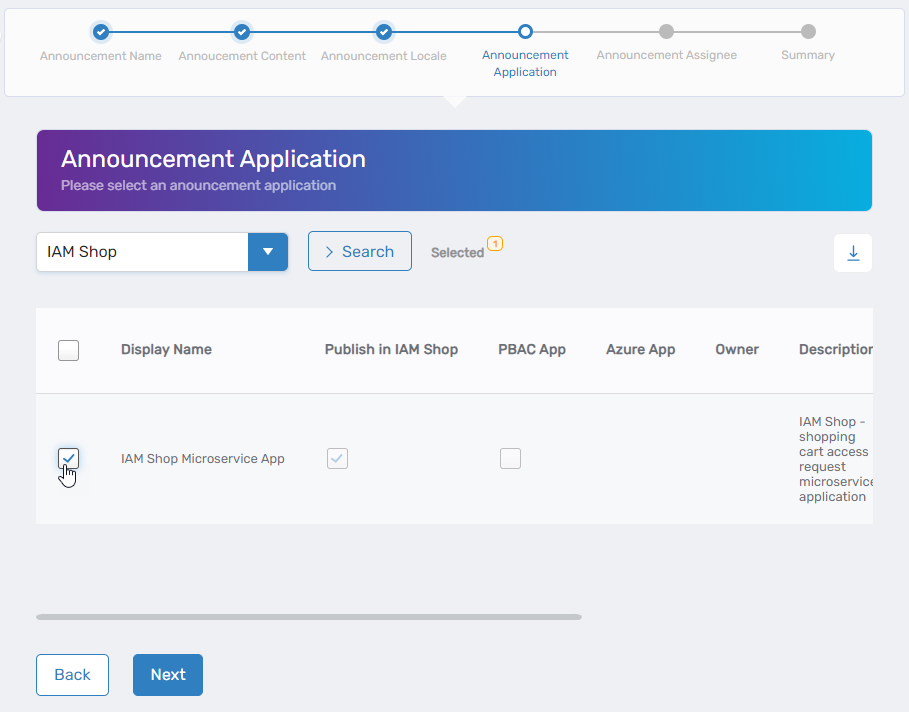
- Repeat as needed to select additional applications.
- Click Next to proceed.
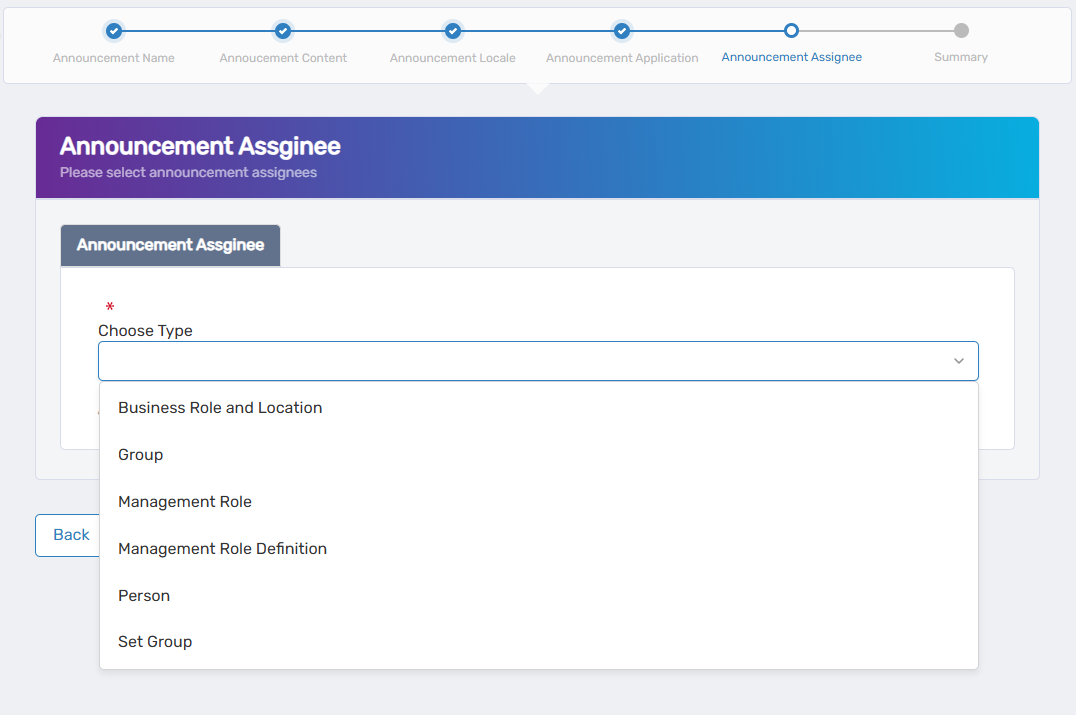
Step 6: Select Announcement Assignees
- Select the assignee type from the Choose Type dropdown. Assignee types include the following:
- Business Role and Location – Targets all users belonging to the specified Business Role and Location.
- Group – Targets all users belonging to the specified group.
- Management Role – Targets all users belonging to the specified Management Role.
- Management Role Definition – Targets all users belonging to Management Roles derived from the specified Management Role Definition.
- Person - Targets a specific person.
- Set Group – Targets all users belonging to the specified Set Group.
- Select the specific Assignee for the Assignee Type chosen in step 1. For example, if you selected Management Role as the Assignee Type, search for and select the target Management Role.
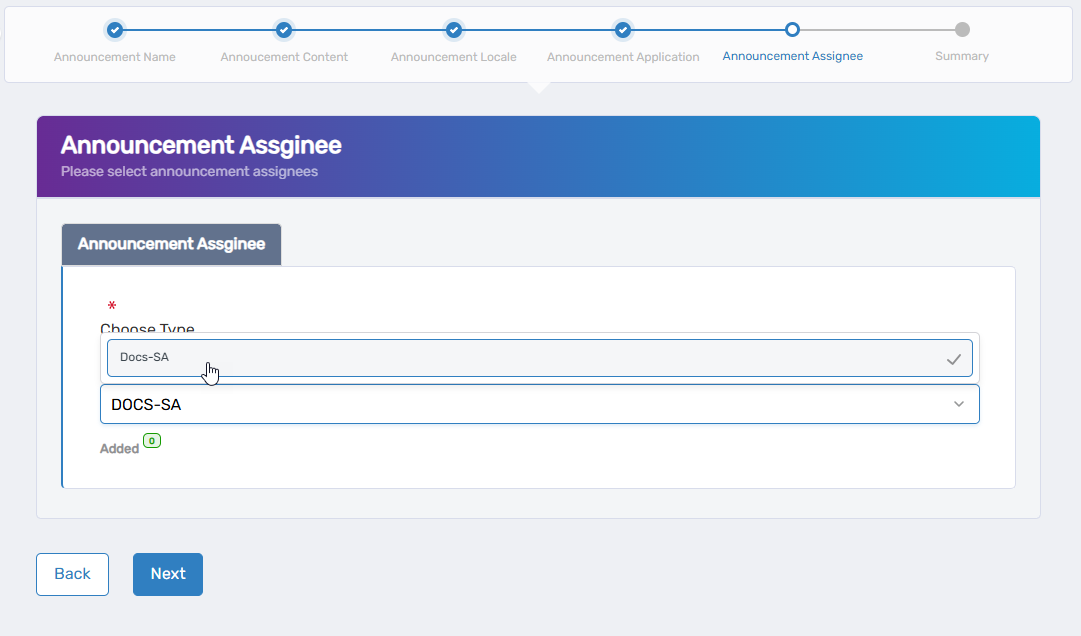
- Repeat steps 1 and 2 to search for and select other recipients as needed. Please note that if you are assigning to different Assignee Types, you need to clear the previous type before selecting the new type.
- Optional: Click the Added flag to review assignees as desired. You can remove an assignee by clicking the delete button.
- Click Next to proceed.
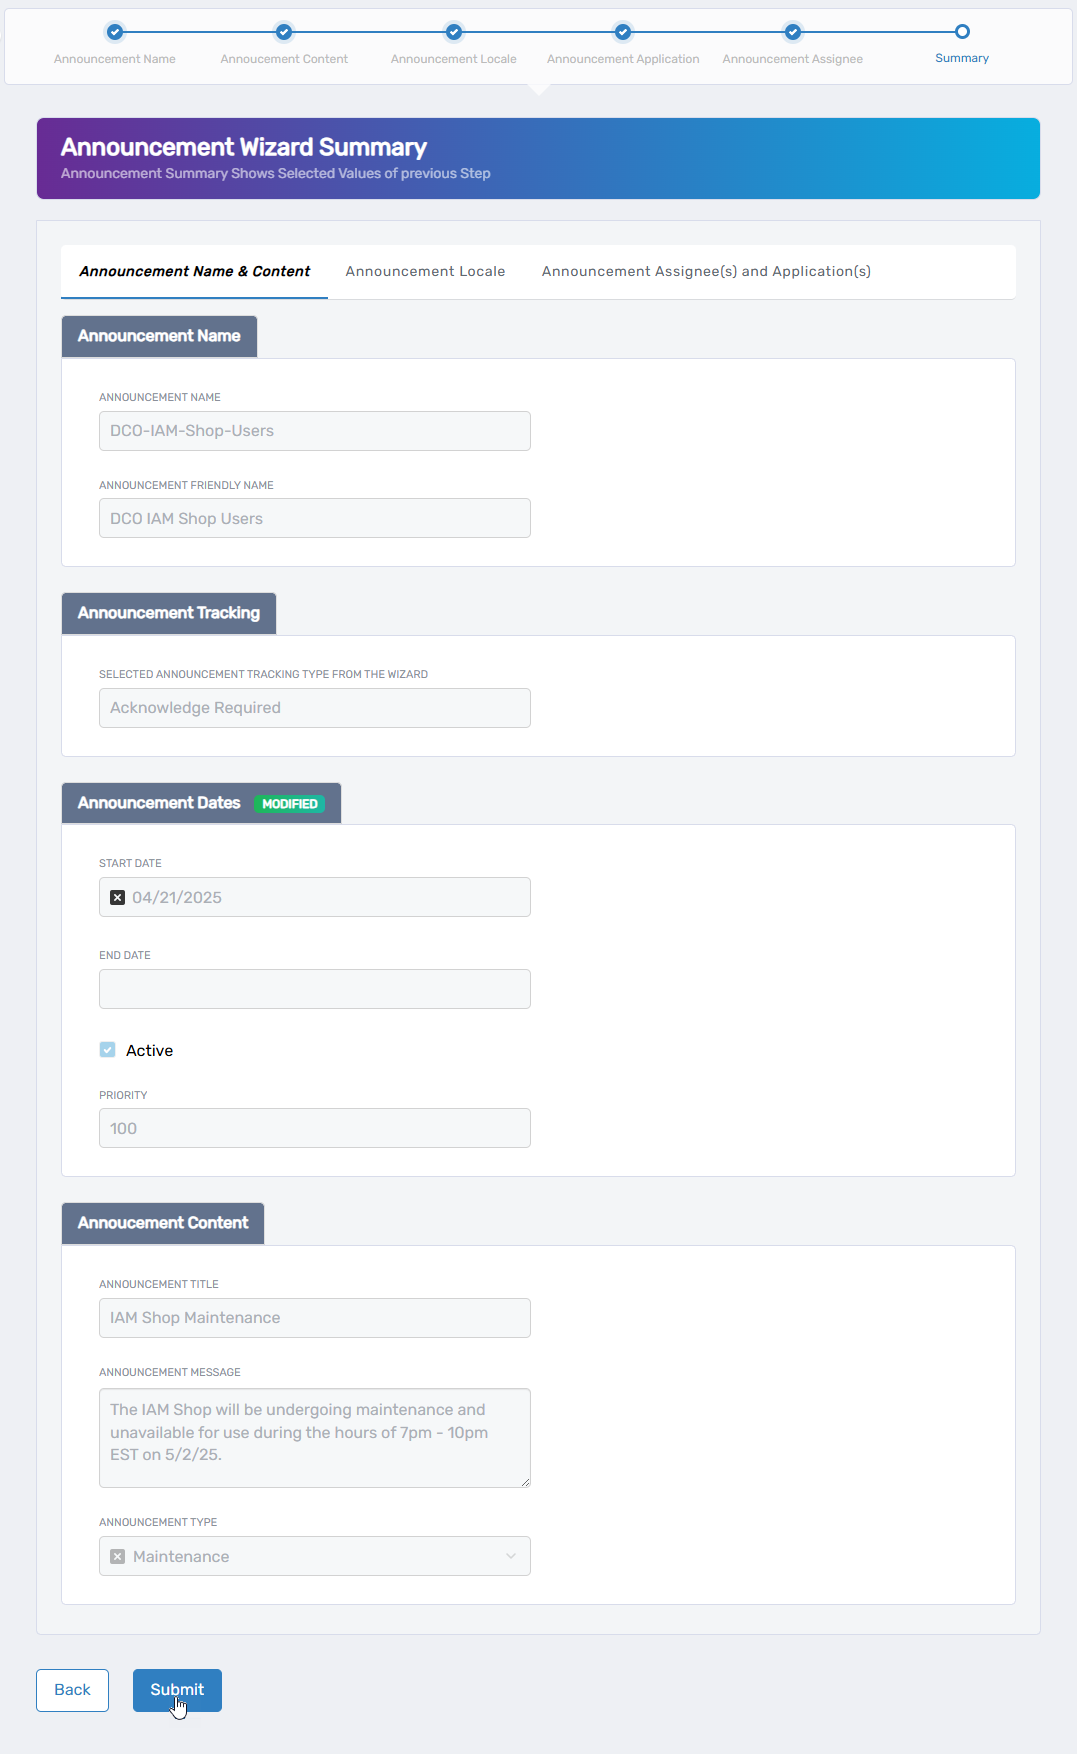
Step 7: Review and Submit
- Review the summary of your announcement details.
- If any revisions are needed, click Back to return to the relevant step.
- Once satisfied, click Submit to create the announcement.
Expected Results
The announcement should be visible to each recipient for the target application. Navigate to the application's URL and log in as a recipient to verify this. You should see the announcement before reaching the application's landing page.
If the announcement requires acknowledgment, users must read and acknowledge the notification before continuing to the target application.