Add Additional Applications to Announcements
After initially creating announcements, you can assign them to additional applications to ensure the announcement reaches all intended recipients across relevant environments. This article demonstrates how to assign an existing announcement to one or more new applications.
Procedure
Step 1: Access the Announcements Page
- Log in to the EmpowerID Web portal as an administrator.
- In the sidebar menu, navigate to Admin > Miscellaneous > Announcements.
Step 2: Select the Target Announcement
- In the Announcements grid, search for the announcement you want to update.
- Click the Name link for the target announcement.
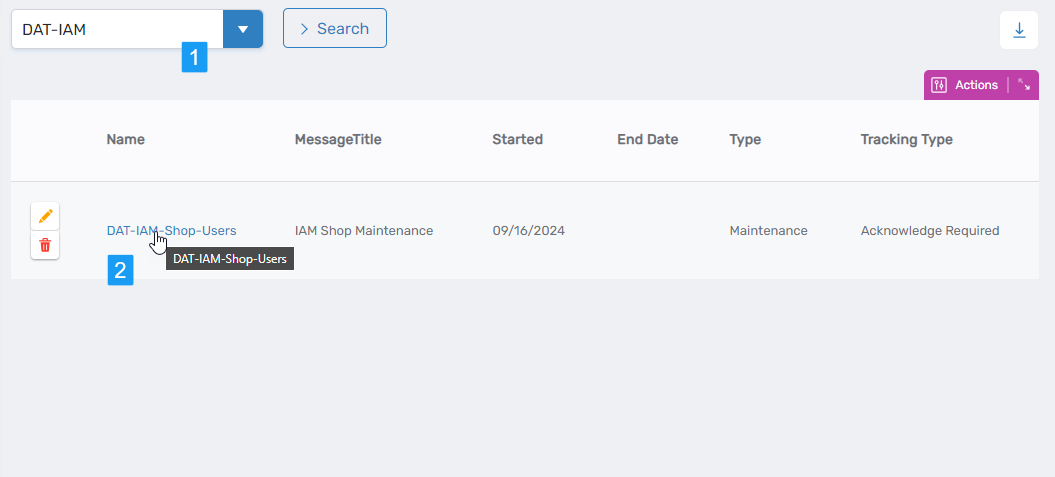
This opens the View One page for the selected announcement.
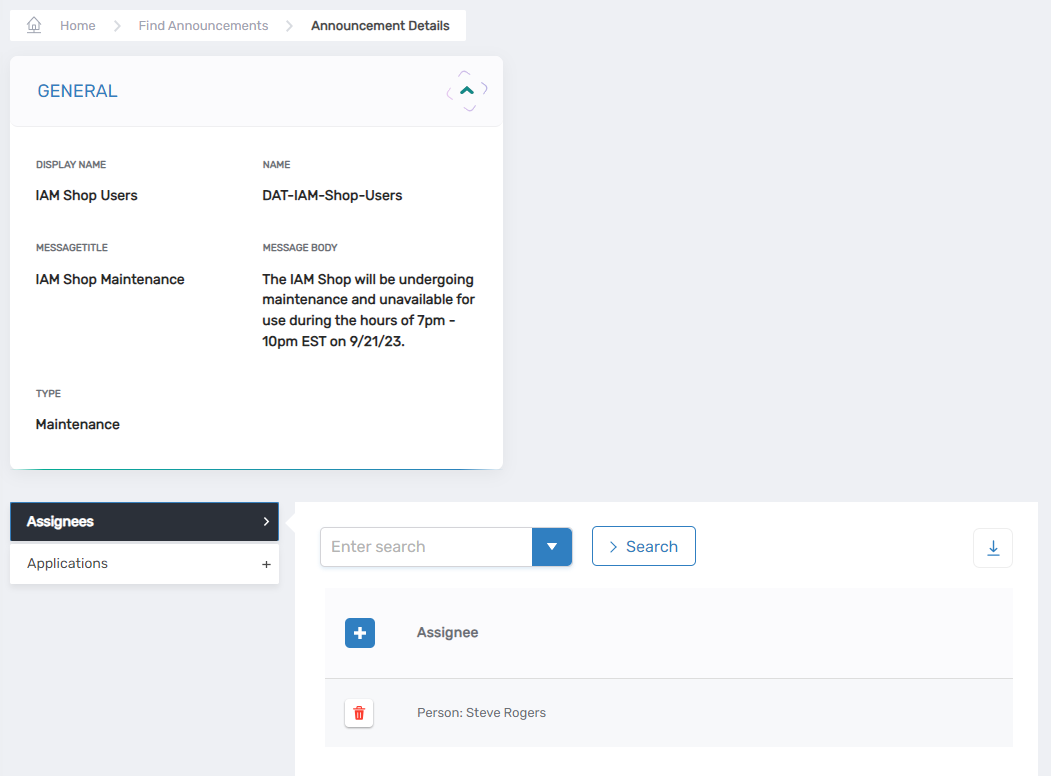
Step 3: Add the New Application
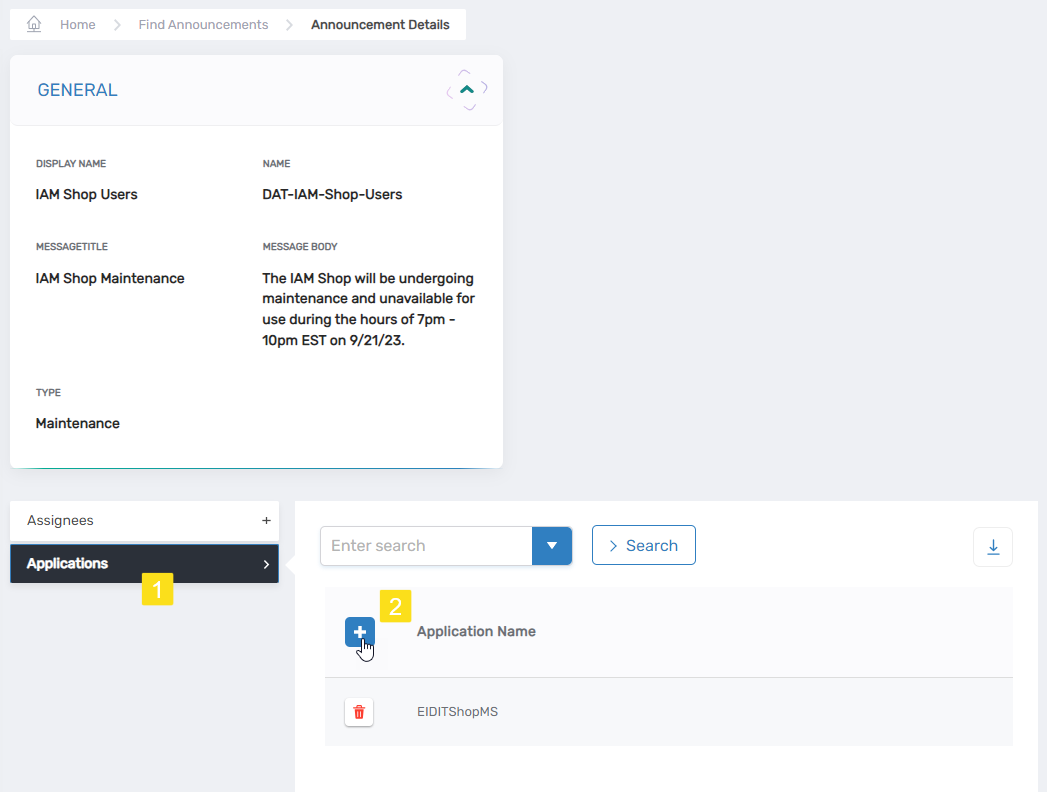
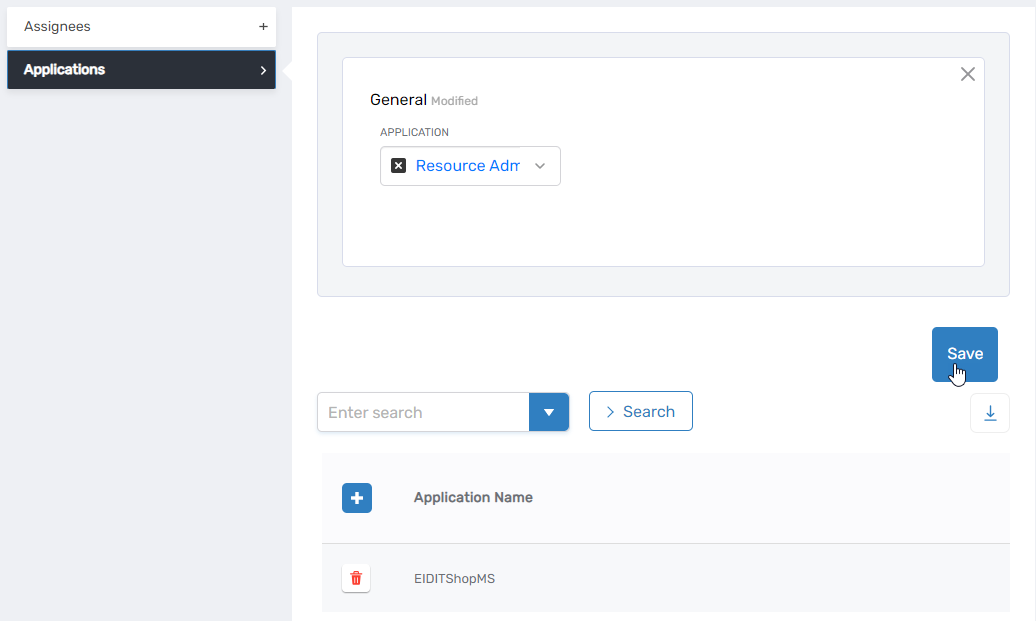
- On the View One page, expand the Applications accordion.
- Click Add New Application.
- In the modal that appears, search for and select the desired application.
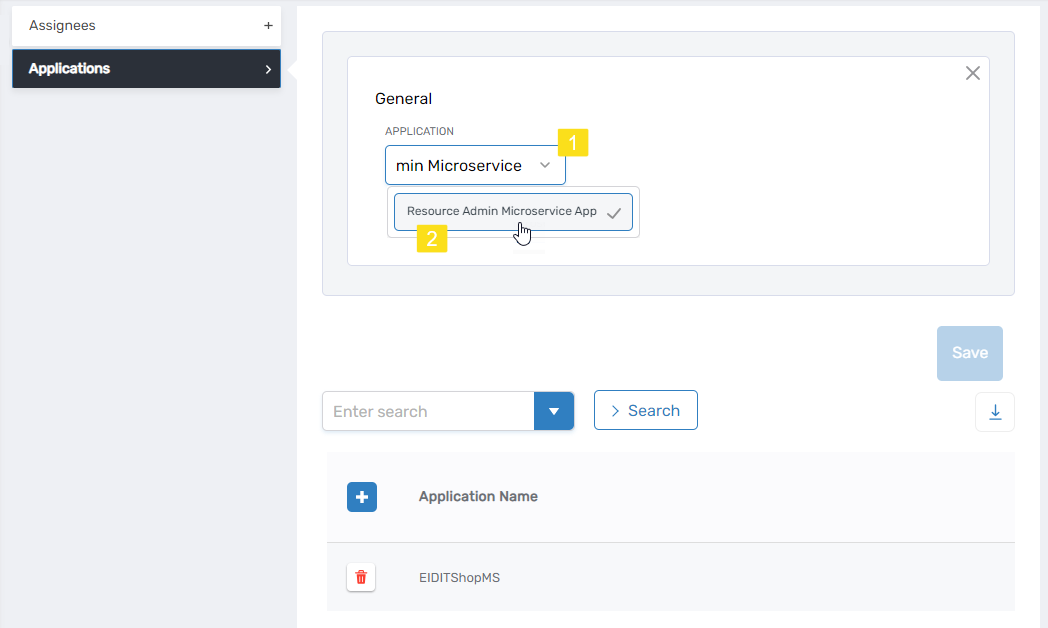
- Click Save.
A confirmation message appears, and the application is now listed in the Applications grid.
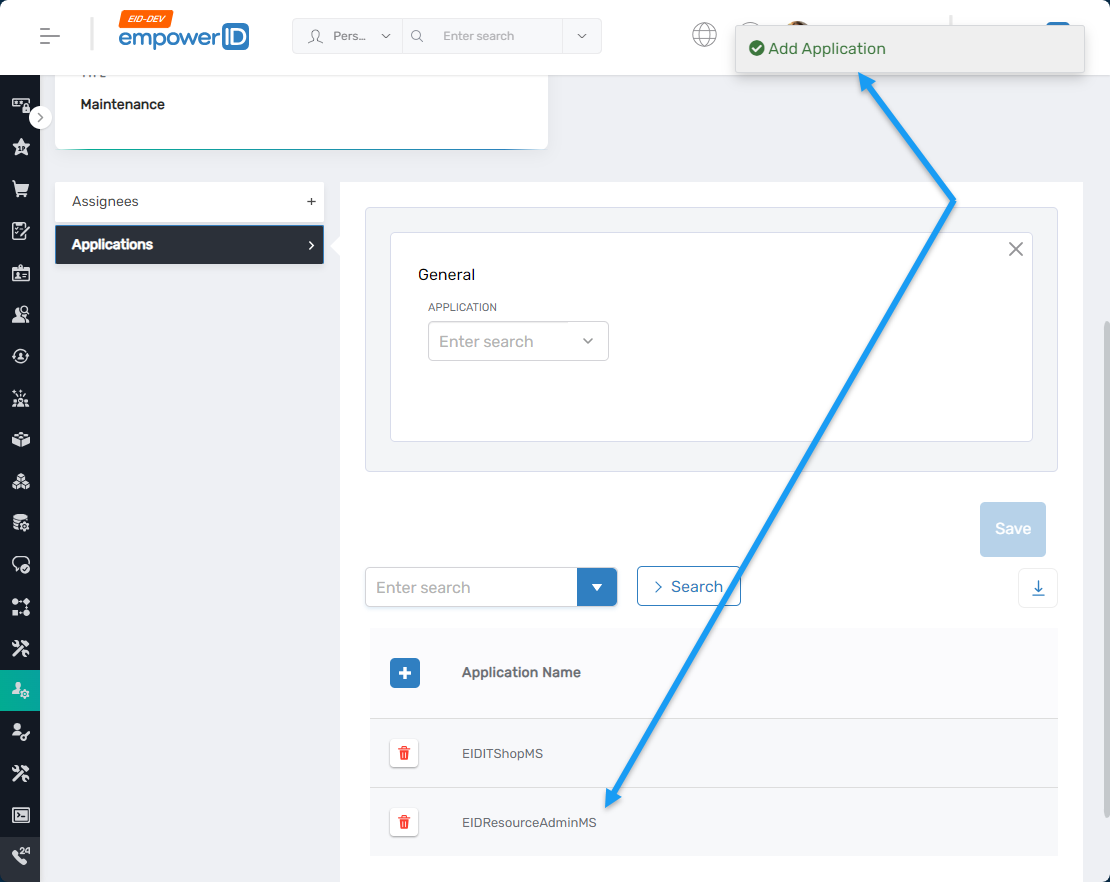
Step 4: Repeat as Needed
Repeat Step 3 to assign additional applications to the announcement if needed.
Expected Results
The announcement will now display to users associated with any of the newly added applications. To confirm:
- Navigate to the application's login URL.
- Log in as a user assigned to the announcement.
- The announcement should appear before the application’s landing page.
Announcement Visibility Note
Announcements are only shown to users who are valid assignees and are accessing the application to which the announcement has been assigned.