Add Additional Assignee Types to Announcements
After creating an announcement, you can assign it to Business Roles and Locations, Management Roles, groups, or Query-Based Collections. This ensures that all users within those structures receive the announcement, making it ideal for notifying large audiences.
This article demonstrates how to assign additional assignees to an existing announcement.
Procedure
Step 1: Access the Announcements Page
- Log in to the EmpowerID portal as an administrator.
- In the sidebar, navigate to Admin > Miscellaneous > Announcements.
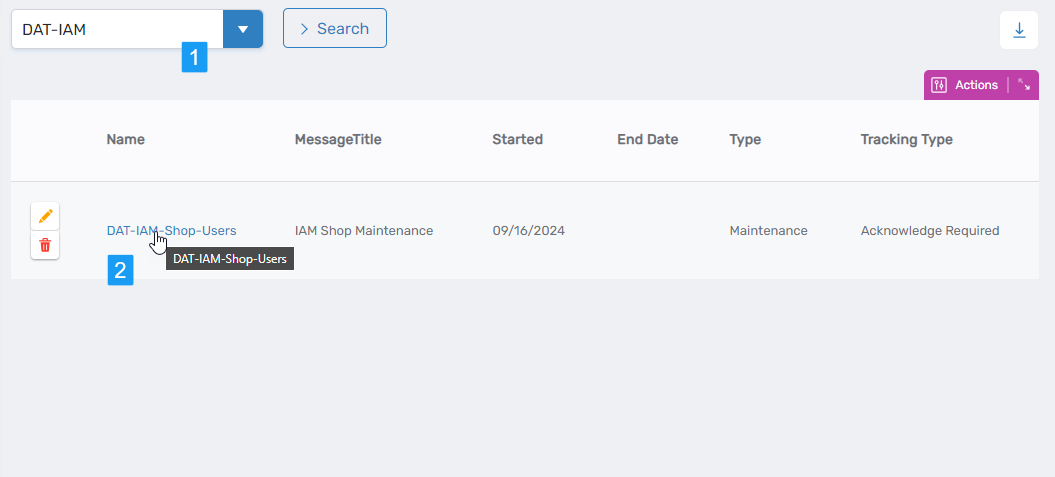
Step 2: Select the Target Announcement
- Search for the announcement you want to update.
- Click the Name link for the announcement.
This opens the View One page for the selected announcement.
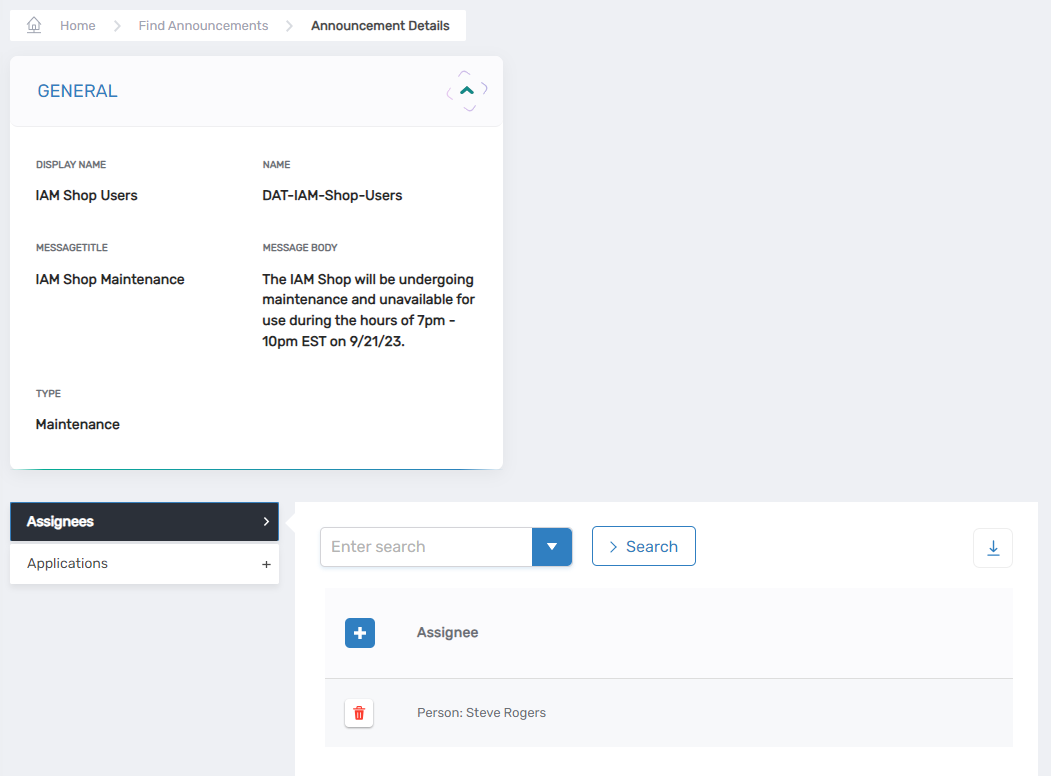
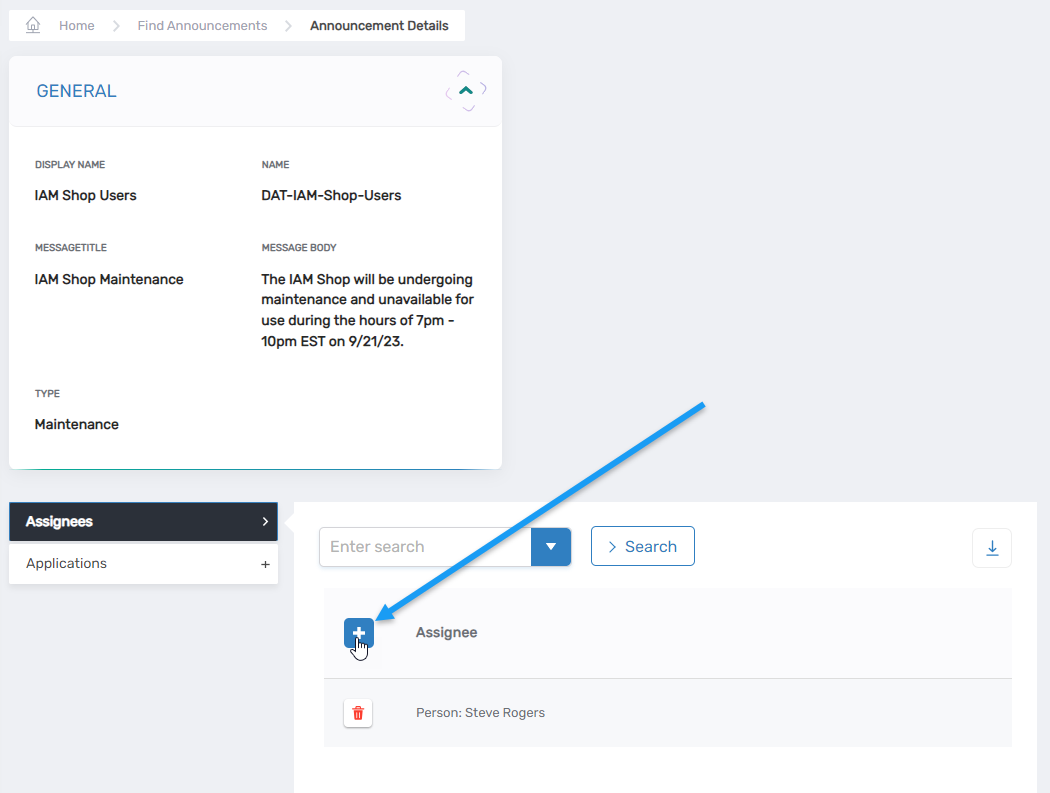
Step 3: Add a New Assignee
- In the Assignees grid, click Add New Assignee.
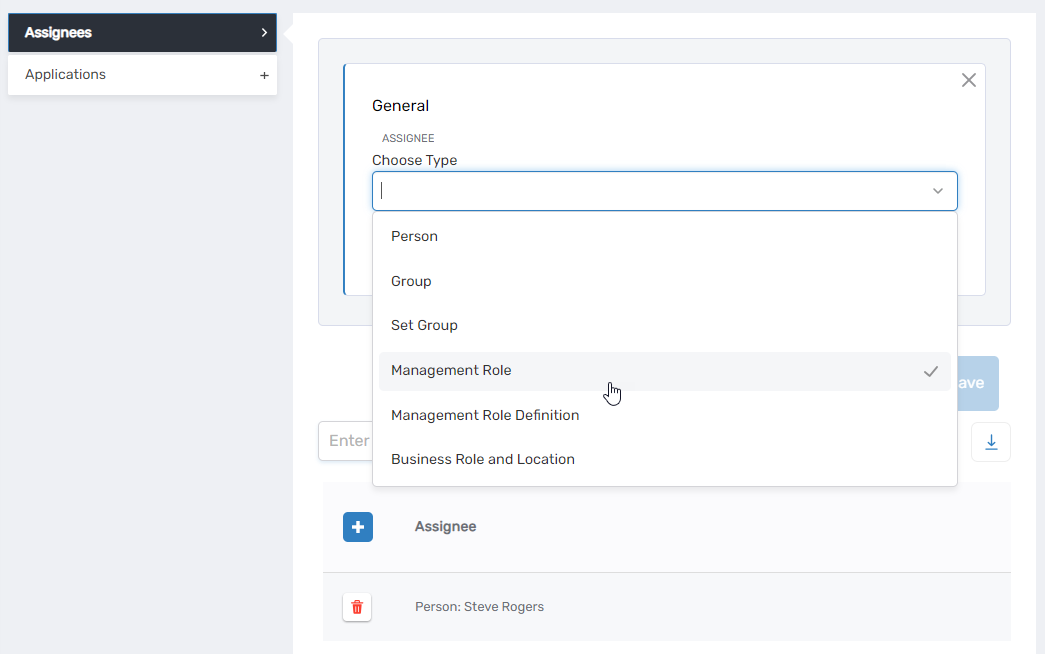
- In the modal, select the desired assignee type:
- Business Role and Location
- Management Role
- Group
- Query-Based Collection
- Search for the specific assignee that matches the selected type.
- Click the tile for that assignee.
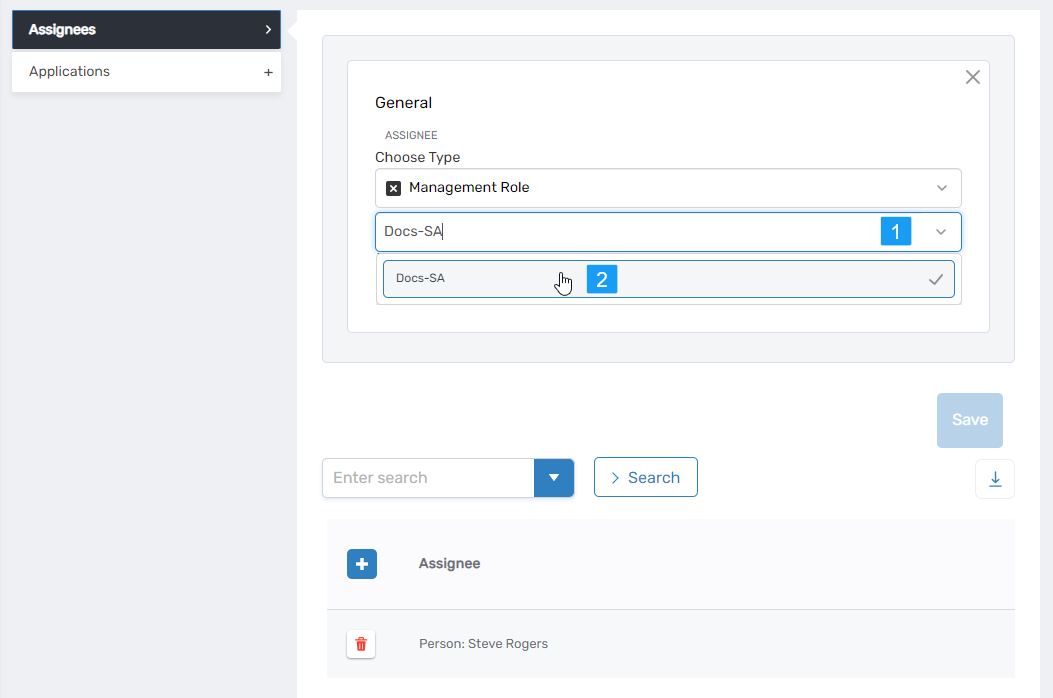
- Click Save.
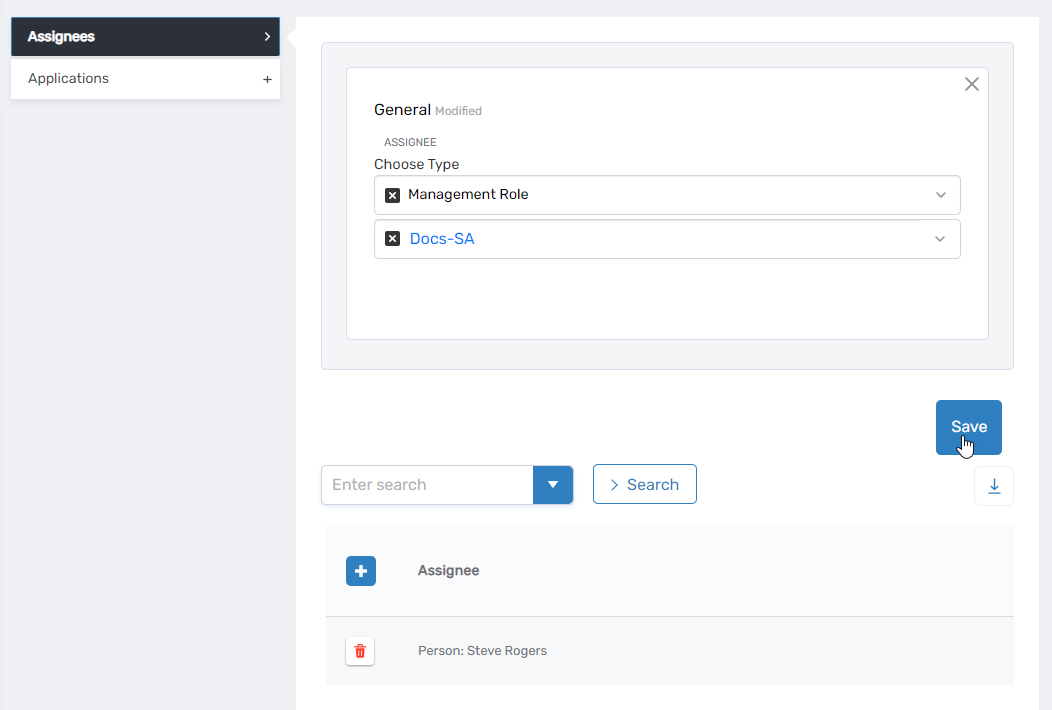
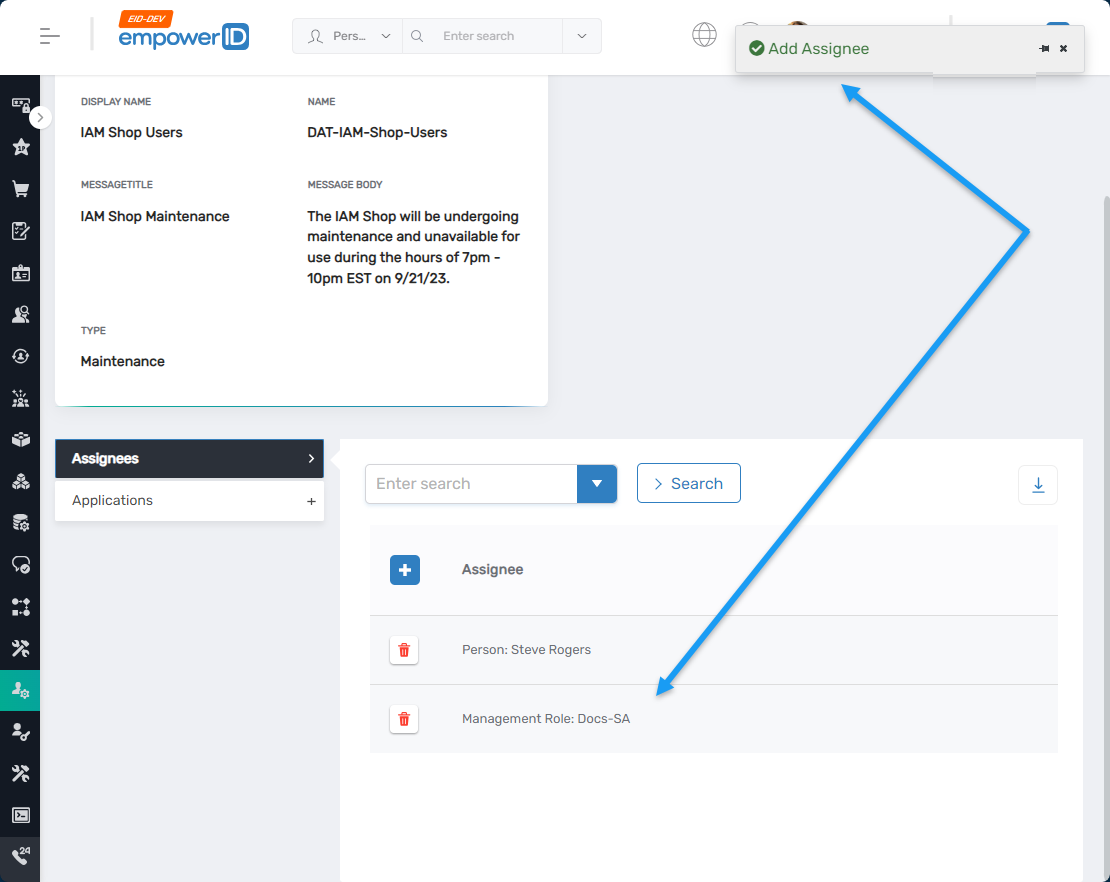
A confirmation message will appear, and the assignee will be listed in the grid.
Step 4: Repeat as Needed
Repeat Step 3 to add additional assignees as required.
Expected Results
Each user who is part of the selected Business Role, Management Role, group, or collection will now receive the announcement for the assigned application. To verify:
- Navigate to the application's URL.
- Log in as a member of the newly added group or role.
- The announcement should appear before the application’s landing page.
Visibility Requirement
Announcements are only displayed if the user is both an assignee and accessing an application to which the announcement has been assigned.