Create a Simple Page with Advanced Search
The Page Designer enables you to create custom UI pages for the EmpowerID web interface using a visual, code-free approach. This tutorial shows you how to create a simple page with a data grid and advanced search functionality.
What You'll Build
In this tutorial, you'll create an Account Usage page that displays:
- A searchable grid of account data
- Multiple columns with different data types
- An advanced search panel with custom search fields
- Pagination for large datasets
Prerequisites
- Workflow Studio installed and configured
- Access to create UI pages in your target package
- Basic understanding of EmpowerID data concepts (accounts, people, etc.)
Create the Page
- Open Workflow Studio and select the Solution Explorer.
- Click the Workspace tab.
- Right-click the package where you want to create the page.
- Select Add New Item > User Interface > UI Page.

The new page is stored in the selected package under User Interface > UI Pages.
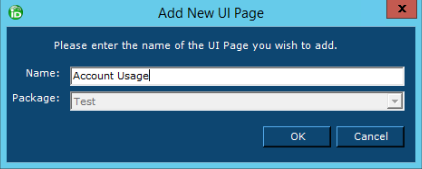
- In the Add New UI Page dialog, enter a name for the page (e.g.,
AccountUsage). - Click OK.
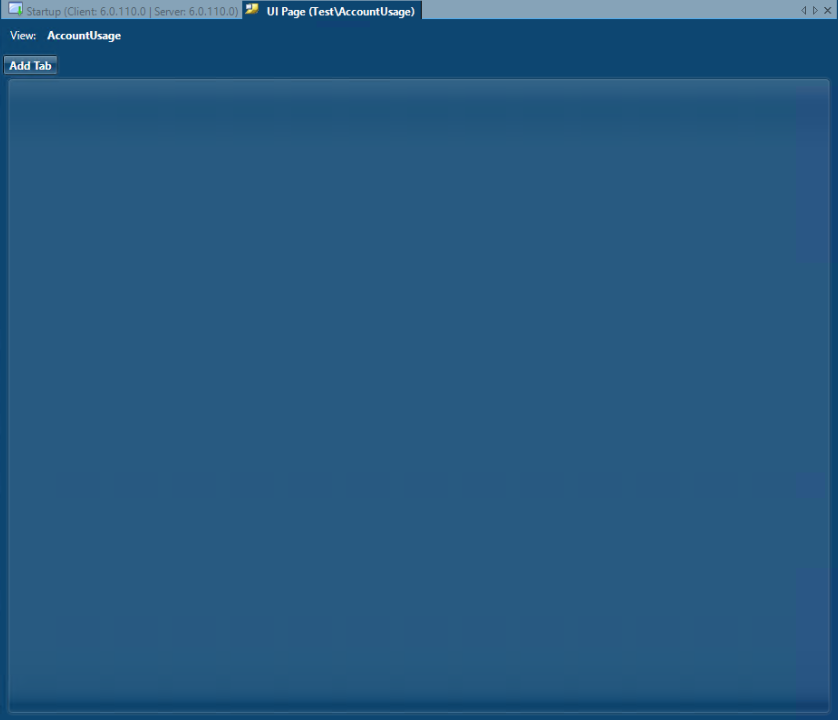
 The Page Designer opens with an empty page.
Add a Tab
-
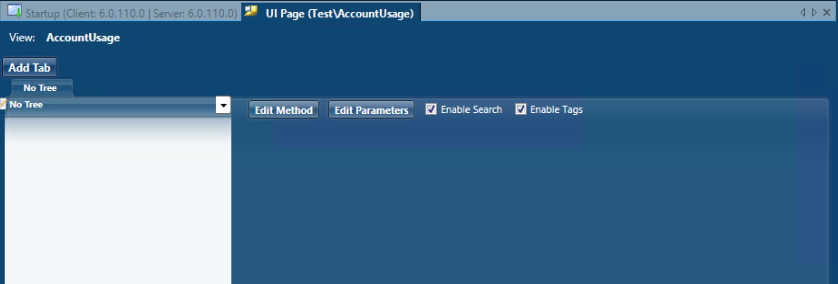
Click Add Tab. A new tab appears named No Tree by default, with controls along the top.
-
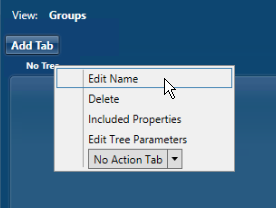
Right-click the tab name and select Edit Name.
-
Enter a descriptive name that matches your page purpose (e.g.,
Account Usage). -
Click OK.

-
Leave the Tree dropdown set to No Tree for this simple page.
tipFor information about adding trees to pages, see Create a Multi-Tab Page.
Configure the Data Source
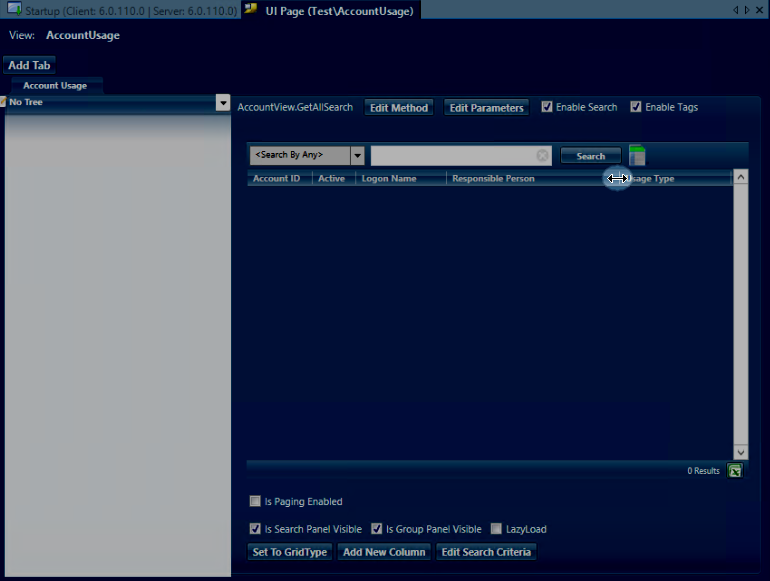
- Click Edit Method in the controls along the top of the tab.
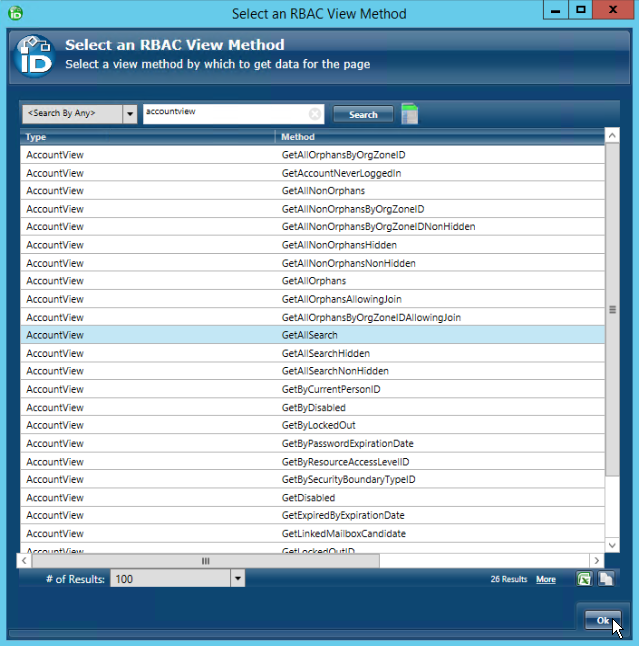
- In the Select an RBAC View Method dialog, click Search to see all available methods.
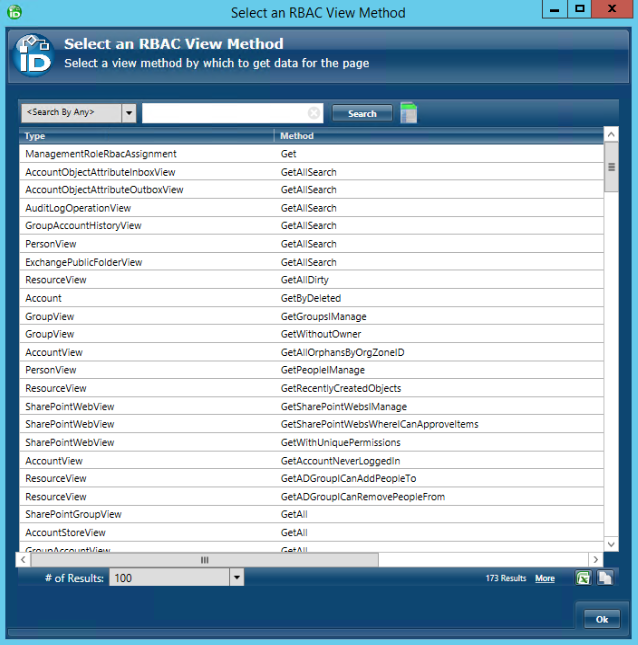
- To narrow the results, enter a search term (e.g.,
AccountViewfor account-related data). - Click Search.
- Select the appropriate method for your data (e.g., GetAllSearch).
- Click OK.
 The method name now appears to the left of the Edit Method button, and additional controls appear along the bottom of the grid.
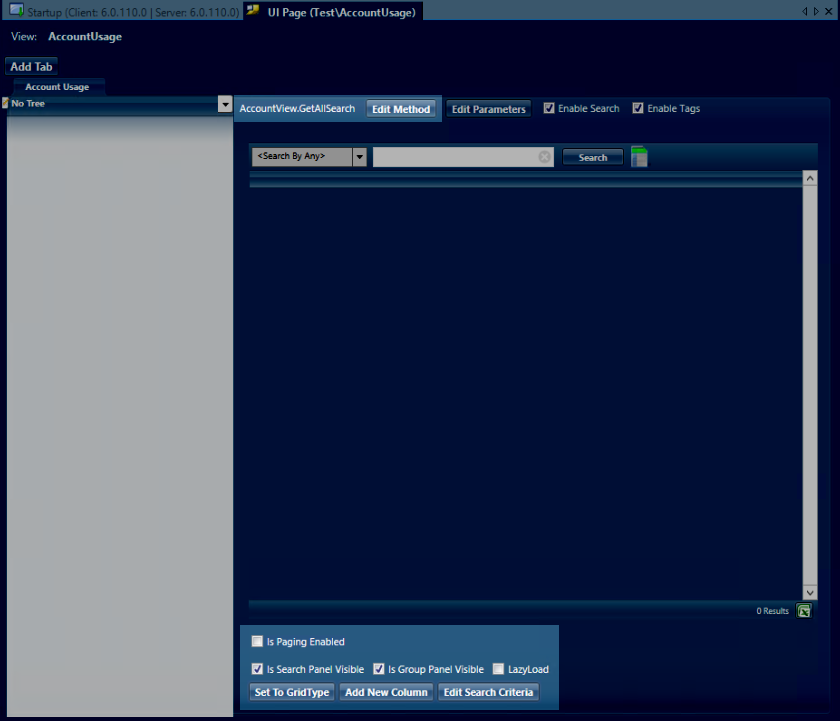
If you want to replicate an existing grid with predefined columns, click Set To GridType and select the grid you want. This replaces any columns you've already added.
For this tutorial, leave the default value of Custom.
Enable Pagination
Since the GetAllSearch method can return large amounts of data, enable pagination to improve page load times:
- Below the grid, select the Is Paging Enabled checkbox.
Add Grid Columns
Add columns to display the data you want users to see:
- Click Add New Column.
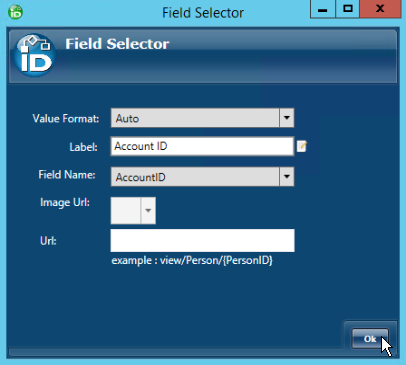
- In the Field Selector dialog, configure the first column:
- Field Name:
AccountID - Label:
Account ID - Value Format: (leave as default)
- Field Name:
- Click OK.
 The column is added to the grid.
Right-click any column to edit or delete it.
-
Repeat the process to add these additional columns:
Active Column:
- Field Name:
Active - Label:
Active - Value Format:
BooleanCheckBox
Logon Name Column (with hyperlink):
- Field Name:
LogonName - Label:
Logon Name - Value Format:
Hyperlink - URL:
view/Account/{AccountID}
Required PropertyTo enable the hyperlink, you must include the property on the tab:
- Right-click the tab above the tree pane
- Select Included Properties
- Scroll down and check LogonName
Responsible Person Column (with hyperlink):
- Field Name:
OwnerFriendlyName - Label:
Responsible Person - Value Format:
Hyperlink - URL:
view/Person/{PersonID}
Usage Type Column:
- Field Name:
AccountUsageTypeFriendlyName - Label:
Usage Type
- Field Name:
-
Use your mouse to resize column widths as needed.
Add Advanced Search
The basic search box is enabled by default at the top of the page. To add custom search fields:
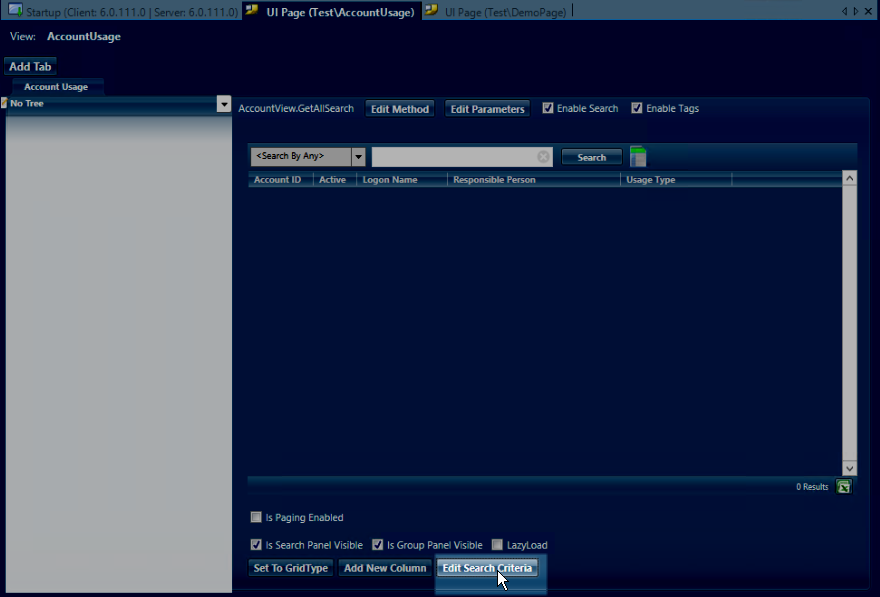
- Below the grid, click the Edit Search Criteria button.
- In the Edit Search Details dialog, select Is Advanced Search Enabled at the bottom left.
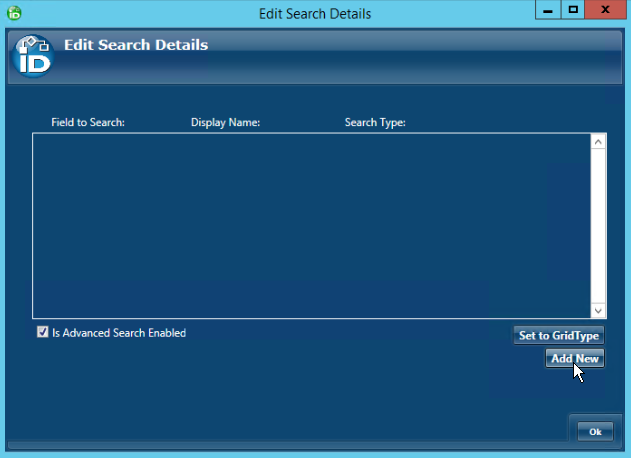
- Click Add New to add a search field.
- Configure the first search field:
- Field to Search: Select a field from the dropdown
- Display Name: Enter the label users will see
- Search Type: Select the data type (e.g., String, Date, Boolean)
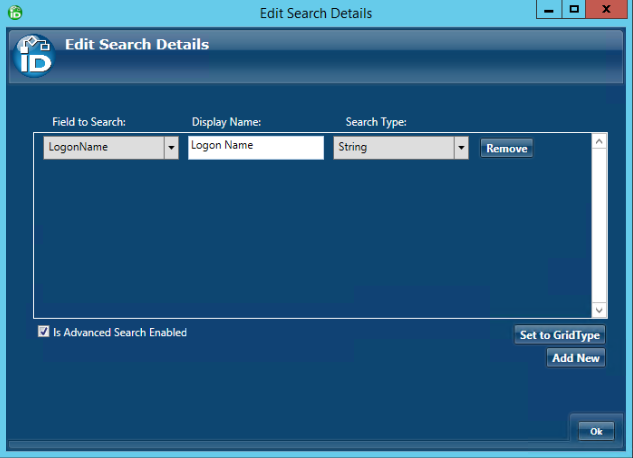
- Repeat for each field you want users to search by.
If you want to use the same search fields as an existing EmpowerID page, click Set to GridType and select the grid with the desired search configuration.
- Click OK when finished adding search fields.
Include Search Properties
For search fields to function, you must include them as properties on the tab:
- Right-click the tab.
- Select Included Properties.
- Check each field you added to the advanced search.
Properties that are included show a checkmark in the list.
Publish the Page
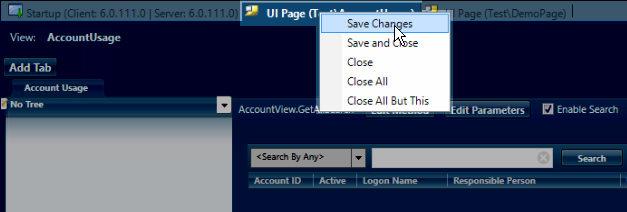
- Right-click the UI Page tab and select Save Changes.
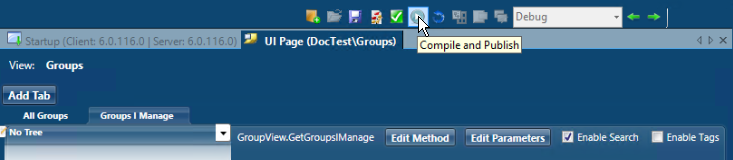
- Click the Compile and Publish button above the UI Page tab.
- In the UI Page Publishing wizard, click Next.
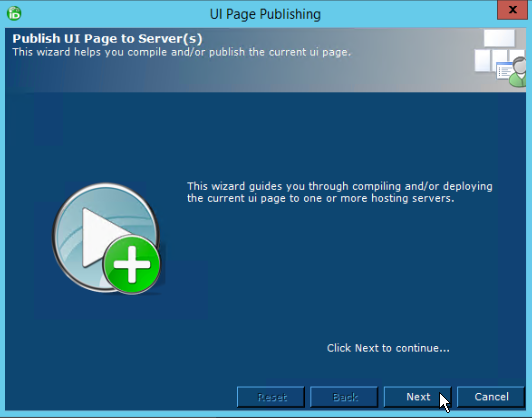
- Select the server hosts where you want to publish the page.
The default host is your current server.

- Click Next.
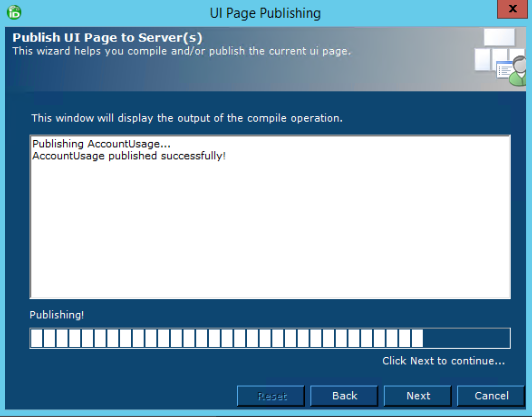
- When the success message appears, click OK.
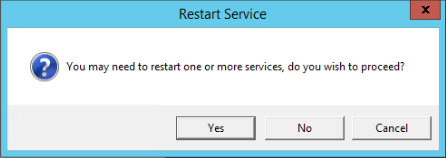
- When prompted to restart services, click No.
You do not need to restart services to view new or updated pages.
View the Page
To access your newly created page:
-
Open Microsoft SQL Server Management Studio.
-
In the Object Explorer, expand Databases and select EmpowerID.
-
Click New Query in the toolbar.
-
Execute the following query:
SELECT * FROM RBACView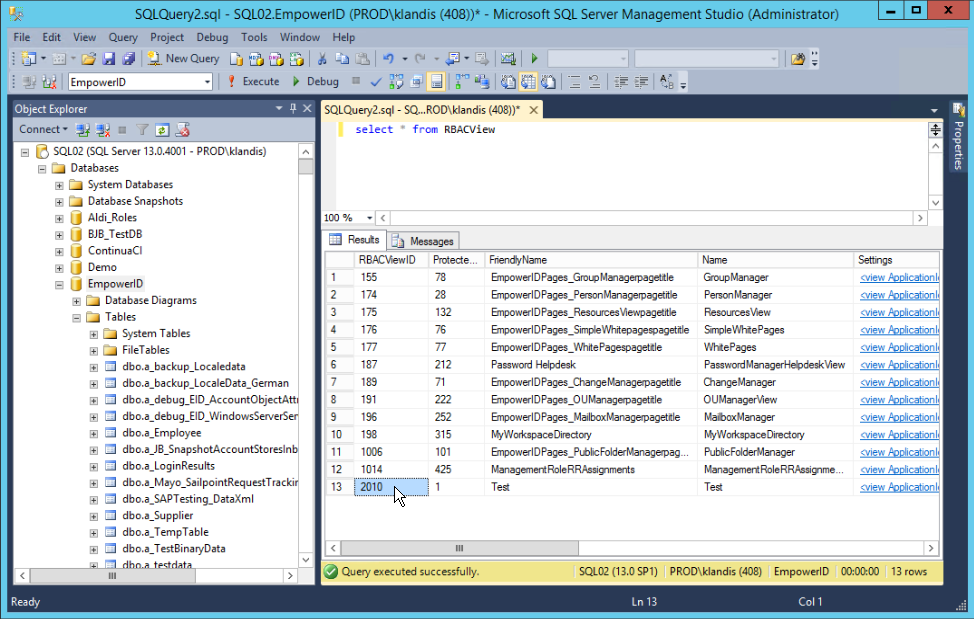
-
In the results, find the row for your package.
-
Note the RBACViewID value for your page.
-
In a browser where you're logged into EmpowerID, navigate to:
https://your-server.com/UI/#common/pages/view/YOUR_RBACVIEWIDReplace
your-server.comwith your EmpowerID server URL andYOUR_RBACVIEWIDwith the ID from the database query.
Your custom page loads with the grid, columns, and advanced search functionality you configured.
Related Topics
- Add multiple tabs to your pages - see Create a Multi-Tab Page