Business Rules
Business Rules are logical expressions, based on Boolean values, which control how workflows branch to different paths based on conditions. When you assign a Business Rule to a connection between activities, you define the criteria that determine whether the workflow follows that particular path.
When to Use Business Rules
In the Your First Workflow tutorial, you created a linear workflow where every activity executed in sequence: Start → Lookup → Form → Operation → End.
However, many workflows require different paths based on conditions. For example:
- Execute different operations based on the selected person's department
- Show different forms based on user role
- Skip activities when certain conditions are met
- Route approvals to different managers based on business logic
Business Rules enable these conditional workflows by evaluating Boolean expressions and directing the workflow down the appropriate path.
What You'll Learn
In this tutorial, you will:
- Create Business Rules in the Workflow Designer
- Write Boolean logic to control workflow branching
- Apply Business Rules to activity connection lines
- Configure true and false path conditions
- Understand visual indicators for rule evaluation
Prerequisites
- Complete the Your First Workflow tutorial
- Familiarity with basic C# Boolean expressions
Visual Indicators for Business Rules
Before diving into the steps, understand how Workflow Studio visually indicates rule evaluation:
- Blue lines indicate the path taken when the business rule evaluates to true
- Orange lines indicate the path taken when the business rule evaluates to false
- Black lines indicate no business rule is applied to that connection
Add Business Rules to Workflows
Step 1: Create the Business Rule
- Right-click anywhere on the white space of a workflow open in the Workflow Designer and select Workflow Business Rules from the context menu.

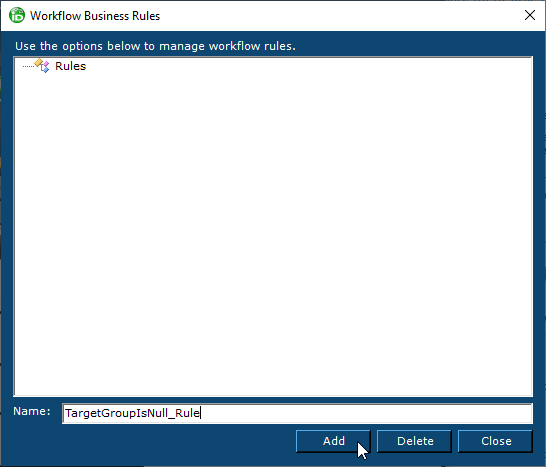
- Enter a name for the Business Rule in the Workflow Business Rules window that opens and click the Add button.
- Double-click the new rule to create an event handler for it.
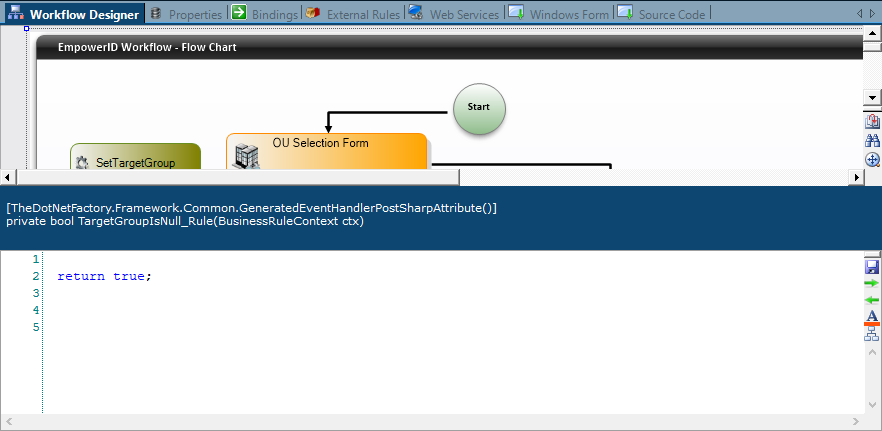
Step 2: Write the Rule Logic
In the C# Editor that opens, add your Boolean logic. Here's an example that checks if a person's department matches a specific value:
bool canProceed = false;

// Example: Check if the target person is from the IT department
if (this.CurrentWorkflow.TargetPerson.Department == "IT")
{
    canProceed = true;
}
else
{
    canProceed = false;
}

return canProceed;
This example builds on the HelloWorld workflow from the First Workflow tutorial, using the TargetPerson property you created there.
Other common conditions:
// Check multiple conditions
if (this.CurrentWorkflow.TargetPerson.Department == "IT" &&
    this.CurrentWorkflow.TargetPerson.JobTitle == "Manager")
{
    canProceed = true;
}

// Check if a value exists
if (!string.IsNullOrEmpty(this.CurrentWorkflow.TargetPerson.StreetAddress))
{
    canProceed = true;
}
Apply Rule to Activity Lines
Once you've created a Business Rule, apply it to connections between activities to control workflow branching.
Step 1: Select the First Path
-
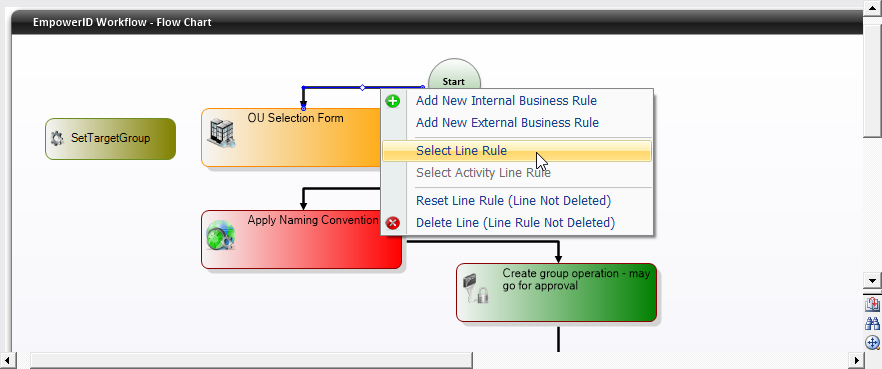
Right-click one of the lines proceeding from an activity where branching occurs and choose Select Line Rule from the context menu.
-
In the Select Rule window that appears, choose the desired rule from the Rule drop-down list.
-
Decide which condition this path represents:
- Leave "If Rule Not True" unchecked if you want the workflow to follow this path when the rule evaluates to true
- Check "If Rule Not True" if you want the workflow to follow this path when the rule evaluates to false

-
Click OK to close the Select Rule window.
Step 2: Select the Alternate Path
- Right-click the second line originating from the same activity.
- Select the same rule from the Rule drop-down list.
- Set the "If Rule Not True" option to the opposite of what you set for the first line:
- If you left it unchecked for the first line, check it for this line
- If you checked it for the first line, leave it unchecked for this line
This ensures that the workflow takes one path when the condition is true and the other path when false.
Step 3: Verify Visual Indicators
After applying the Business Rules, the connection lines change color to indicate their condition:
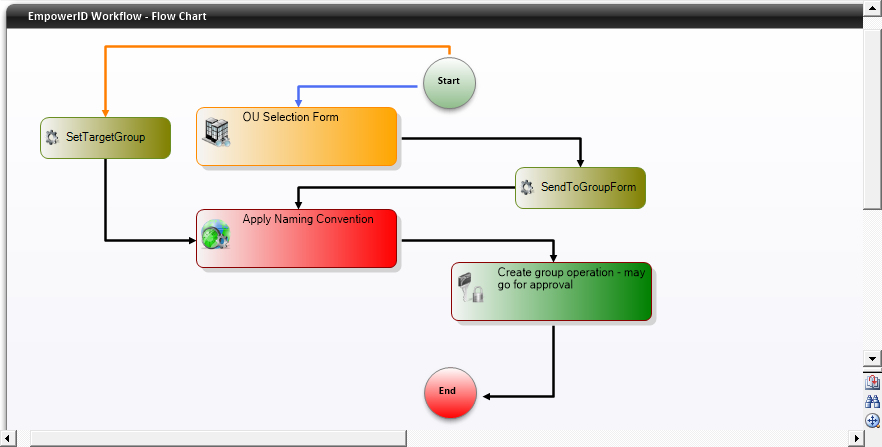
- Blue lines = Rule evaluates to true
- Orange lines = Rule evaluates to false
- Black lines = No rule applied
While this tutorial demonstrates a simple true/false branching scenario (the most common case), workflows can have more than two branches from a single activity. Each branch can have its own Business Rule with different conditions.
Example Workflow with Business Rules
Building on the HelloWorld workflow from the First Workflow tutorial, here's how you might add conditional logic:
Start → Lookup Person → Check Department Rule
                              ├─ (Department = "IT") → IT-specific Form → Update → End
                              └─ (Department ≠ "IT") → Standard Form → Update → End
This workflow shows different forms based on the person's department, demonstrating how Business Rules enable conditional workflows.
Related Topics
- Your First Workflow - Build the foundation workflow this tutorial references
- Understanding Activities - Learn about different activity types
- Working with Forms - Learn form design techniques