Creating Forms
This tutorial demonstrates how to create User Input and User Decision forms in Workflow Studio. You will build a Leave Request form for collecting user input and an Approval form for routing decisions to approvers. For conceptual information about forms, form types, and components, see About Forms.
What You'll Learn
In this tutorial, you will:
- Create a User Input form for collecting leave request information
- Add primitive components (DateTime, MultiLineString) to forms
- Configure form component properties and layout
- Create a User Decision form based on an existing User Input form
- Add RBAC components to display Person attributes
- Configure read-only fields for approval forms
- Add approval decision buttons to User Decision forms
- Publish forms to make them available as workflow activities
Prerequisites
- Complete the Your First Workflow tutorial
- Understand form components from the About Forms article
Create User Input Form
User Input forms collect information from users. In this example, you'll create a form that allows employees to request leave by providing start dates, end dates, and reasons.
-
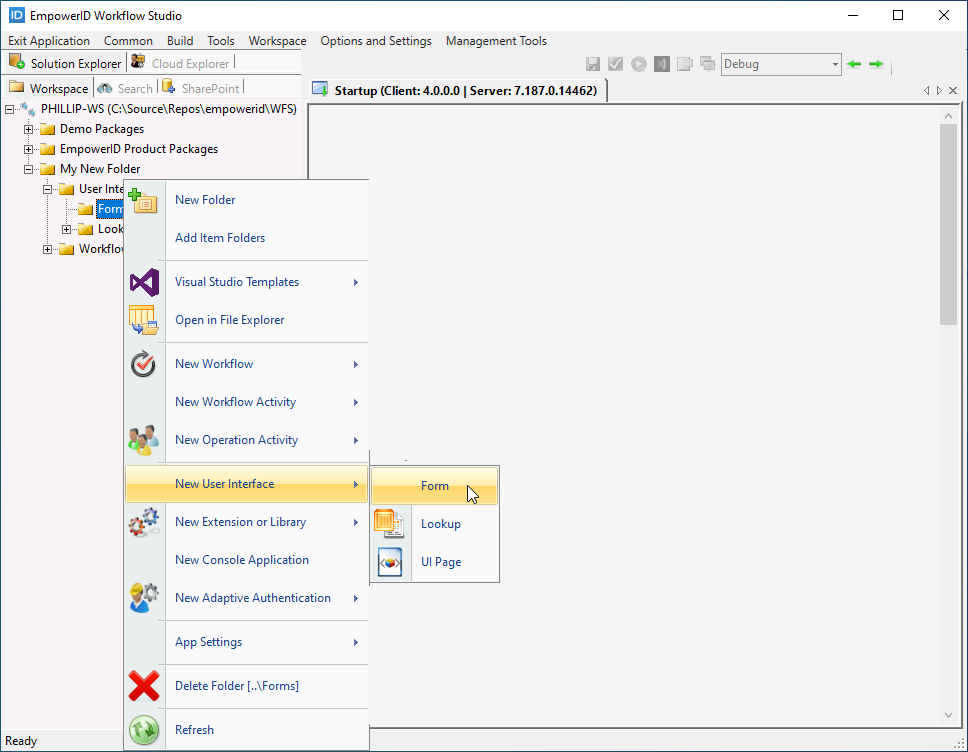
In the Workspace tree of Solution Explorer, right-click the Package node in which you want to create the form and select New User Interface > Form from the context menu.
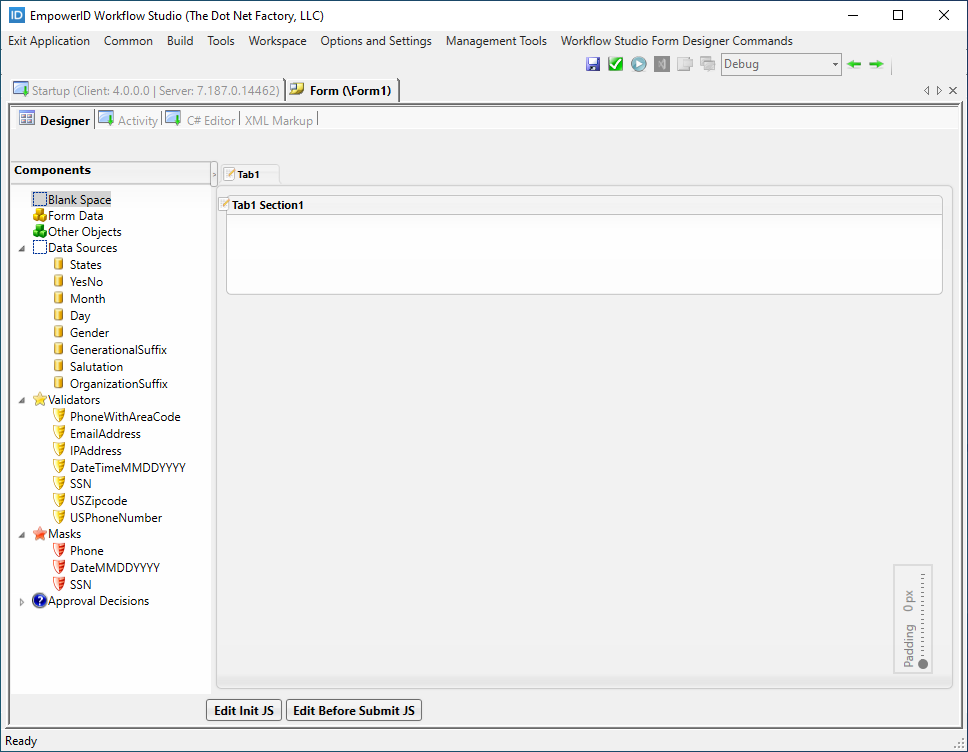
 This opens the form with the default tab in the Workflow Studio Form Designer.
-
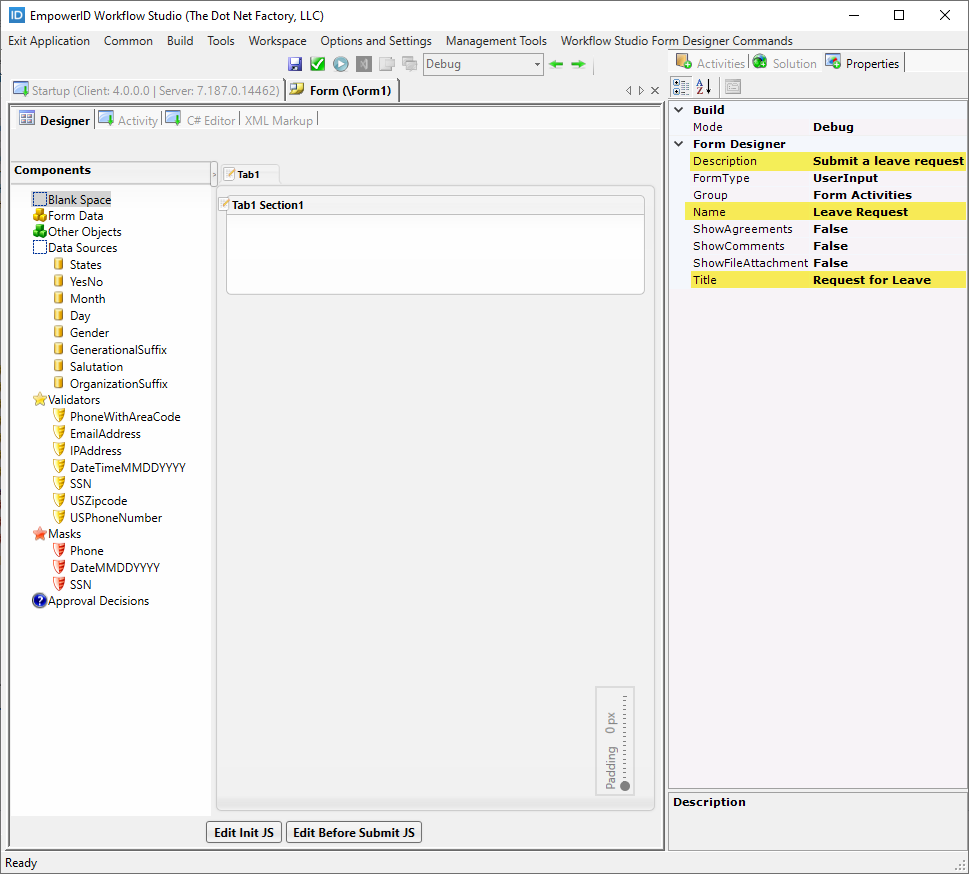
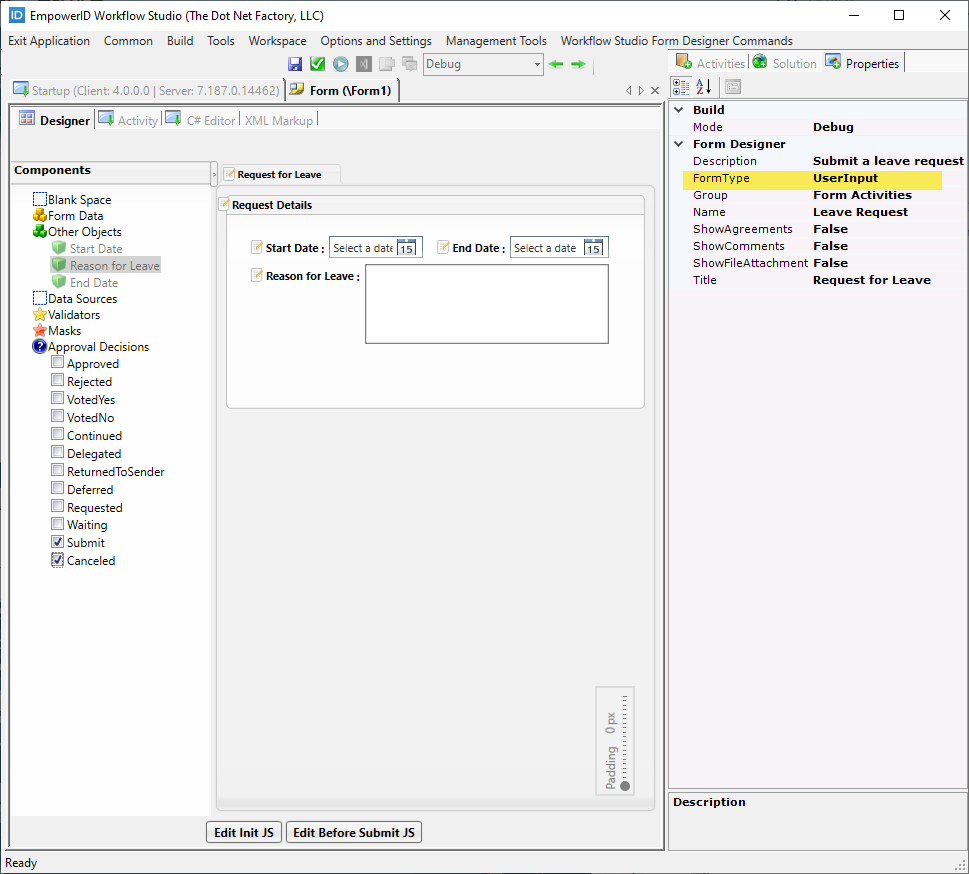
In the Properties pane, change the default Name, Description and Title properties.
-
Edit the caption in the form tab by double-clicking directly on the caption text and entering new text, such as Request for Leave.
-
Repeat the process for the form section text, changing it from Tab1 Section1 to something like Request Details. Next, add primitive controls to the form to allow users to enter information relevant to the workflow for which the form is being used.
-
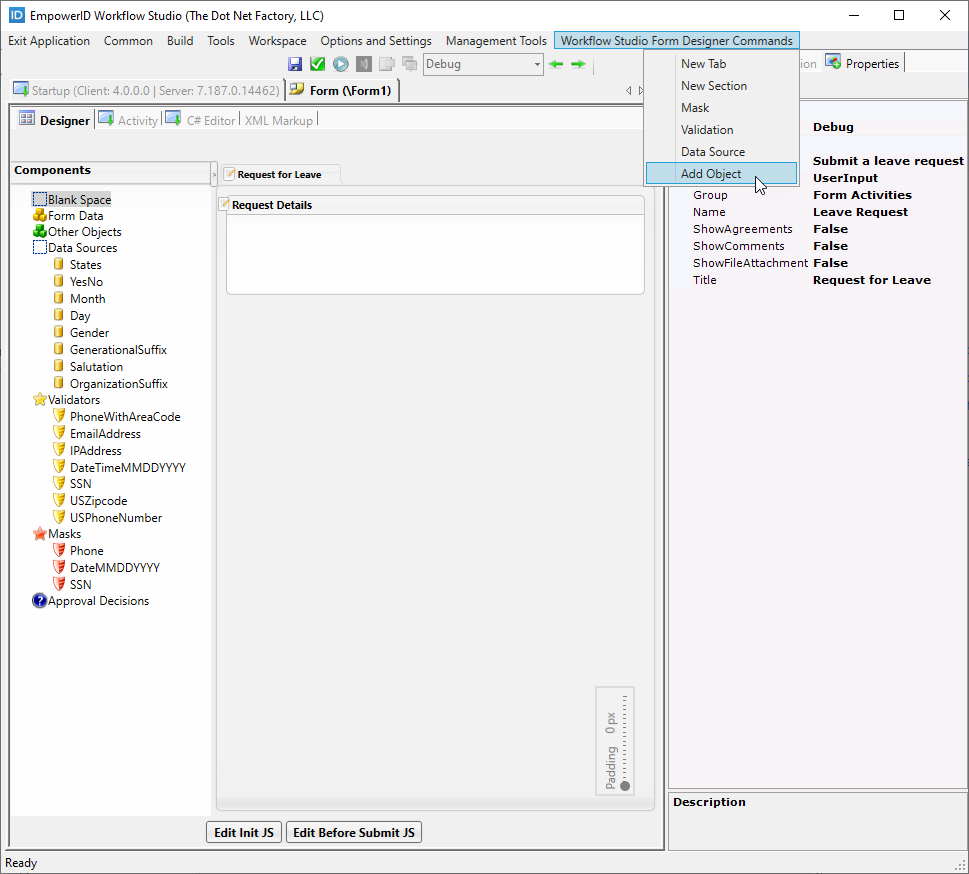
Click the Workflow Studio Form Designer Commands tab and select Add Object.
-
In the Add Object window that appears, select the DateTime and MultiLineString objects from the Primitives tab and then click the Add button. The DateTime object uses a Calendar template, allowing users to select a date from a calendar interface. The MultiLineString control allows users to enter multiple lines of text.
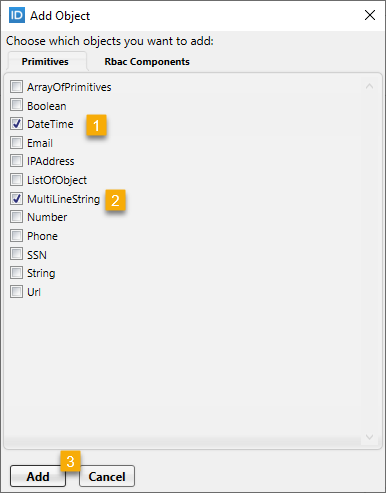
-
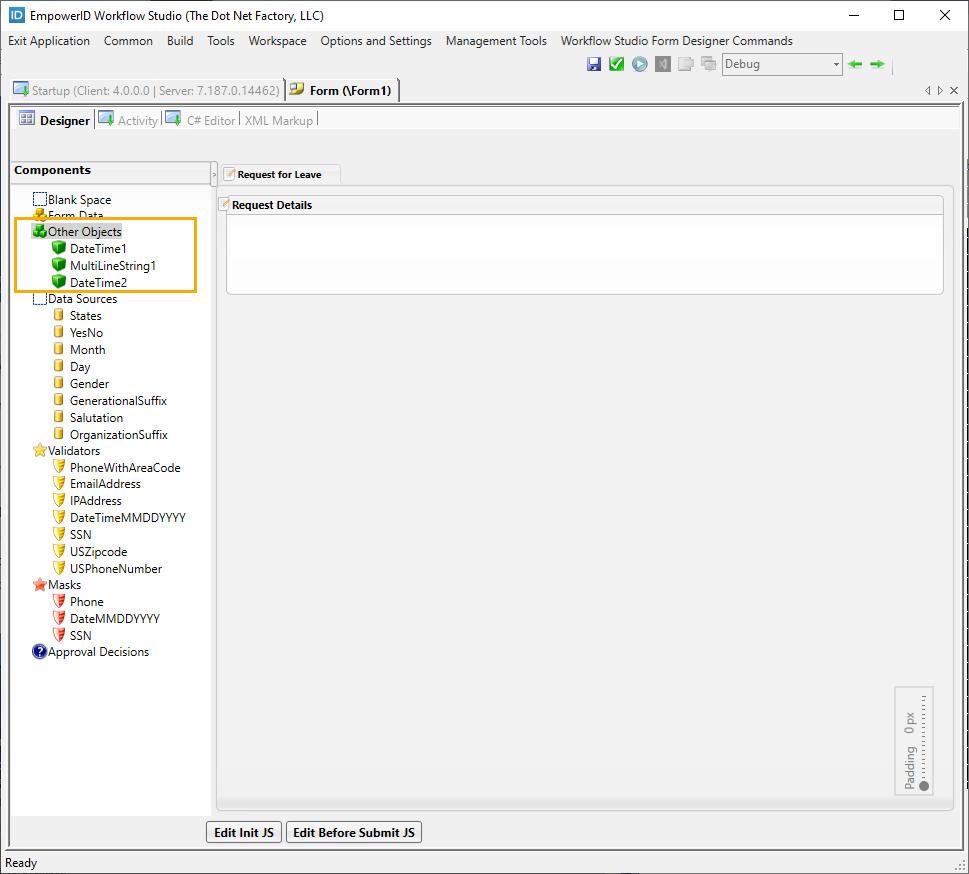
Open the Add Object window again and add a second DateTime object to the form's Components tree. You should see the new objects under the Other Objects node of the Components tree.
-
To help you identify the purpose for each primitive object you just added to the form's Component tree, double-click each object name to put the label in Edit mode and change the names of each to something meaningful. For example, change:
- DateTime1 to StartDate
- MultiLineString1 to ReasonForLeave
- DateTime2 to EndDate
-
Add the components to the form by dragging them from the Components tree onto the form in the Form Designer.
-
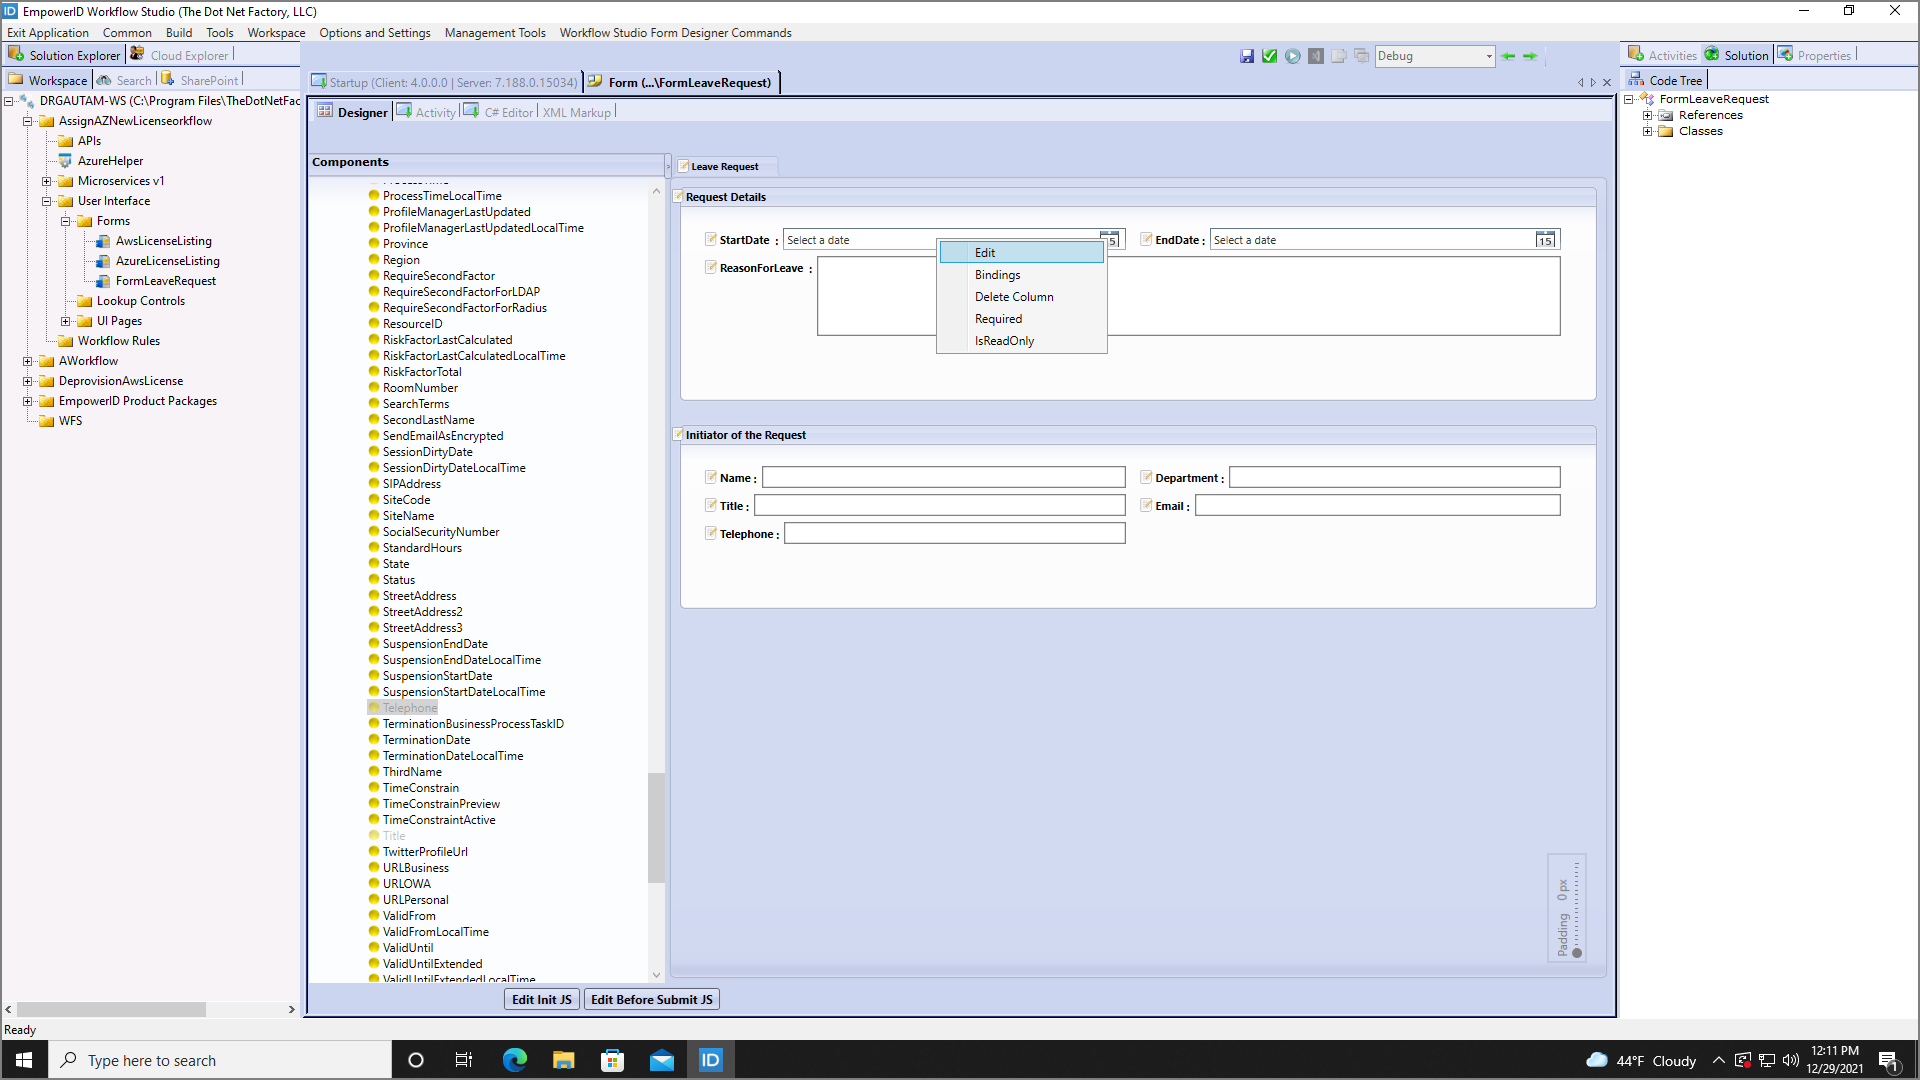
Right-click the text control you just added to the Form Designer and click Edit to open the Field Configuration window.
-
Select Is Double ColumnSpan and then click OK.
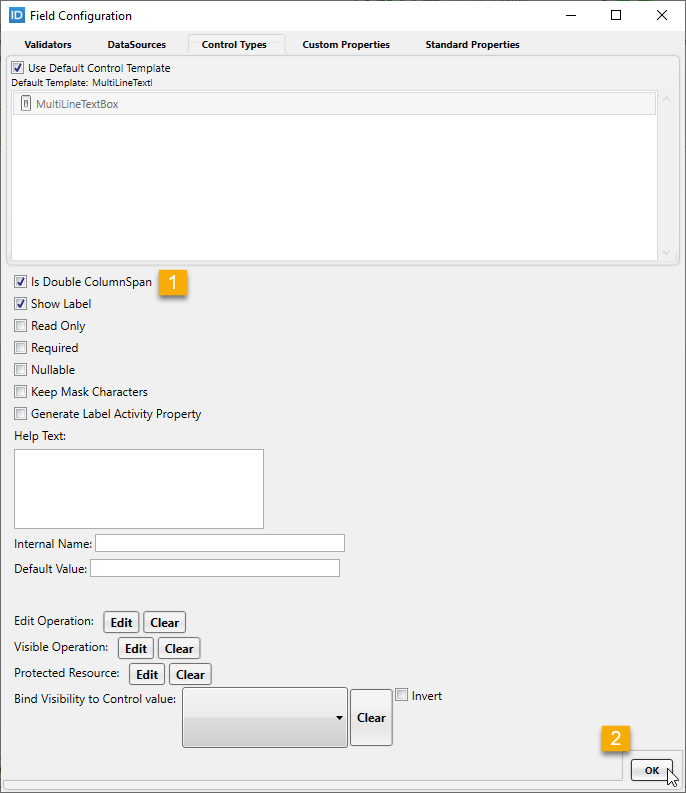 This allows the field to spread across the form, as shown by the below image.
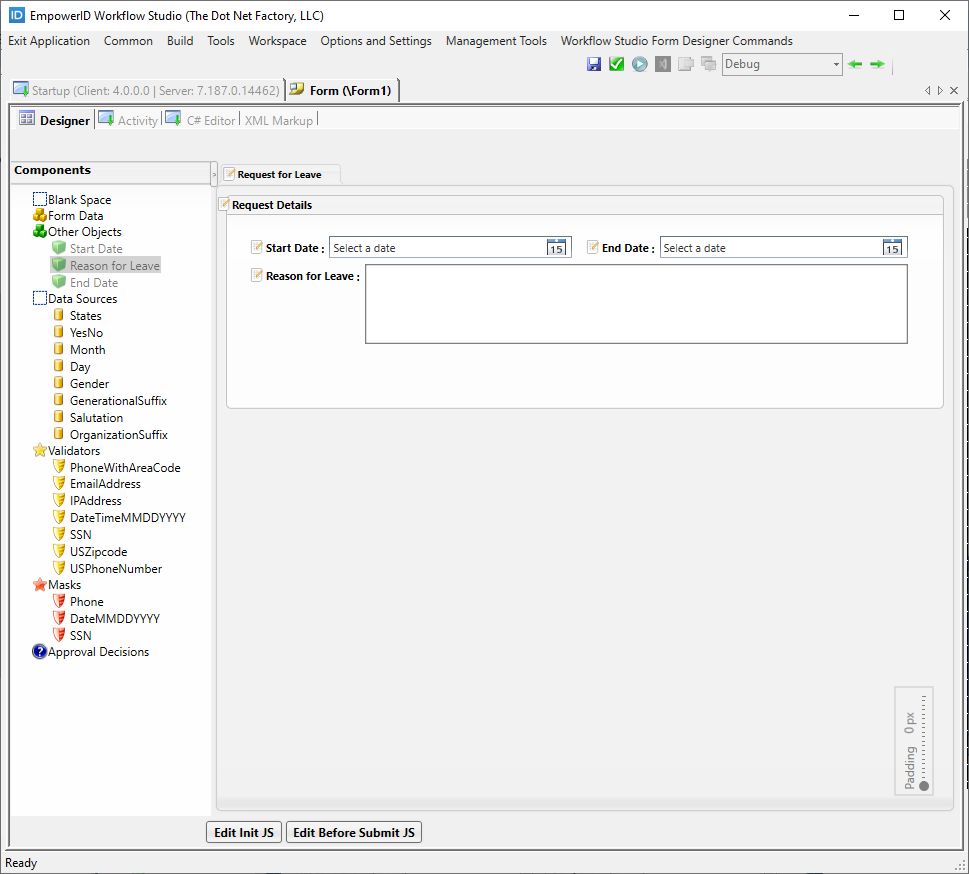
-
In the Components tree, expand the Approval Decisions node and check the boxes for Submit and Canceled. This adds buttons to the form that allow the request initiator to submit or cancel the request.

-
From the Properties grid, verify that the FormType is set to UserInput.
-
Save the form.
-
Next, publish the form by following the steps below. When you publish the form, Workflow Studio converts it to an activity that can be placed within the workflow.
- Click the Compile and Publish button located above the Form Designer.
- In the Form Publishing wizard that appears, click the Next button.
- Select the server to which you want to publish the form and click Next.
- Click OK to close the Publishing action completed successfully! message box.
- Wait for the toolbox to load and then select Yes when prompted to restart Workflow Studio.
- Select Yes to save changes to any opened files.
Create User Decision Form
User Decision forms present information to approvers and provide buttons for making decisions (Approve, Reject, Delegate, etc.). These forms work in tandem with User Input forms in approval workflows:
- The User Input form collects information from the requestor
- The workflow routes the request to an approver
- The User Decision form displays the request details in read-only mode to the approver
- The approver makes a decision using the provided buttons
- The workflow continues based on that decision
In this example, you'll create an approval form based on the User Input form you just created, transforming data entry fields into read-only displays and replacing submit buttons with approval decision buttons.
- Open the User Input form you created above, click the Common menu, and click the Save As button.
- In the Save As dialog that appears, name the form appropriately (e.g., "ApproveLeaveRequest"), saving it in the package of your choice.
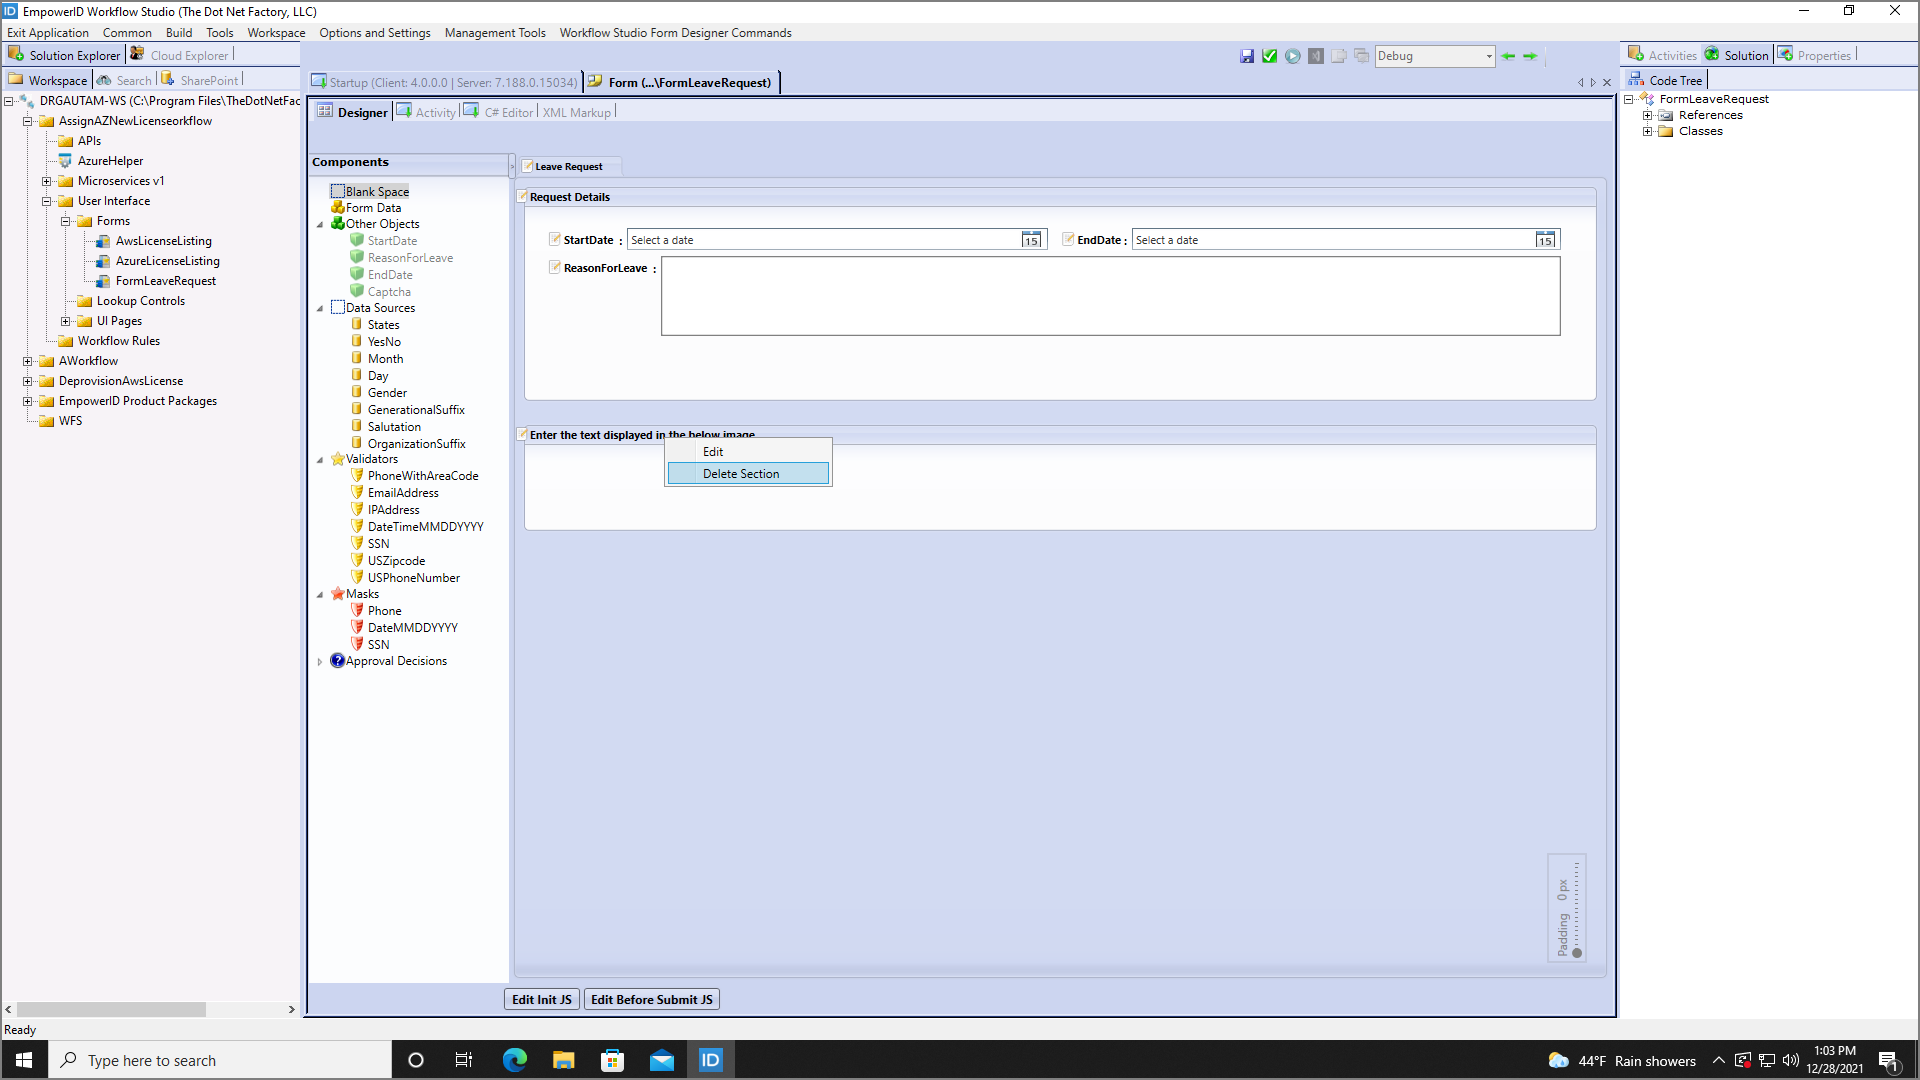
- Right-click the Request Details section and click Delete Section.
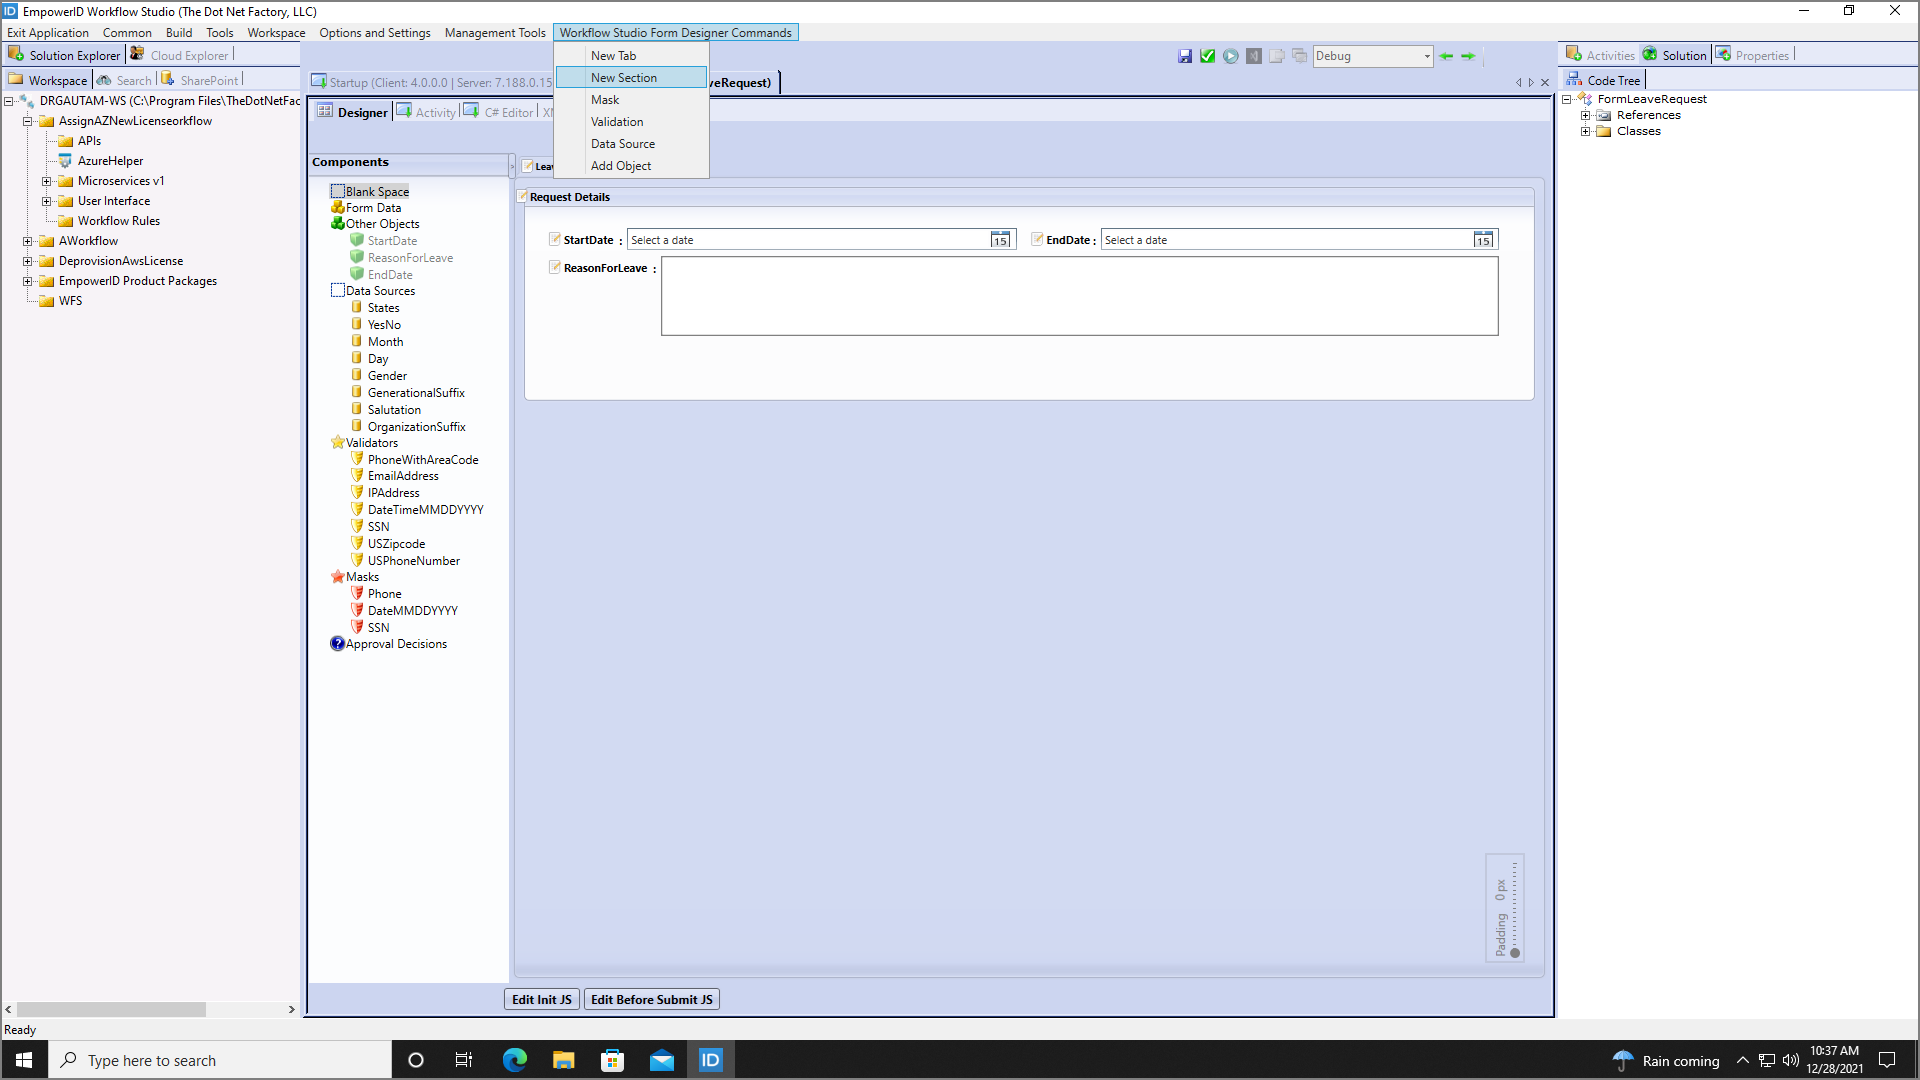
- Click the New Section button in the Workflow Studio Form Designer Commands menu to add a new section.
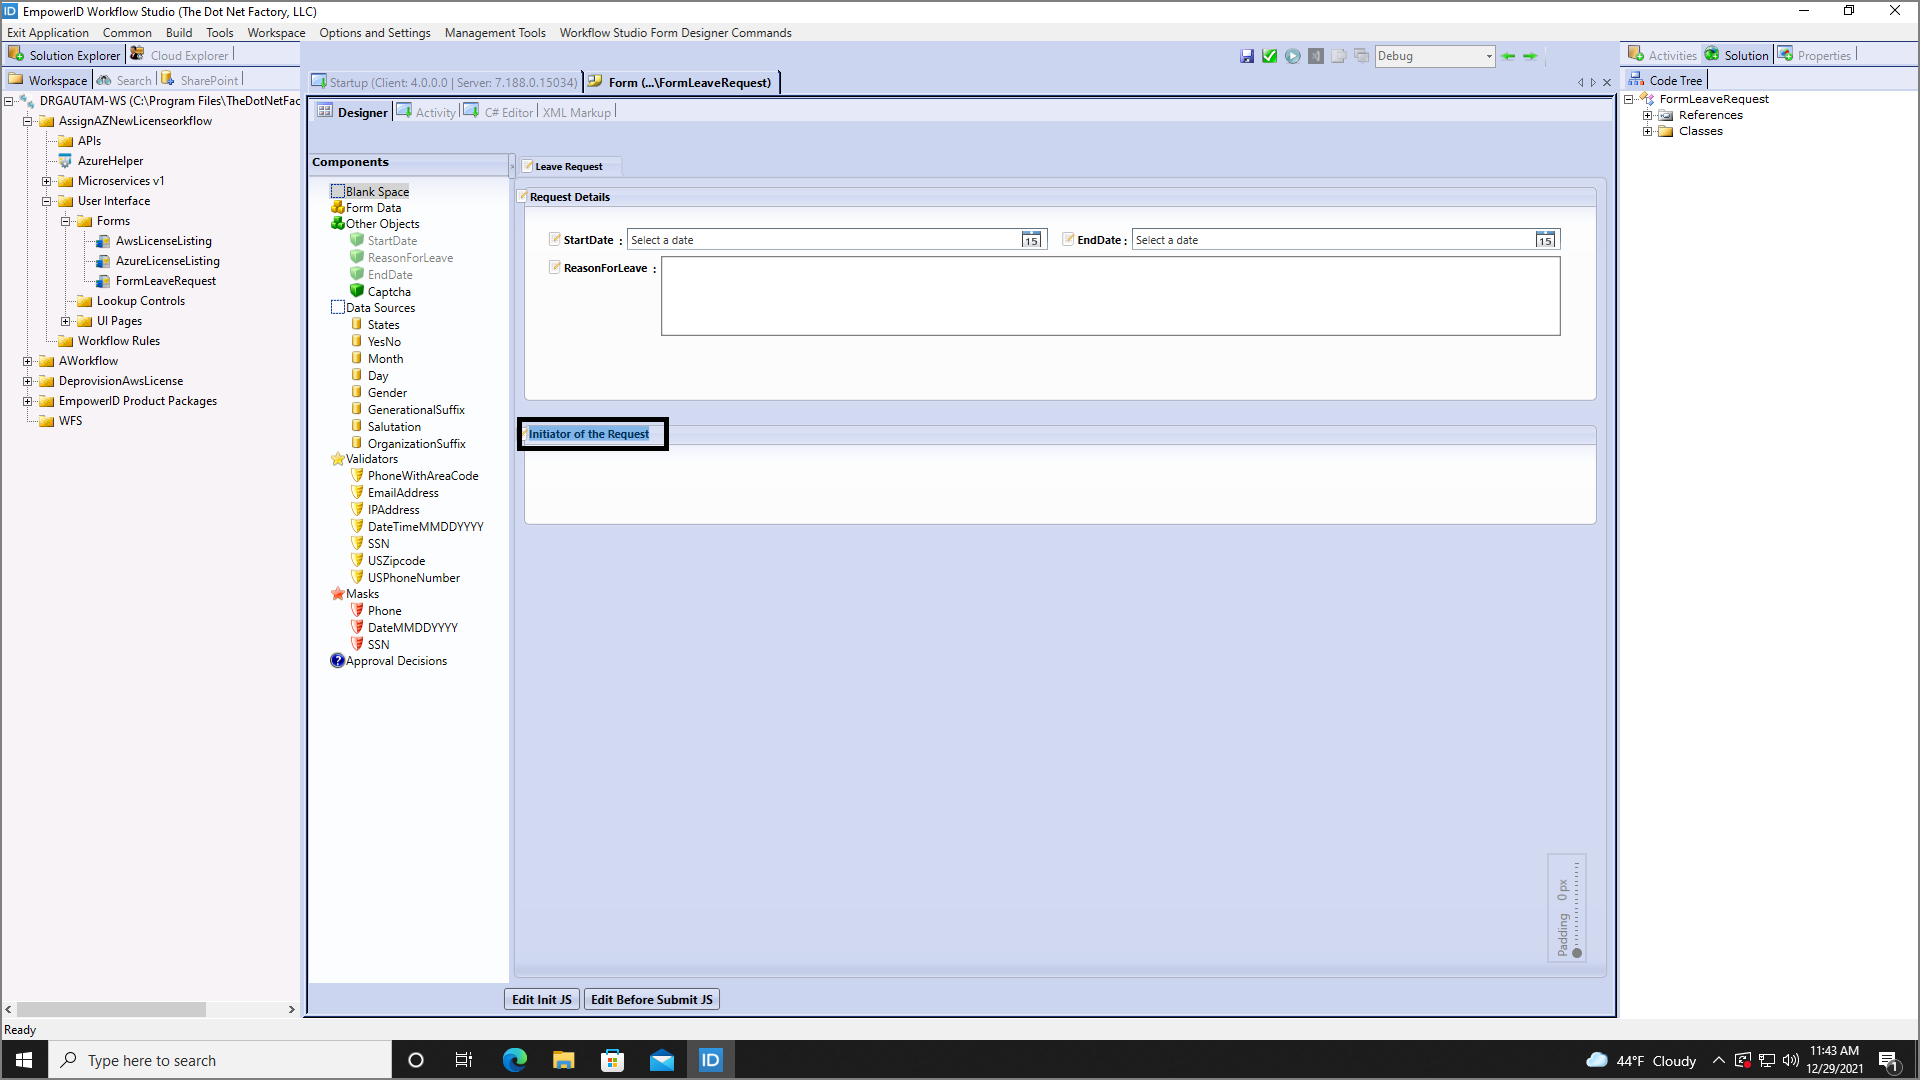
- Change the section's name to Initiator of the Request by double-clicking the default text.
- Click the Add Object button from the Workflow Studio Form Designer Command menu.

- In the Add Object window that appears, navigate to the Rbac Components tab. Locate and select the Person component, and then click the Add button.
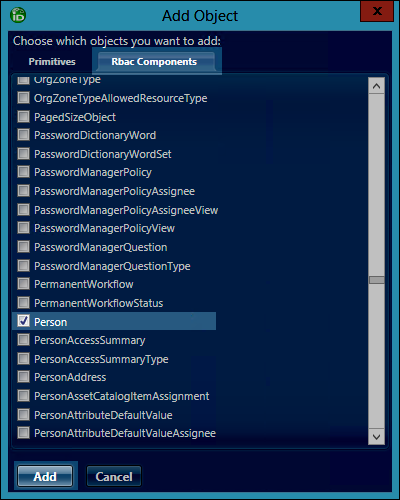 A component named Person1 is added to the Components tree.

- Double-click directly on the Person1 text to place it in Edit mode and change the object's name to Initiator.
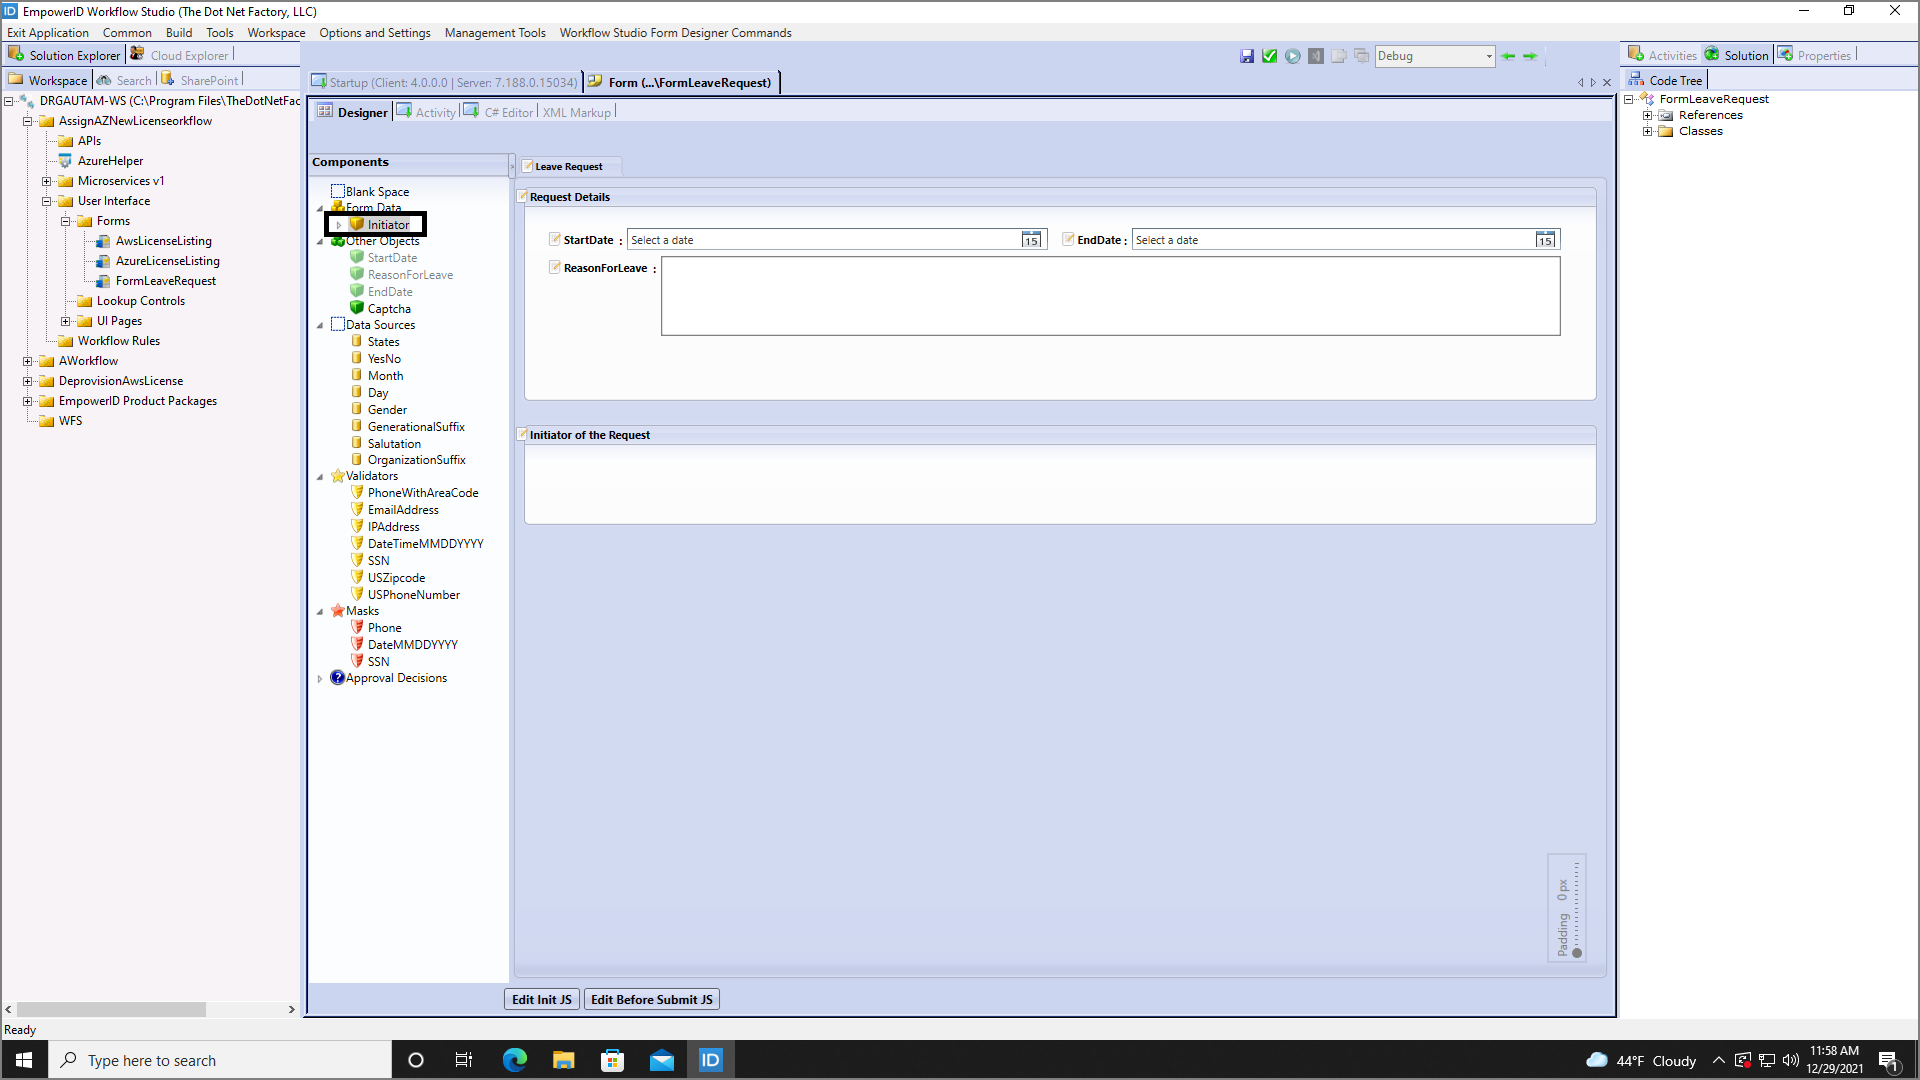
- Expand the Initiator object node, locate the FriendlyName attribute, and drag it onto the Initiator section of the form.
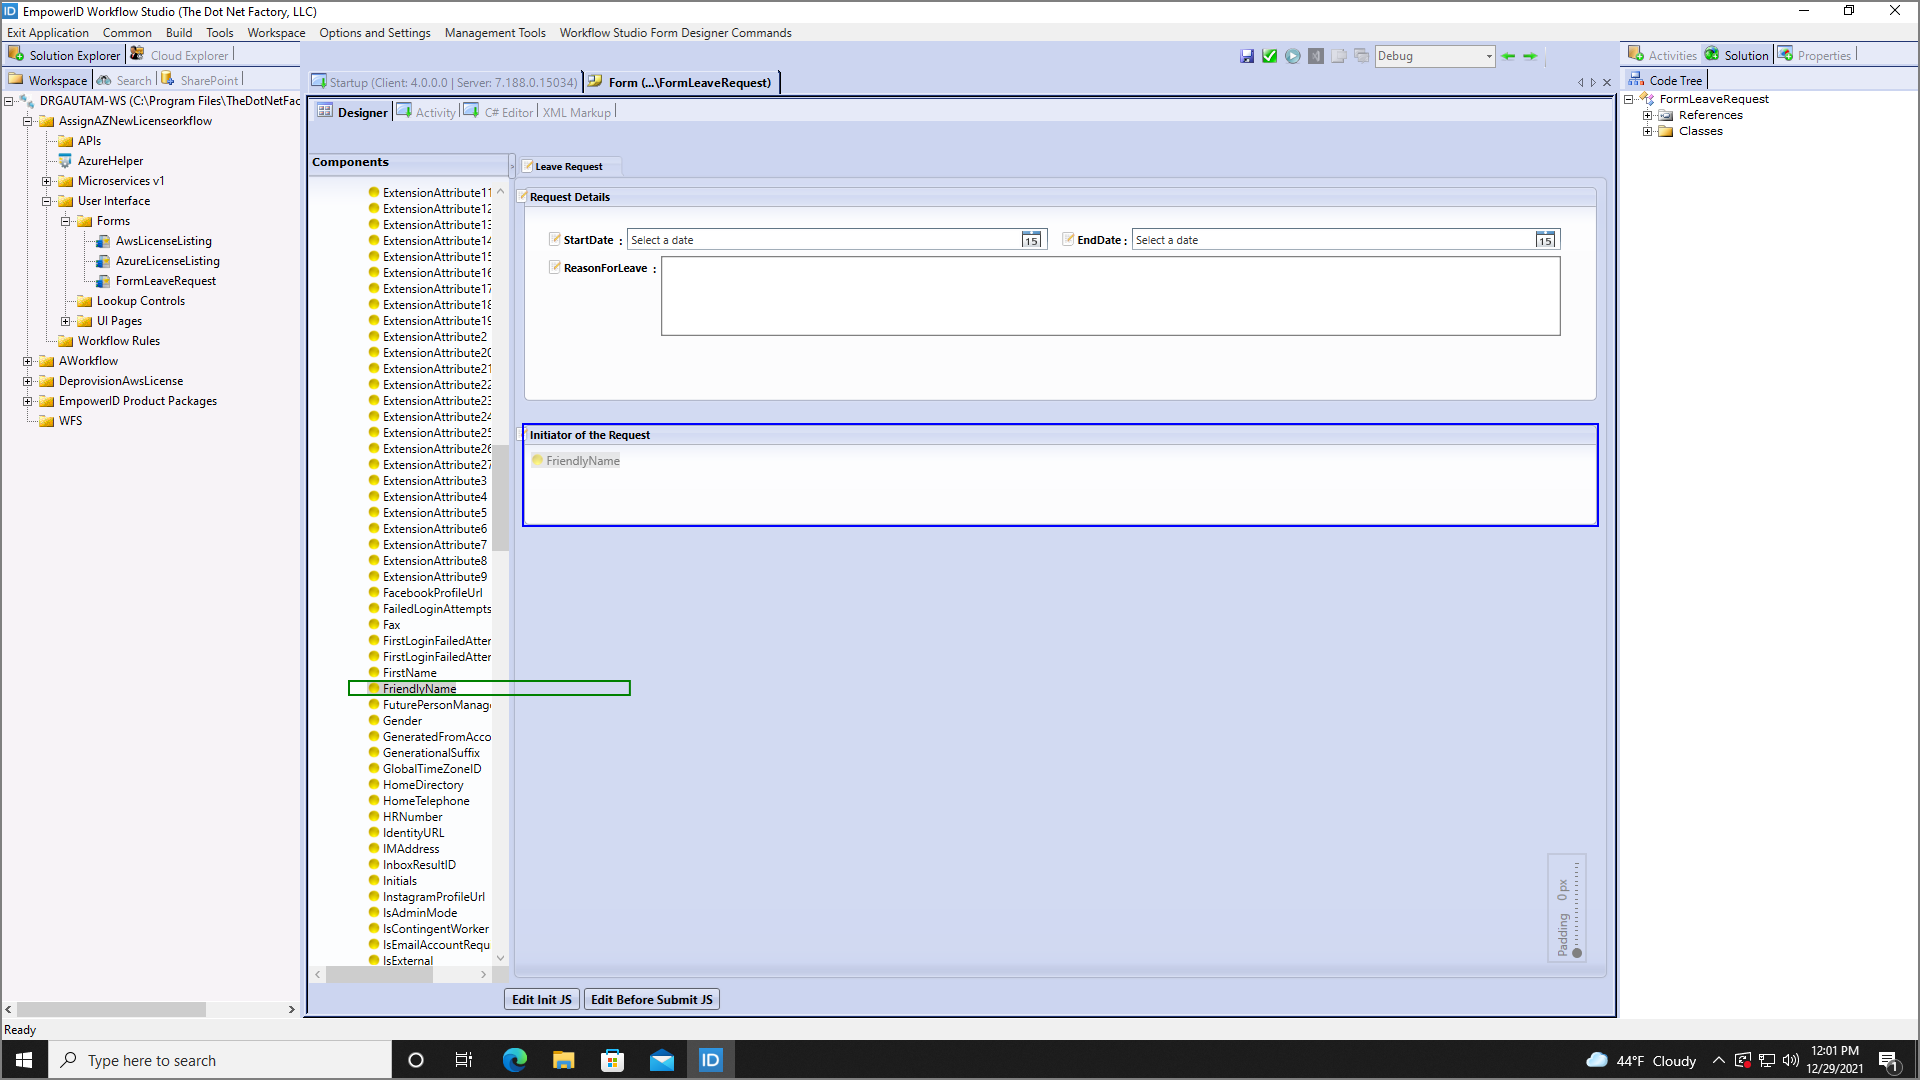
- Edit the FriendlyName label, changing the text from FriendlyName to Name.
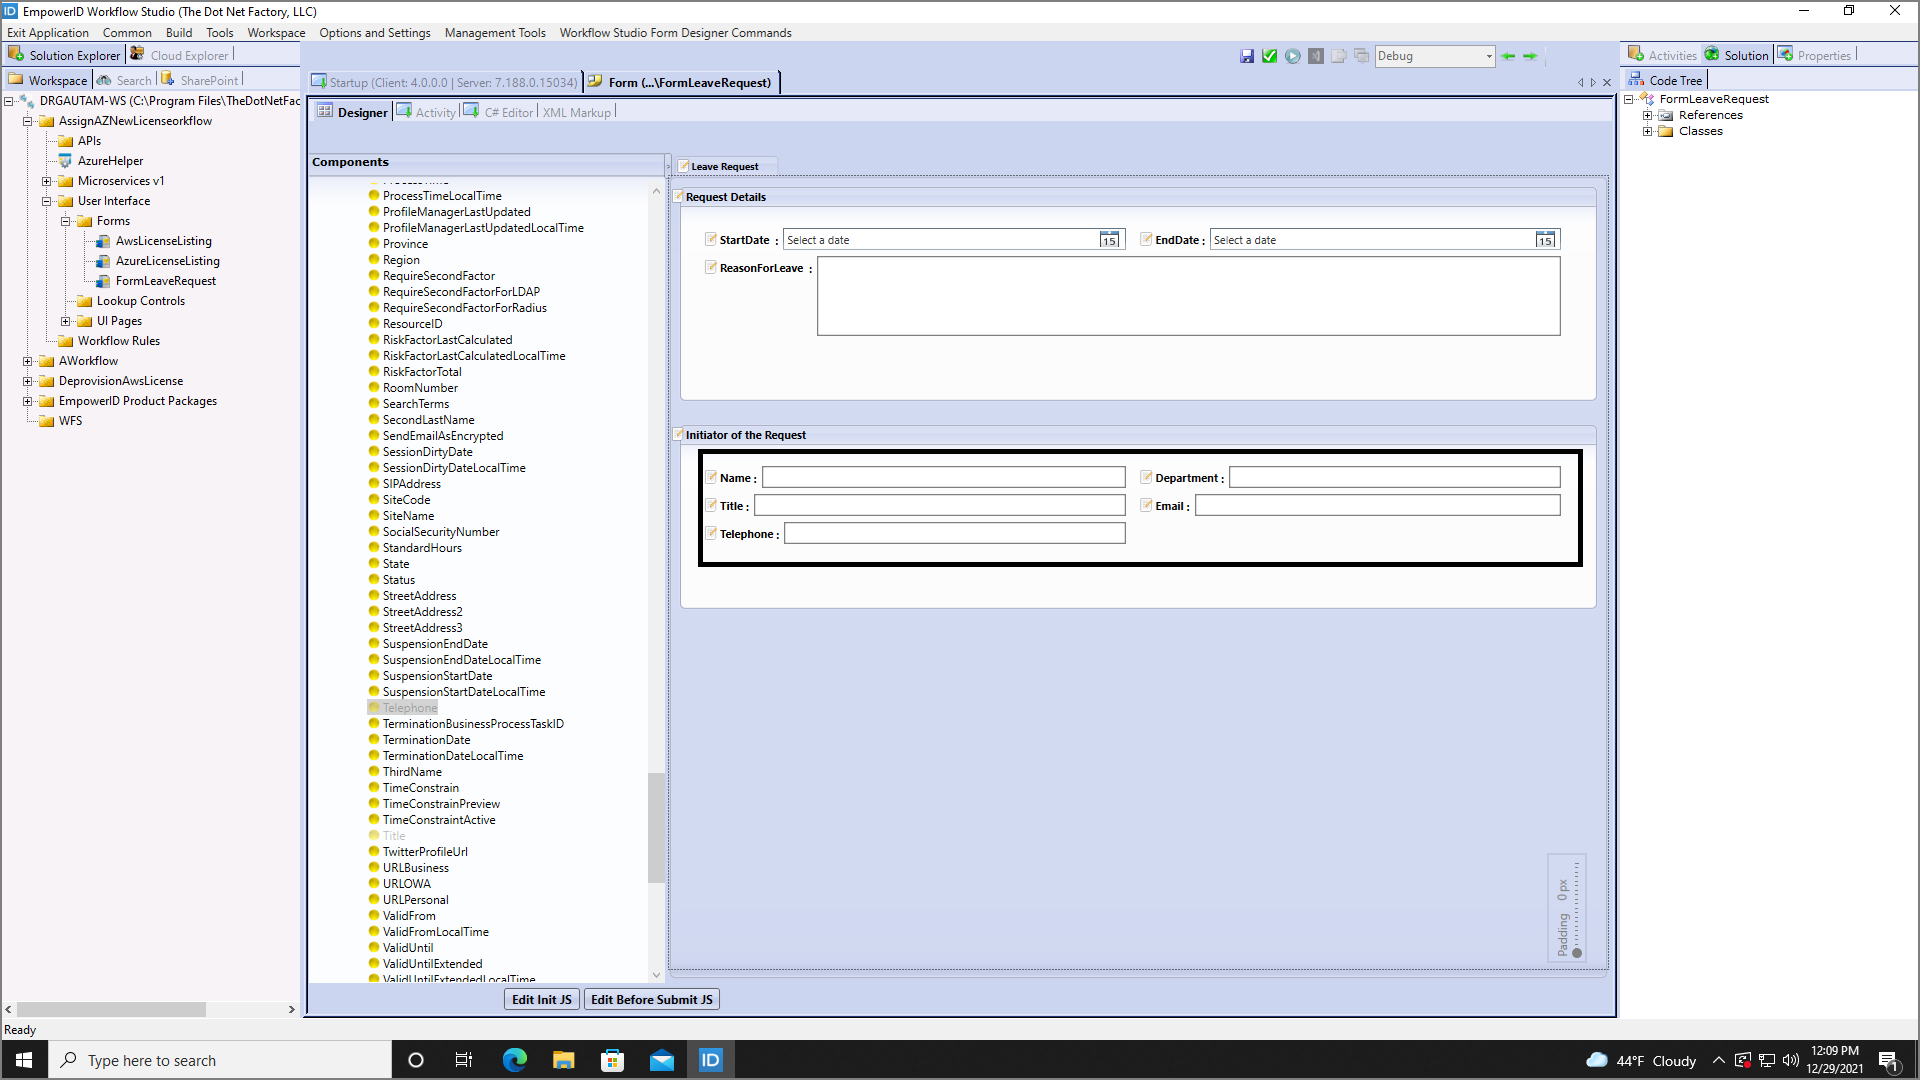
- From the Initiator object node in the Components tree, find the Department, Title, Email, and Telephone attributes. Drag each attribute onto the form, arranging them to resemble the image provided below.
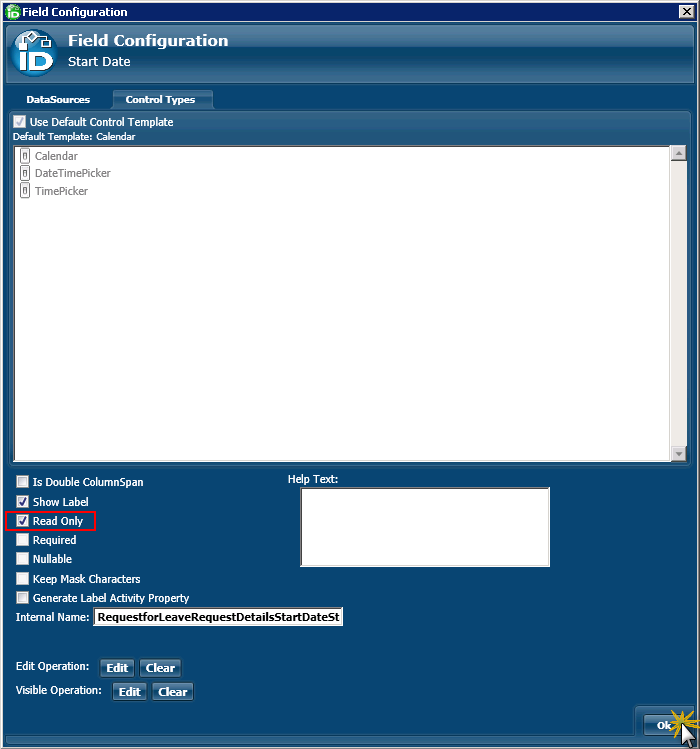
- Right-click the Start Date field and select Edit from the context menu.
- In the Field Configuration window that appears, select Read Only from the lower pane and then click OK to close the window.
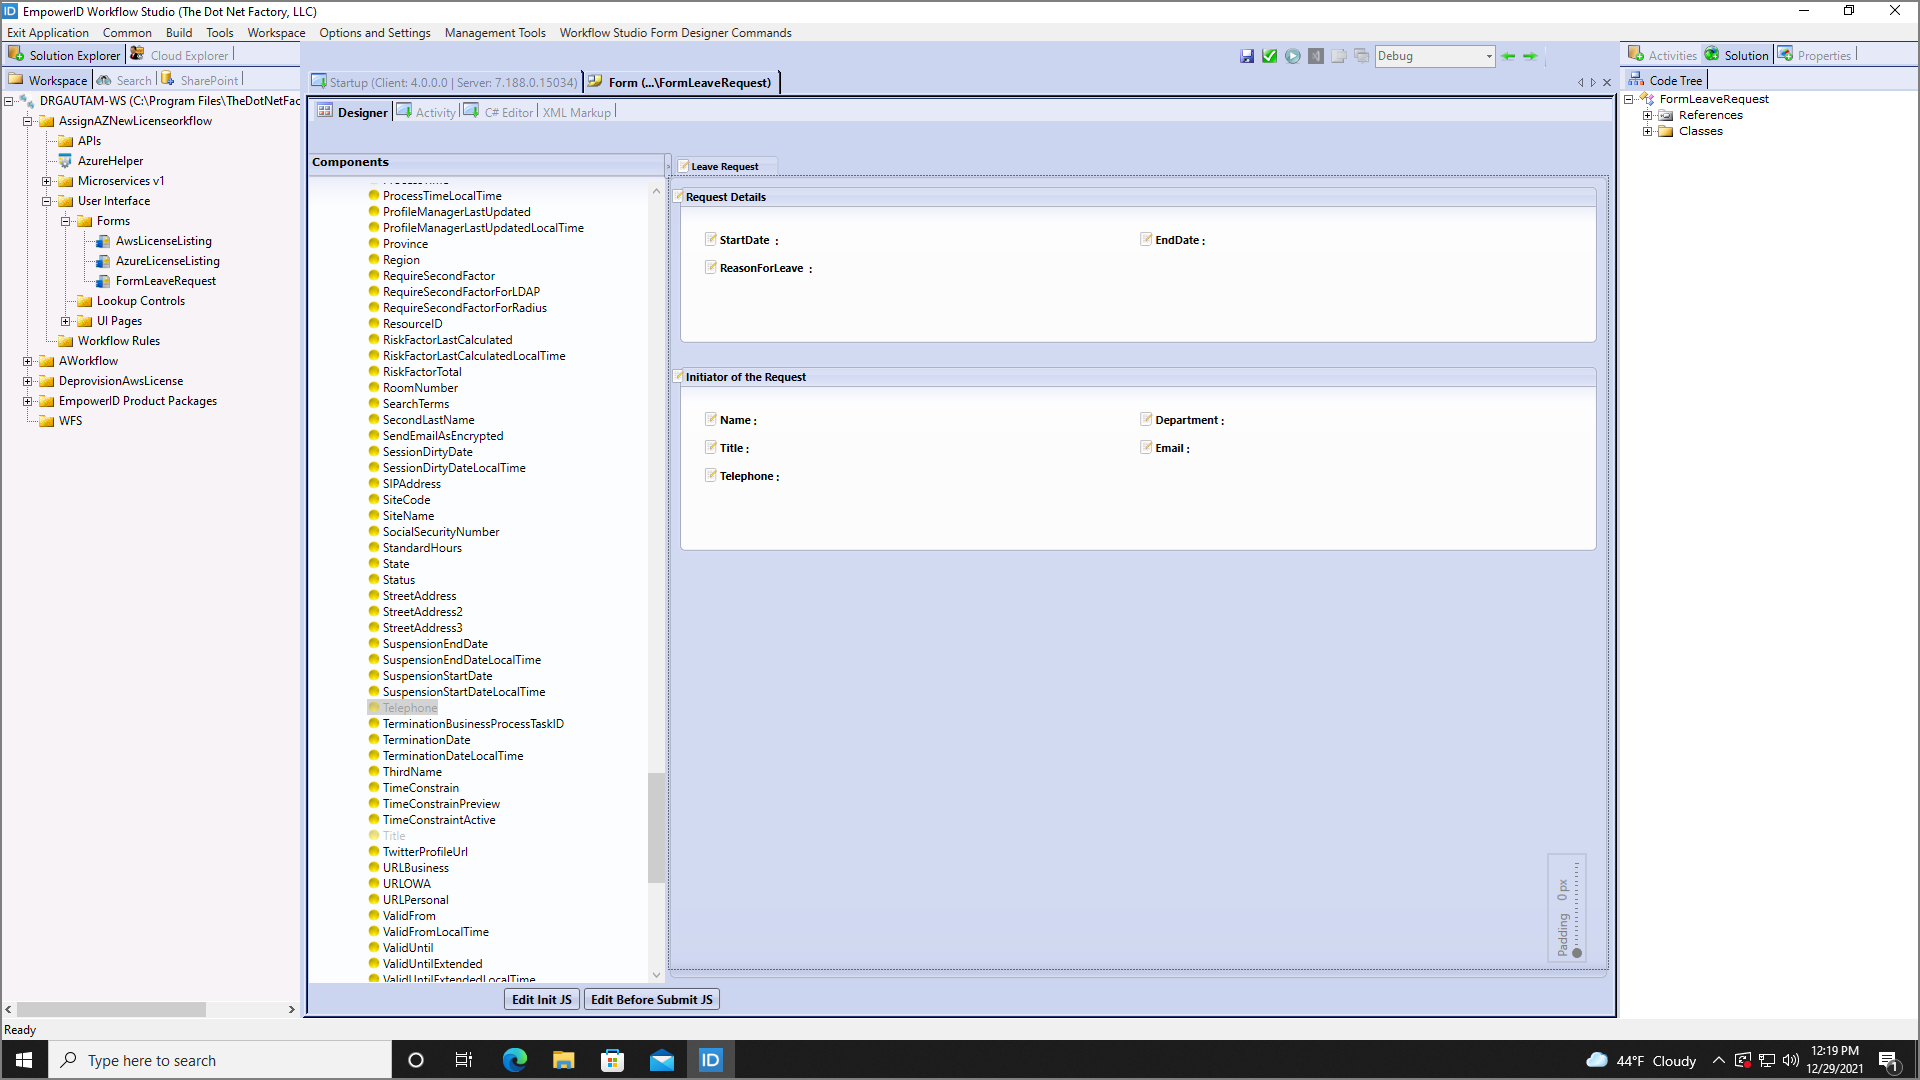
- Repeat the above two steps for the rest of the objects in both sections of the form. Once completed, you should see only the object labels (no editable fields), as shown in the below image.
- From the Components tree, expand the Approval Decisions node. Check the boxes to select or deselect decision buttons as follows:
- Check the box for Approved to add this button
- Check the box for Rejected to add this button
- Check the box for Delegated to add this button
- Check the box for ReturnedToSender to add this button
- Uncheck the box for Submit to remove this button
- Uncheck the box for Canceled to remove this button

- In the Properties pane, change the FormType to User Decision.
- Save your changes and publish the form to make it available to workflows as a Form activity.
Related Topics
- About Forms - Understand form types and components
- Your First Workflow - Learn basic workflow creation
- Business Rules - Add conditional logic based on form decisions