Create Announcements
Announcements are created through a wizard workflow that configures content, scheduling, audience targeting, and tracking options.
Create an Announcement
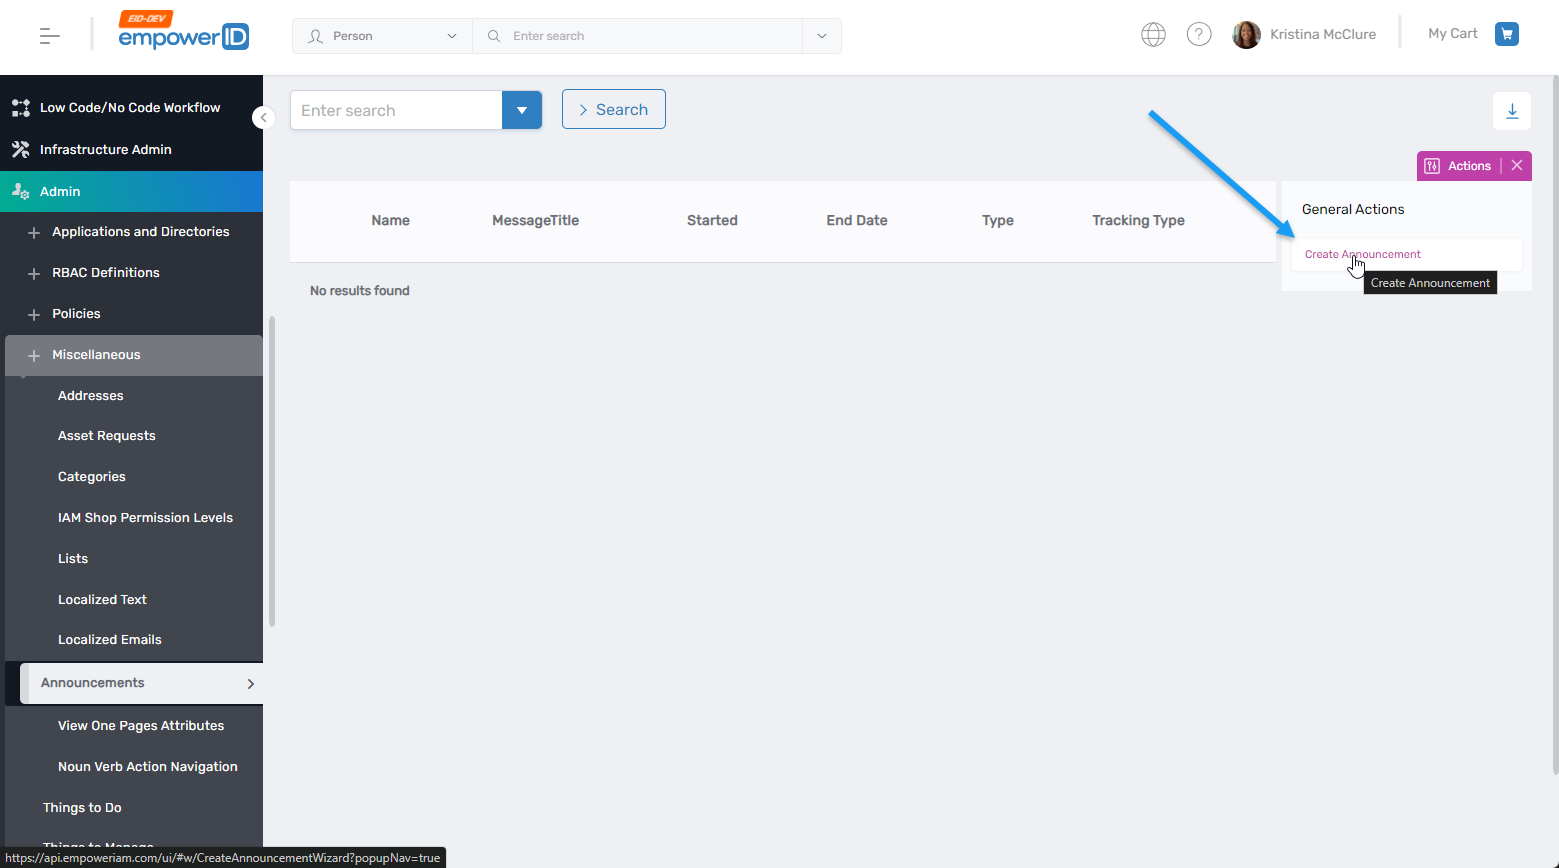
- Log in to the EmpowerID portal as an administrator.
- Navigate to Admin > Miscellaneous > Announcements.
- Click Create Announcement to start the Create Announcement Wizard workflow.
- On the Announcement Name Information screen, fill in the required fields:
- Announcement Name - Provide a unique name for the announcement.
- Announcement Friendly Name - Enter a display name for the announcement.
- Announcement Tracking - Choose one of the following tracking options:
- Announce Only - Displays the announcement to the user each time they log in to the target application.
- One Time Show - Displays the announcement once before the user logs in to the target application.
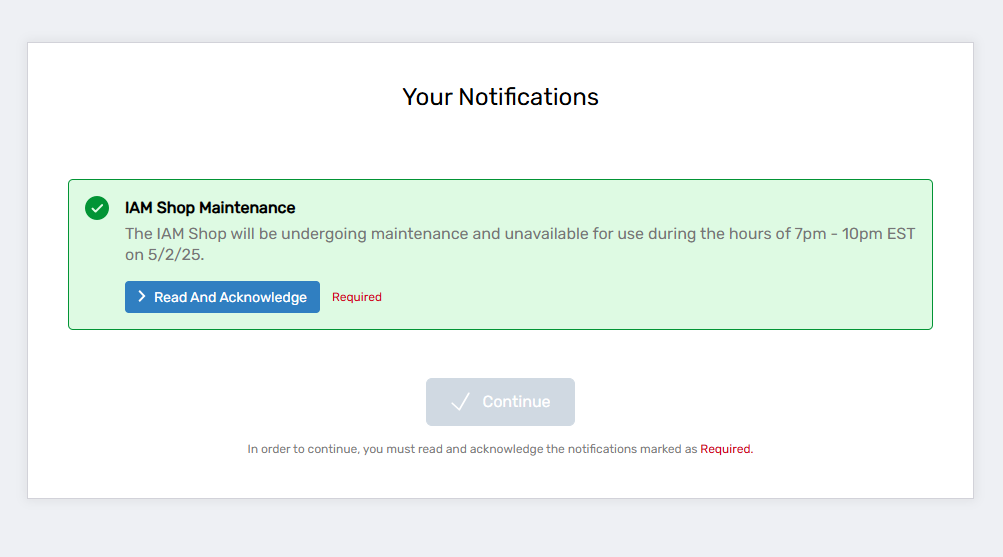
- Acknowledge Required - Requires the user to acknowledge they have read the announcement before accessing the application.
- Start Date - Set the start date for the announcement (default is the current date).
- End Date - Optionally, specify an expiration date after which the announcement will no longer appear.
- Active - Select this option to make the announcement active.
- Priority - Enter a priority value for the announcement. Lower values indicate higher priority.
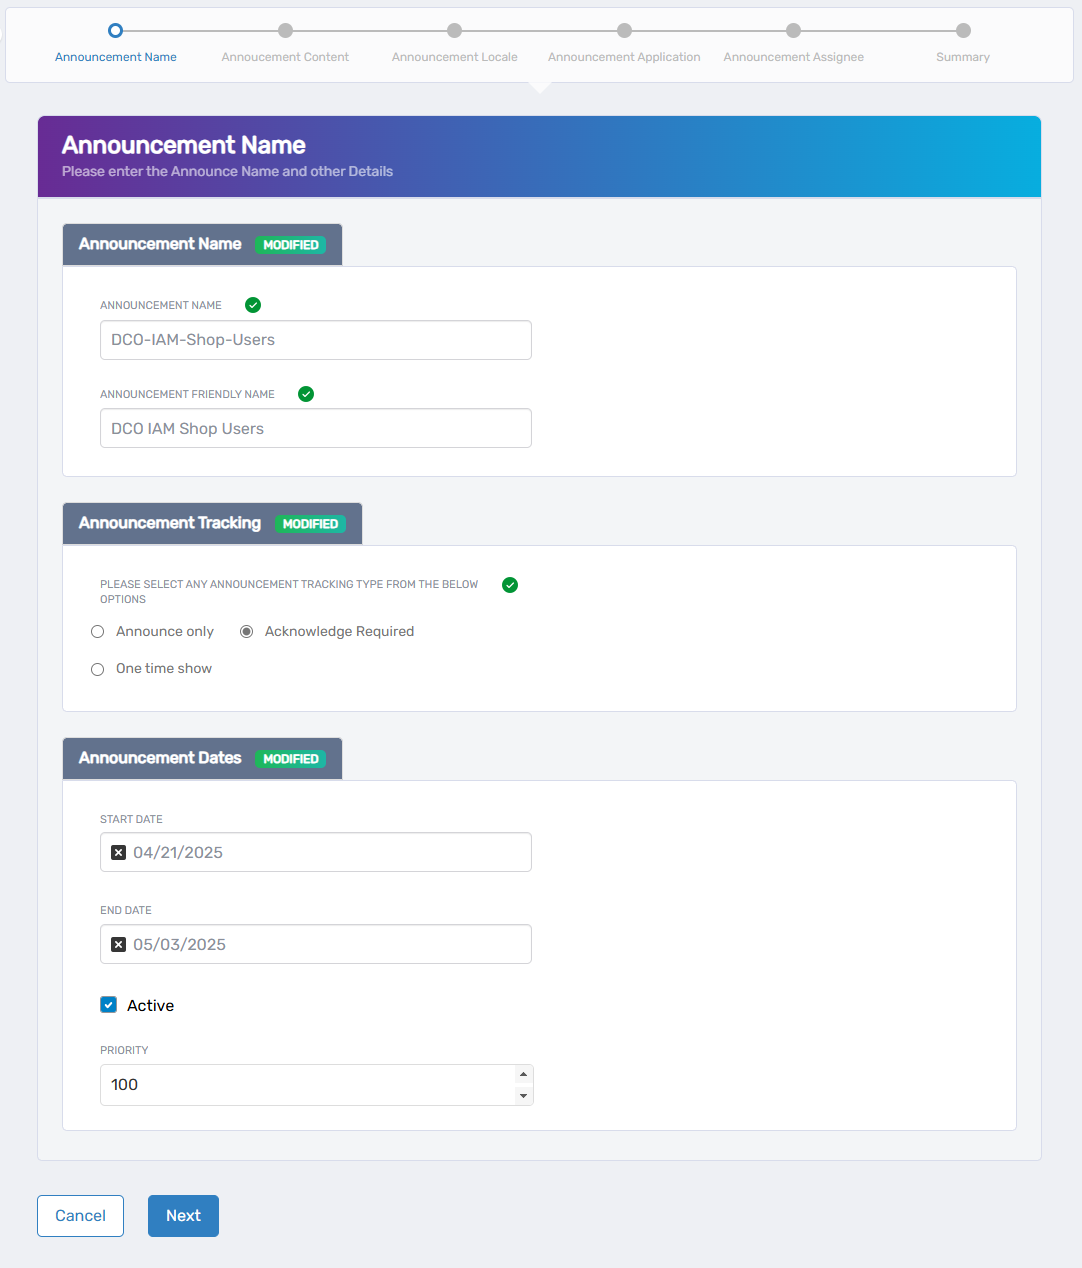
- Click Next to proceed.
- On the Announcement Content screen, enter the following:
- Announcement Title - Enter a title for the announcement.
- Announcement Message - Enter the body of the announcement.
- Announcement Type - Select one of the following announcement types:
- Alert
- General
- Maintenance
- Warning
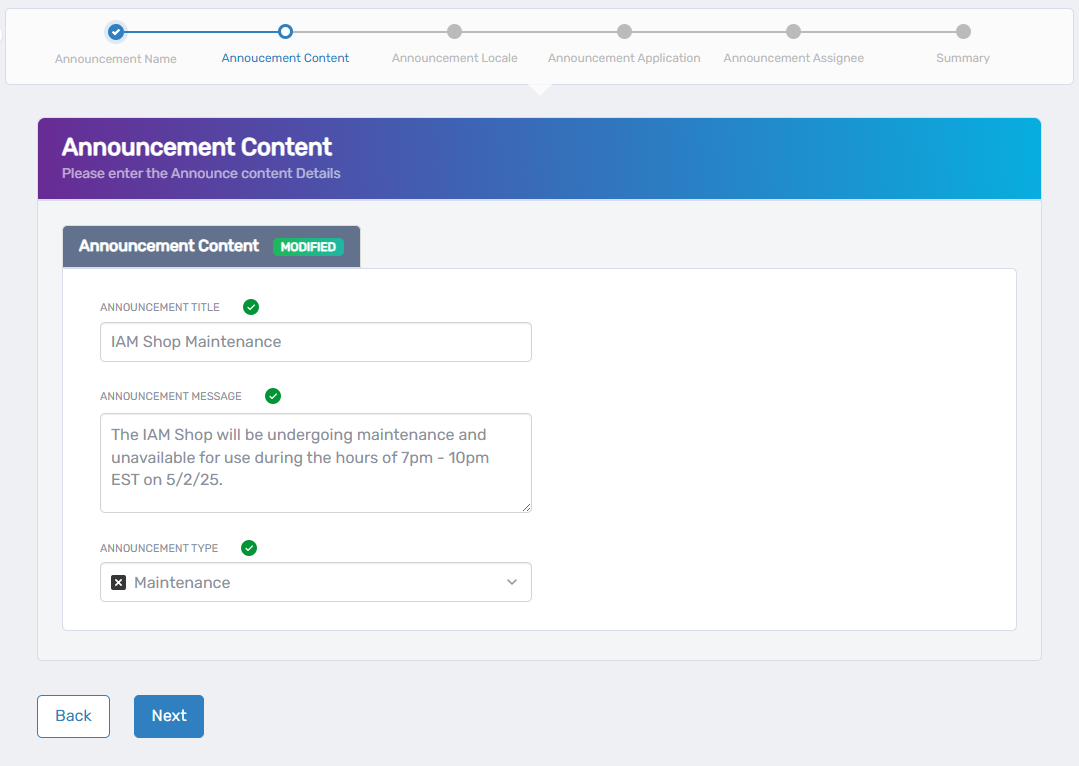
- Click Next to proceed.
- On the Announcement Locale screen, configure localization settings:
- Select Language - Choose the language for the locale.
- Announcement Locale Key for Title - Enter a locale key for the announcement title.
- Announcement Locale Key for Message - Enter a locale key for the body of the announcement.

- Optionally, click Add New Item to configure additional locales.
- Click Next to proceed.
- On the Select Application screen, select the target applications:
- Search for the application that the announcement targets.
- Check the box to select the application.
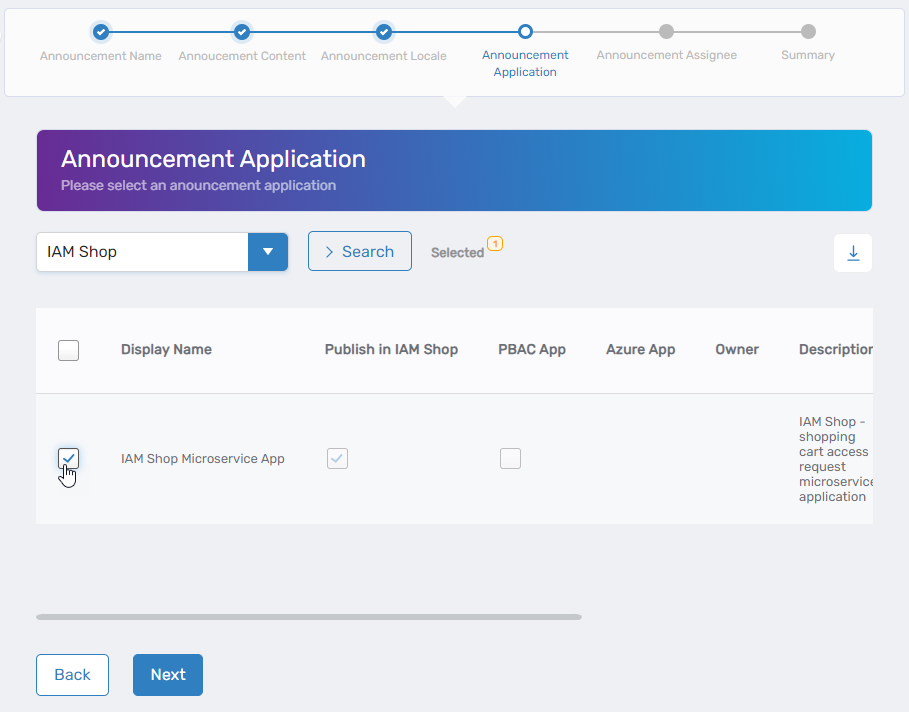
- Repeat as needed to select additional applications.
- Click Next to proceed.
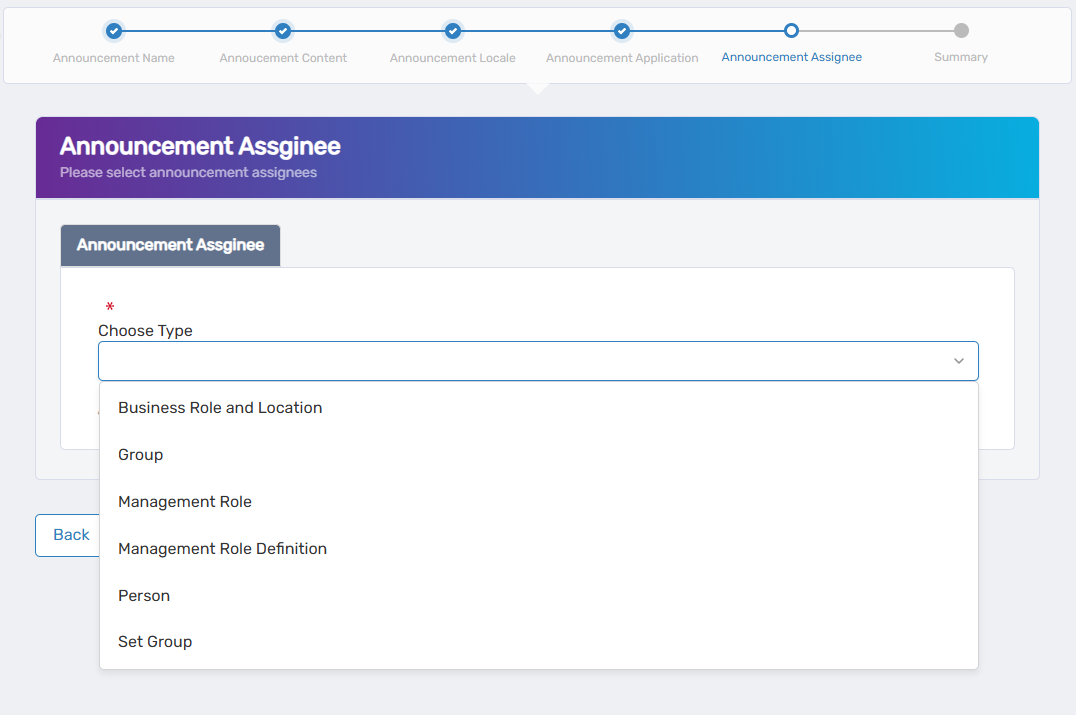
- On the Select Assignees screen, assign the announcement to users:
- Select the assignee type from the Choose Type dropdown. Assignee types include the following:
- Business Role and Location - Targets all users belonging to the specified Business Role and Location.
- Group - Targets all users belonging to the specified group.
- Management Role - Targets all users belonging to the specified Management Role.
- Management Role Definition - Targets all users belonging to Management Roles derived from the specified Management Role Definition.
- Person - Targets a specific person.
- Set Group - Targets all users belonging to the specified Set Group.
- Select the specific Assignee for the Assignee Type chosen above. For example, if you selected Management Role as the Assignee Type, search for and select the target Management Role.
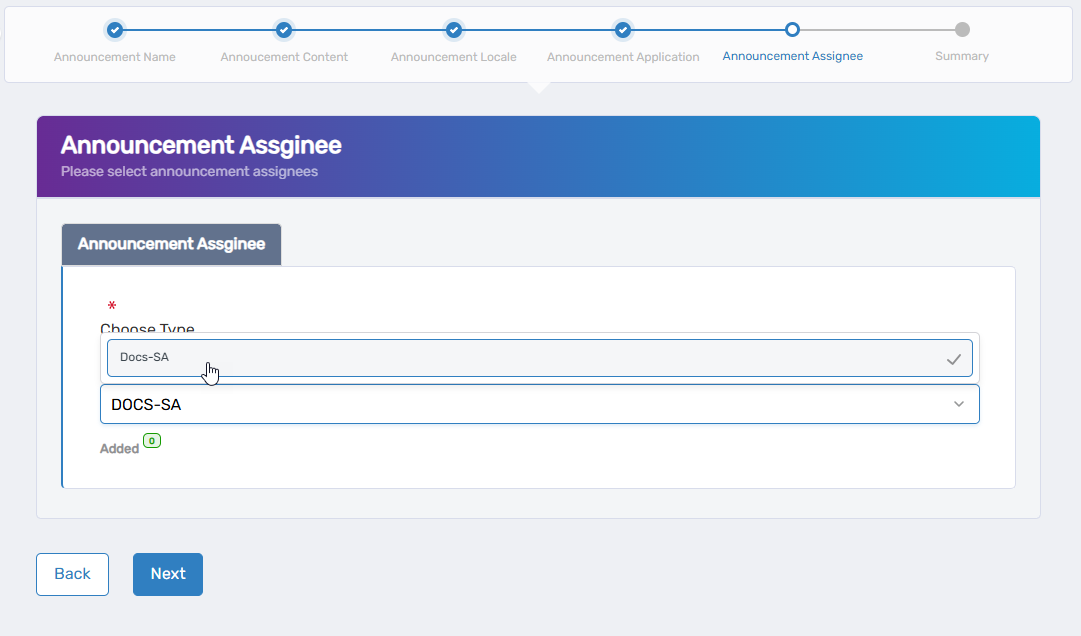
- Repeat to add additional recipients as needed.
- Optionally, click the Added button to review the list of selected assignees. You can remove an assignee by clicking the delete button.
- Select the assignee type from the Choose Type dropdown. Assignee types include the following:
Multiple Assignee Types
When assigning to different Assignee Types, clear the previous type selection before selecting a new type.
- Click Next to proceed.
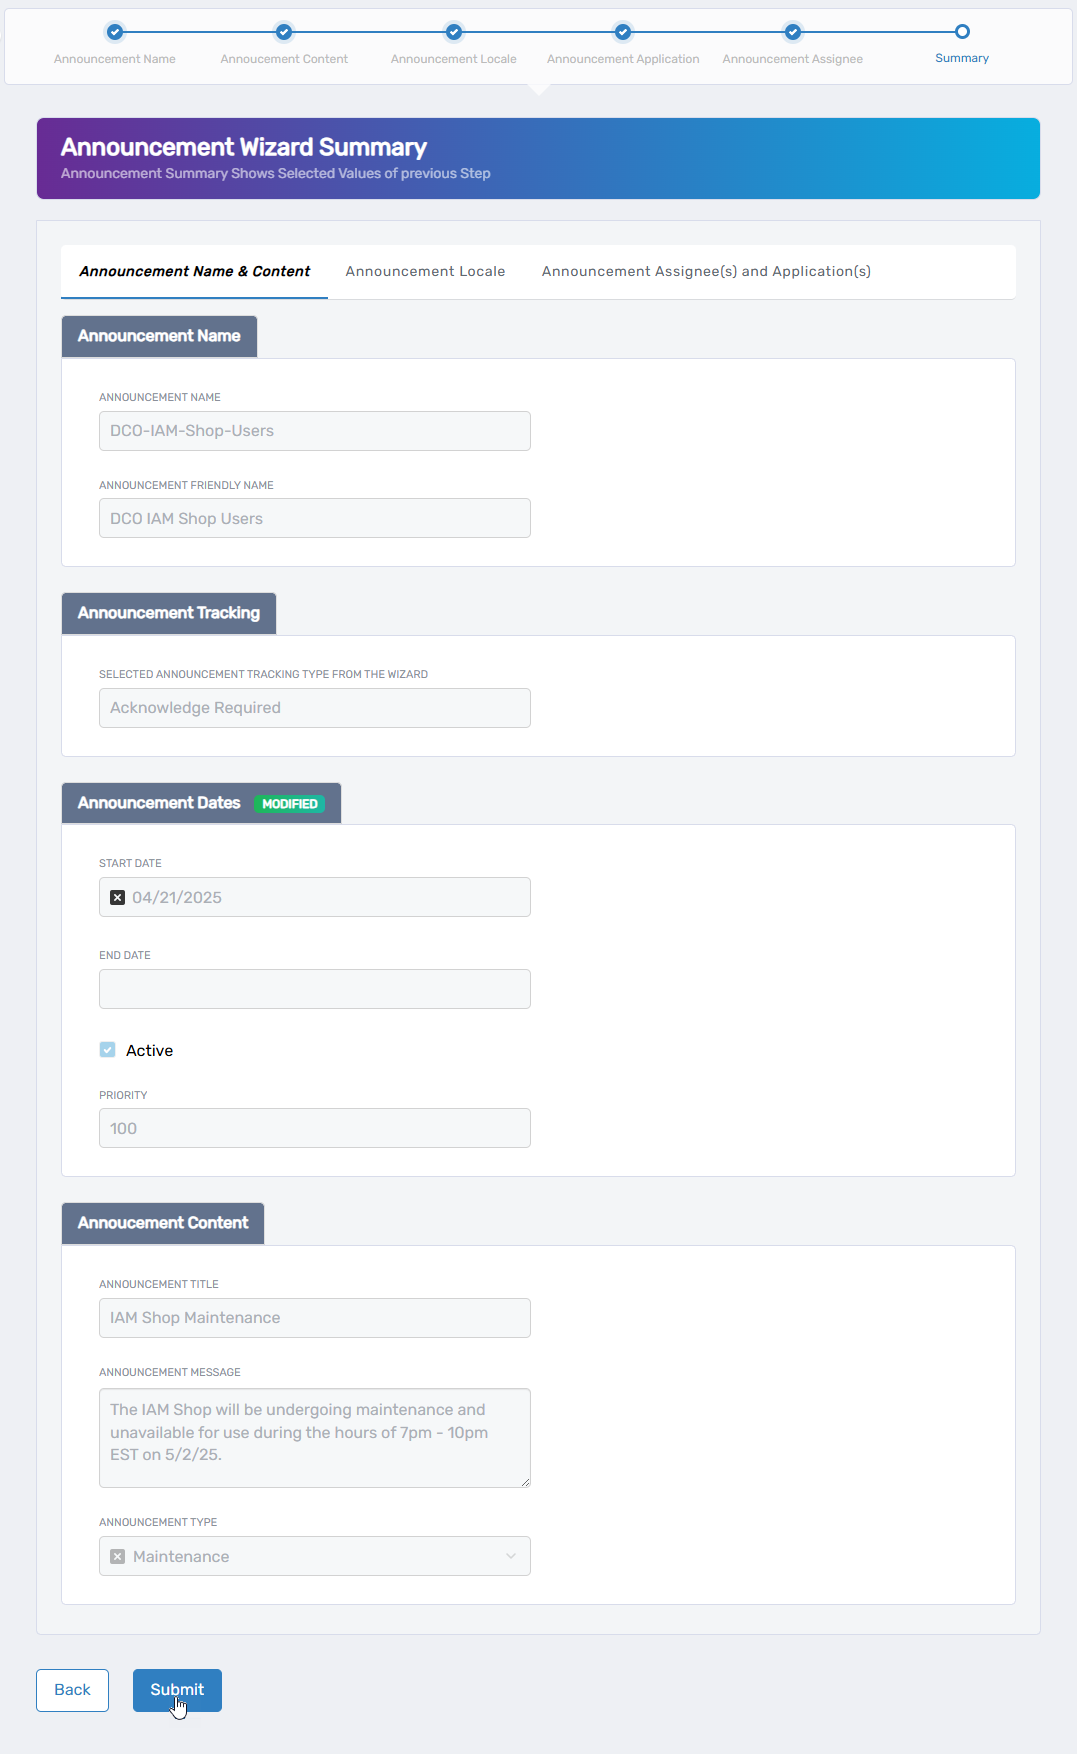
- On the Review and Submit screen, review the summary of your announcement details.
- If any revisions are needed, click Back to return to the relevant step.
- Click Submit to create the announcement.
Expected Results
The announcement should be visible to recipients when they access the target application.
To verify:
- Navigate to the application's URL.
- Log in as a recipient.
- Verify the announcement appears before the application's landing page.
If the announcement requires acknowledgment, users must read and acknowledge the notification before continuing to the target application.