Create Flow Policies
Flow Policies link Flow Events to Flow Definitions, specifying which automated workflows to trigger in response to specific events. This guide walks through creating a Flow Policy.
Create a Flow Policy
-
Navigate to the Find Business Request Flow page by expanding Low Code/No Code Workflow and selecting No Code Flow Event Policies from the navbar.
-
Click the Add New button.
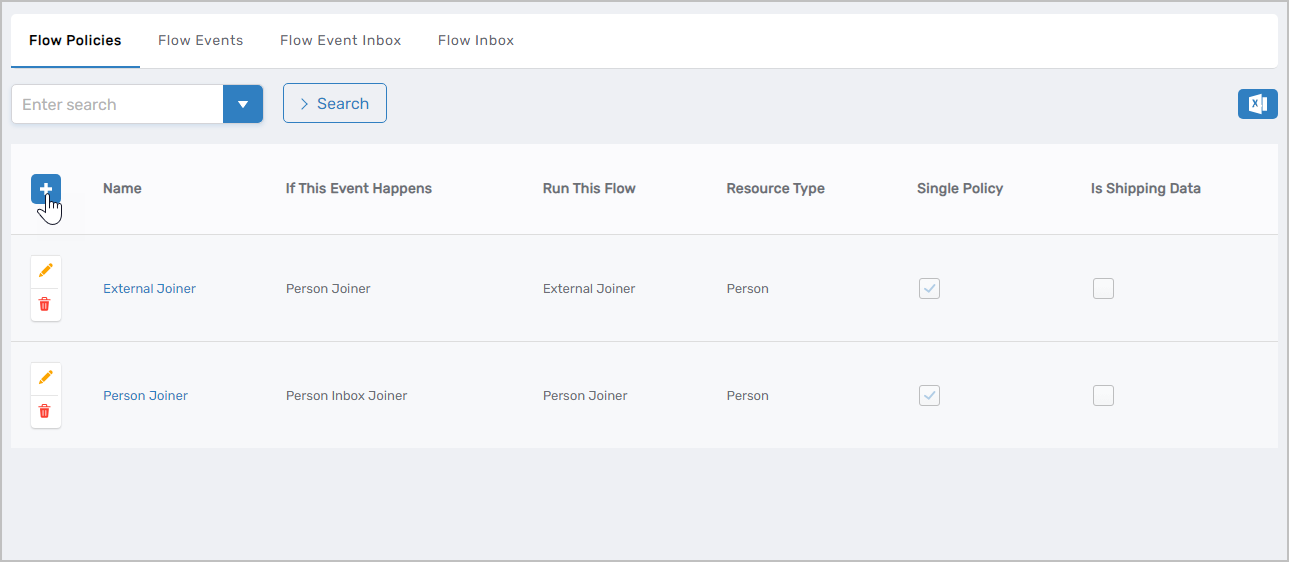 Figure 1: Click Add New to create a new Flow Policy
 -
Enter the details for the Flow Policy:
Field Description If This Event Happens Flow Event that triggers this policy (e.g., "Person Leaver") Run This Flow Flow Definition to execute when the event is detected Name Name for the policy (e.g., "Employee Offboarding") Display Name Name displayed in the EmpowerID UI Description Description of the policy's purpose Locale Key (Unique Name) Optional locale key for the Flow Policy name Local Key for Description Optional locale key for the Flow Policy description -
Click Save.
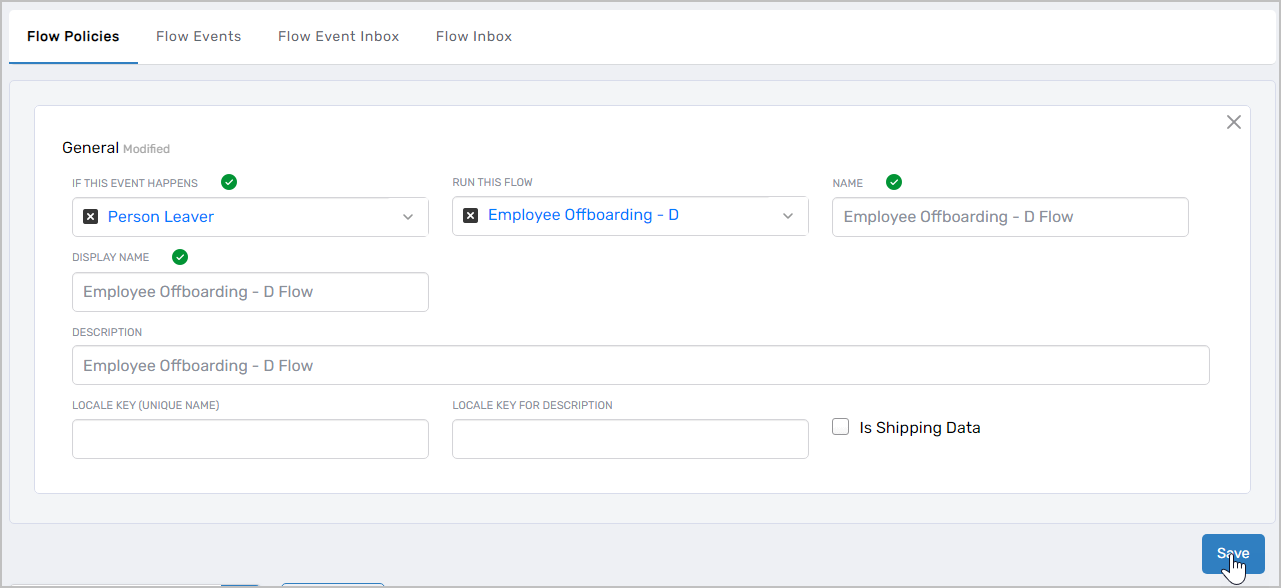 Figure 2: Flow Policy successfully created and saved
The Flow Policy is now active. When the specified Flow Event is detected, the system will automatically execute the associated Flow Definition.
Next Steps
With Flow Policies created, your No Code Flows are complete and will execute automatically when events are triggered. To create specialized Flow Items for specific actions: