Create and Add Flow Items
Flow Items define the specific actions to be performed within a Flow Definition. This guide walks through creating a Flow Item that disables a user's EmpowerID Person account and adding it to a Flow Definition.
-
Navigate to the Find Business Request Flow page by expanding Low Code/No Code Workflow and clicking No Code Flows.
-
Select the Flow Items (Activities) tab and click the New Flow Item button.
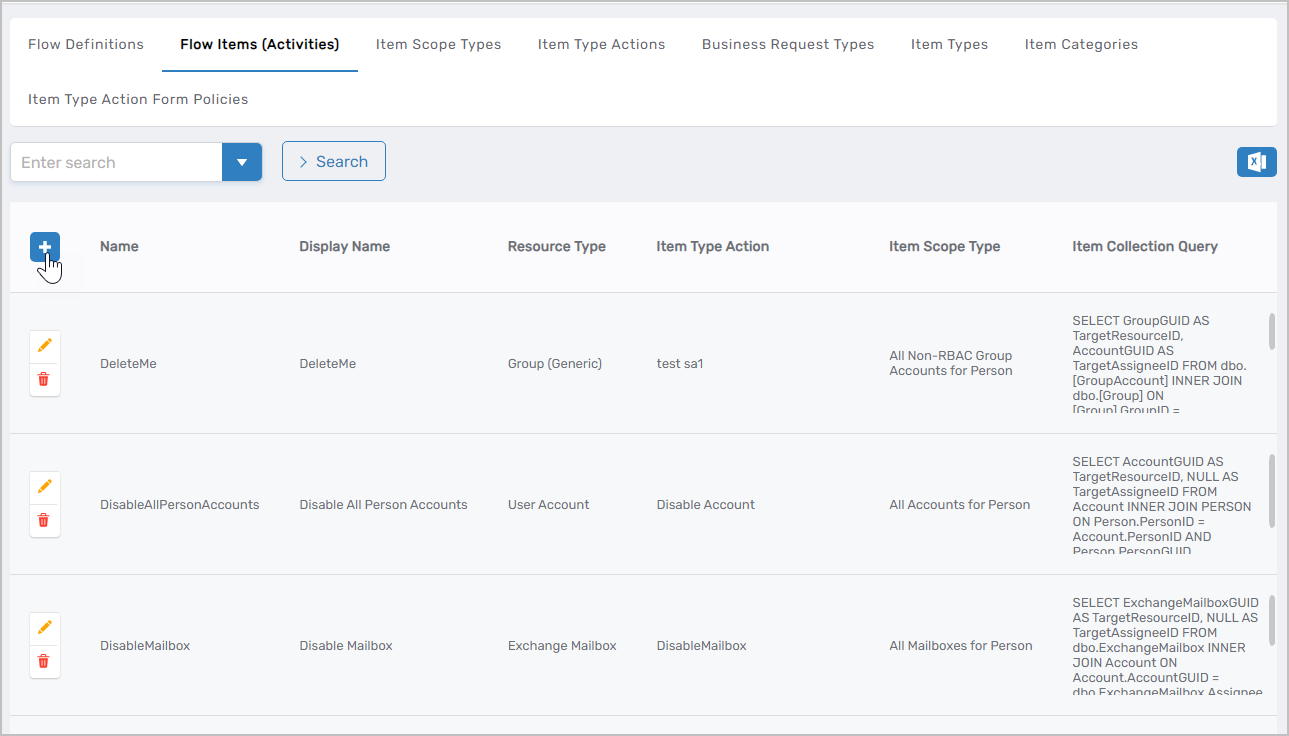 Figure 1: Click New Flow Item to create a new Flow Item
 -
Enter the details for the Flow Item:
Field Description Item Type Action Action to execute when the Flow Item runs (e.g., "PersonDisable" to disable an EmpowerID Person account) Scope Type (How to Get Items) Resource type for the Flow Item (e.g., "Person Resource" for Person accounts) Item Collection Filter Optional filter setting Threshold Item Count Maximum number of items the system can process using default policies. If exceeded, the system uses the policy specified in Over Threshold Switch to Item Over Threshold Switch to Item Policy to use if item count exceeds the threshold Name Name for the Flow Item (e.g., "Person Disable") Display Name Name displayed in the EmpowerID UI Description Description of the Flow Item's purpose Fulfillment WF JSON Optional JSON for custom fulfillment workflow configuration -
Click Save.
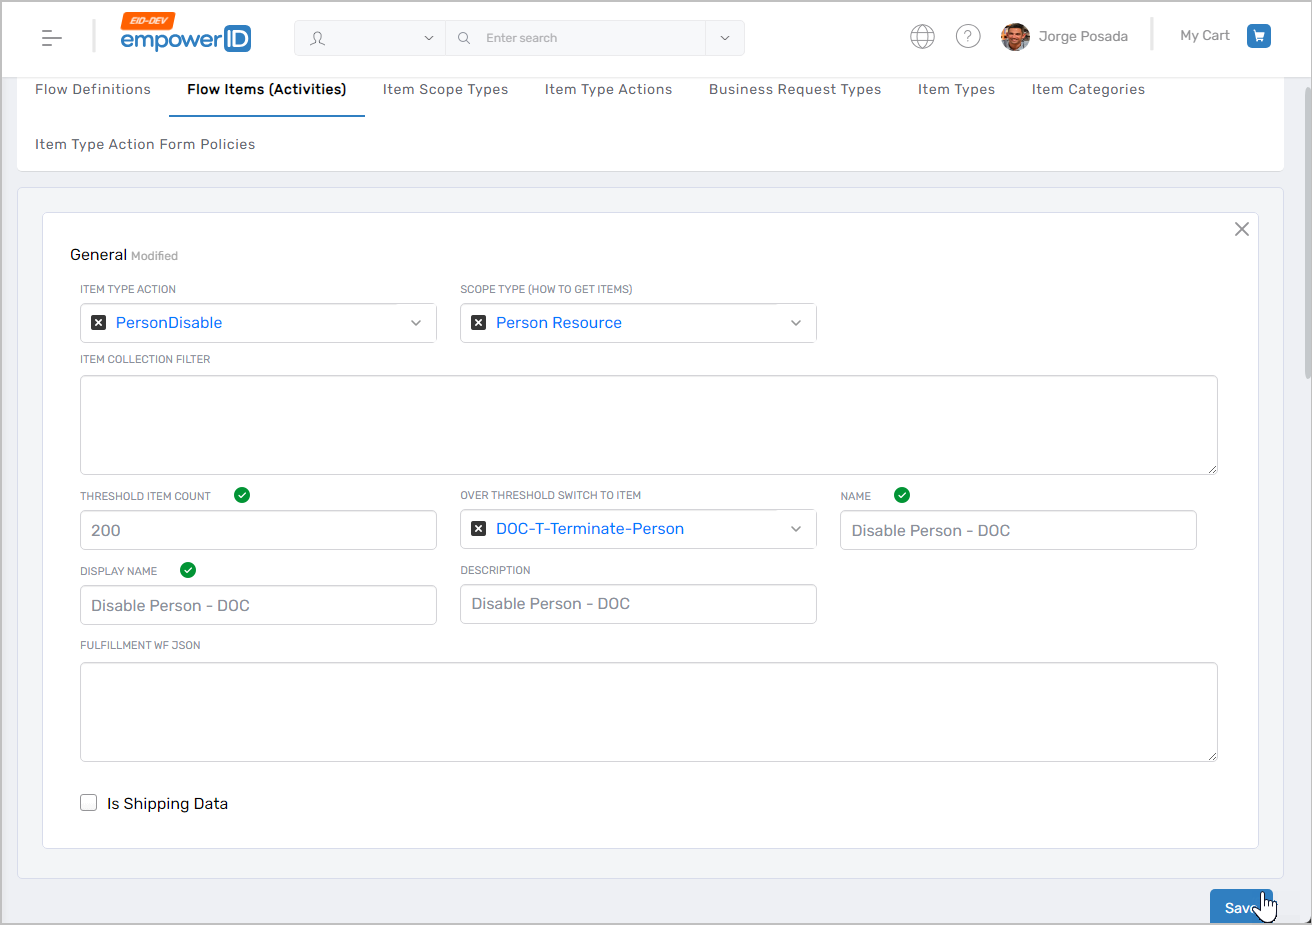 Figure 2: Flow Item configuration page with fields completed
 -
Repeat the above steps to create any additional Flow Items needed for your workflow.
-
Select the Flow Definitions tab on the Find Business Request Flow page and search for the Flow Definition you created earlier.
-
Click the Name link for the definition to open its View One page.
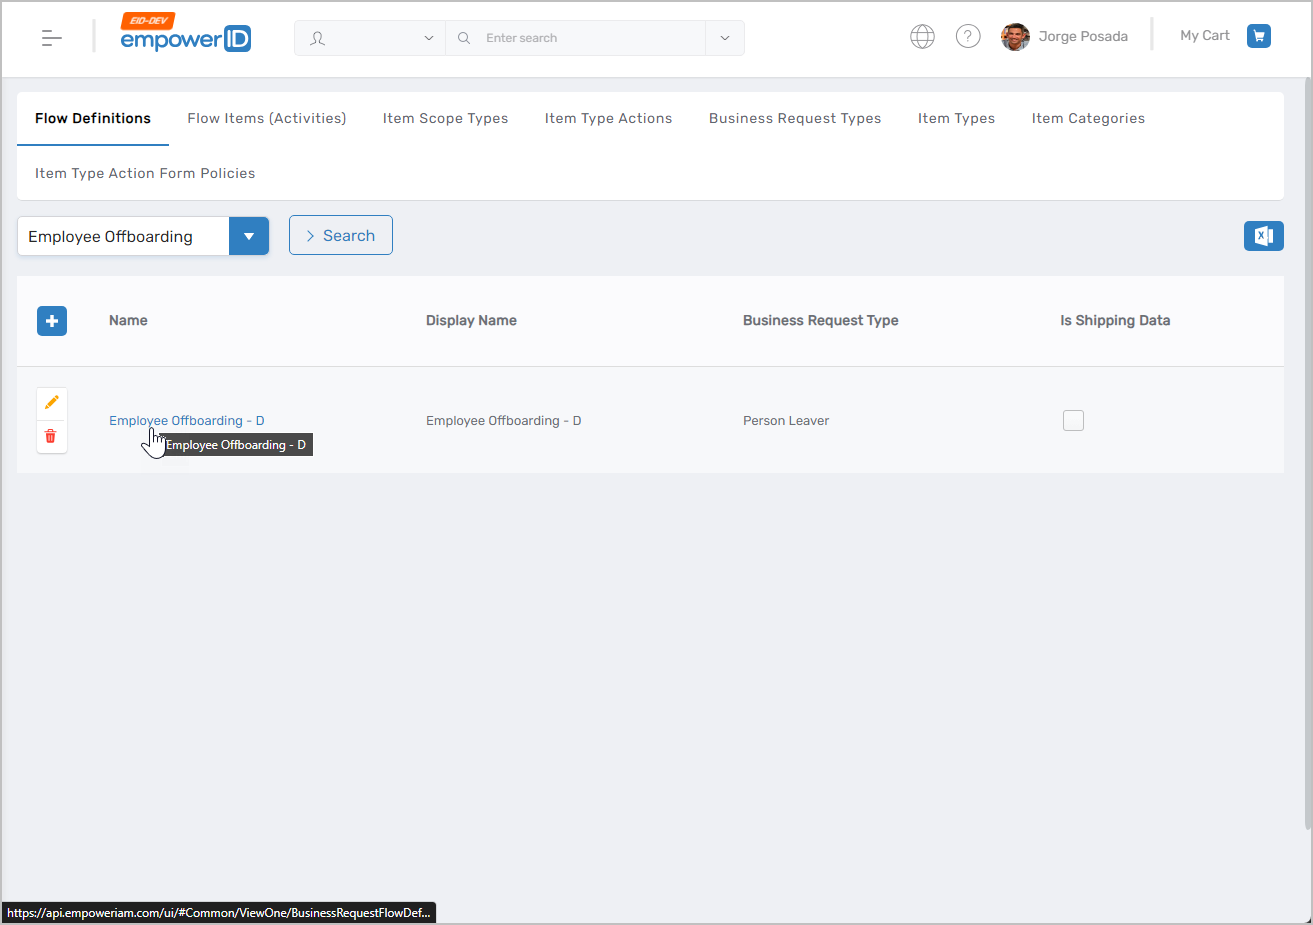 Figure 3: Click the Flow Definition name to open its View One page
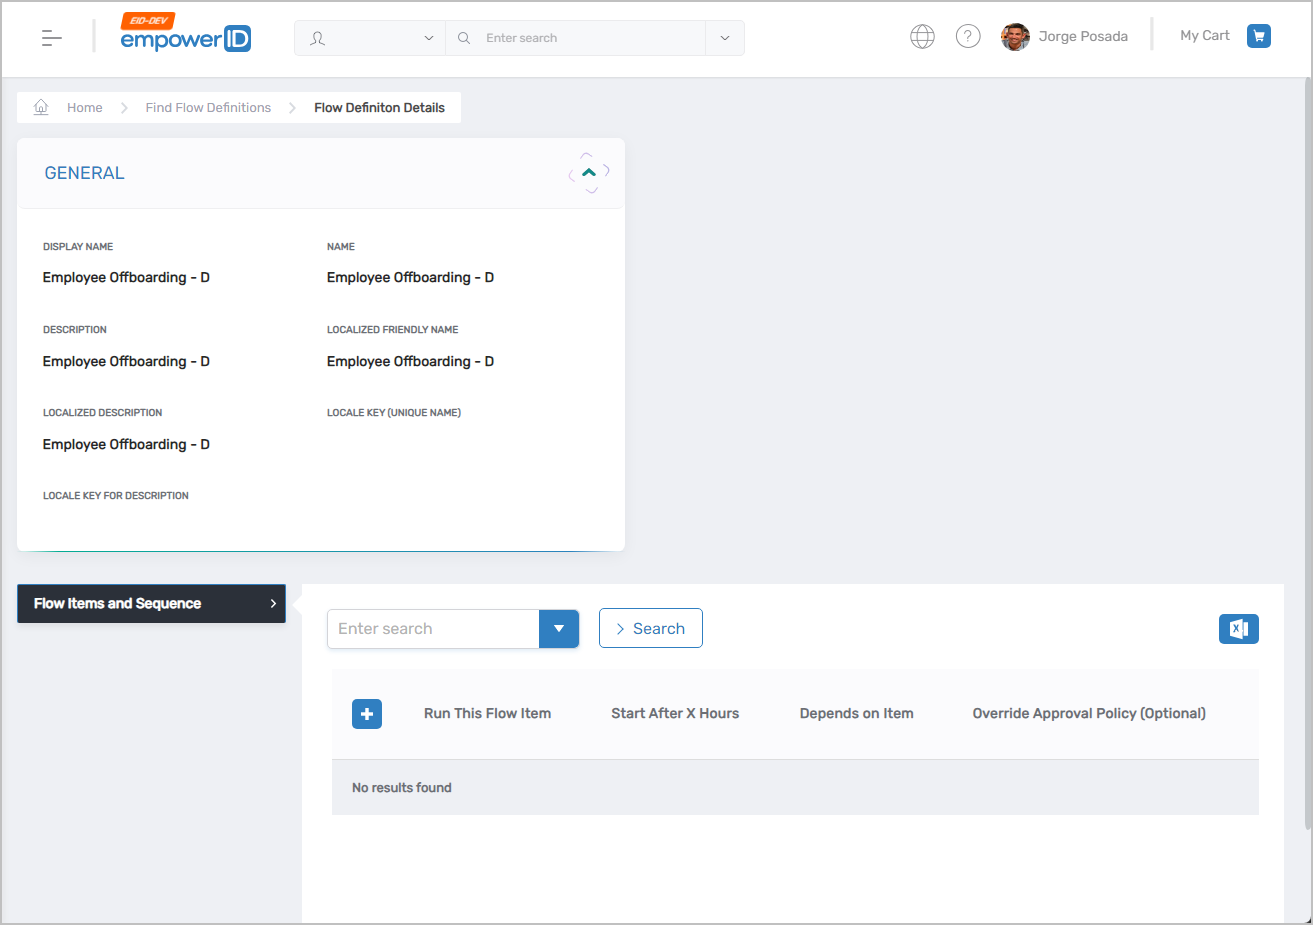 Figure 4: Flow Definition View One page for managing the definition
 -
Click the Add New button in the Flow Items and Sequence accordion.
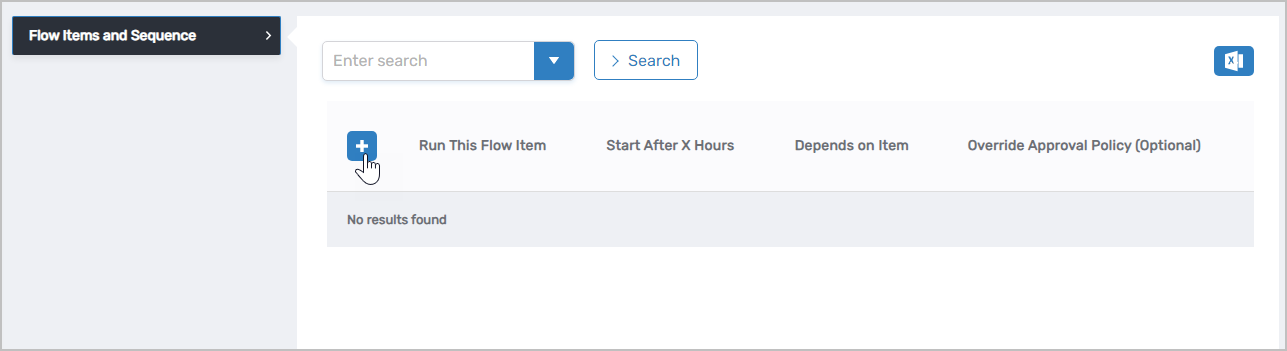 Figure 5: Click Add New to add a Flow Item to the definition
 -
Enter the following information to add the Flow Item to the definition:
Field Description Run This Flow Item Select the Flow Item created in step 4 Start After X Hours Number of hours to wait after detecting the Flow Event trigger before executing this Flow Item Depends on Item Optional Flow Item that must execute before this item Override Approval Policy Optional setting to use a different Approval Policy than the default for the Item Type Action Fulfillment WF JSON Optional JSON for custom configuration -
Click Save.
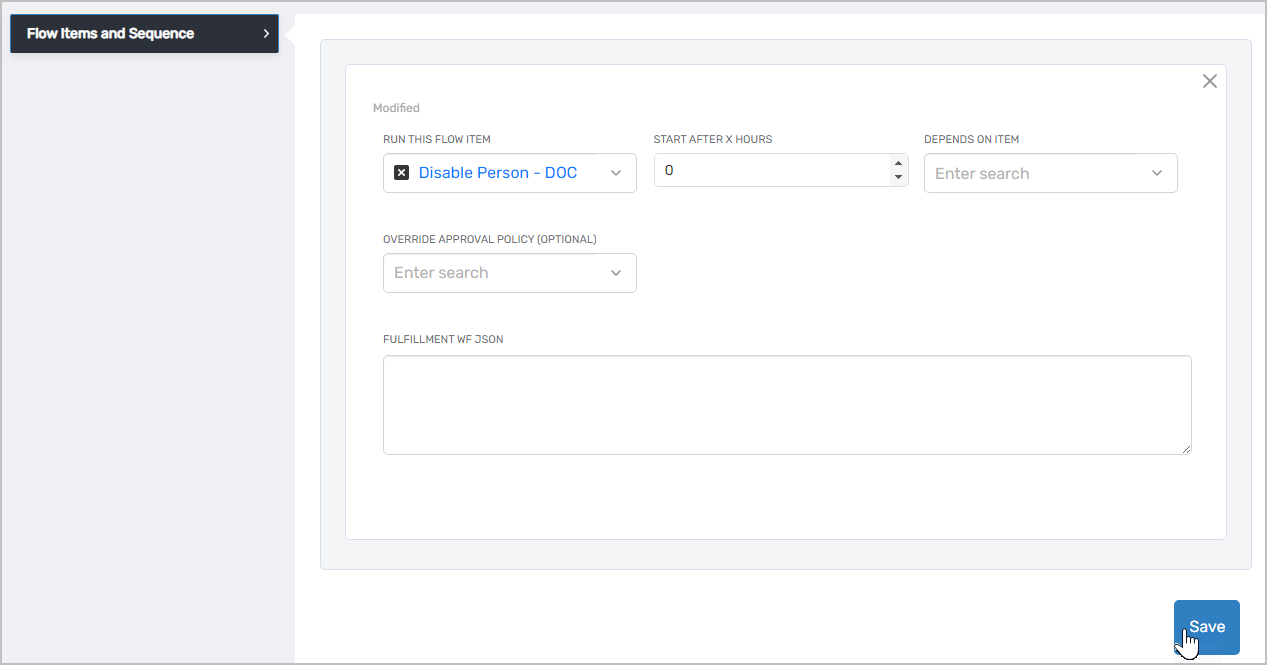 Figure 6: Flow Item successfully added to the Flow Definition sequence
 -
Repeat steps 8-10 to add other Flow Items to the definition as needed. Flow Items are processed in the order they are added.
Next Steps
After creating Flow Items and adding them to your Flow Definition, create Flow Policies to connect Flow Events to your Flow Definitions.