Set up Database Archiving
Database archiving in EmpowerID helps manage storage by moving historical data to a dedicated archive database or deleting data that no longer needs to be retained. This maintains system performance while preserving records for compliance and auditing purposes.
Overview
EmpowerID provides a Database Archiving Rule Processor job that automatically manages data retention across eligible component tables in the Identity Warehouse. The system can either archive data to a separate database for long-term storage or permanently delete it based on configurable rules.
Database archiving addresses two key operational needs:
- Performance Management - Reduces the size of active operational tables by removing aged data
- Compliance & Record Keeping - Preserves historical data in a dedicated archive database for audit trails and regulatory requirements
How Database Archiving Works
When database archiving is enabled, the system processes data in eligible component tables based on three configurable settings:
Archiving Action ID
Specifies whether data should be deleted or archived:
- 1 = Delete data from the Identity Warehouse
- 2 = Archive data by moving it to the archiving database
Rule Code
Optional SQL logic that must evaluate to true before any archiving action occurs. If set to NULL, archiving is based solely on the Archiving Action ID and Back Interval In Days.
Back Interval In Days
The number of days data must remain in the component table before any archiving action can occur.
Example: Web Cache Component
The Web Cache table has an Archiving Action ID of 1 (delete), a Rule Code of NULL, and a Back Interval In Days of 2. When the Database Archiving Rule Processor job runs, the system deletes all data in the WebCache table older than two days. Since the Rule Code is NULL, no additional conditions must be met.
Default Archiving Configuration
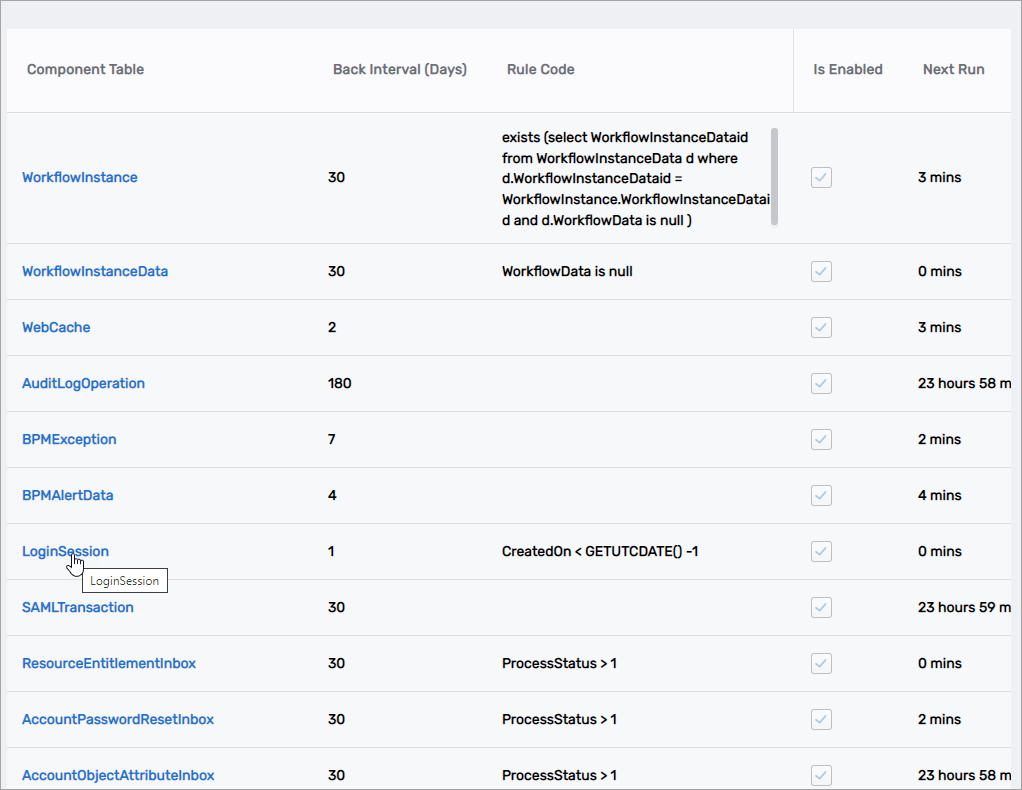
In a default configuration, the following tables are eligible for archiving:
| Archiving Rule ID | Component Table Name | Archiving Action ID | Rule Code | Back Interval In Days |
|---|---|---|---|---|
| 1 | Workflow Instance | 1 (Delete) | exists (select WorkflowInstanceDataid from WorkflowInstanceData d where d.WorkflowInstanceDataid = WorkflowInstance.WorkflowInstanceDataid and d.WorkflowData is null ) | 30 |
| 2 | Workflow Instance Data | 1 (Delete) | WorkflowData is null | 30 |
| 3 | Web Cache | 1 (Delete) | NULL | 2 |
| 4 | Audit Log Operation | 2 (Archive) | NULL | 180 |
| 5 | BPM Exception | 1 (Delete) | NULL | 7 |
| 6 | BPM Alert | 1 (Delete) | NULL | 4 |
| 7 | Login Session | 1 (Delete) | CreatedOn < GETUTCDATE() -1 | 1 |
| 8 | SAML Transaction | 1 (Delete) | NULL | 30 |
| 9 | Resource Entitlement Inbox | 2 (Archive) | ProcessStatus > 1 | 30 |
| 10 | Account Password Reset Inbox | 2 (Archive) | ProcessStatus > 1 | 30 |
| 11 | Account Object Attribute Inbox | 2 (Archive) | ProcessStatus > 1 | 30 |
| 12 | Account Object Attribute Outbox | 2 (Archive) | ProcessStatus > 1 | 30 |
| 13 | Person OrgRoleOrgZone ReEval Inbox | 2 (Archive) | NULL | 30 |
| 14 | Execution Runtime Job History | 1 (Delete) | NULL | 14 |
| 15 | Person Login History | 1 (Delete) | NULL | 180 |
| 16 | Scheduled Workflow History | 1 (Delete) | NULL | 14 |
| 17 | Workflow Internal Task History | 1 (Delete) | 14 | |
| 18 | Archiving Rule History | 1 (Delete) | NULL | 30 |
| 21 | Access Request Catalog Item | 2 (Archive) | NULL | 31 |
The tables eligible for archiving or deletion are relatively small. While it's possible to add more tables, this requires in-depth knowledge of the relationships between data in the Identity Warehouse. Contact EmpowerID professional services before adding additional tables to the archiving configuration.
Set up database archiving
Prerequisites
- SQL Management tools installed on an EmpowerID server
- Appropriate permissions to create databases and execute stored procedures
Create the archive database
- From any EmpowerID server with SQL Management tools installed, open Microsoft SQL Server Management Studio (SSMS).
- From SSMS, right-click Databases and select New Database... from the context menu.
- In the New Database window that opens, type EmpowerID_Archive in the Database name field and then click OK.
Host the archive database on the same SQL server as the EmpowerID Identity Warehouse for optimal performance and simplified management.
If you name the database something other than EmpowerID_Archive, you must:
- Replace the value of the DatabaseName parameter in the stored procedure below
- Update the name of the ExtensionAttribute1 field in the ExecutionRunTimeJob table
- Perform an iisreset to ensure EmpowerID picks up the new archive database
Generate archive tables
- From the EmpowerID Identity Warehouse, execute the dbo.Custom_ArchivingRule_CreateArchiveTables stored procedure. This generates the tables and related information for each component with data eligible for archiving or deletion.
Replace the value of the DatabaseServerName parameter with the name of the SQL server hosting the database in your environment.
EXEC dbo.Custom_ArchivingRule_CreateArchiveTables @DatabaseServerName=N'SQL2019',
                                                 @Owner='dbo',
                                                 @DatabaseName='EmpowerID_Archive'
Configure retention intervals (optional)
-
To customize the Back Interval In Days setting for any table:
-
On the navbar of the EmpowerID Web interface, expand Admin > Miscellaneous and click Archiving Rules.
-
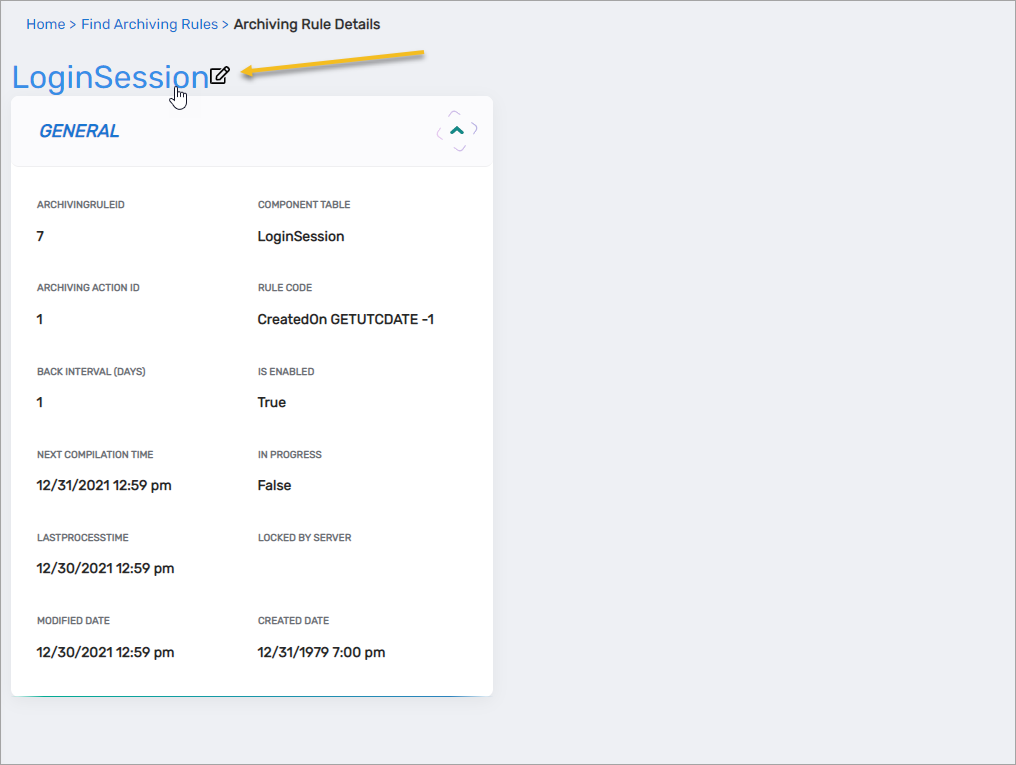
On the Archiving Rule page, click the Component Table link for the component whose Back Interval In Days setting you want to change.
-
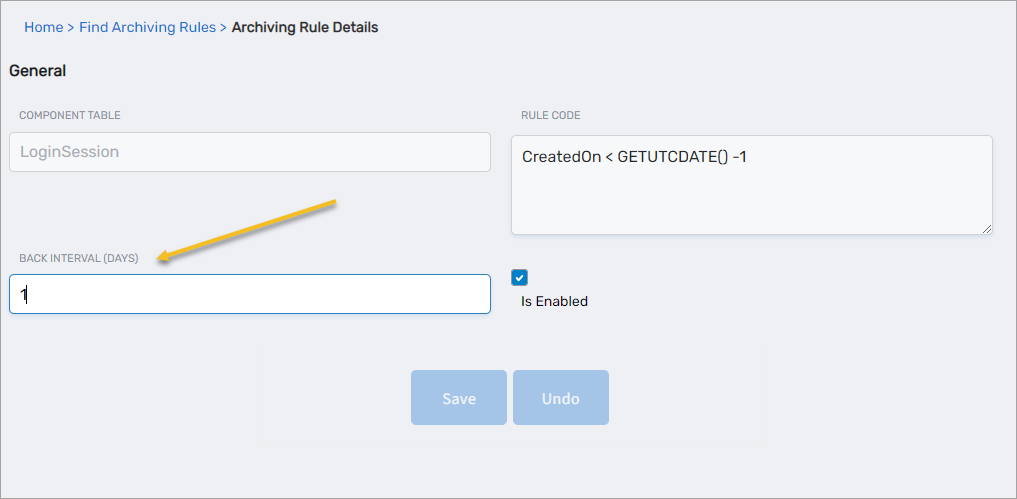
On the Archiving Rules Details view that appears, click the Edit link.
-
Enter the new integer value in the Back Interval (Days) field and then click Save.
-
Next steps
After completing the setup, enable the Database Archiving Rule Processor job to begin automatic data archiving. The job processes eligible data based on the configured rules and intervals.