Create Client Secrets
As an application owner, you can generate client secrets for your Microsoft Entra application to enable secure connections to other services.
You will only see the client secret value once—immediately after it's created. Make sure to copy and store it in a secure location.
Steps to Create a Client Secret
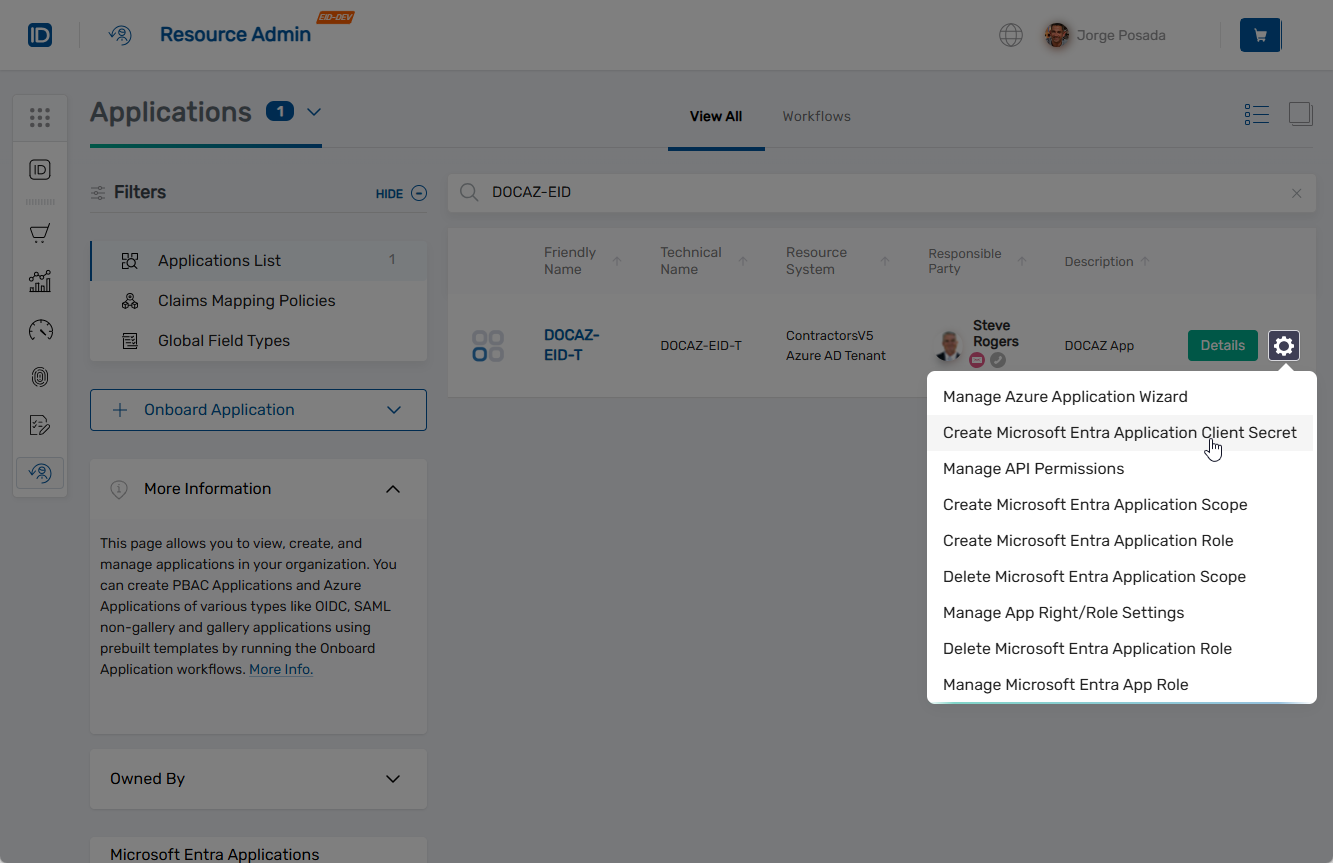
- Log in to the Resource Admin portal.
- In the Resource Type menu, select Applications.
- Search for your application.
- Click the gear icon on the application record and select Create Microsoft Entra Application Client Secret.
 The Client Secret Details form opens.
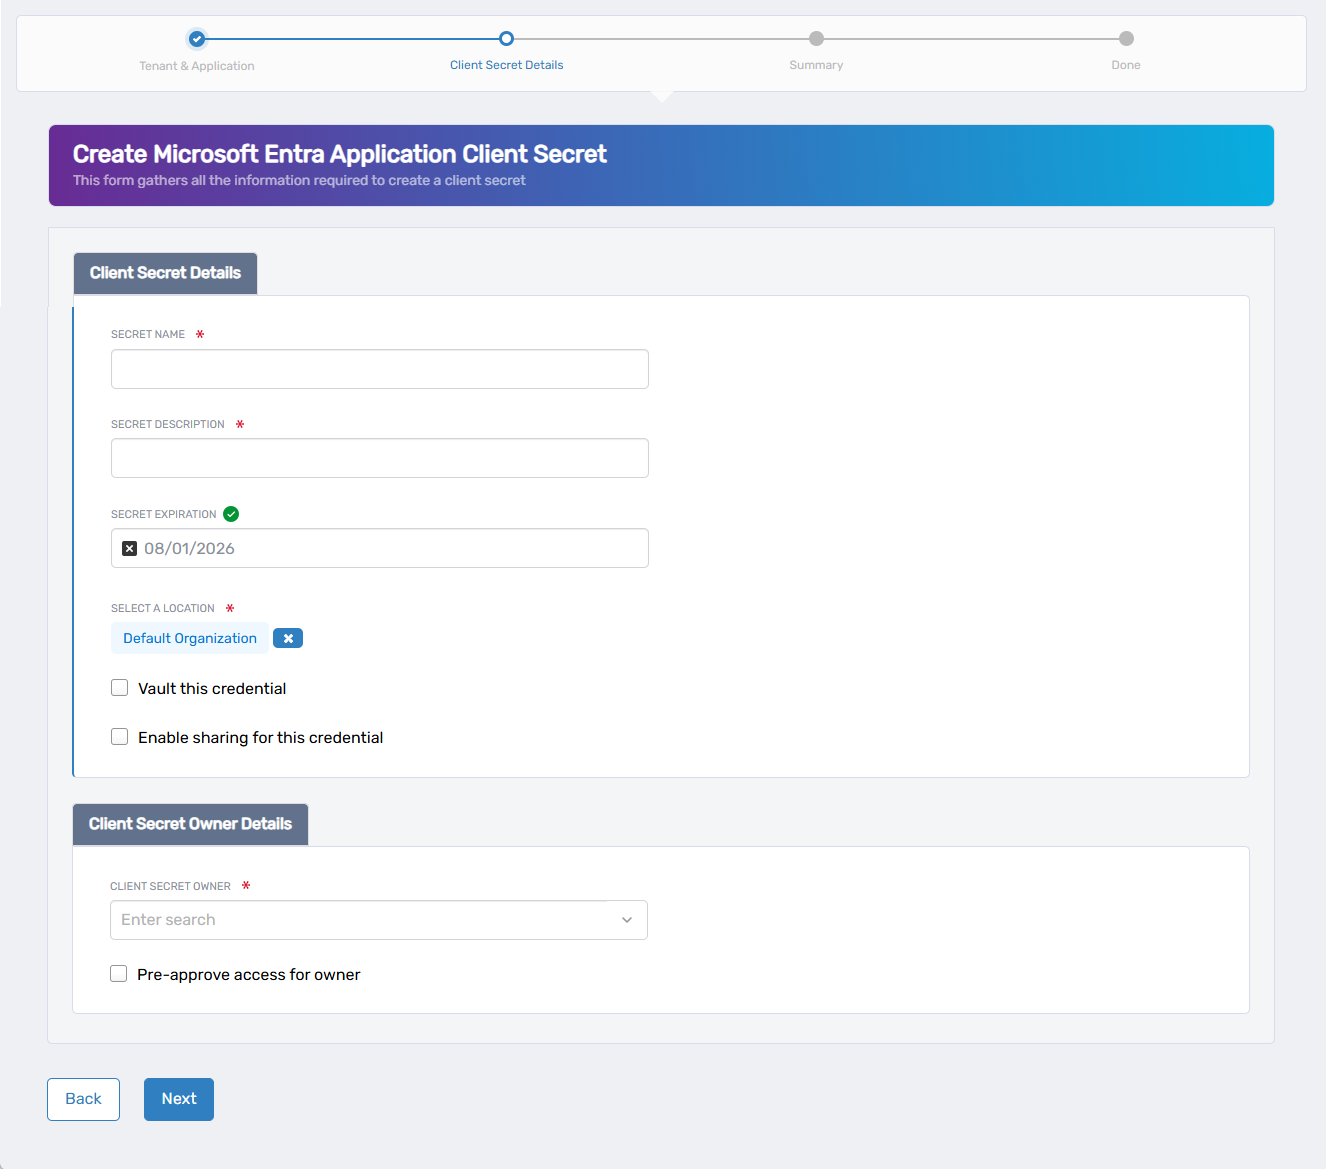
Complete the fields in both the Client Secret Details and Client Secret Owner Details sections:
| Field | Description |
|---|---|
| Secret Name | Required. Enter a name to identify the client secret. |
| Secret Description | Required. Provide a description for the secret's purpose. |
| Secret Expiration | Required. Select an expiration date. The default is one year from the current date. |
| Select a Location | Required. Choose the EmpowerID location where the secret should be stored. |
| Vault this credential | Optional. Select to store the secret in EmpowerID's credential vault. |
| Enable sharing for this credential | Optional. Allows other users to request access to the secret in EmpowerID. |
Sharing, ownership, and access approvals apply only if the credential is vaulted. If you do not vault the secret, EmpowerID will not retain or control access to it after creation.
Under Client Secret Owner Details, complete the following:
- In Client Secret Owner, enter the name of the person you want to assign and click to select them.
The user must exist in EmpowerID and belong to the same Microsoft Entra tenant as the application. - Select Pre-approve access for owner if the credential is vaulted and you want the owner to access the secret without approval.
The secret owner is always required, but EmpowerID access control features only apply if the credential is vaulted.
-
Click Next to proceed to the summary screen.
-
Review all entered information carefully on the summary screen.
- If you need to make changes, click Back to return to the previous step and edit the form.
-
When ready, click Submit to create the secret.
After submitting, the Fulfill Microsoft Entra Application Client Secret screen appears, showing the generated client secret.
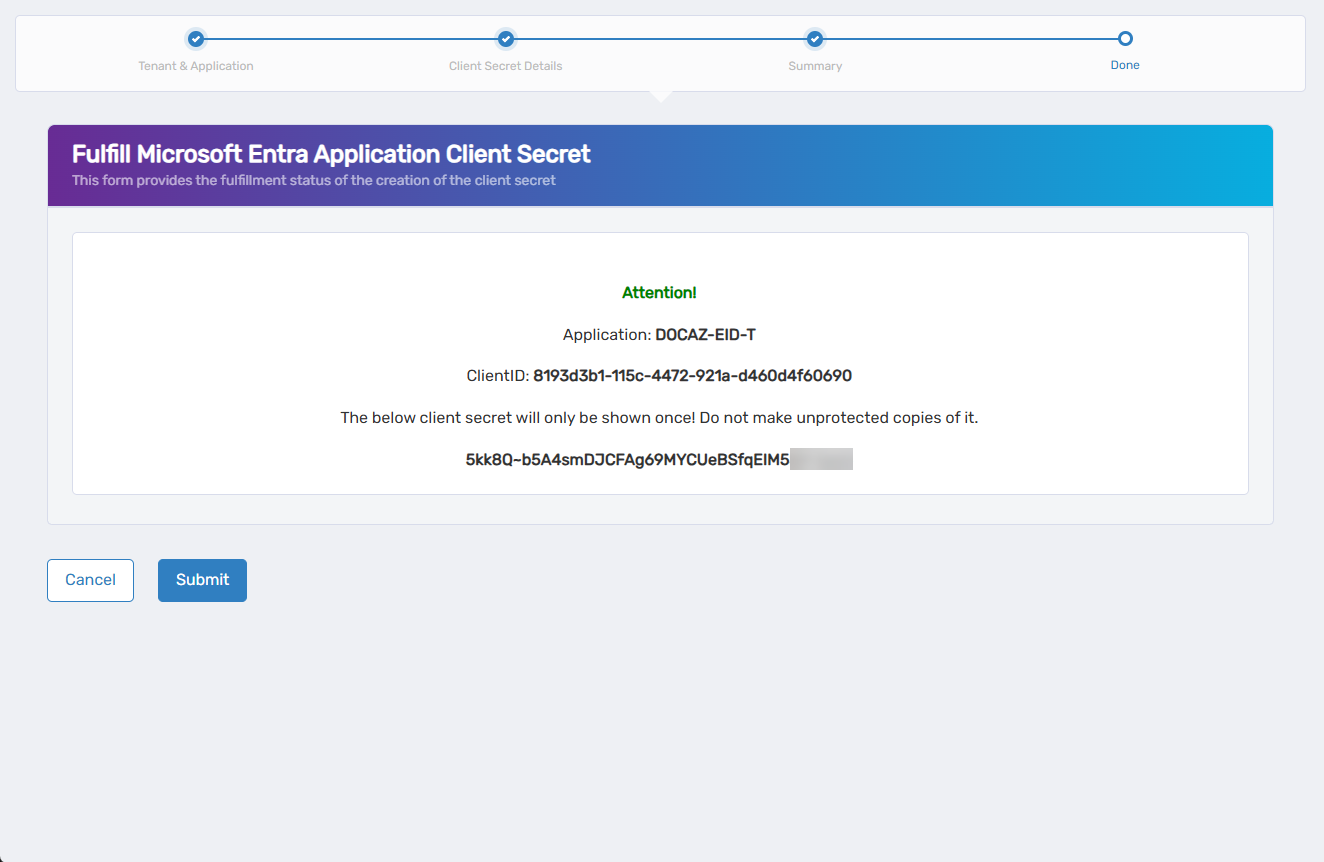 important
The secret value is displayed only once. Copy and store it in a secure location before continuing.
-
After copying the secret, click Submit to complete the workflow.
What Happens Next
- The client secret is registered with the Azure application.
- If vaulting and sharing were enabled, those configurations are applied.
- You can return to the Client Secrets tab in the application record to view metadata or delete the secret.