Setting up PBAC Approval Routing
PBAC approval routing provides a dynamic framework for routing access requests to appropriate approvers based on field type values. This enables context-aware approval workflows where different approvers review requests based on attributes like region, department, or data classification.
PBAC approval routing uses field types to dynamically determine approvers based on request attributes. For conceptual background on how approval routing works, see Understanding Approval Routing for Applications.
This article demonstrates how to set up PBAC approval routing by creating access request policies, approval rights, and linking them to application rights.
Prerequisites
Before setting up PBAC approval routing, ensure you have:
- Access to Resource Admin with the Application RBAC Owner Management Role (or higher)
- An existing PBAC application with field types, field type values, and app rights already created
Procedure
Create an Access Request Policy for PBAC Approval
-
Use the EmpowerID navbar and navigate to Low Code/No Code Workflow > Access Request Policies.
-
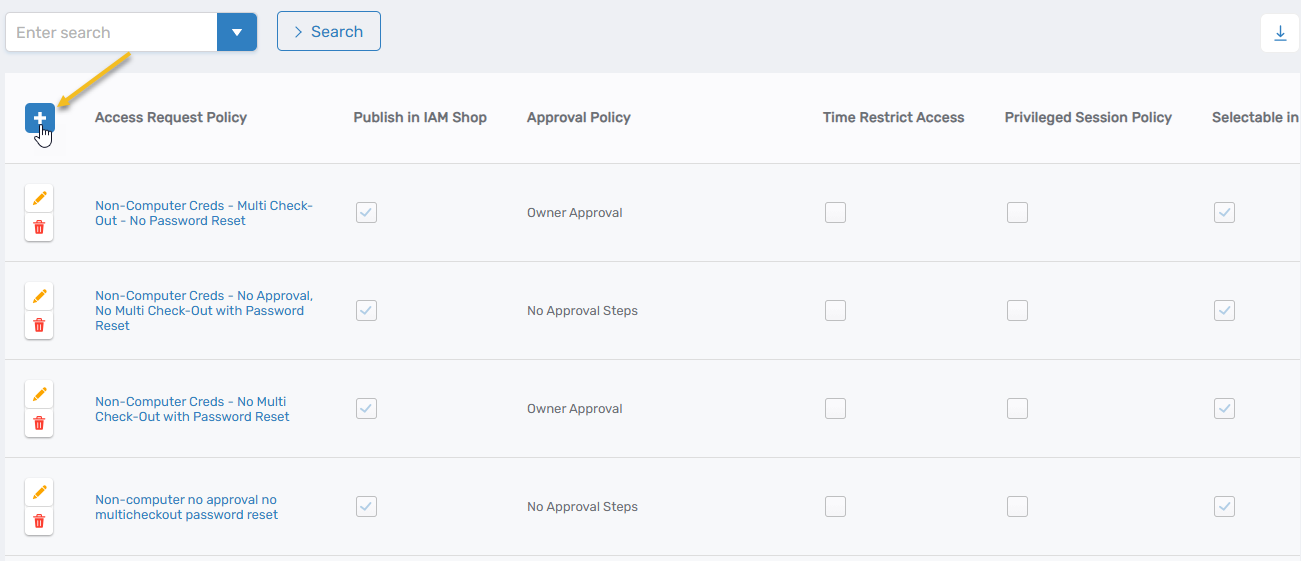
Click the Add button on the Access Request Policy page.
-
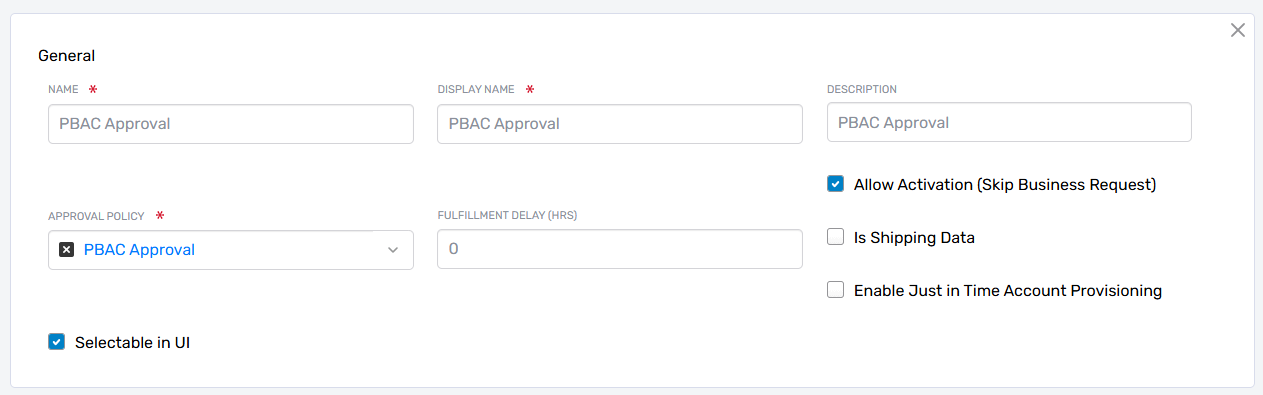
In the General section, enter the following information:
- Name: Enter a name for the policy (e.g., "PBAC Approval" or "PBAC Approval Access Request Policy").
- Display Name: Enter a display name.
- Description: Enter a description.
- Approval Policy: Select PBAC Approval.
- Allow Activation (Skip Business Request): Enable this option.
- Selectable in UI: Enable this option.
-
Leave all other fields with their default settings and click Save.
Create Approval Rights
Create approval rights for each application right you want to configure for PBAC approval. For example, if you have a "View Product Catalog" right, create an approval right named "View Product Catalog Approval."
-
Sign in to Resource Admin with at least the Application RBAC Owner Management Role.
-
Search for the PBAC application where you want to create approval rights and click the Details button.
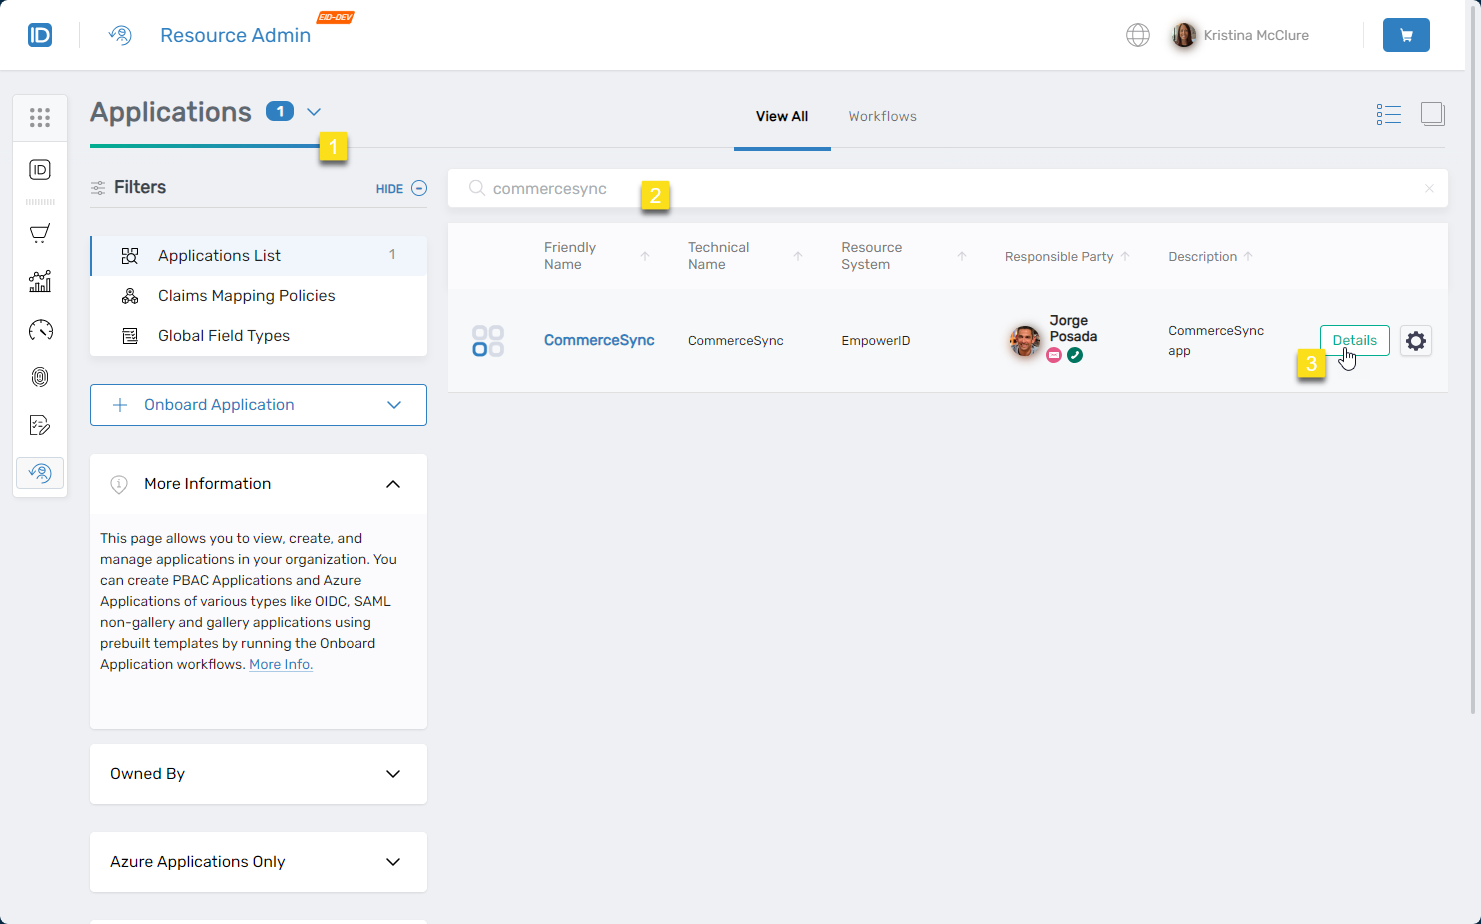
The application Overview page opens.

-
Expand PBAC Definitions, select App Rights, and click Create App Right.
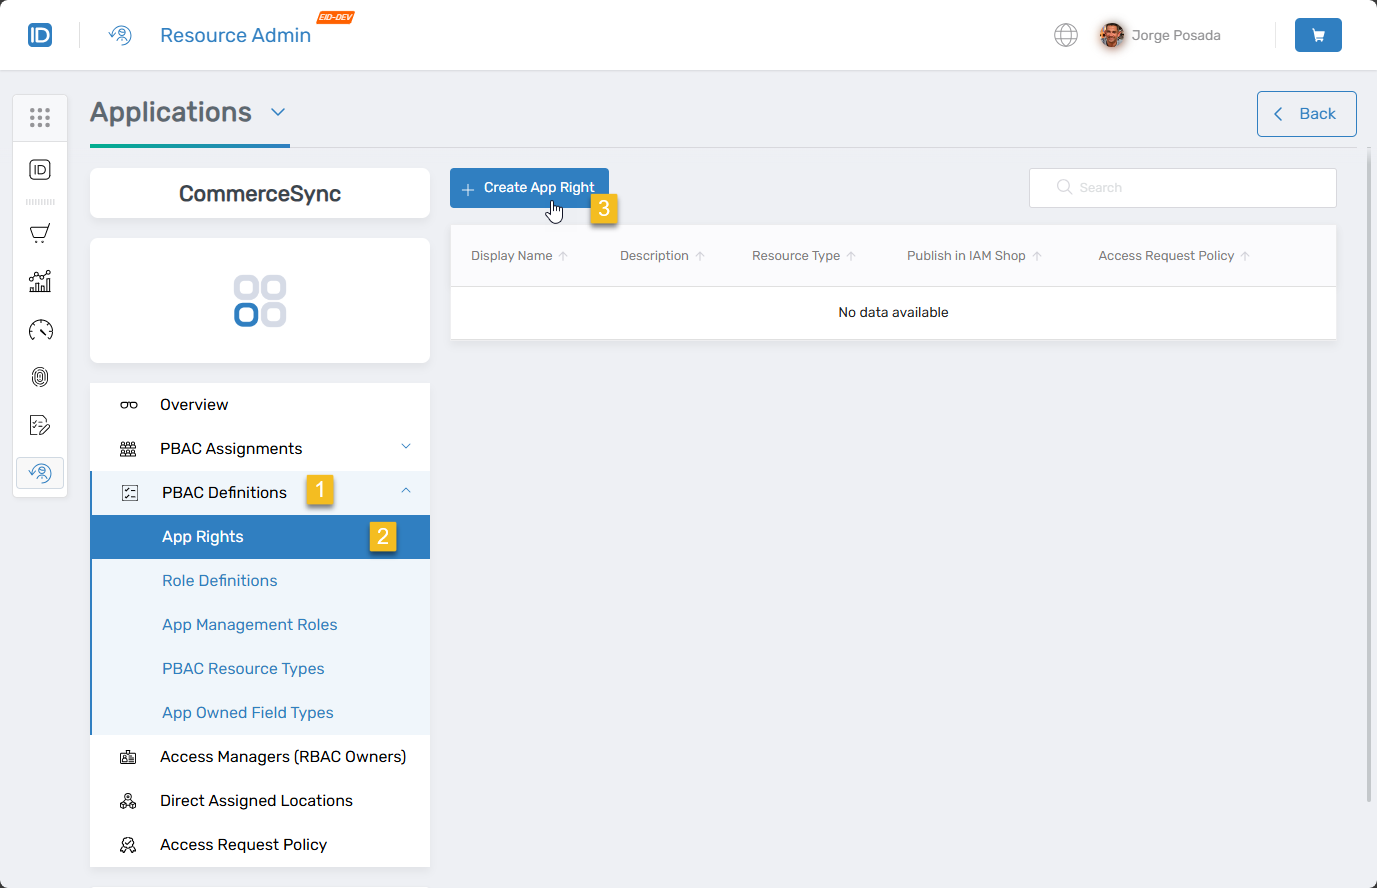 The "Onboard Az Local Right" wizard opens.
-
Complete the wizard sections with the appropriate information for the approval right.
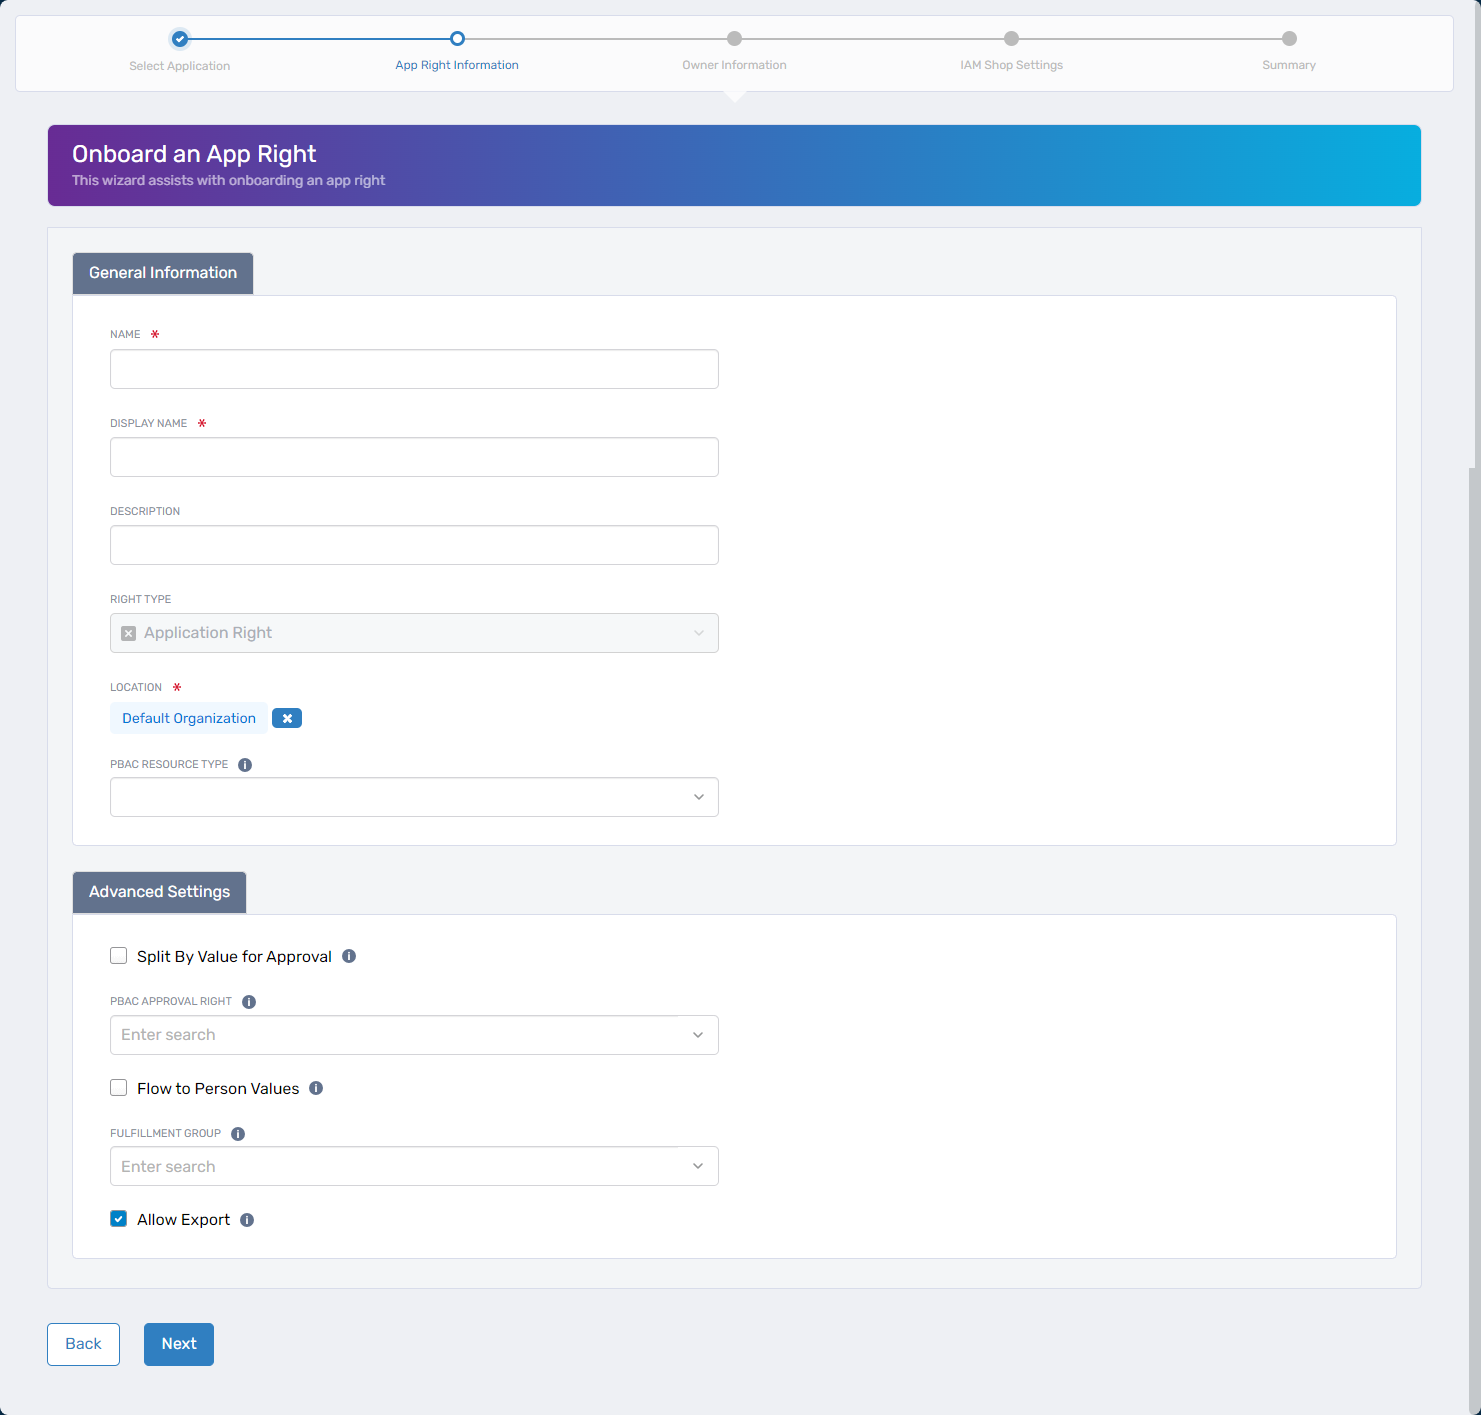
General Information
Field Description Action Name Name of the approval right Enter the approval right name without spaces. For example, if you have an app right named "View Product Catalog," name the approval right "ViewProductCatalogApproval." Display Name User-friendly name shown to end users Enter a display name. Description Brief characterization of the approval right Enter a description. Right Type Application Right N/A (read-only, defaults to Application Right) Location EmpowerID location for RBAC access. Default Organization is selected by default. Clear the default and select a different location if needed. PBAC Resource Type Resource type to which the app corresponds (optional) Select the PBAC Resource Type if applicable. Advanced Information
Under Advanced Right Information, deselect Allow Export and leave all other fields empty, as they pertain to PBAC approval routing set on app rights only, not approval rights.
Owner Information
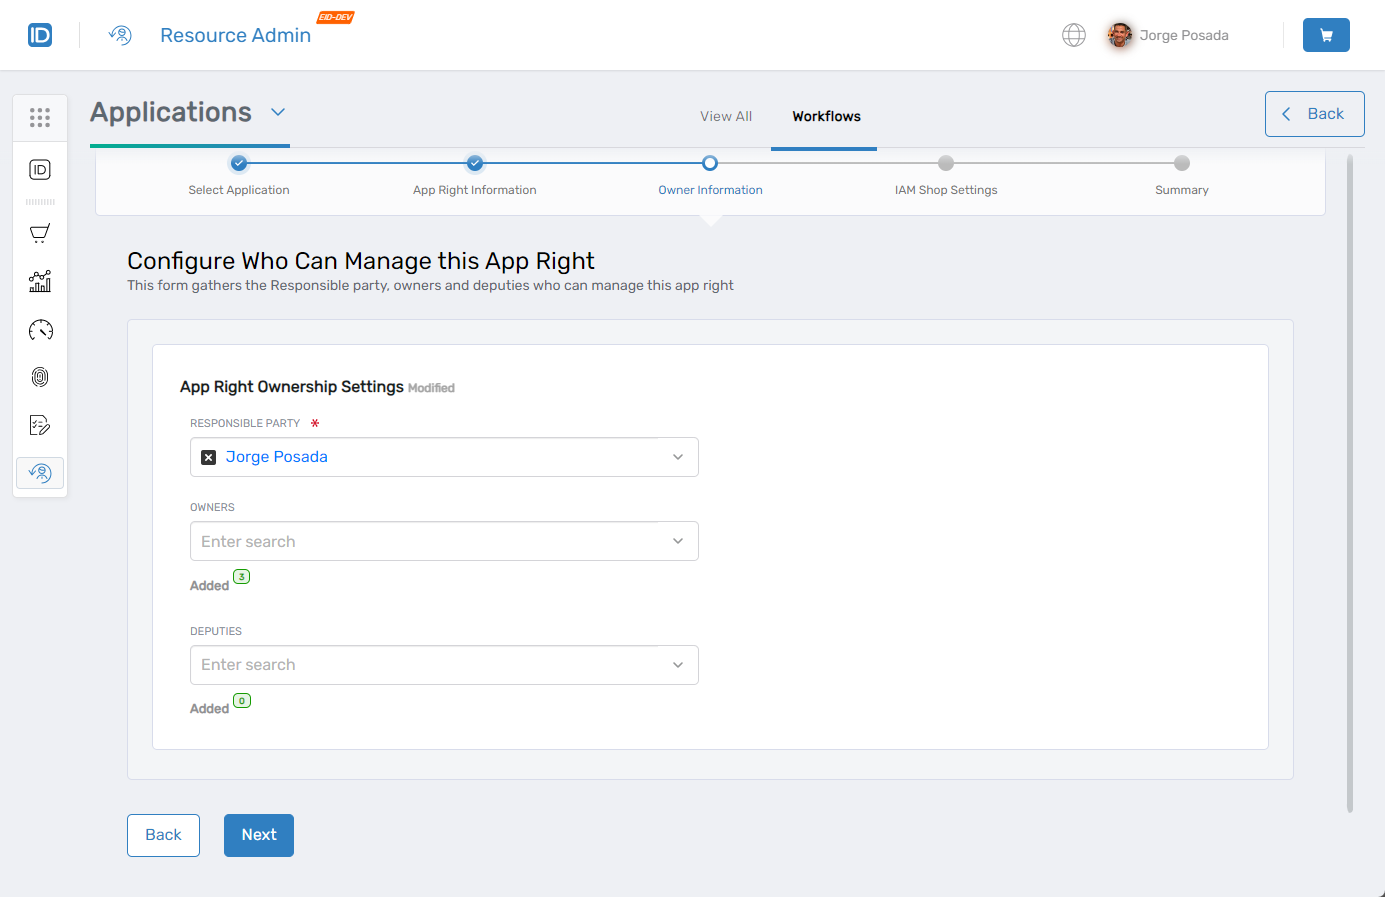
Field Description Action Responsible Party Primary individual accountable for the approval right Enter the responsible party's name (required). Owners People who have ownership rights over the approval right Enter owner names (optional but recommended). Deputies Secondary contacts or assistants to owners Enter deputy names (optional). IAM Shop Settings
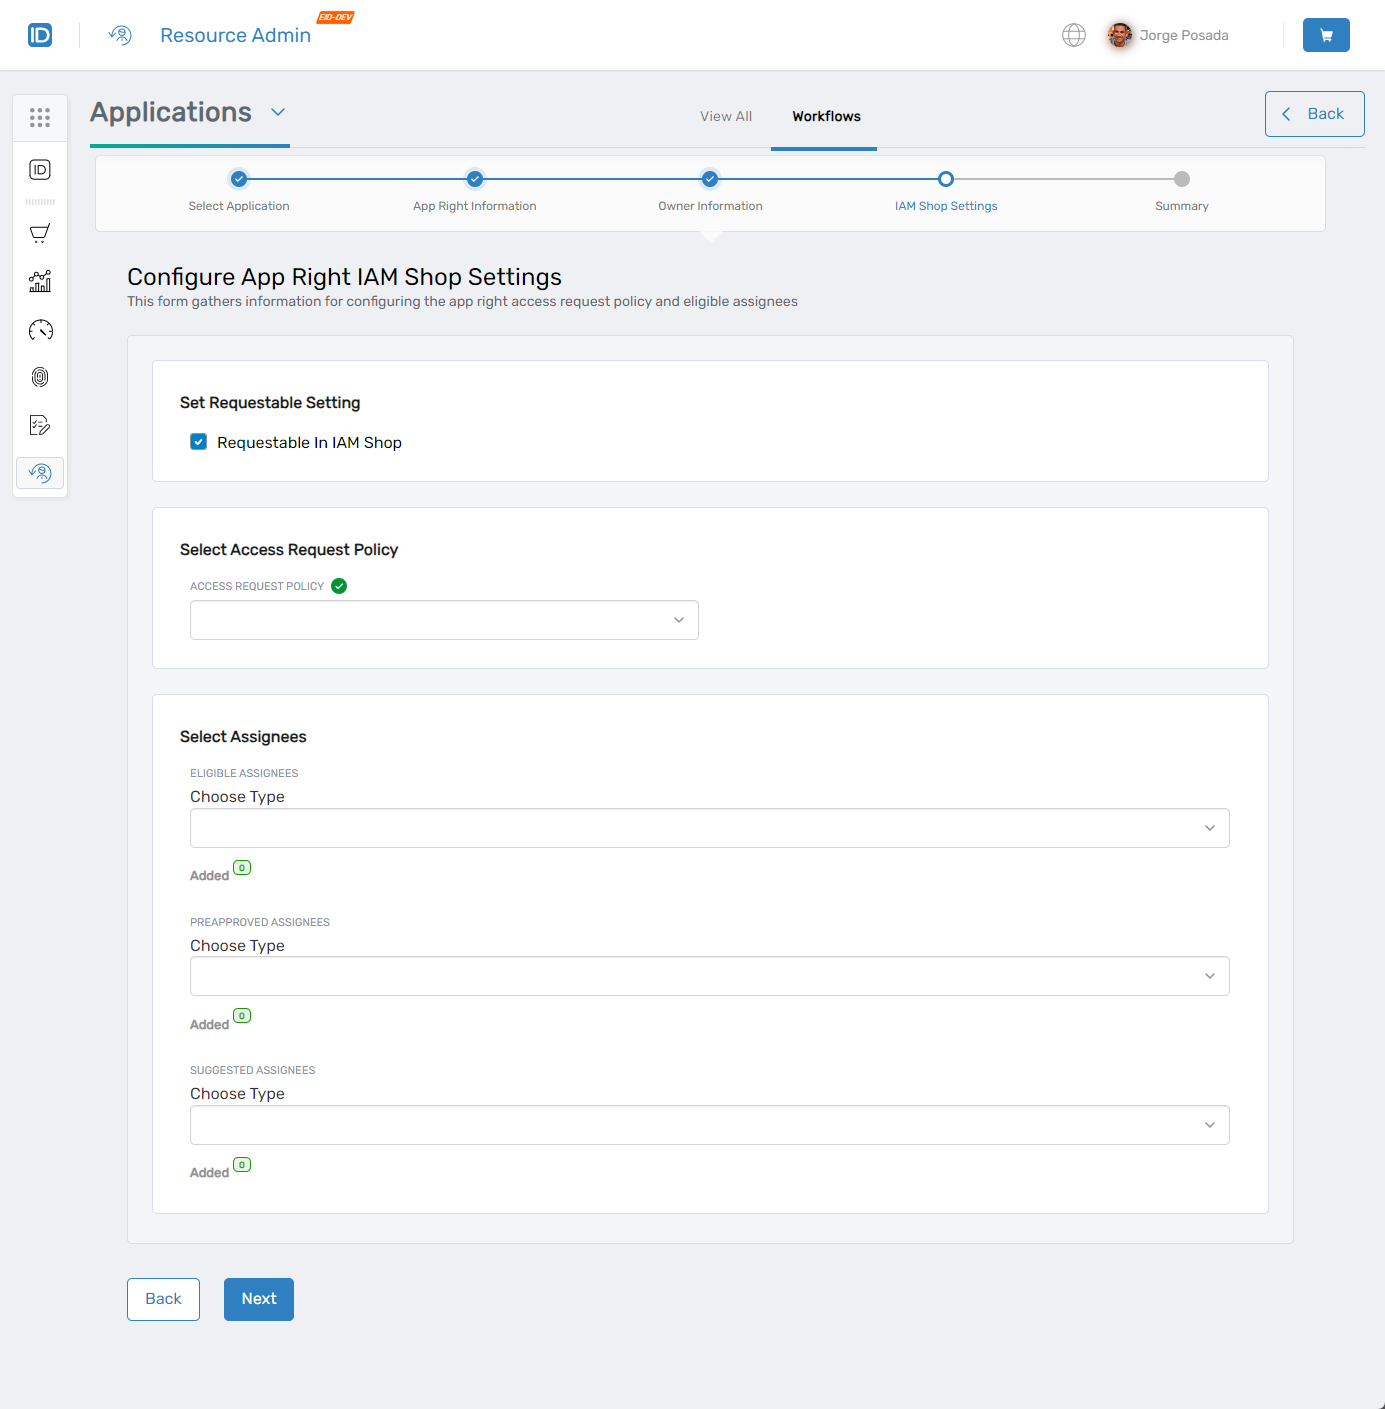
- Under Select Access Request Policy, select Default Access Request Policy.
- Under Select Assignees, select who should be eligible for assignment to the approval right.
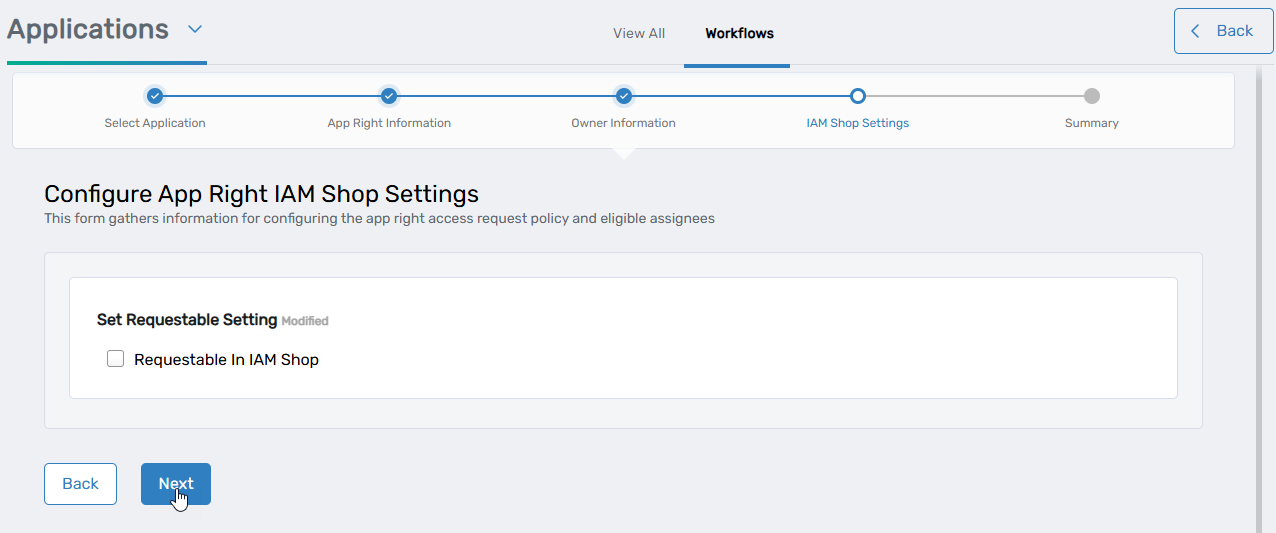
- Deselect Requestable in IAM Shop (approval rights should not be requestable).
- Click Next.
-
Review the summary information for accuracy. Click Back to revisit previous steps if necessary.
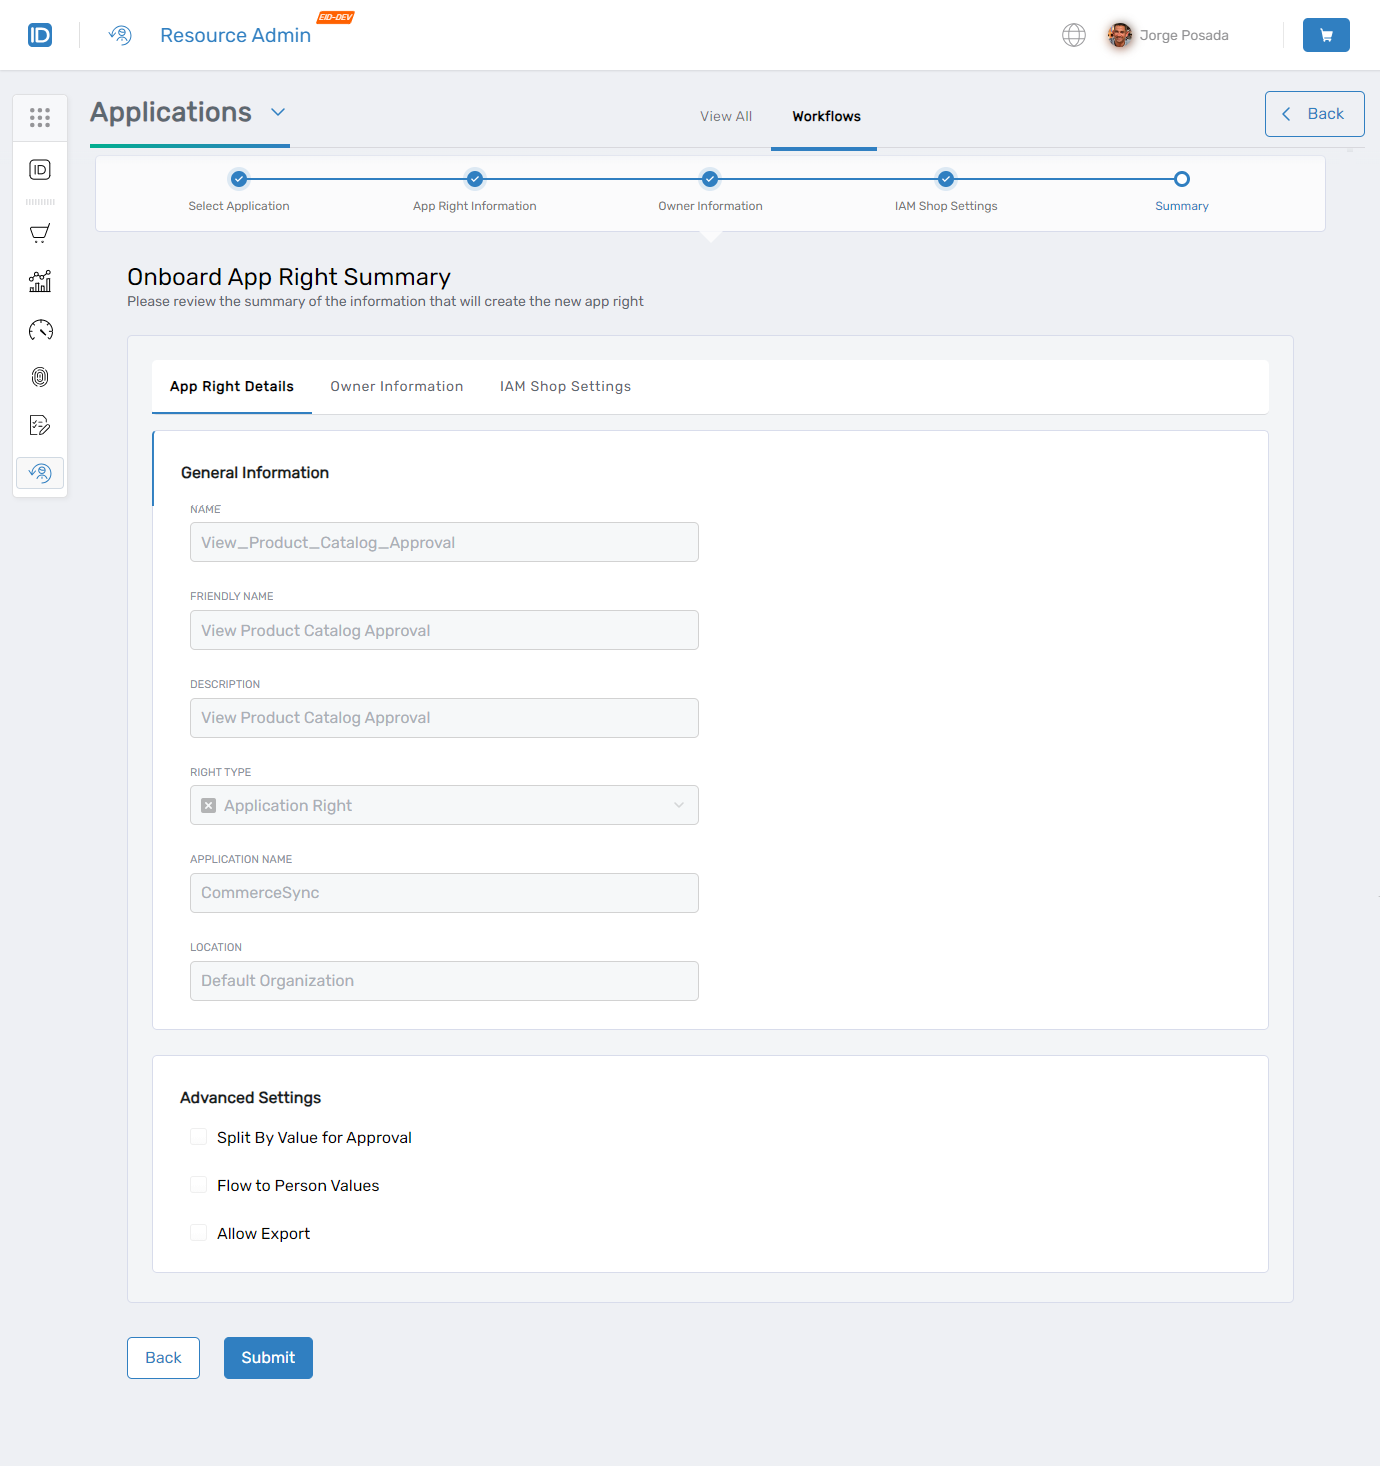
-
Click Submit to create the approval right.
-
Repeat the procedure to add additional approval rights as needed.
Assign Approval Rights to App Rights
-
From the application's App Rights menu, search for the app right that is the target of the approval right you created.
-
Click the gear icon for the app right and select Manage Local Right.
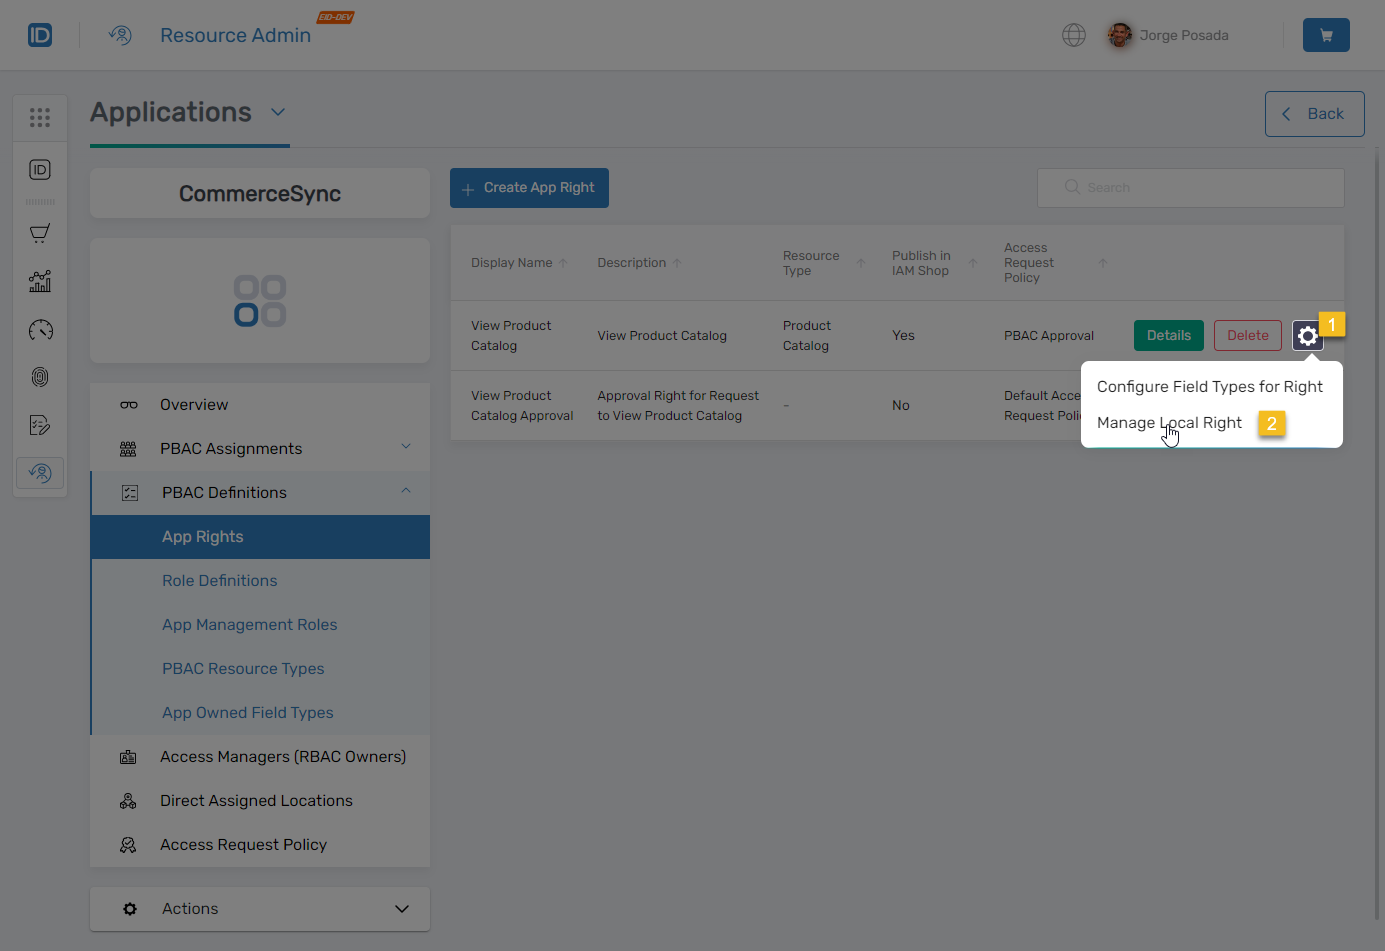
The ManageAzLocalRightWizard workflow opens.
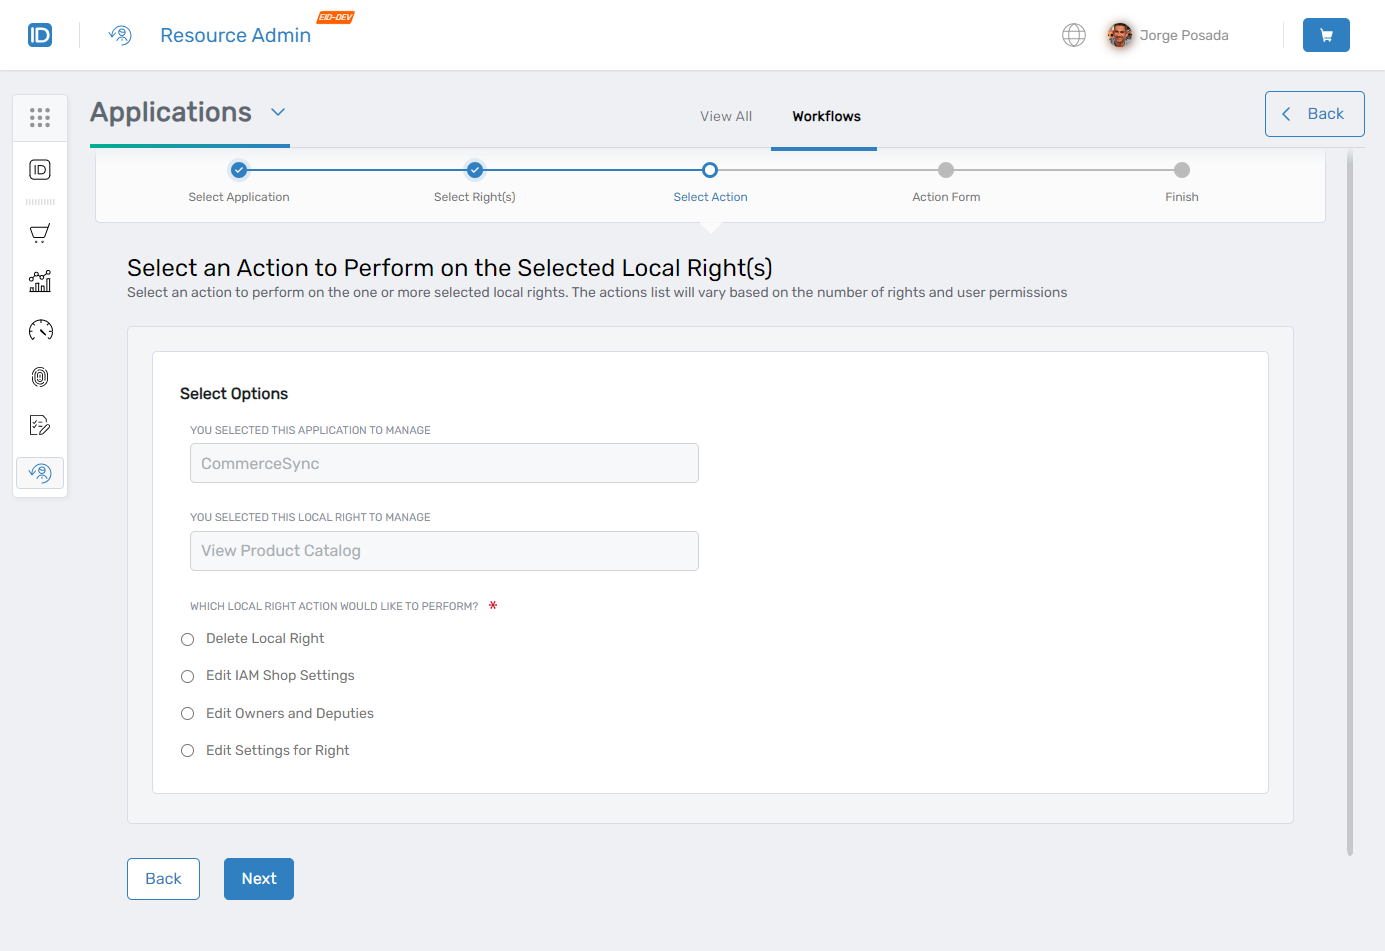
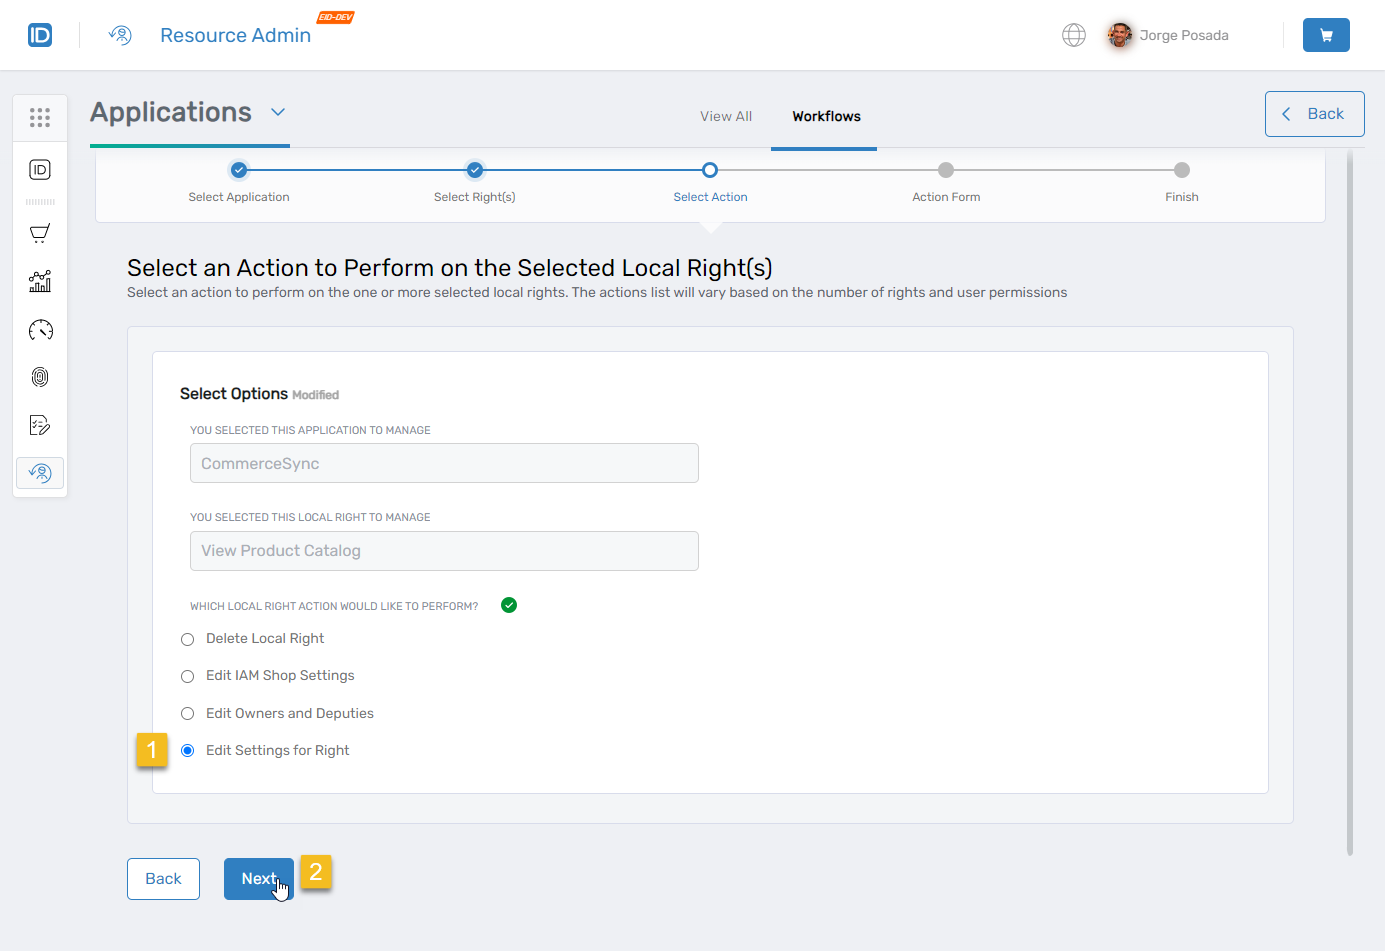
-
Under Select Options, choose Edit Settings for Right and click Next.
-
Under Advanced Settings:
- Select Split By Value for Approval to send approval requests to different people based on the requested field type values. Leave this unselected if you do not want to create separate requests for field type values.
- In the PBAC Approval Right field, enter the name of the approval right and click the tile to select it.

-
Click Next.
-
Click Submit to close the Operation Execution Summary.
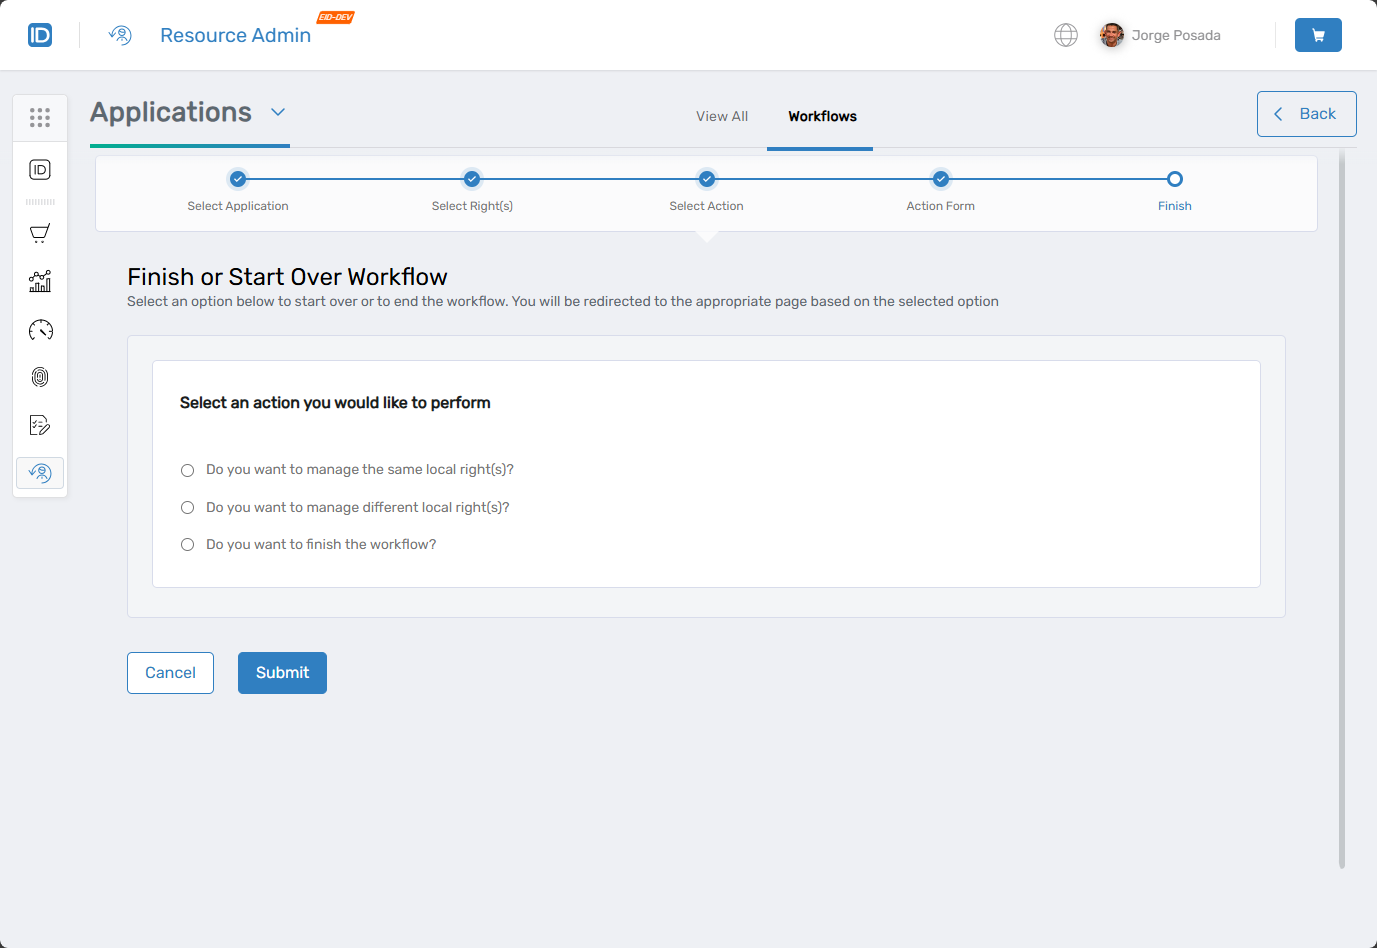
This directs you to the "Finish or Start Over Workflow" step.
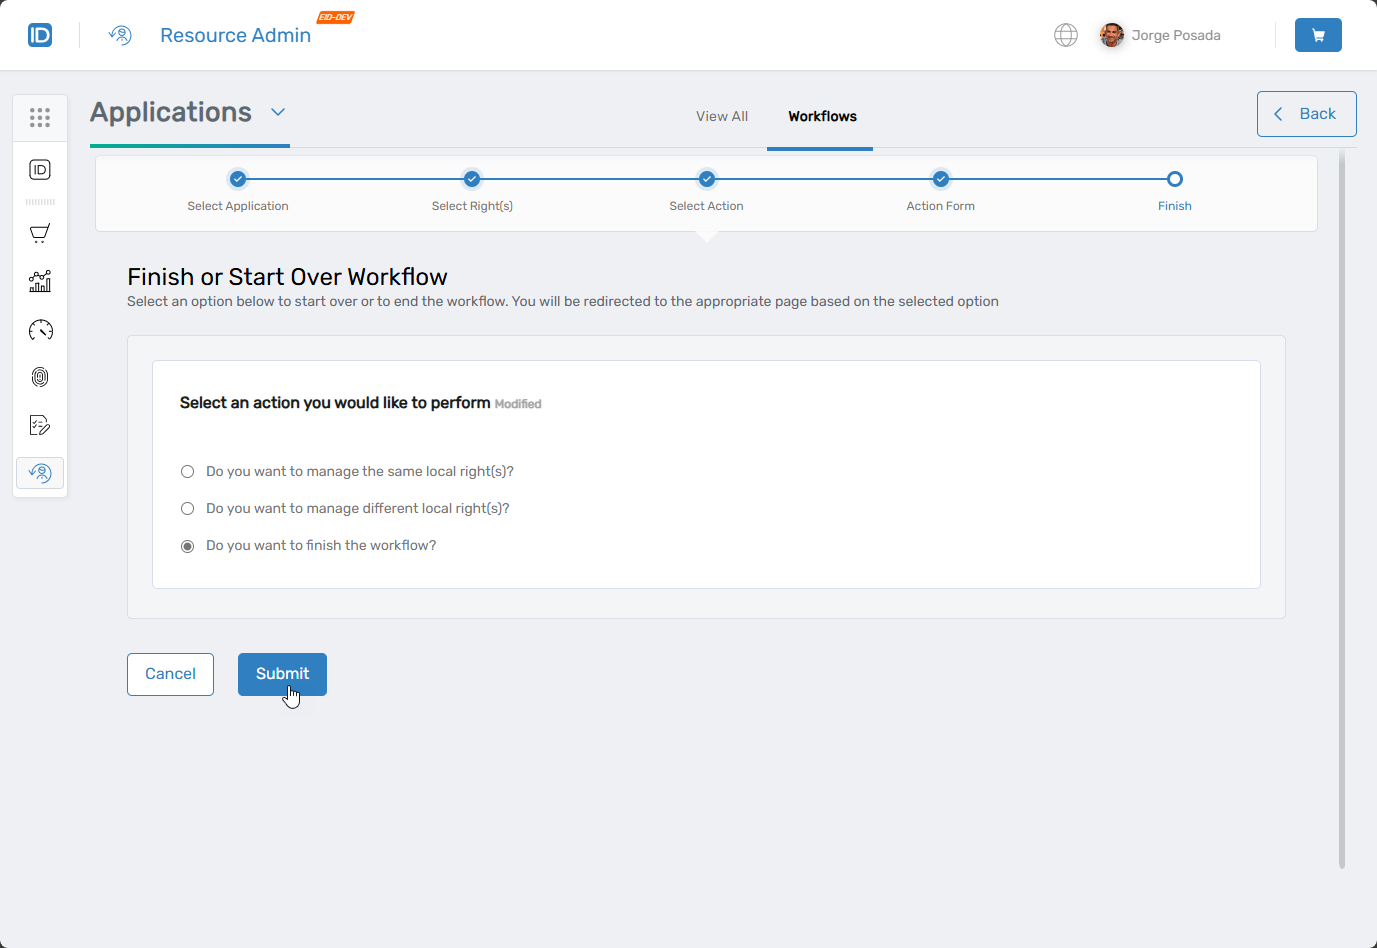
-
Select the appropriate option and click Submit. For this procedure, select Finish.
Assign the Approval Right to Approvers
Assign the approval right to users who can approve or reject business requests for the application right.
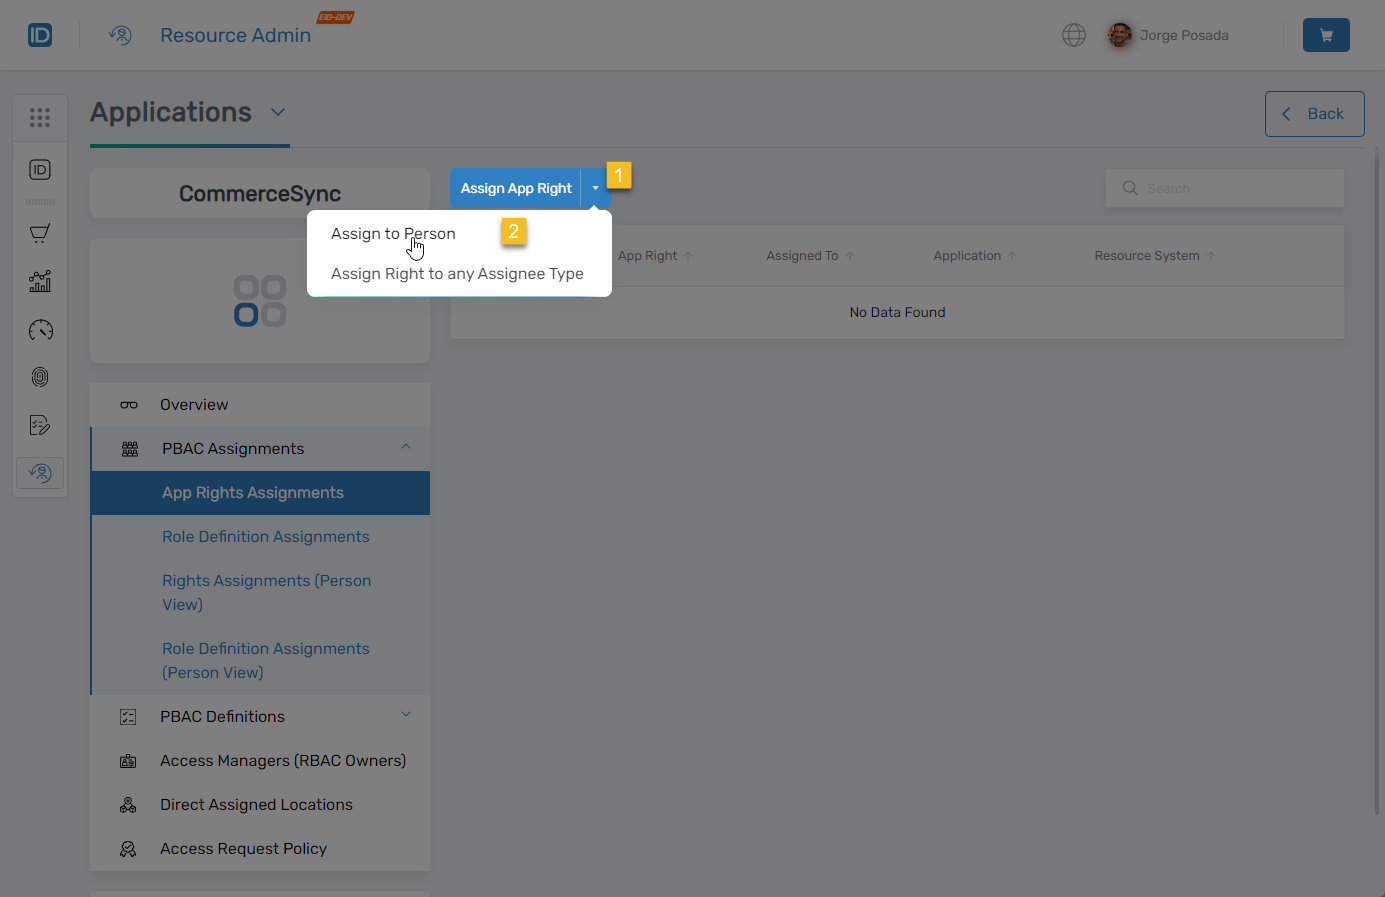
-
On the App menu, navigate to PBAC Assignments > App Rights Assignments.
-
Click the dropdown arrow on the Assign App Right button and select Assign to Person.
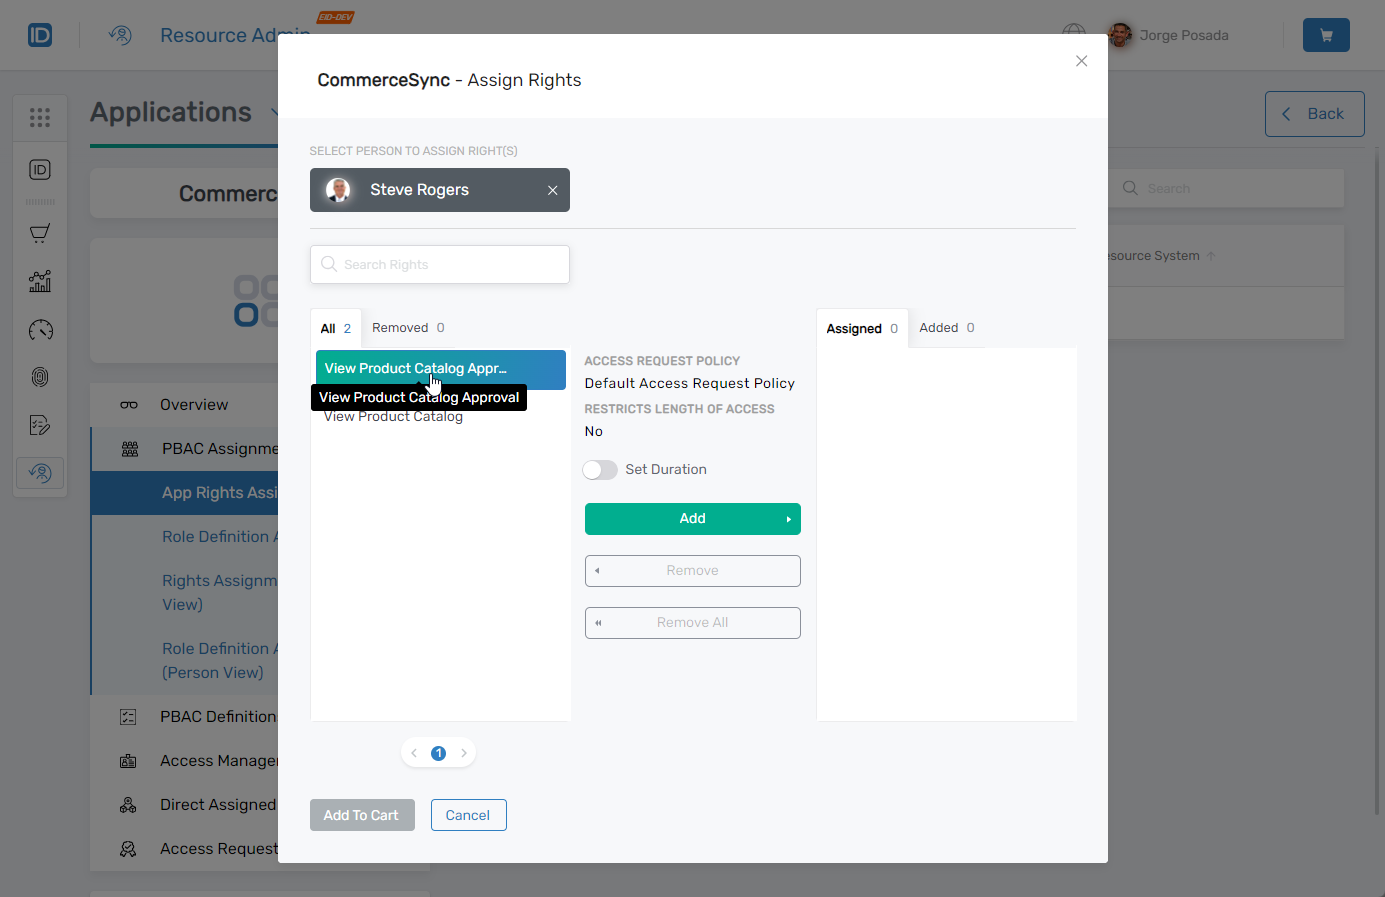
-
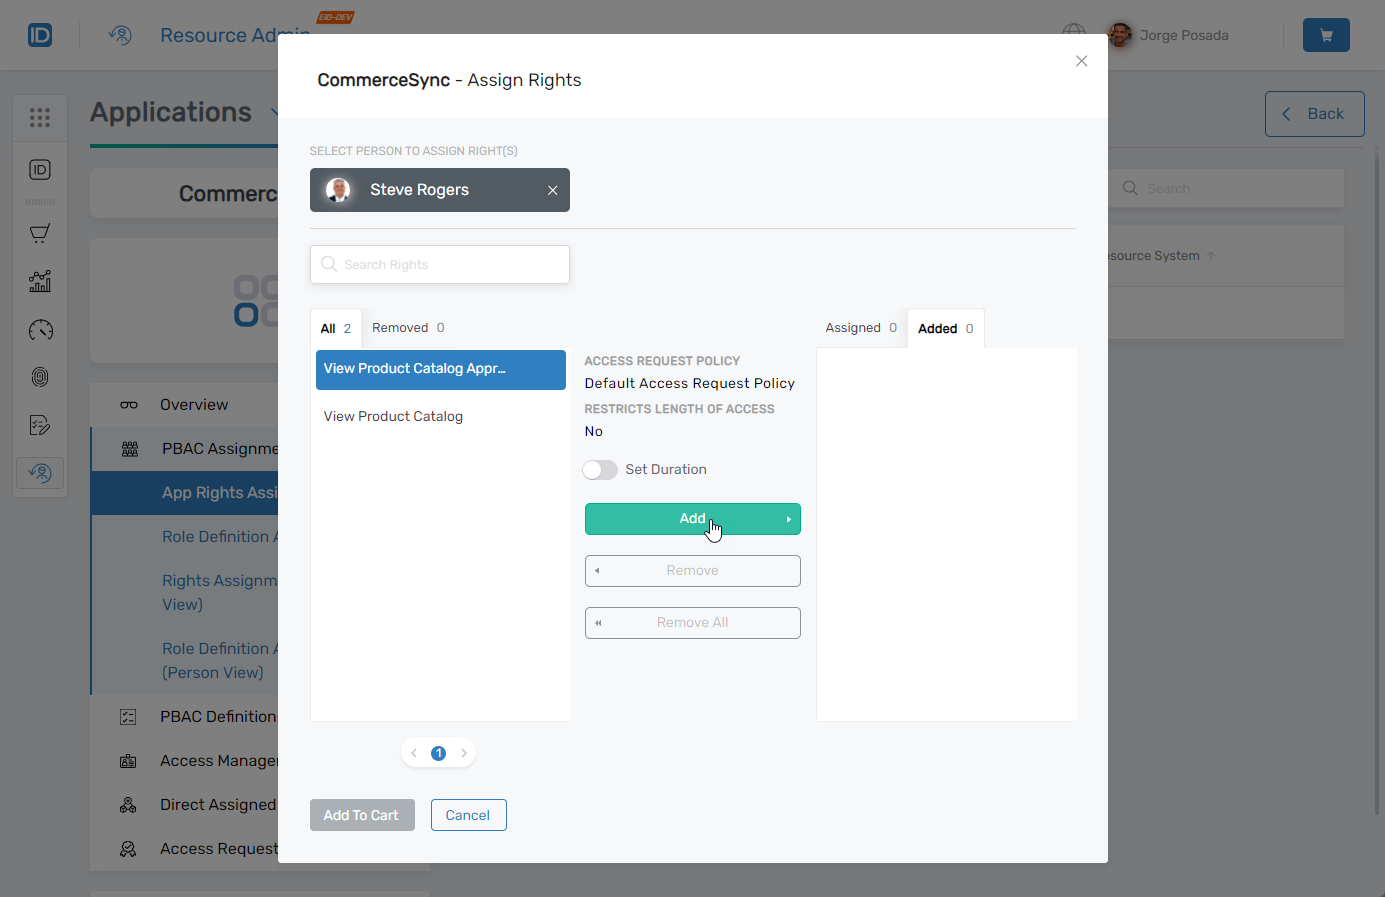
Search for and select the person from the Select Person to Assign Right(s) field.

The "Assign Rights" modal opens.
-
Click the approval right from the All panel. This enables the Add button.
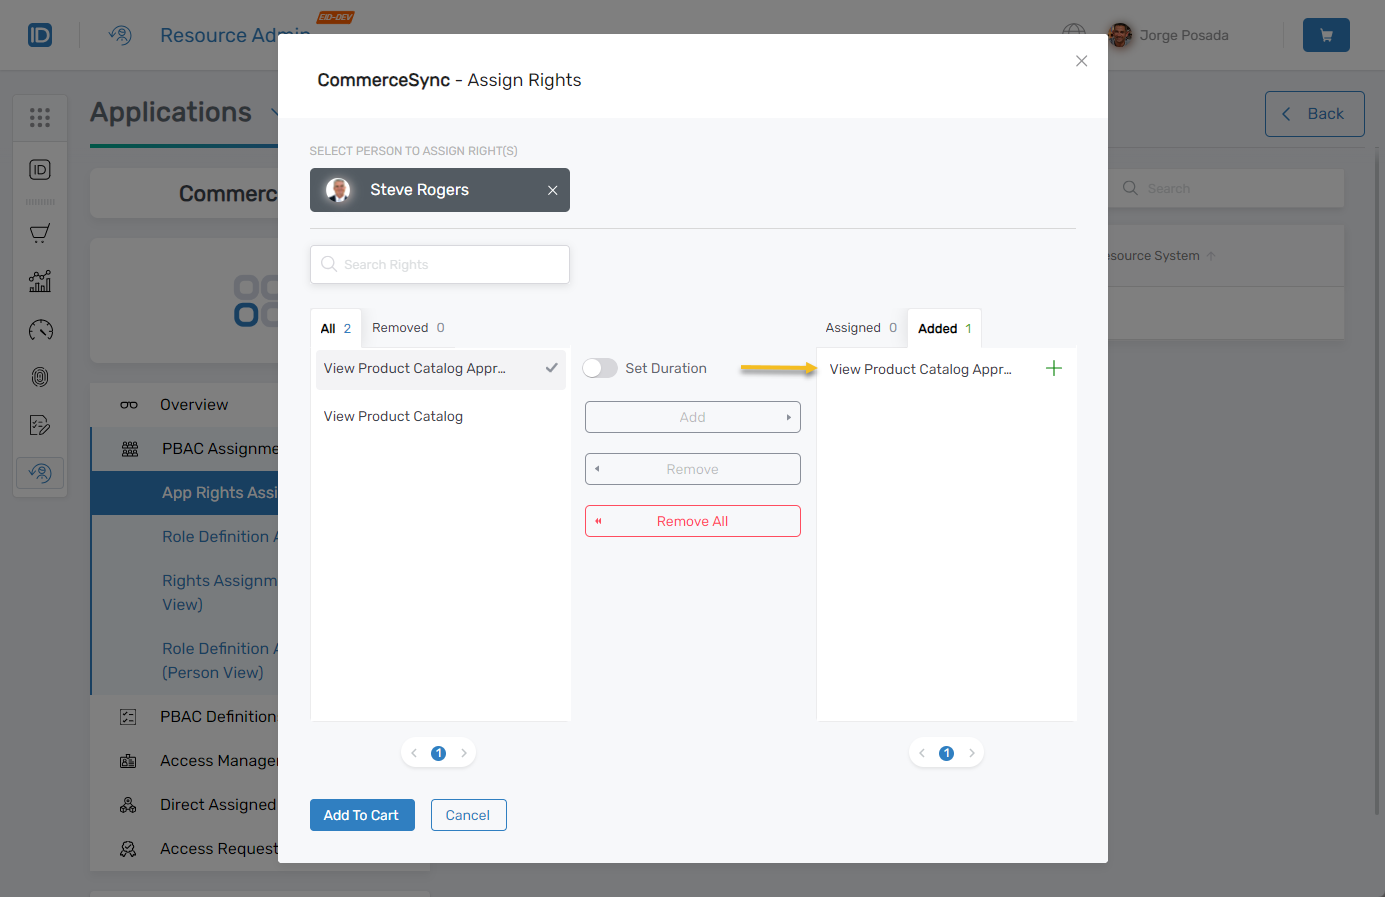
-
(Optional) To add a time constraint, toggle the Set Duration button, click the End Date Time field, and select an end date.

-
Click Add.
-
Click Add to Cart.
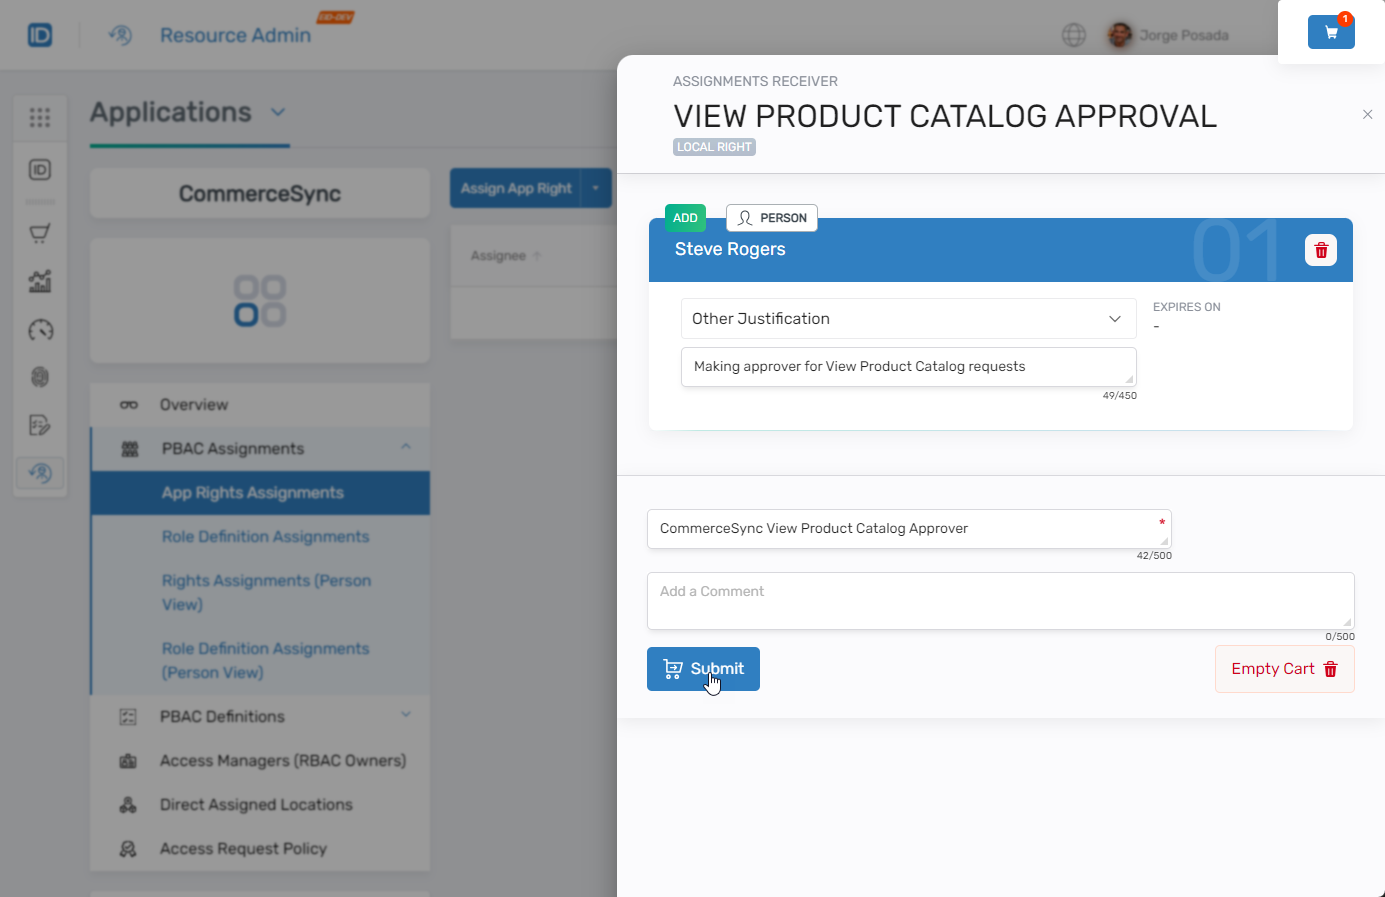
-
Click the shopping cart icon and fill in the Add a Comment and Enter Business Request Name fields.
-
Click Submit.
 You should see a message indicating the status of the cart submission.
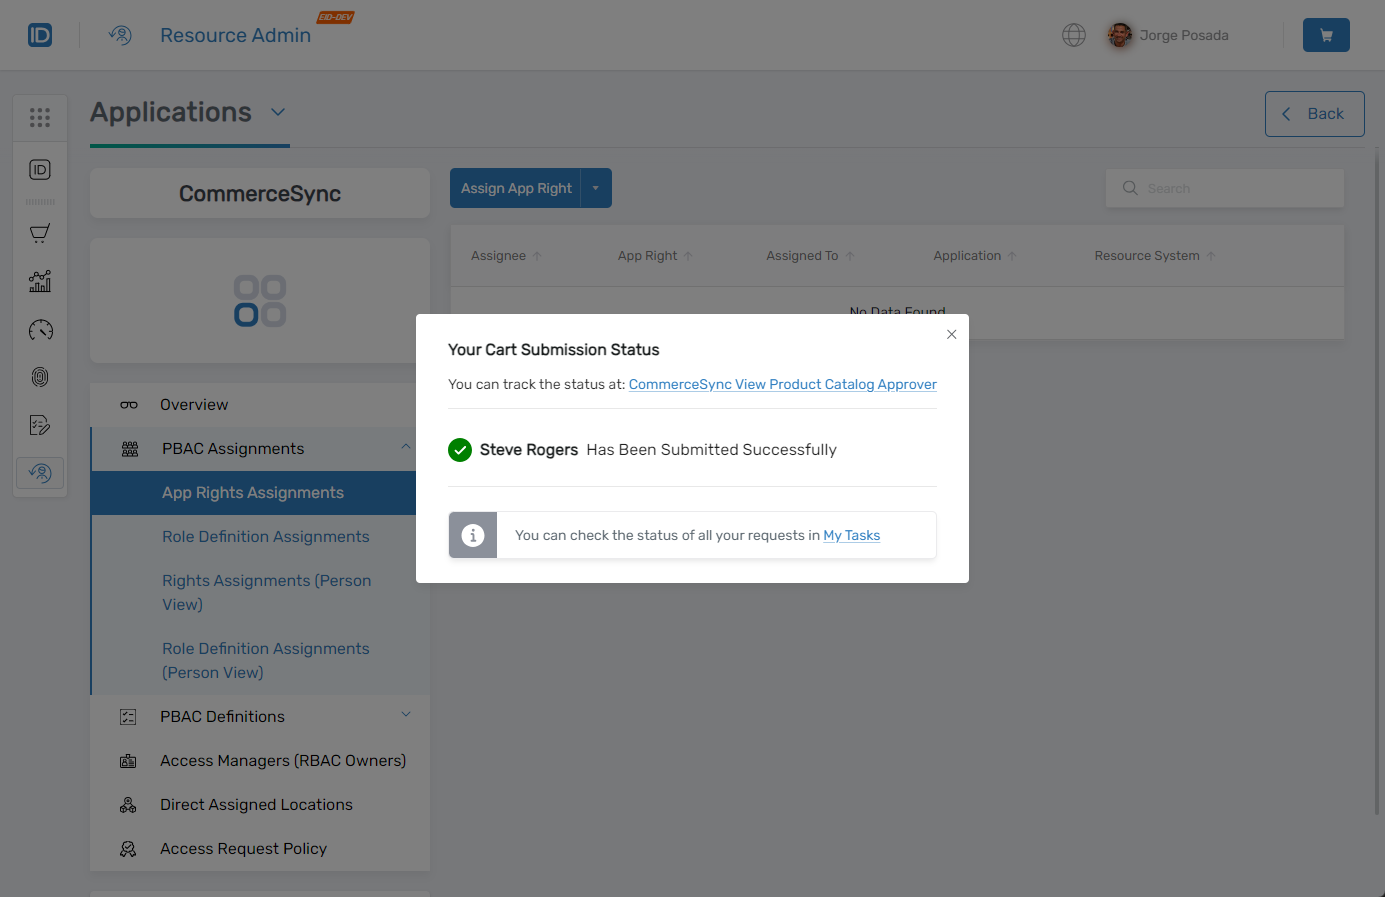
-
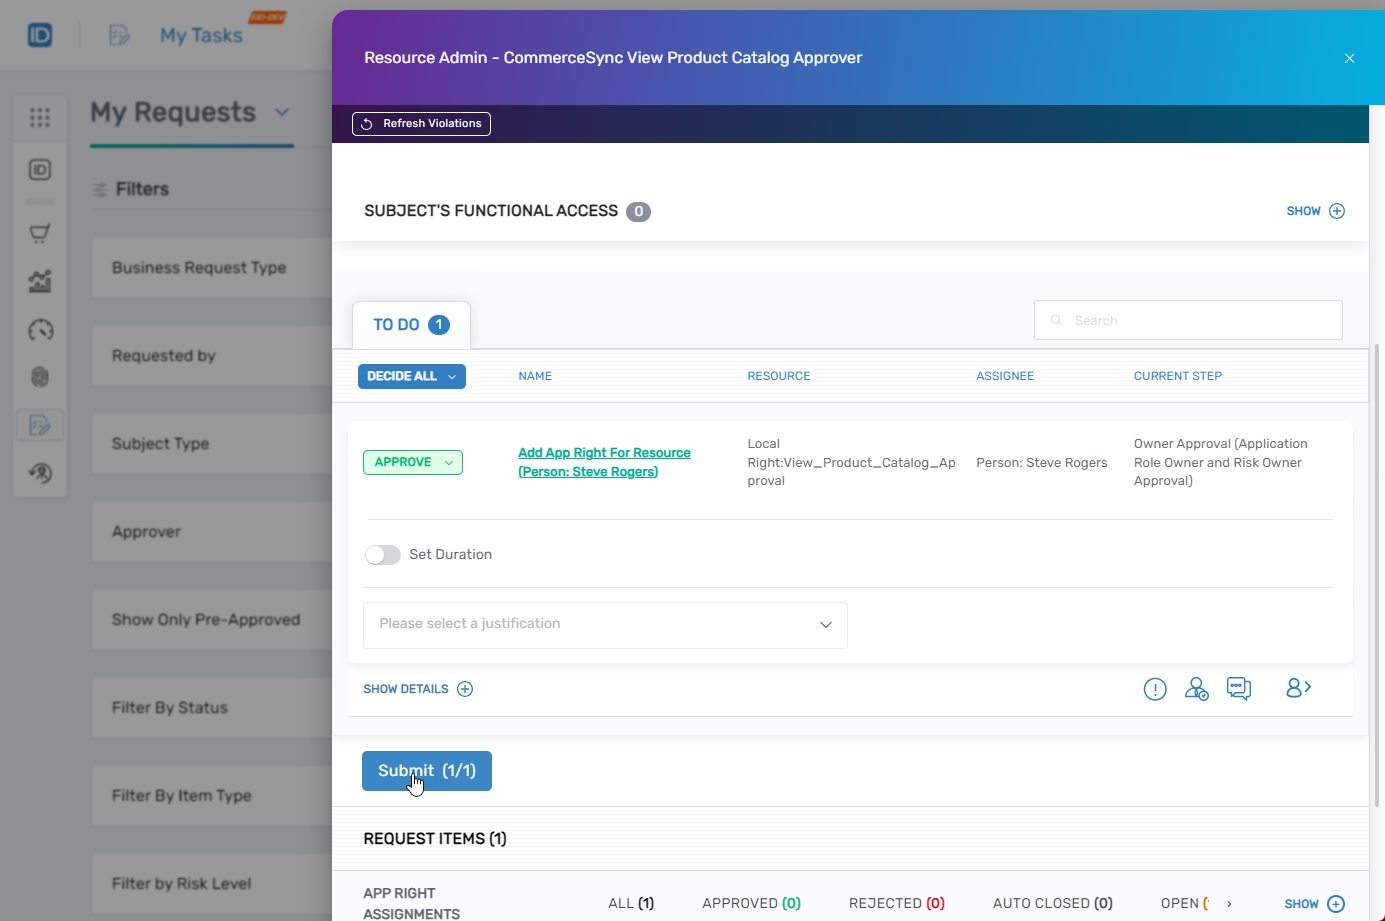
Click the status link to view the request status in My Tasks and approve the assignment.
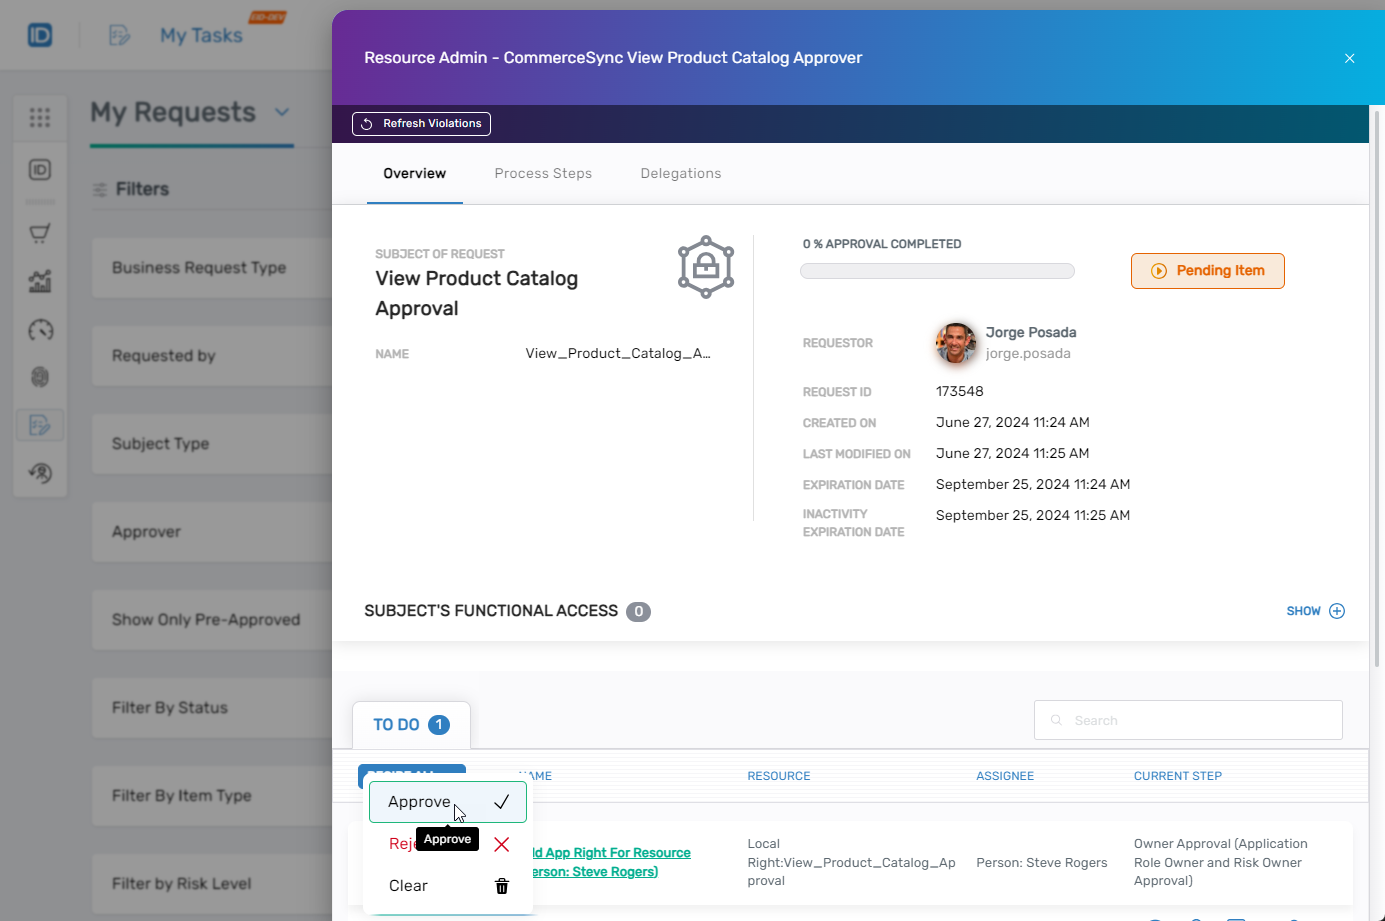
-
Click Submit to complete the approval process.
-
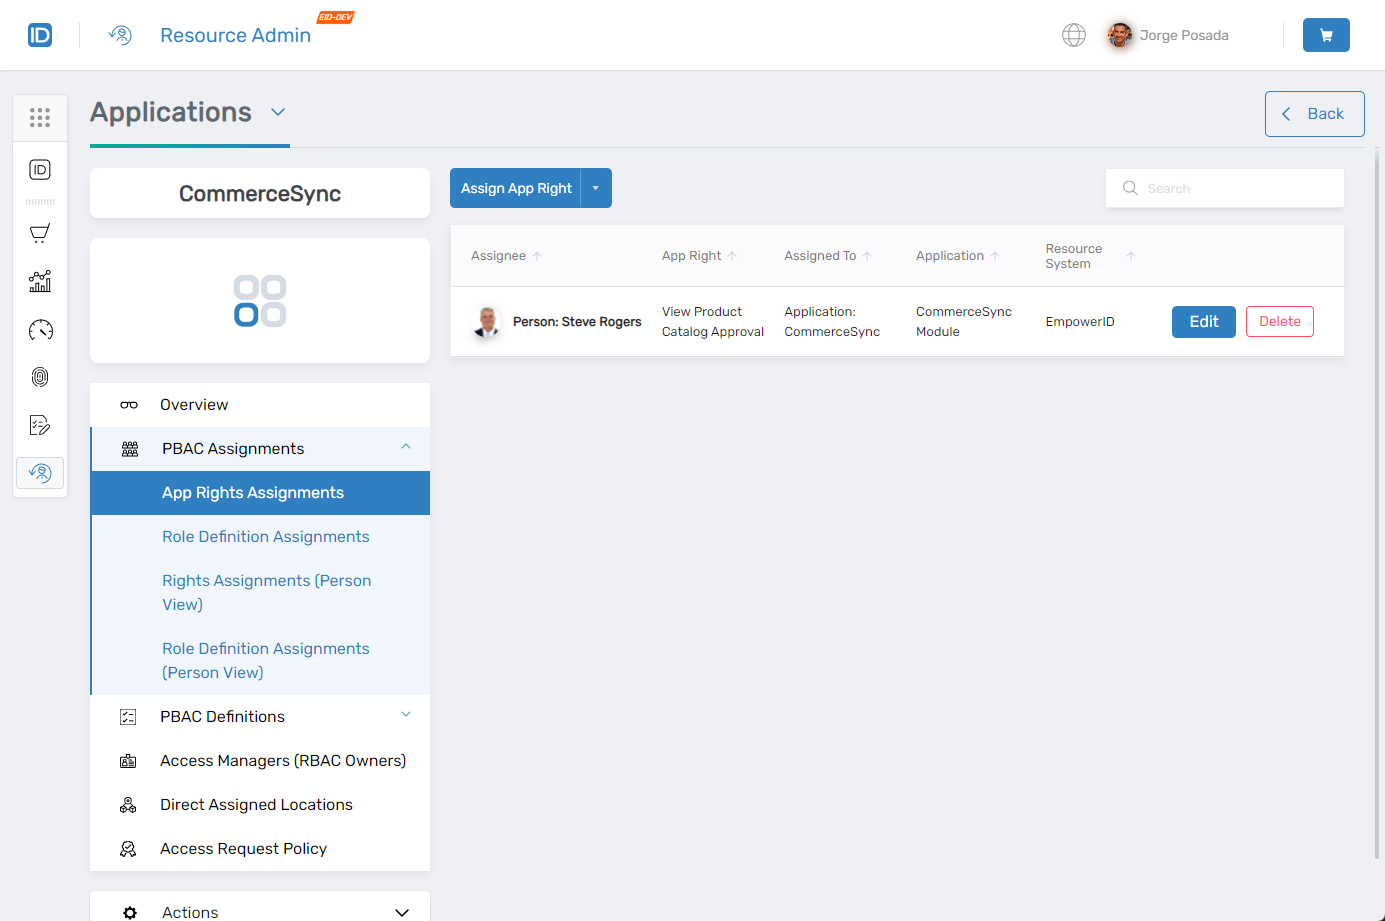
Return to the App Rights Assignments page in Resource Admin. You should see the assignment.
Verify the Results
Test the PBAC approval routing by requesting access to the configured app right:
-
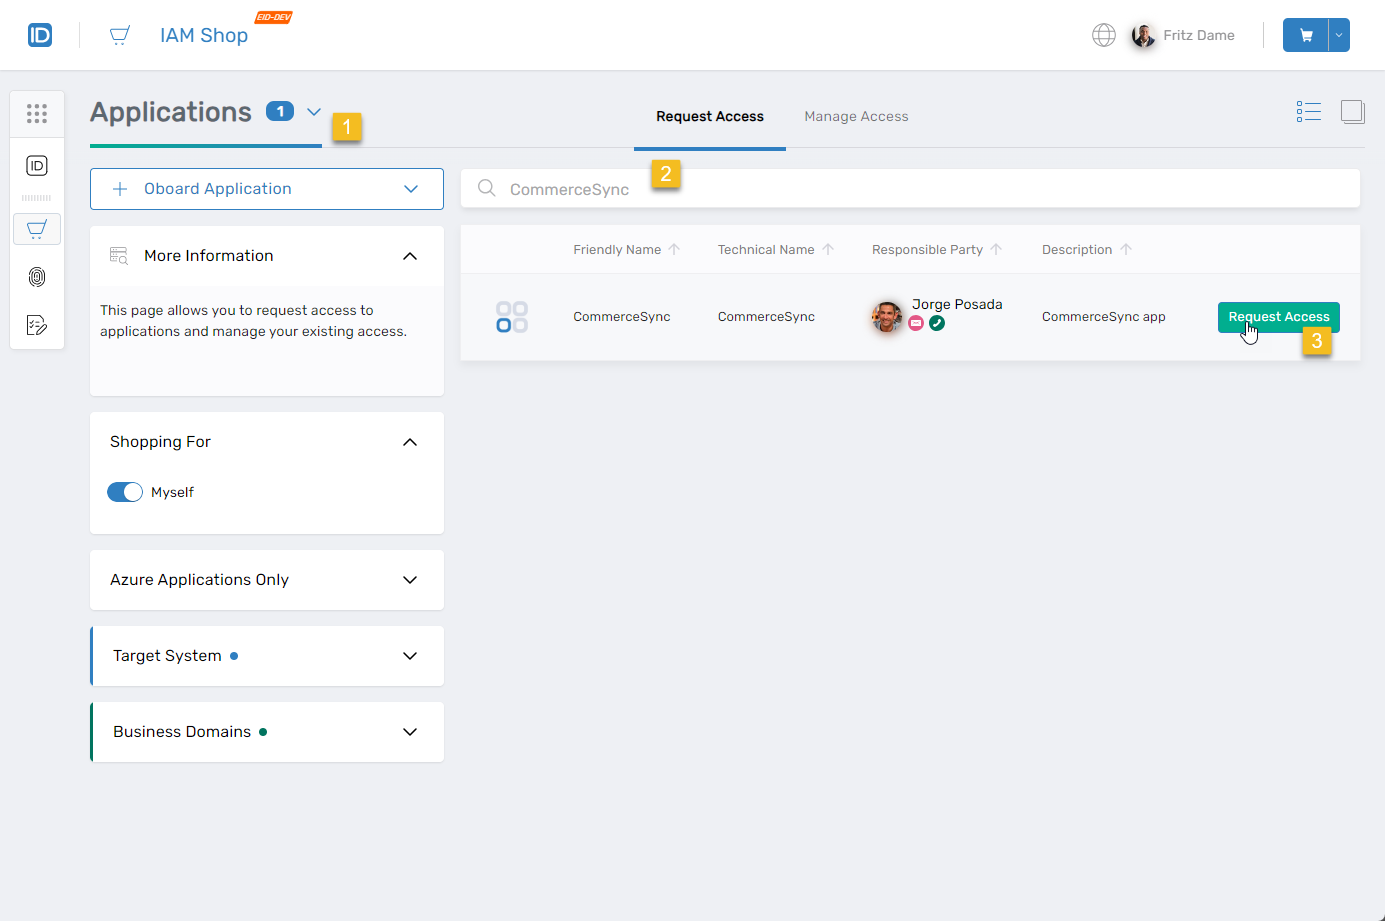
Sign in to the IAM Shop as a user eligible for the application.
-
Search for the application and click Request Access.
-
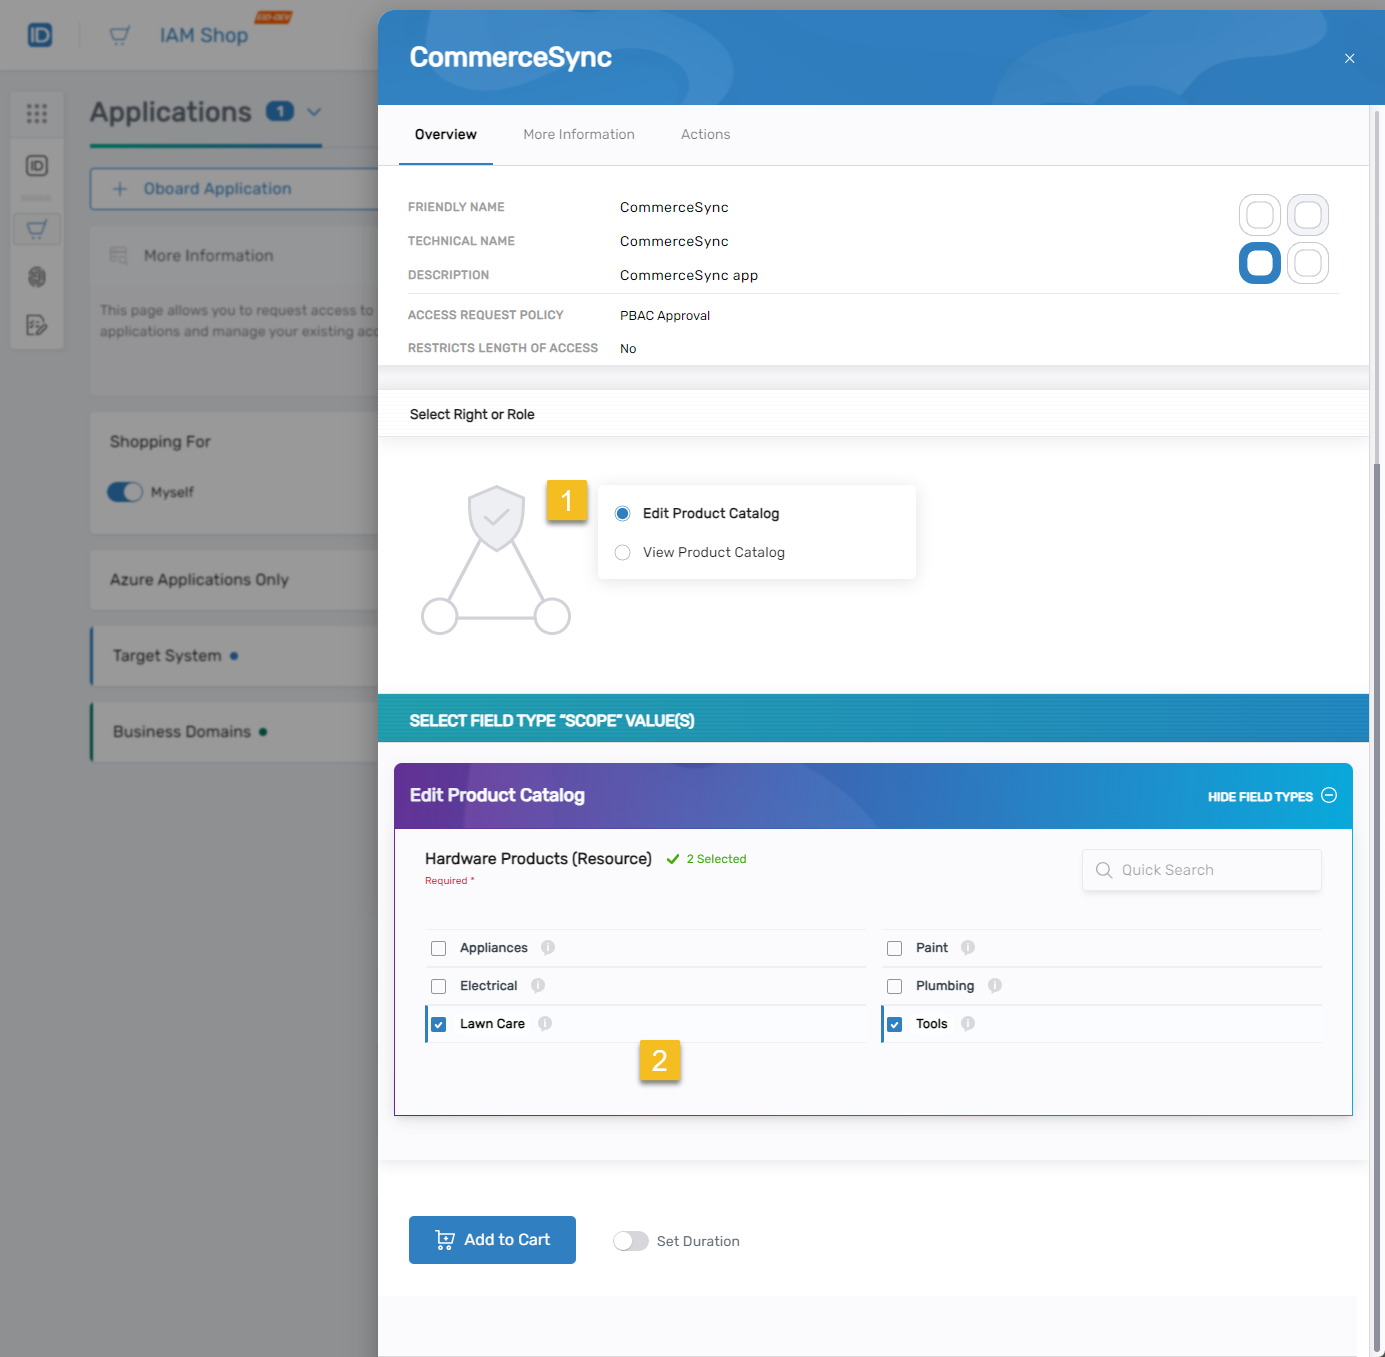
Select one of the rights configured for the application, then select a field type and one or more field type values (if configured). In this example, "Edit Product Catalog" is selected with "Lawn Care" and "Tools" field type values from "Hardware Products."
-
Click Add to Cart.
-
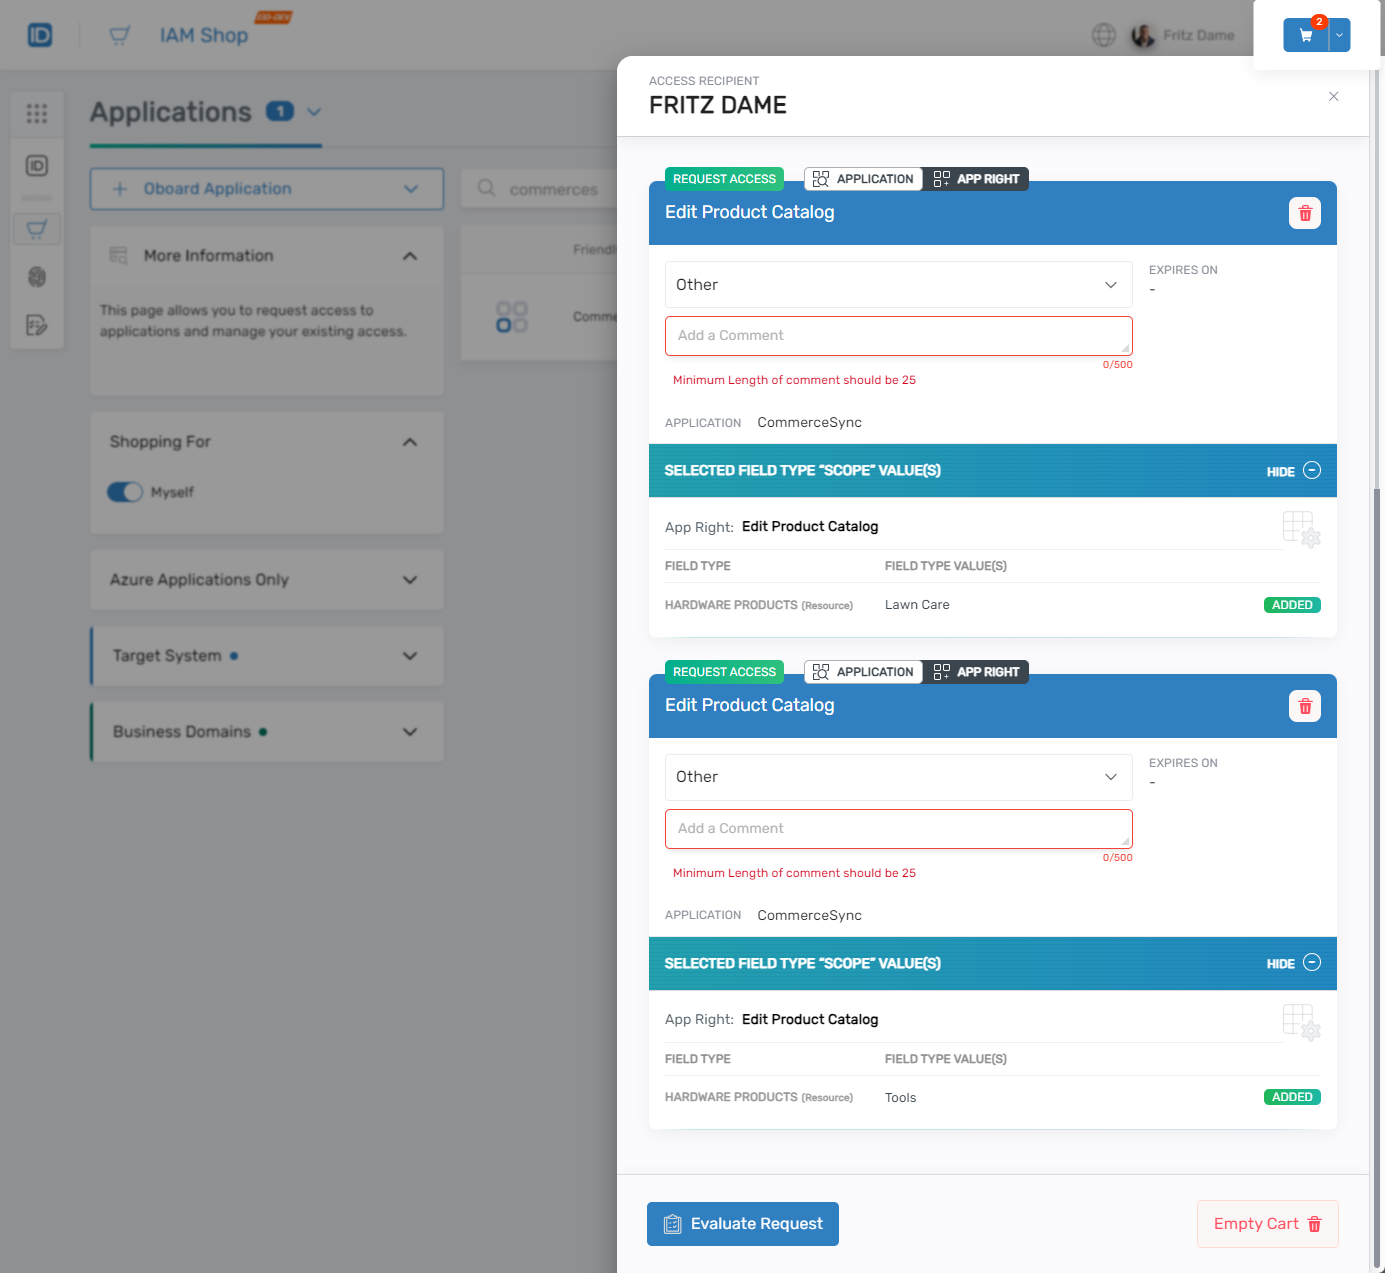
Click the cart icon to open the cart. You should see the app right and any field type "Scope" values.
-
Fill in the required Comment fields and click Evaluate Request to check for potential SOD violations.
-
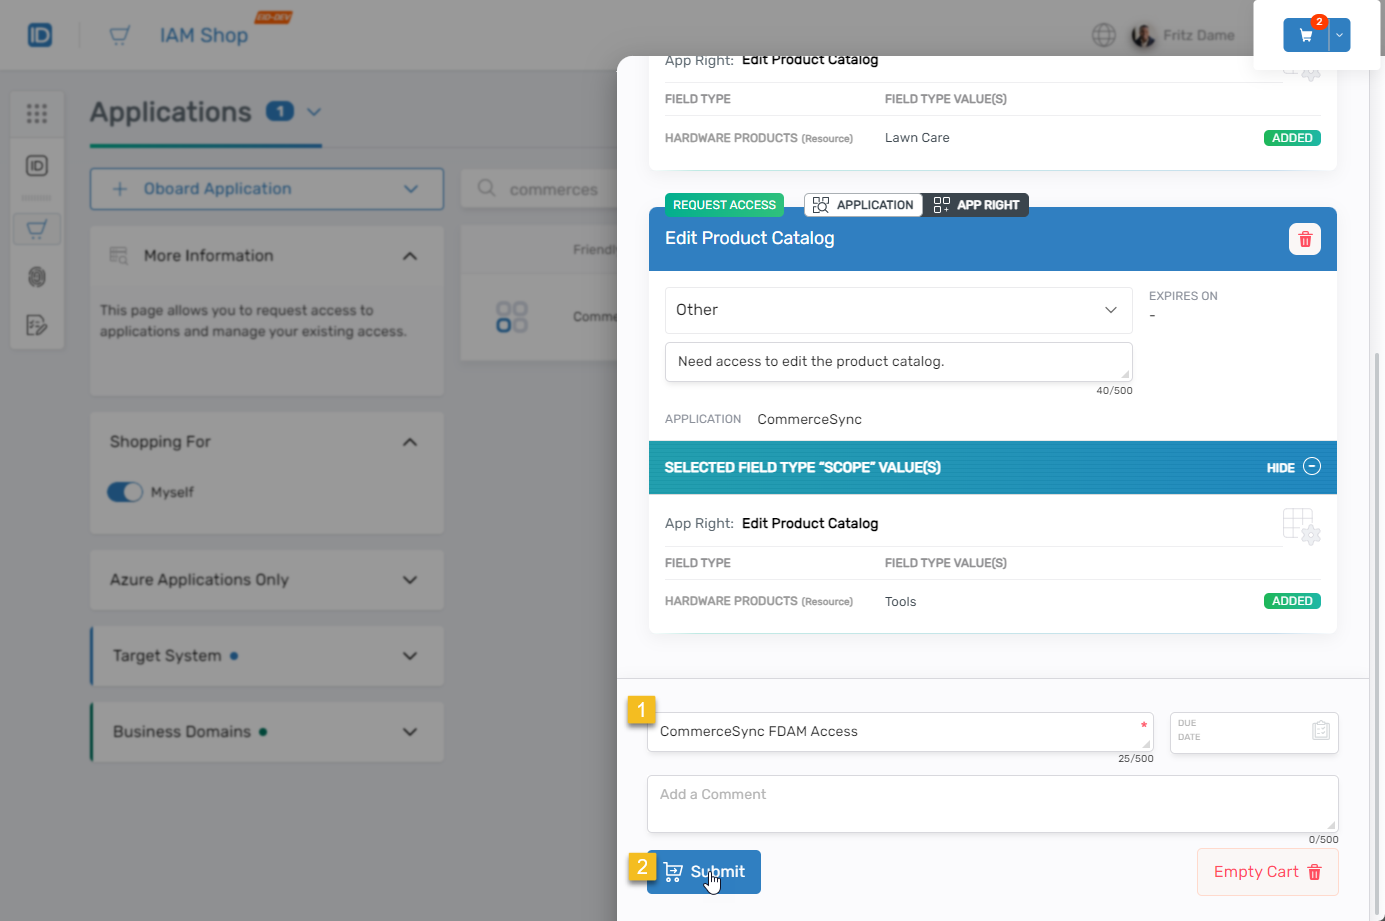
Enter a Business Request Name and click Submit.
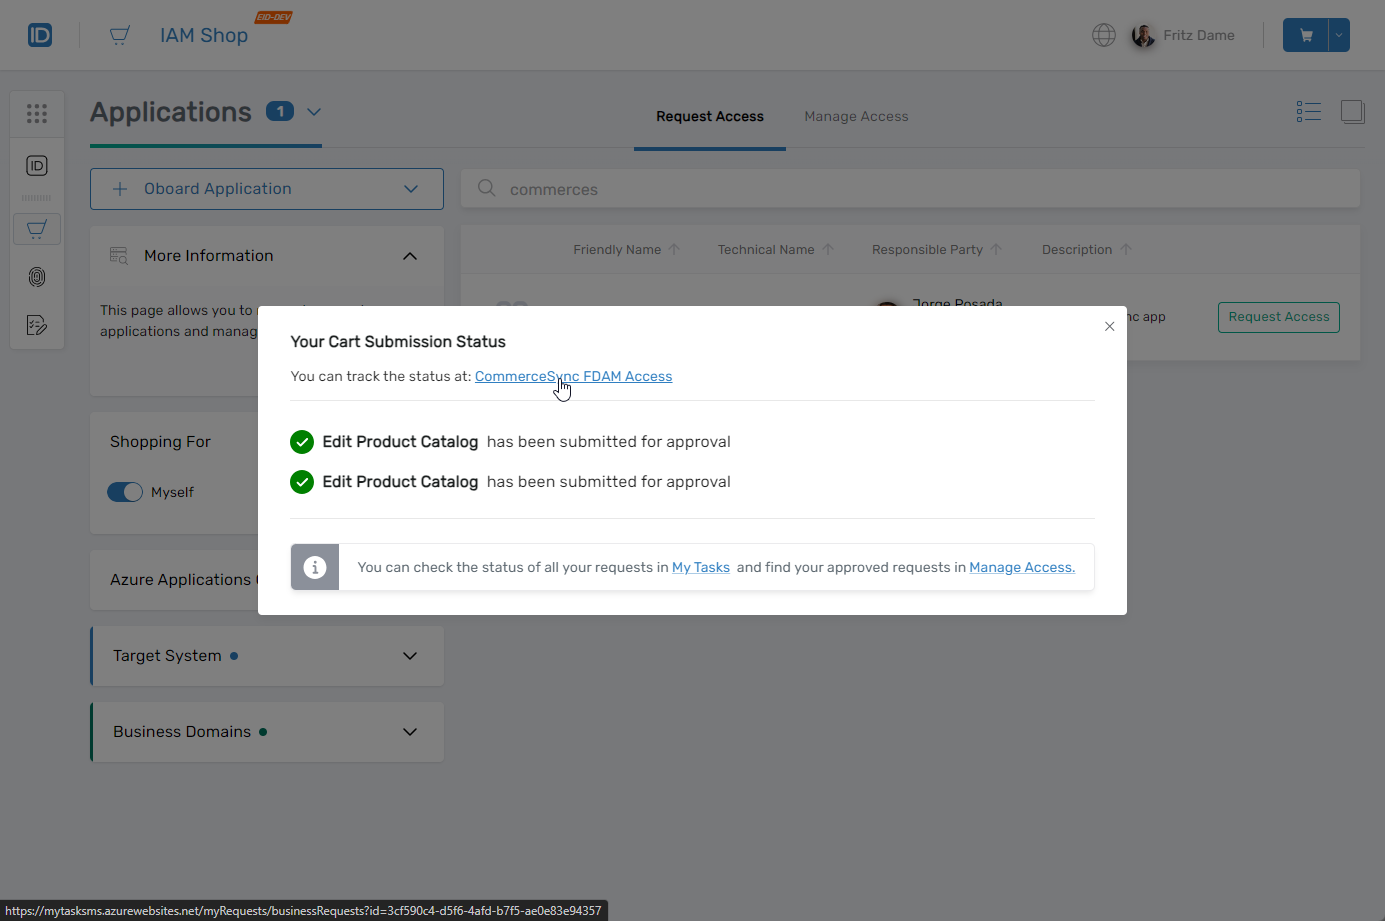
You should see that the request has been submitted for approval. If field type values were selected and Split By Value Approval was enabled, you will see an approval task for each requested field type value.
-
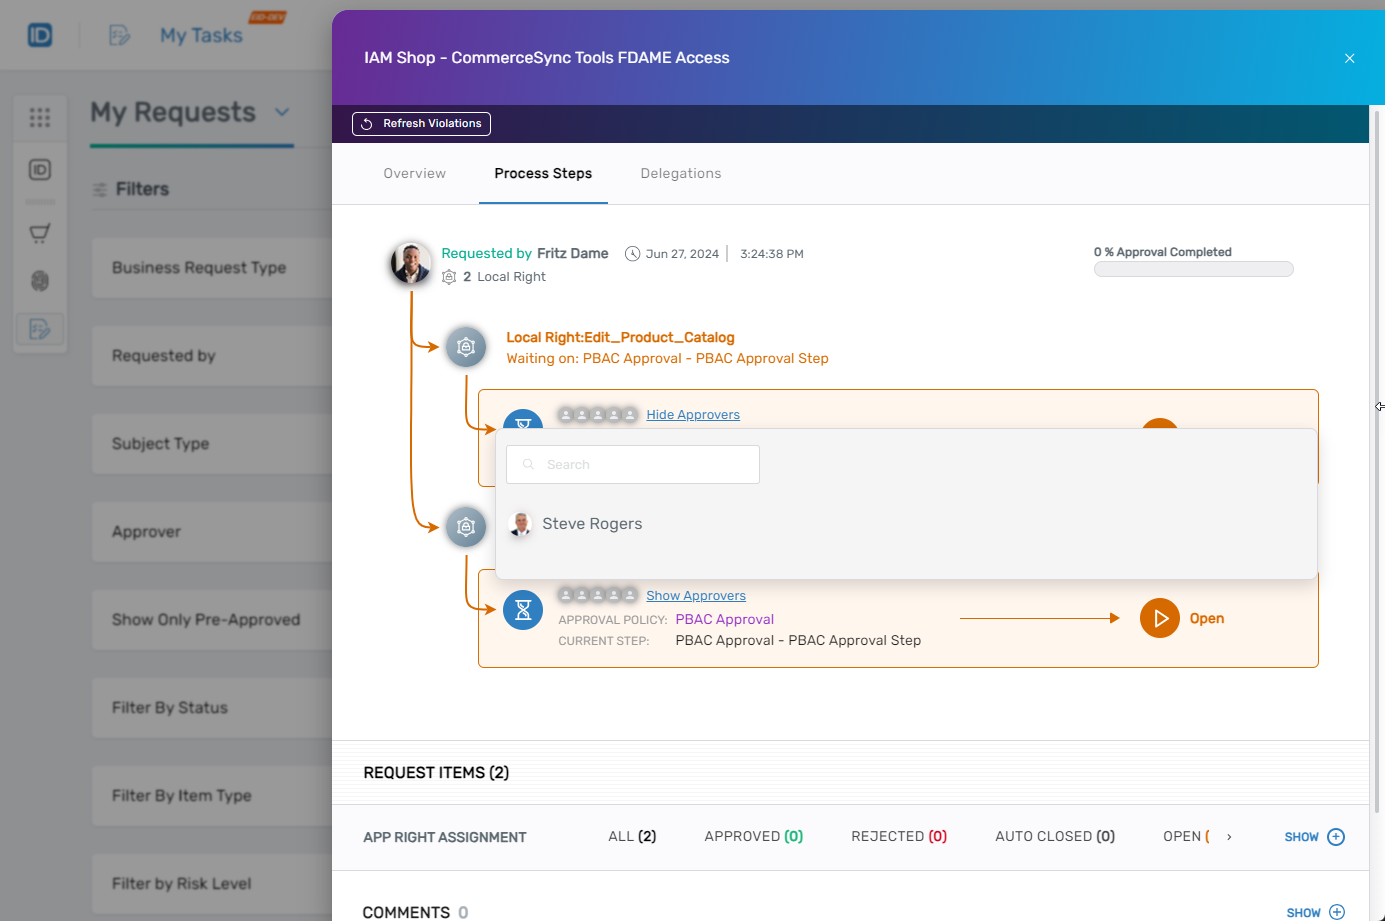
Click the status link to view the Request Detail pane.
-
Click the Process Steps tab and then click the Show Approvers link. You should see the person designated as the PBAC approver.
Next Steps
After setting up PBAC approval routing, monitor approval workflows to ensure requests route to the correct approvers based on field type values.