Requesting Credentials
Credentials are encrypted usernames and passwords for privileged accounts that your organization has vaulted. When users request credentials, they request to "check out" them. Users can see and use those credentials for a specified period if the request is approved. This article demonstrates how users can request credentials within EmpowerID.
Prerequisites
Users must have a master password to request access to credentials. For details on creating a master password, see the Creating Master Passwords article.
Procedure
Step 1 – Locate the Desired Credential
- Log in to the IAM Shop portal.
- From the Resource Type dropdown, select Credentials.
- Search for the credential you want to request.
- Click the Request Access button next to the shared credential.
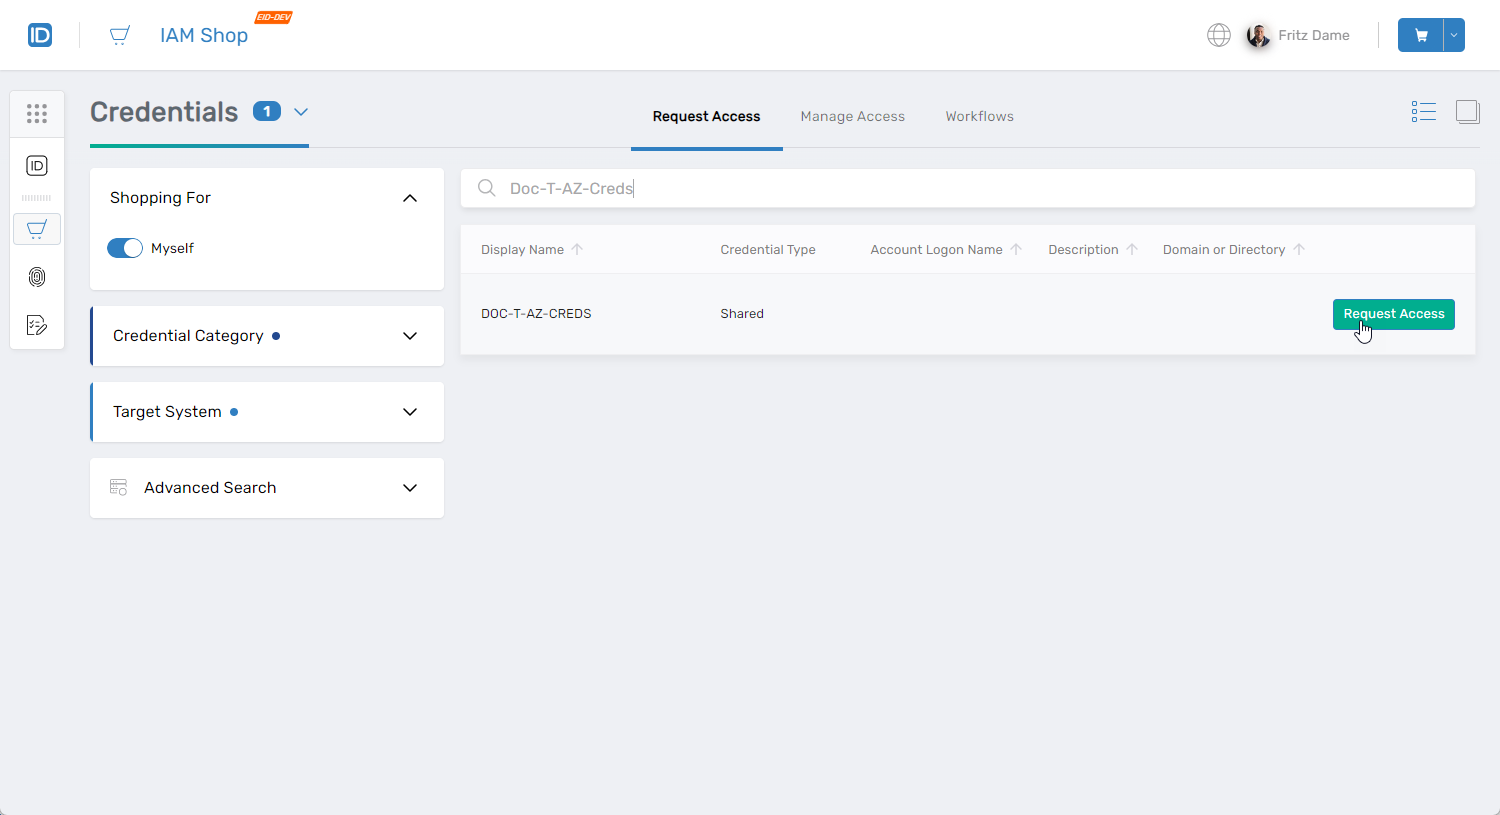 This opens the request card for the credential, displaying the Overview tab by default.
The request card contains three tabs:
- Overview: Displays general information about the credential, such as its name and associated system.
- More Information: Contains additional data, including permissions and other relevant details.
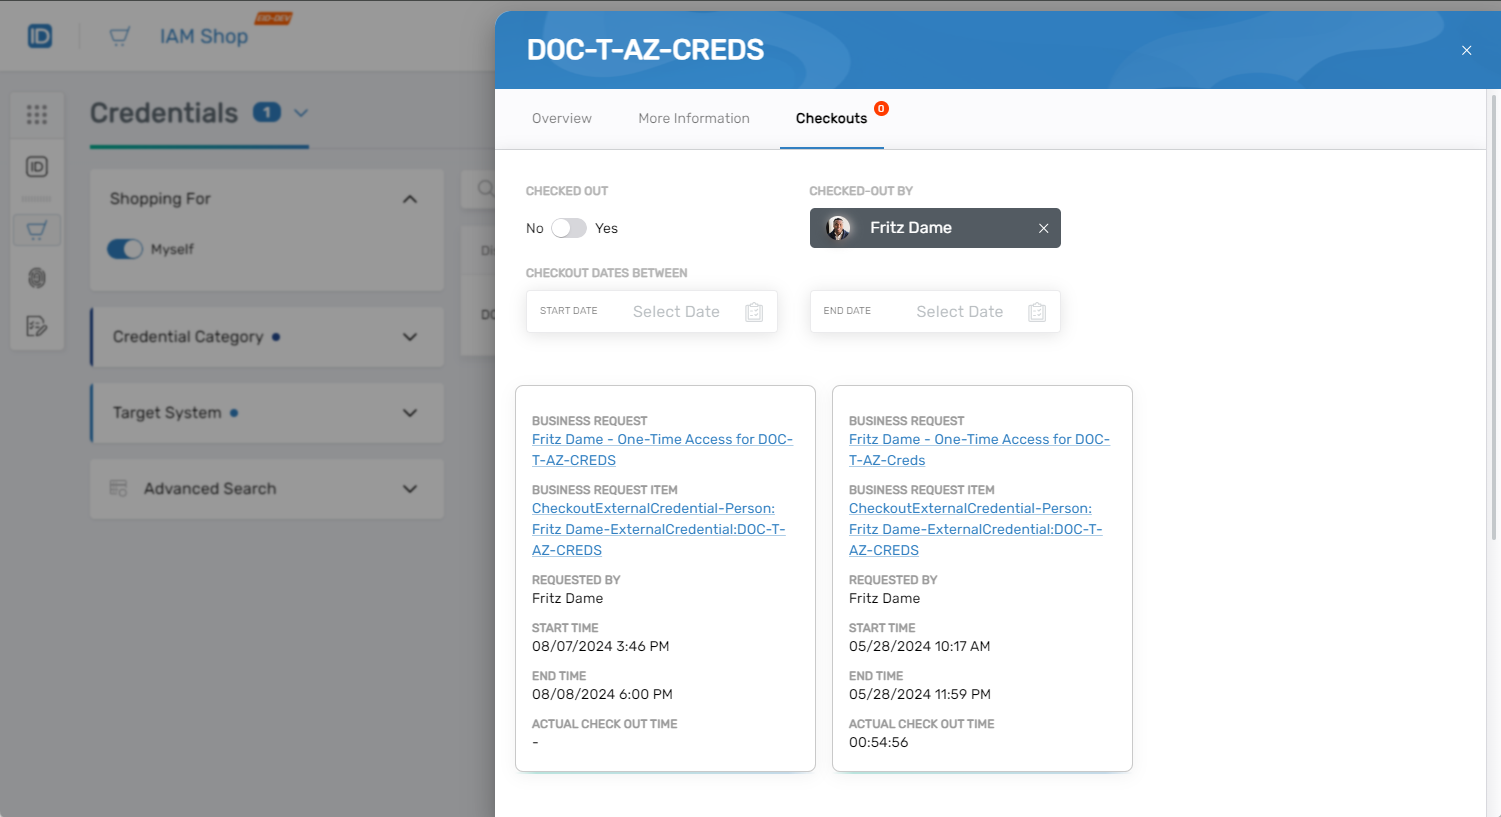
- Checkouts: Allows users to view the credential's checkout history. It includes the following controls for filtering the history:
- Checked Out: By default, this is set to "Yes" to show if the credential is currently checked out by the selected user. Toggle this to "No" to view the user's history of checkouts.
- Checked-Out By: Defaults to the current user, but users can clear this and select others they have permission to see.
- Checkout Dates Between: Filters checkouts by date or can be left empty to show all checkouts for the selected user in the Checked-Out By field.
In the image below, the user toggles Checked Out to No and left Checkout Dates Between empty to view their entire checkout history.
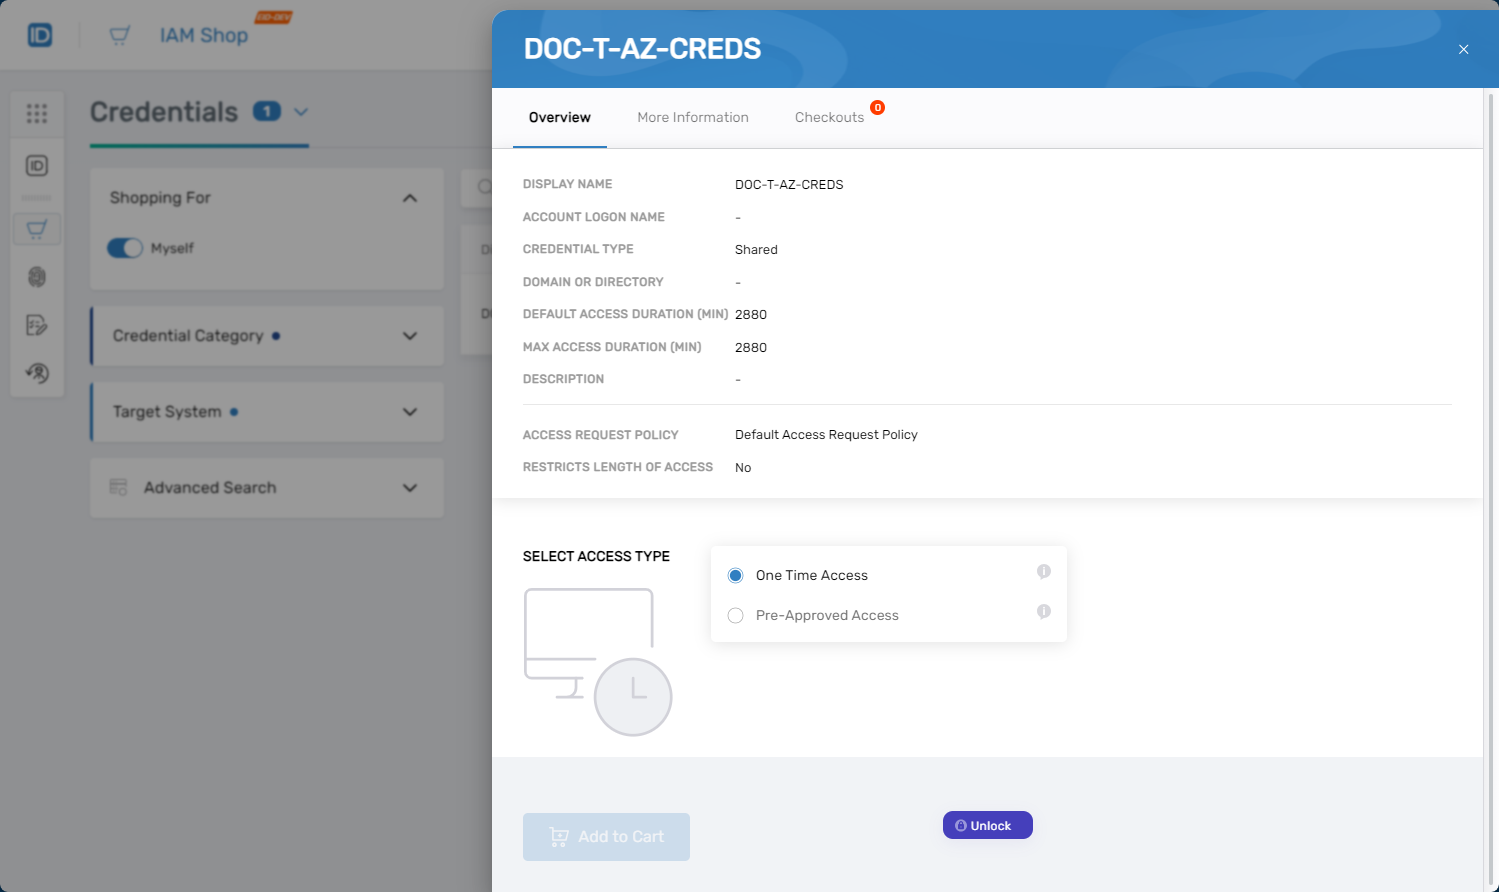
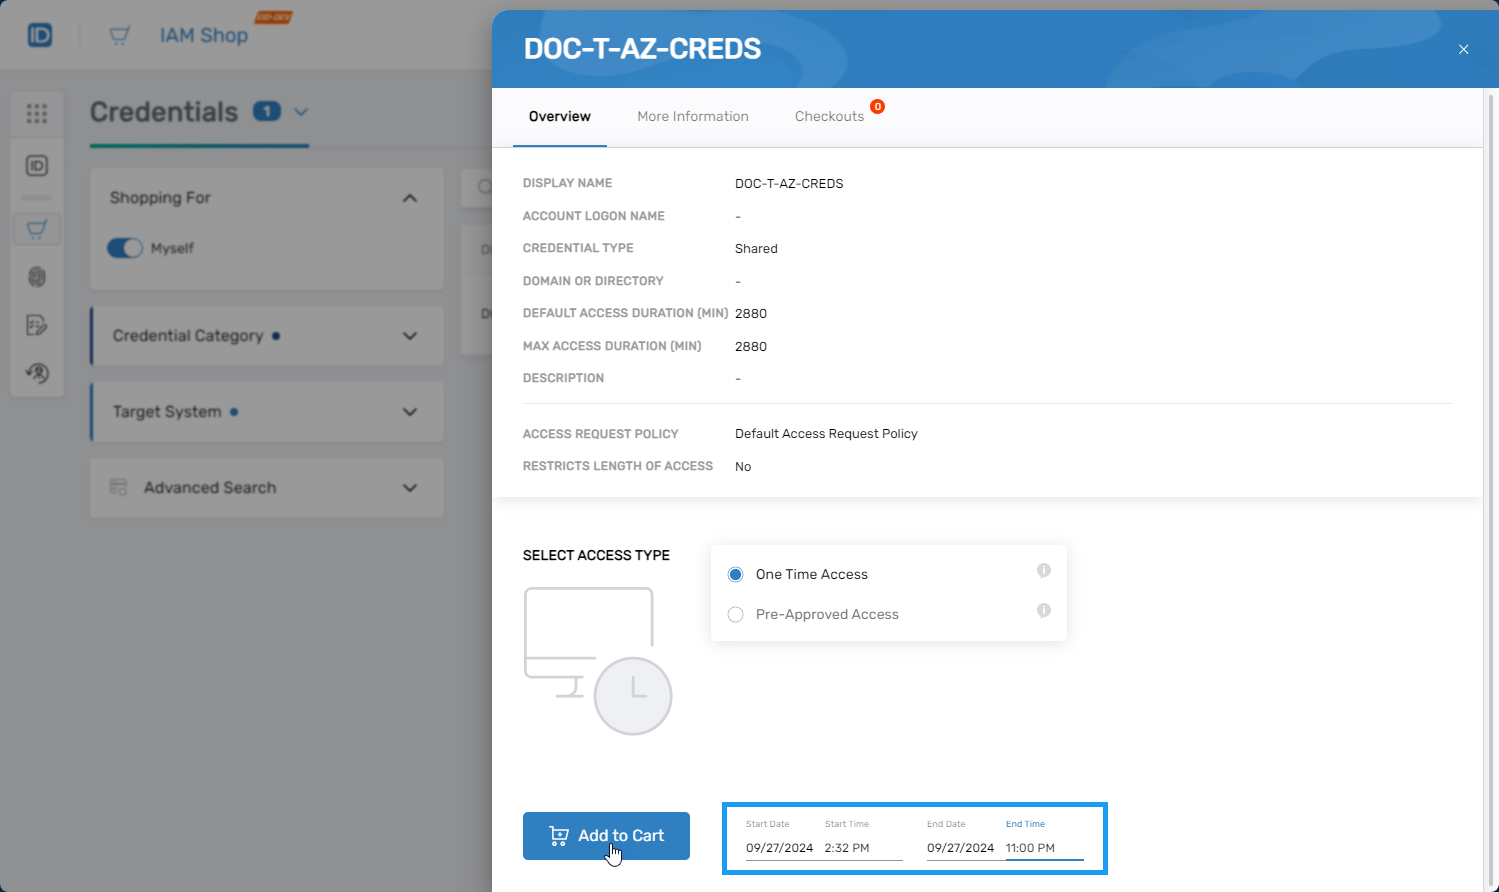
Step 2 – Choose the Access Type
- In the request card, select the desired Access Type:
- One Time Access – Choose this option for a one-time credential checkout.
- Pre-Approved Access – Choose this option if you need regular access to the credential.
- Click Unlock.

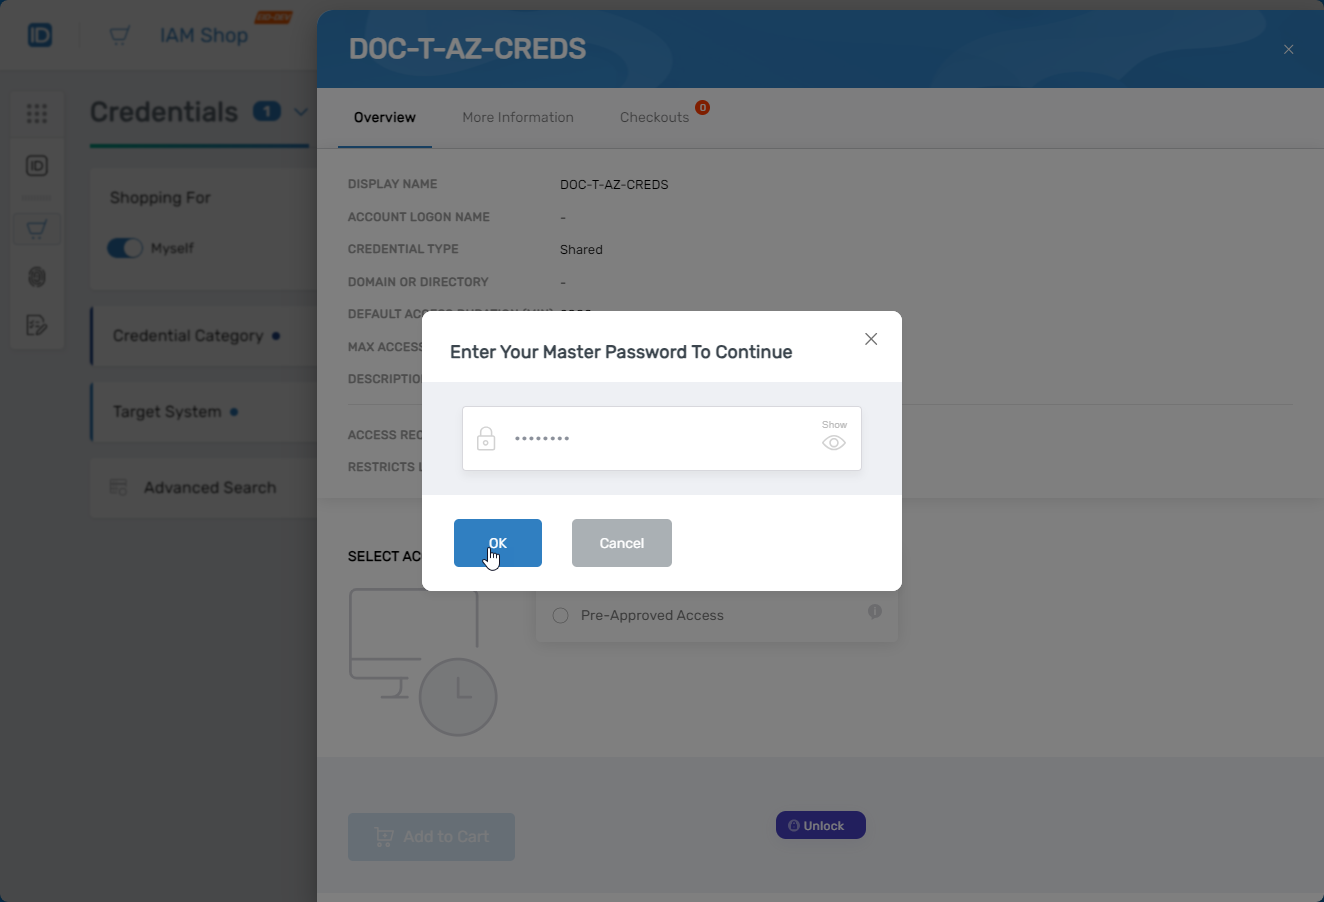
Step 3 – Enter Master Password
- Enter your master password in the prompt.
- Click OK.
Step 4 – Adjust Access Duration (One-Time Access Only)
- If you selected One Time Access, adjust the following fields as needed:
- Start Date
- Start Time
- End Date (required to enable the "Add to Cart" button)
- End Time
- Click Add to Cart.
Step 5 – Complete the Request
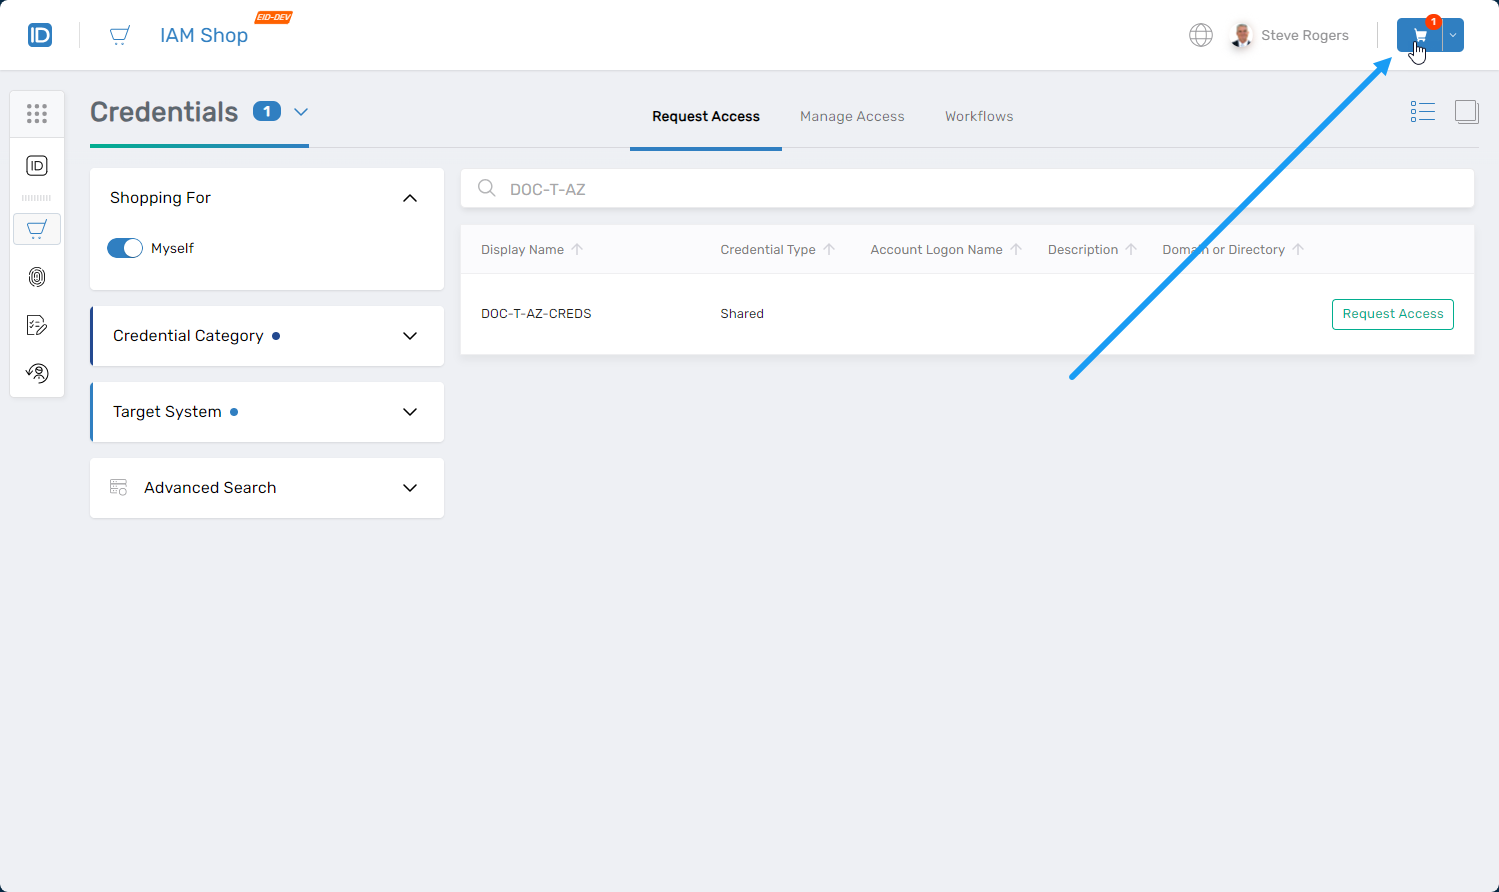
- Click the Cart icon at the top of the page to open it.
- Select a reason for the request.
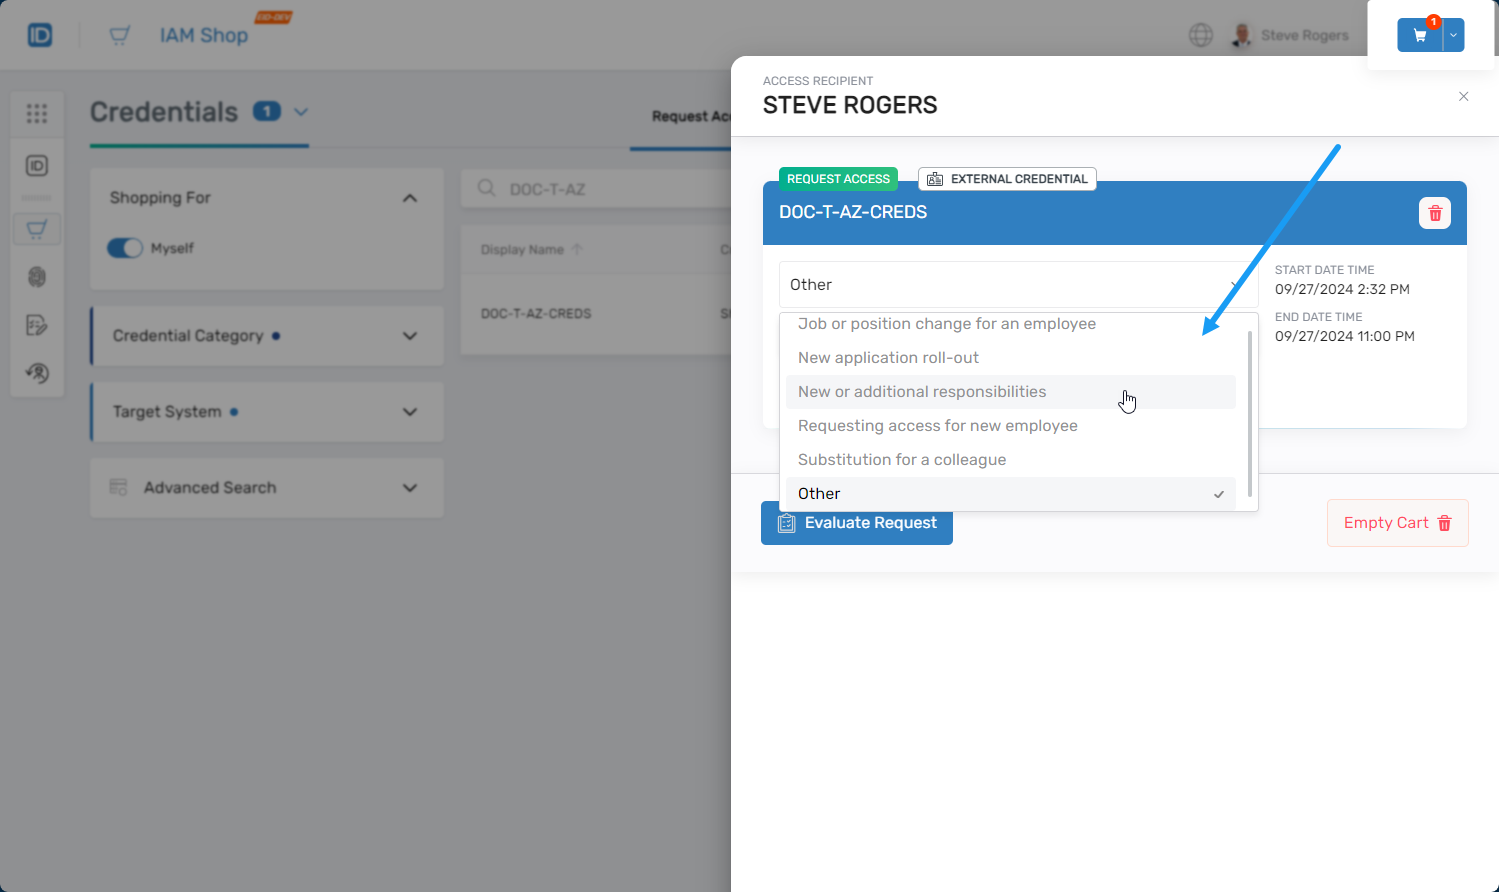
- If you selected Other, enter a comment.
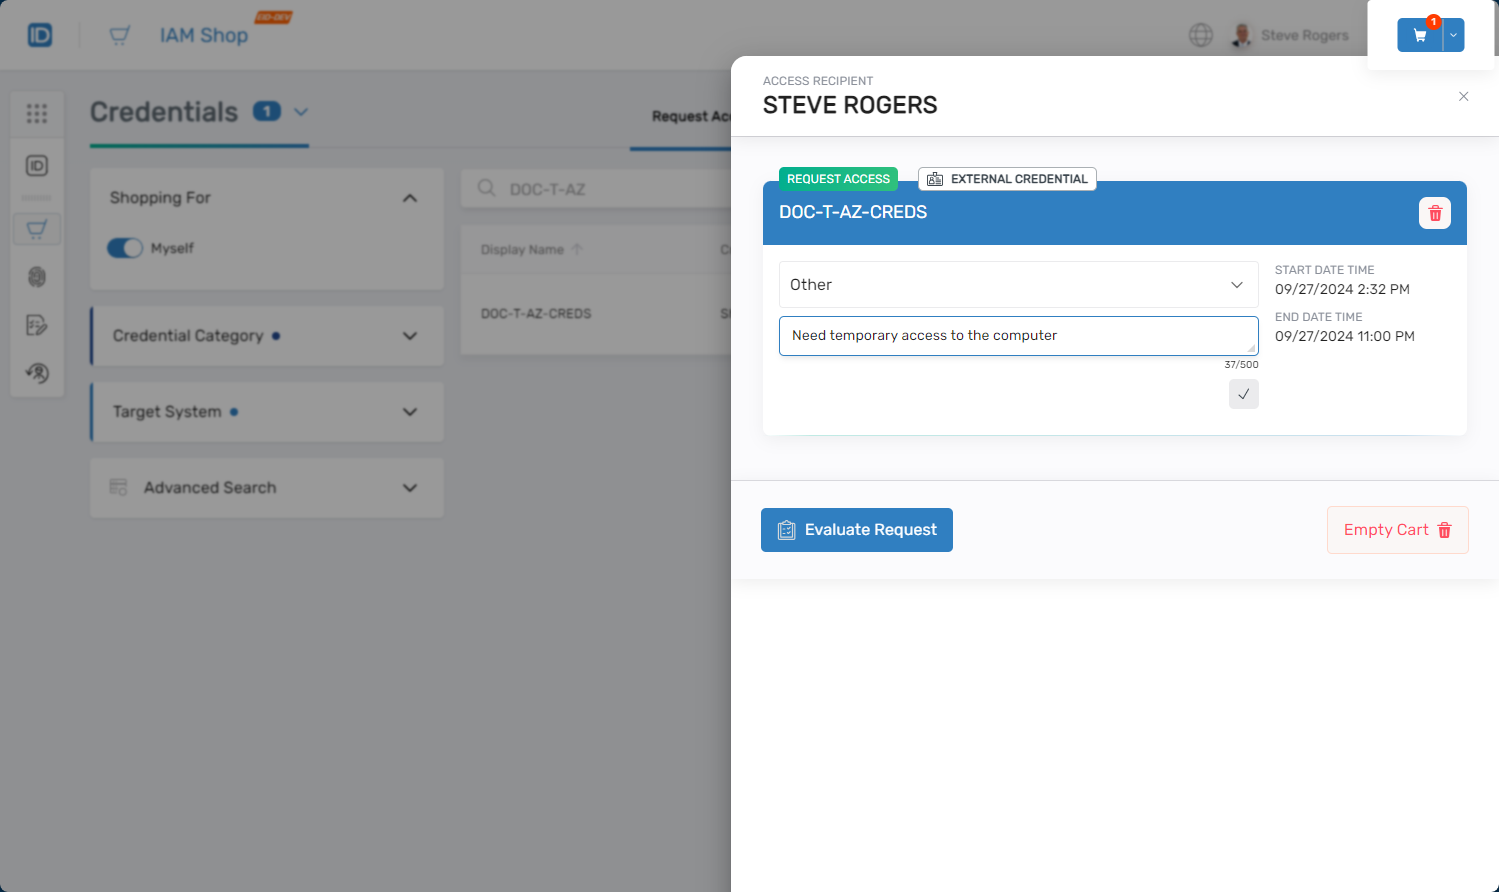
- Click Evaluate Request. This allows the system to check for potential risk violations if the credentials were granted.
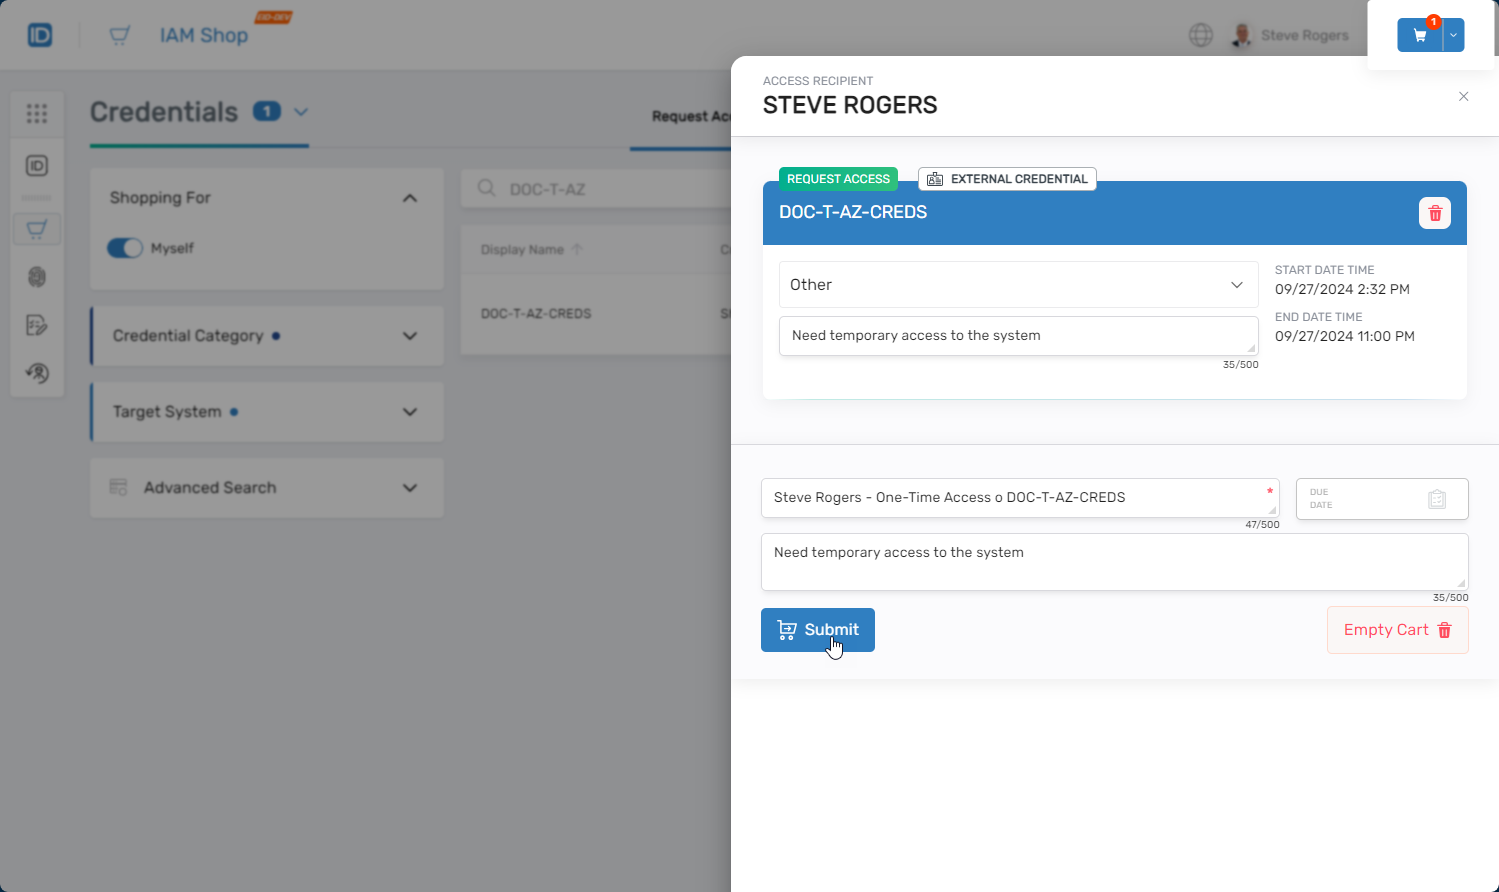
- Enter a Business Request Name. The text entered here helps identify the purpose of the request to potential approvers.
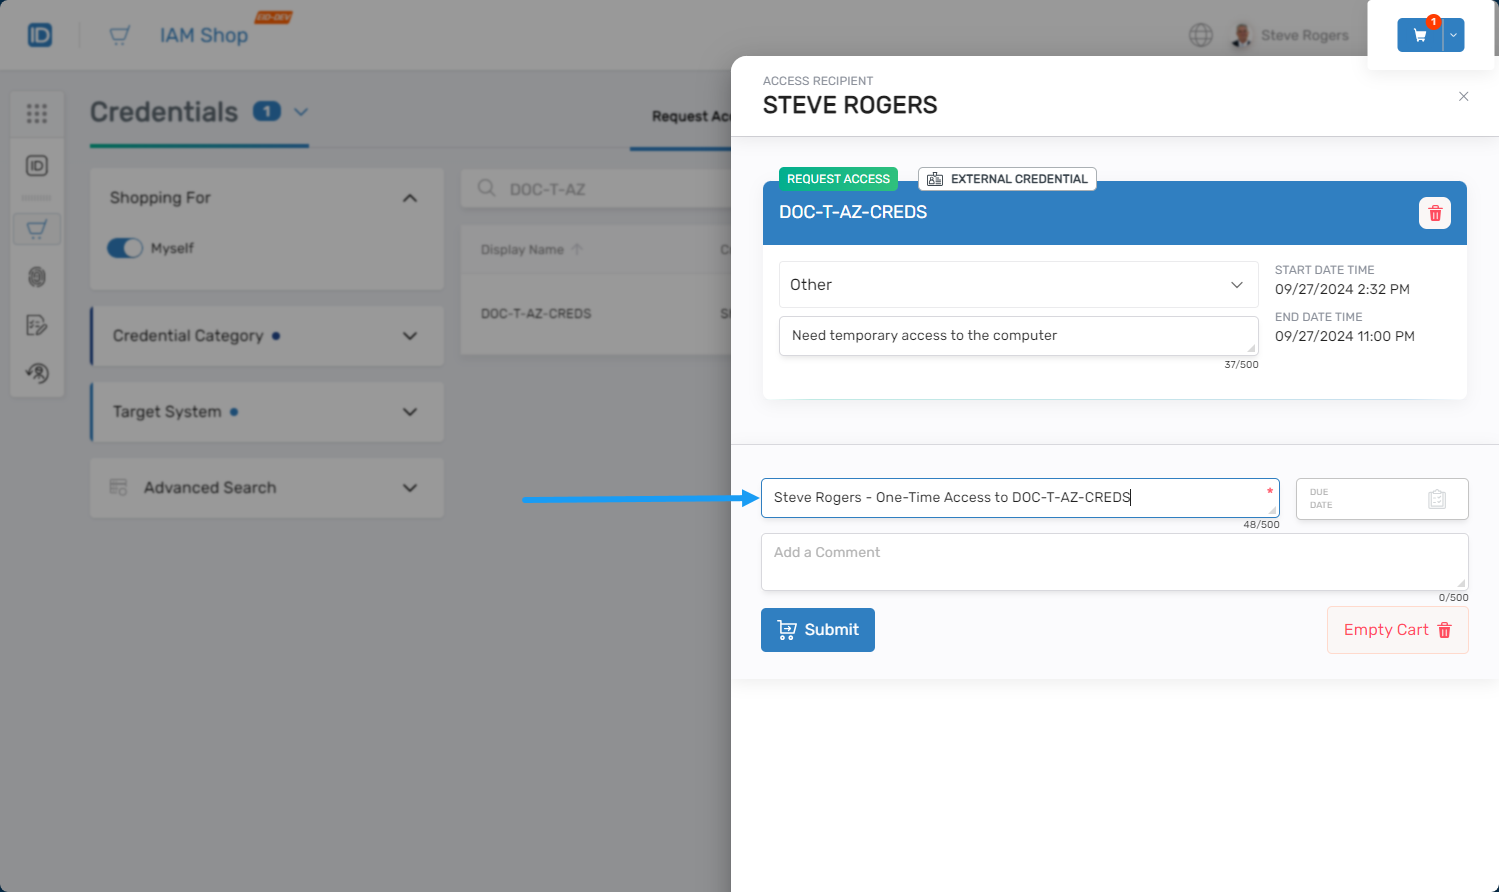
- Enter a comment in the Add a Comment field.
- Optionally, enter a Due Date.
- Click Submit.
Results
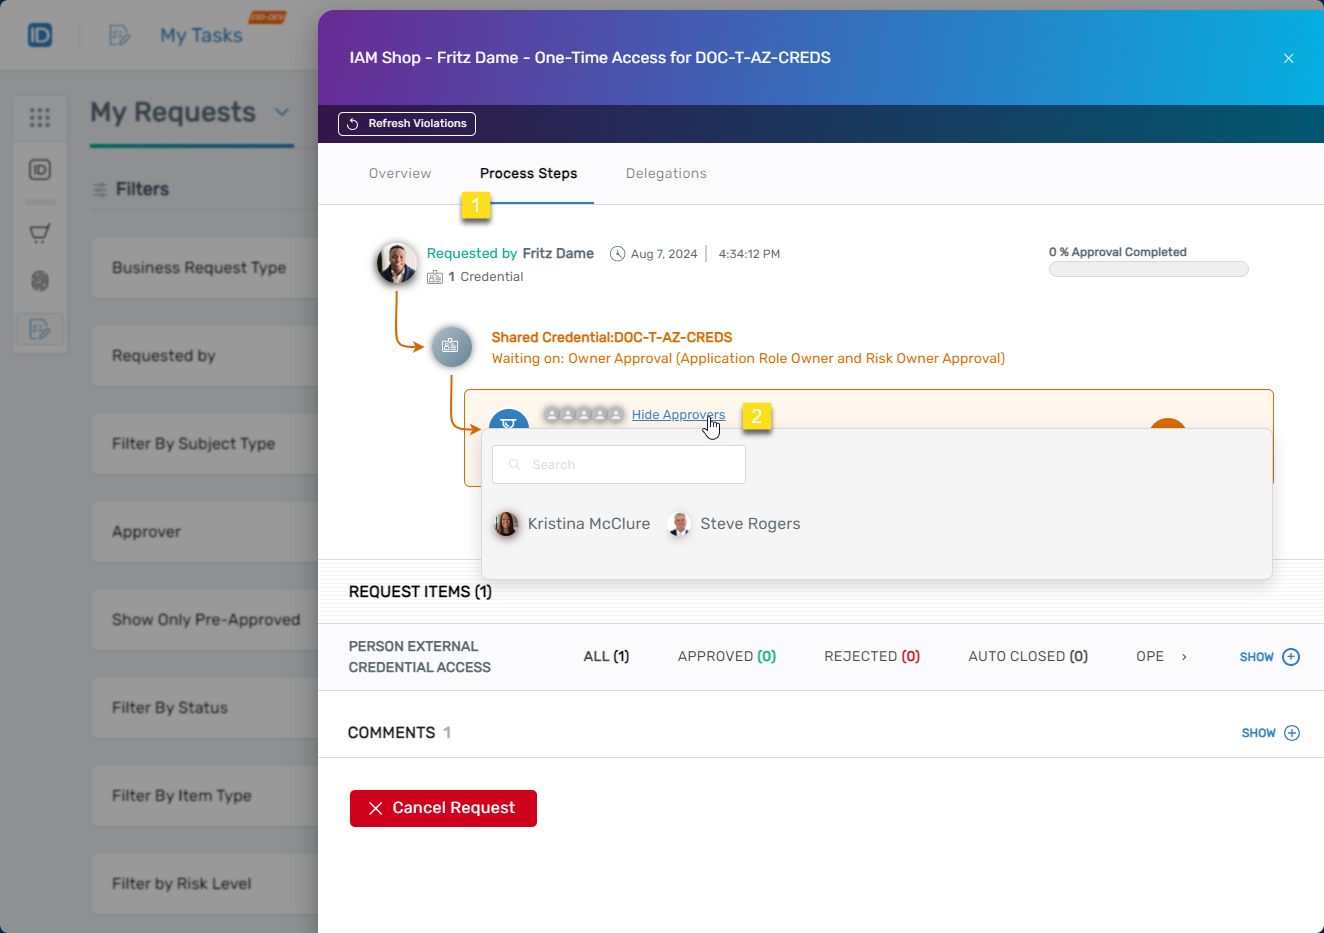
After submission, you should see a confirmation message stating that the cart was successfully submitted and a tracking link.
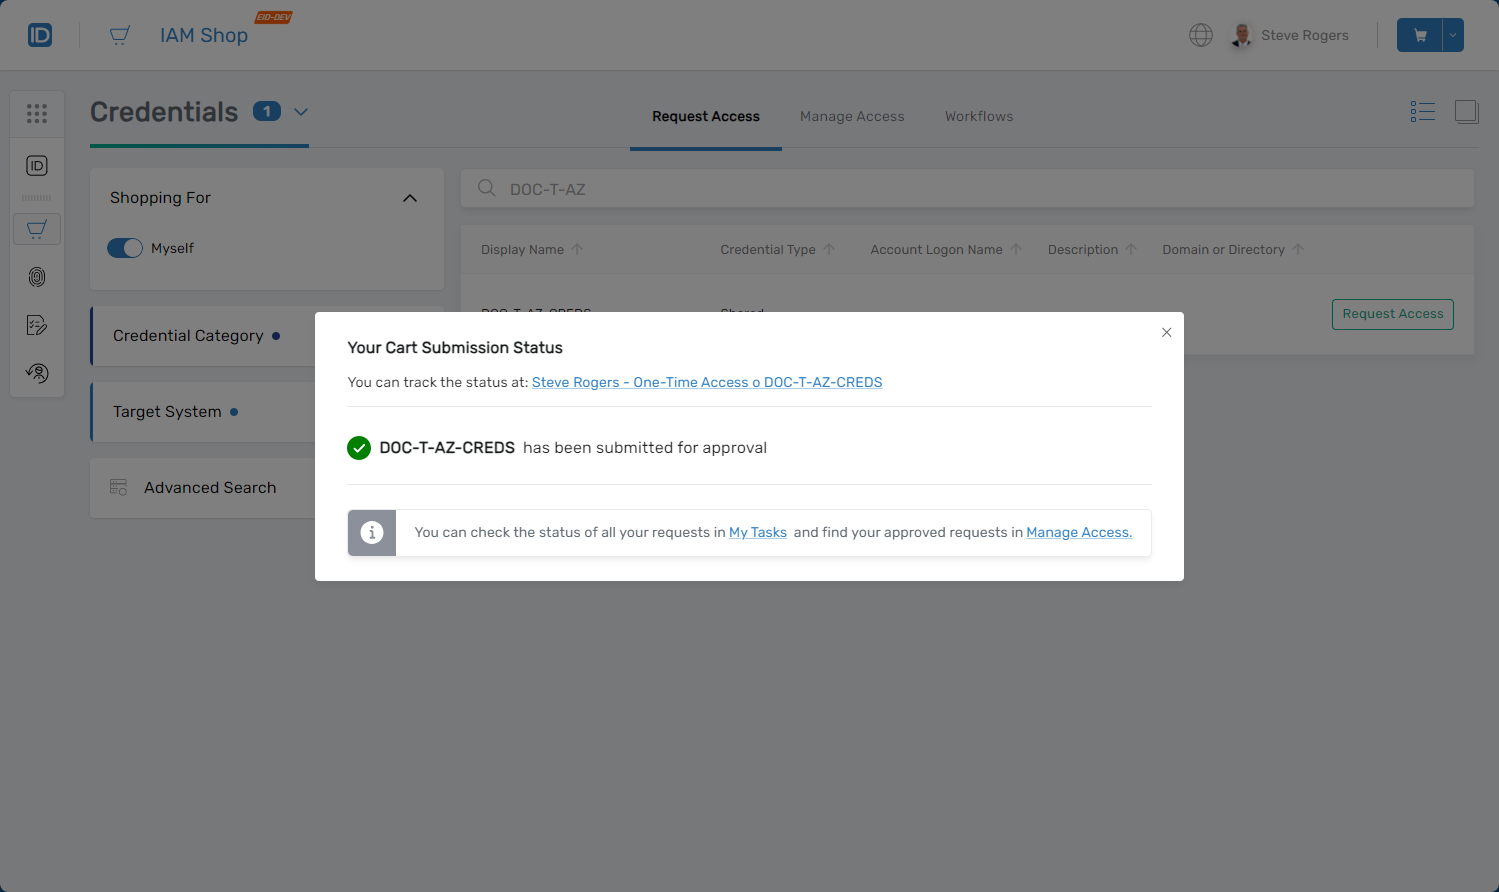
Clicking the link opens the request in the My Tasks application, where you can:
- Cancel the request
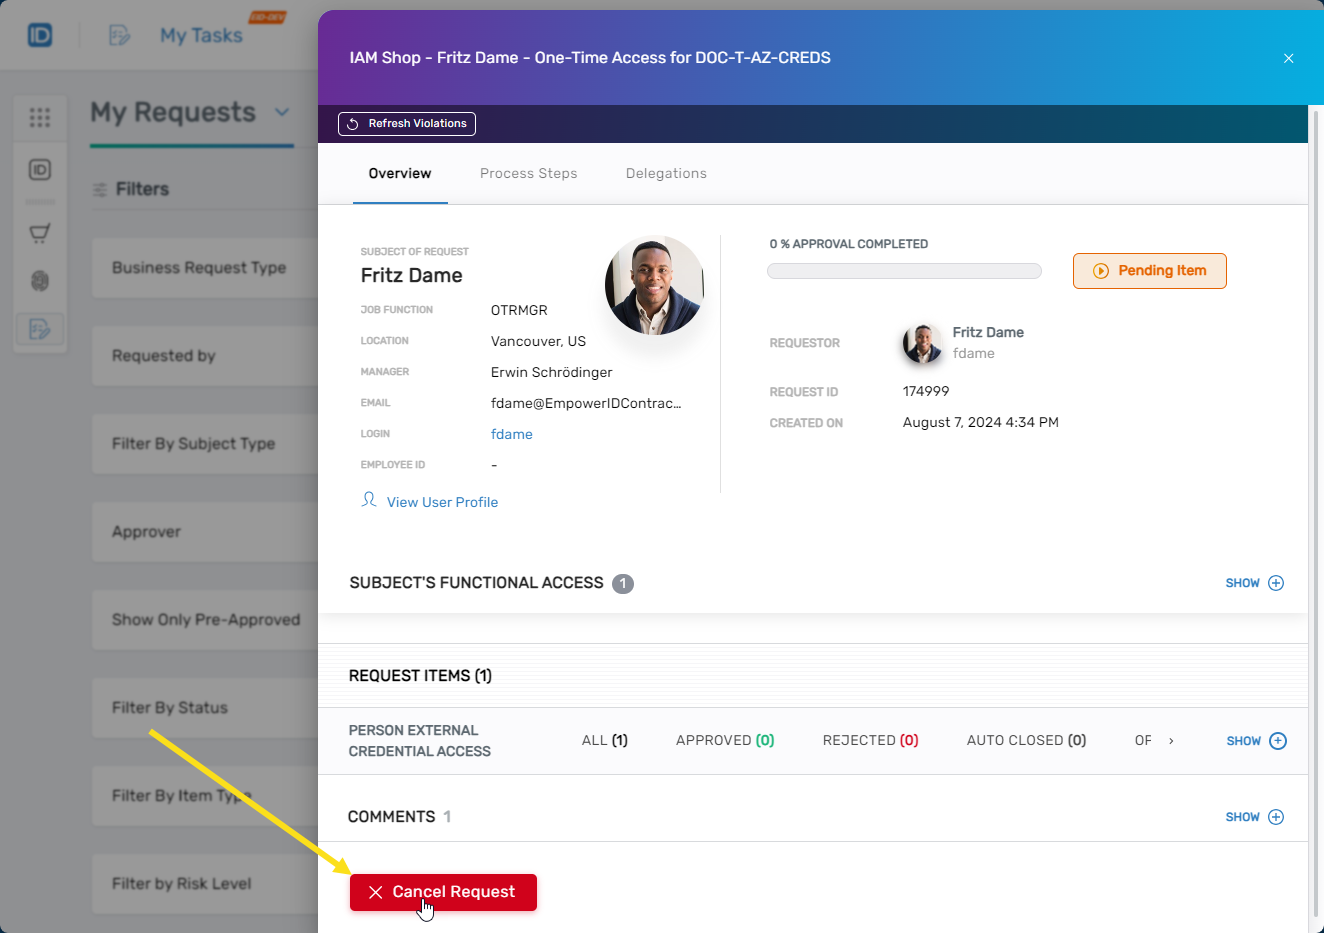
- View your functional access
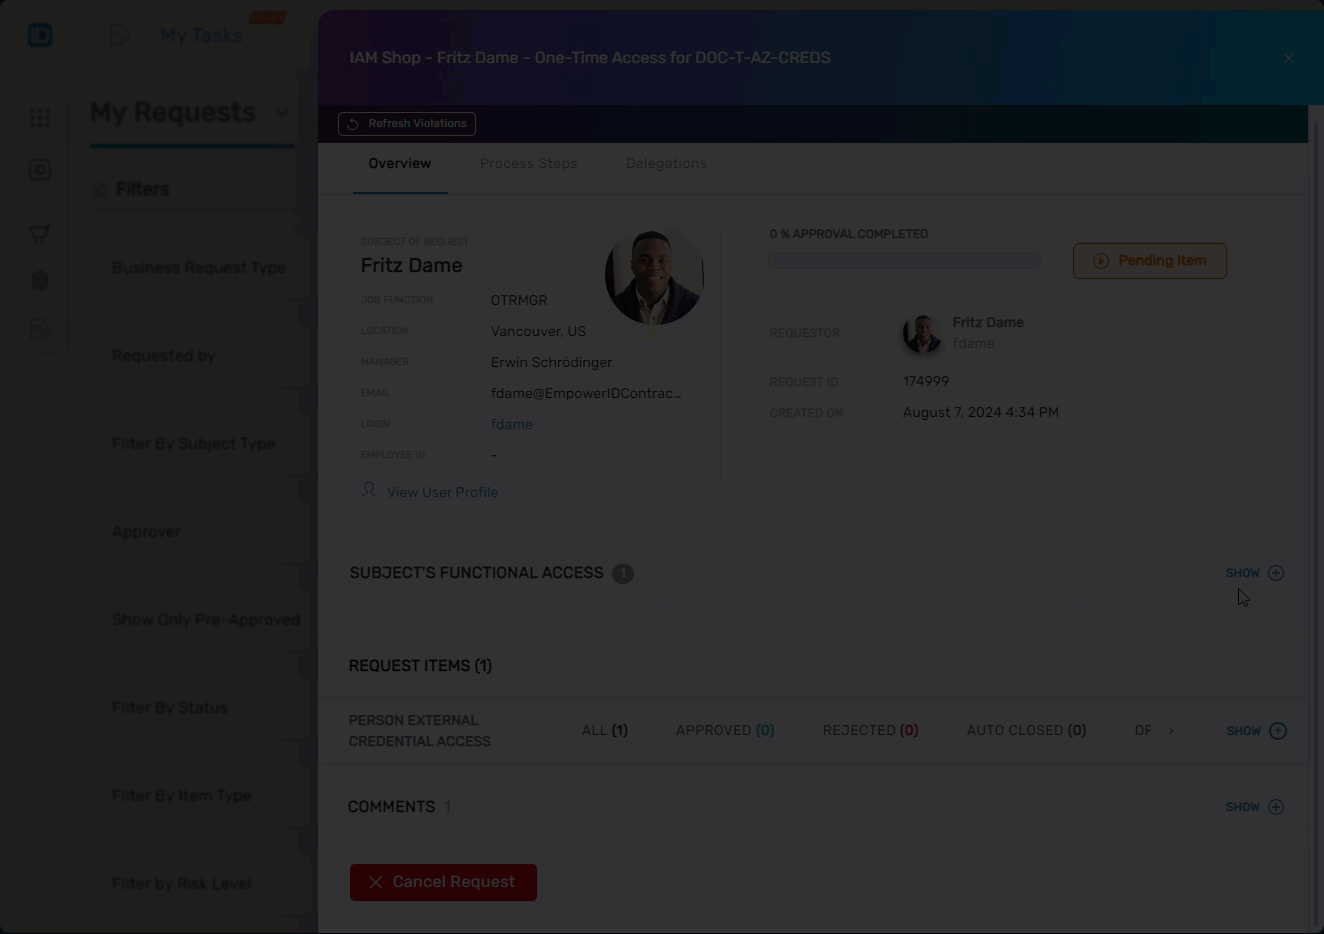
- View Approvers