Onboarding People
EmpowerID provides a comprehensive wizard workflow called "Onboard Person" to simplify and streamline the process of manually onboarding individuals. This wizard offers various options to accommodate different needs and preferences:
- Create Person Simple Mode: Designed for ease of use, this option requires only essential information to create a new person, such as their First Name, Last Name, Primary Business Role, and Location.
- Create Person Advanced Mode: Catering to more complex requirements, this mode provides additional configuration options and demands further details, such as assigning the new person to one or more Management Roles and groups.
- Create Person From Another Mode: This innovative approach enables you to create a new person by using another individual's information as a template.
In order to customize the user experience during the onboarding process, the workflow offers several adjustable parameters. This article will walk you through the steps of modifying these parameters and running the workflow in each mode.
Procedure
Step 1 – Configure workflow parameters
The Onboard Person wizard workflow incorporates numerous customizable parameters, allowing you to modify the fields displayed to users running the workflow and to determine whether human approval is needed before EmpowerID fulfills the request and provisions the person. The table below lists these parameters. By customizing these parameters, you can tailor the onboarding experience to best suit your organization's needs and preferences. In this example, we set the SendForApproval parameter to false.
View Workflow Parameters
| Parameter | Description |
|---|---|
| CreationModeListDataItemTypeName | This is a list that contains the available modes for onboarding people. |
| EmailMessageIdForMgtRoles | Integer that specifies the email message to be sent to all members belonging to the target Management Roles. |
| EmailMessageIdForNewPerson | Integer that specifies the email message to be sent to the newly onboarded person. |
| EmailMessageIdForPersonManager | Integer that specifies the email message to be sent to the manager of the newly onboarded person. |
| IsAssignGroupMembership_IsVisible | Boolean value that determines whether the Assign Group membership section of the workflow is visible to users. |
| IsAssignMgmtRoleBundleMembership_IsVisible | Boolean value that determines whether the Assign Management Role Bundle Membership section of the workflow is visible to users. |
| IsAssignObjectVisibilityAccessRoles_IsVisible | Boolean value that determines whether the Assign Visibility Access Role section is visible to users. |
| IsAssignPreApprovedMgmtRole_IsVisible | Boolean value to determine whether the Assign Pre-Approved Management Roles section of the workflow is visible to users. |
| IsAssignRbacOperationAccessRoles_IsVisible | Boolean value to determine whether the Assign RBAC Operation Access Roles section of the workflow is visible to users. |
| IsAssignSecondaryRoleAndLocation_IsVisible | Boolean value to determine whether the Assign Secondary Role and Location section of the workflow is visible to users. |
| IsAssignUIAccessRoles_IsVisible | Boolean value that determines whether the Assign UI Access Roles section of the workflow is visible to users. |
| IsAutoGeneratePassword_IsVisible | Boolean value that specifies whether the Auto Generate Password option is visible to users. |
| OnboardPersonCreationMode_ItemSetName | Specifies the List Item Set Name containing the creation modes presented to users running the workflow. |
| OnboardPersonPropertiesToClone | Specifies the properties to clone from a selected person to the new person when running the workflow in Create Person From Another mode. Default properties include:- LastName - FirstName - Address.City - Address.State |
| PersonPropertiesToClone | Specifies the properties to clone from a selected person to the new person when running the workflow in Create Person From Another mode. Default properties include:- Name - Address - ManagerInfo - PrimaryLocationAndRole - OrganizationBasicInfo - OrganizationContactInfo |
| SendForApproval | Boolean value that specifies whether the onboarding request needs to be routed for human approval before the systems provisions the new person. |
To configure workflow parameters, do the following:
- On the navbar, expand Low Code/No Code Workflow and select Low Code Workflows.
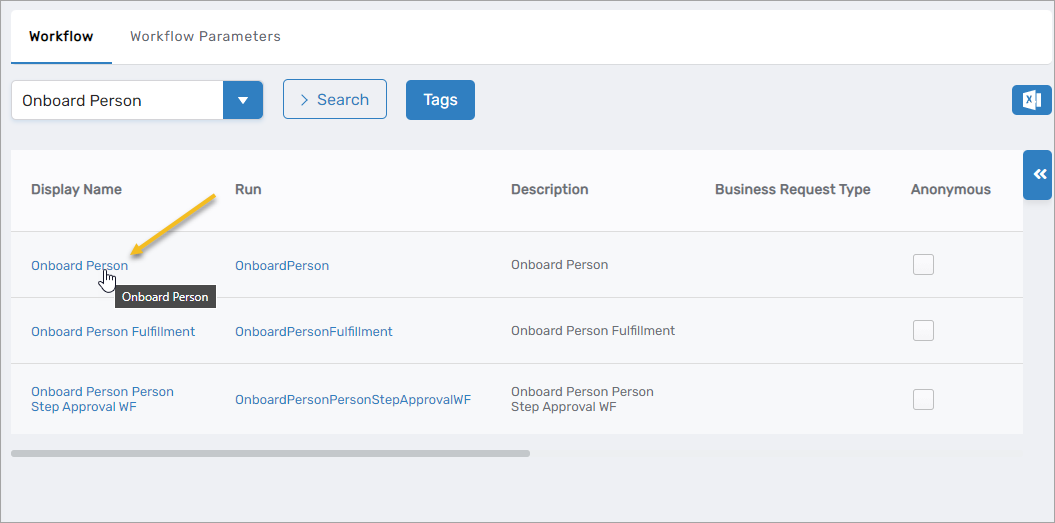
- Select the Workflow tab and search for Onboard Person.
- Click the Display Name for the workflow.
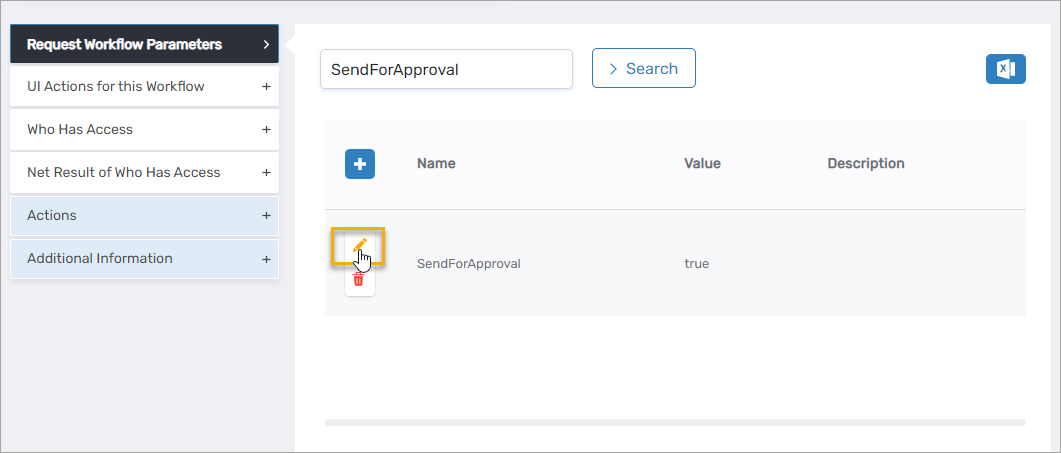
- On the View One page for the workflow, expand the Request Workflow Parameters accordion and search for the SendForApproval parameter.
- Click the Edit button for the parameter.
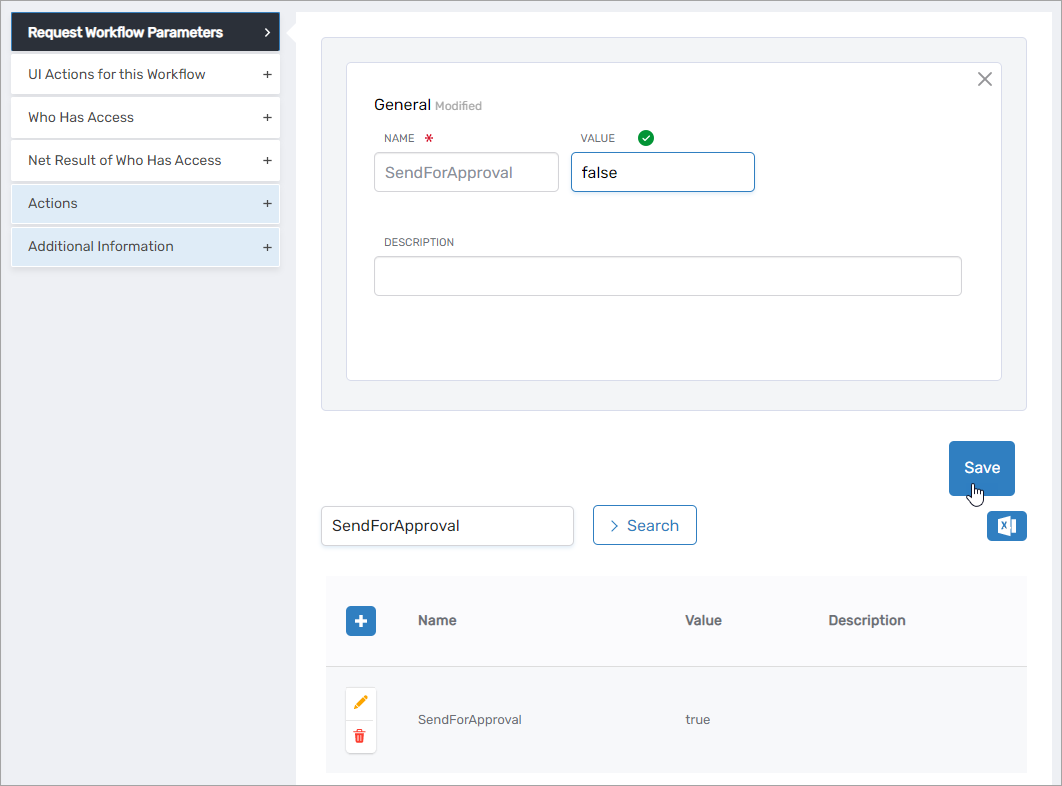
- Change the Value to false and click Save.
- Follow the above steps to change other parameter values as needed.
Step 2 – Run the workflow
- Navigate to the portal for the Resource Admin app in your environment.
- In Resource Admin, select People and then select the Workflows tab.
- Click Onboard a New Person.
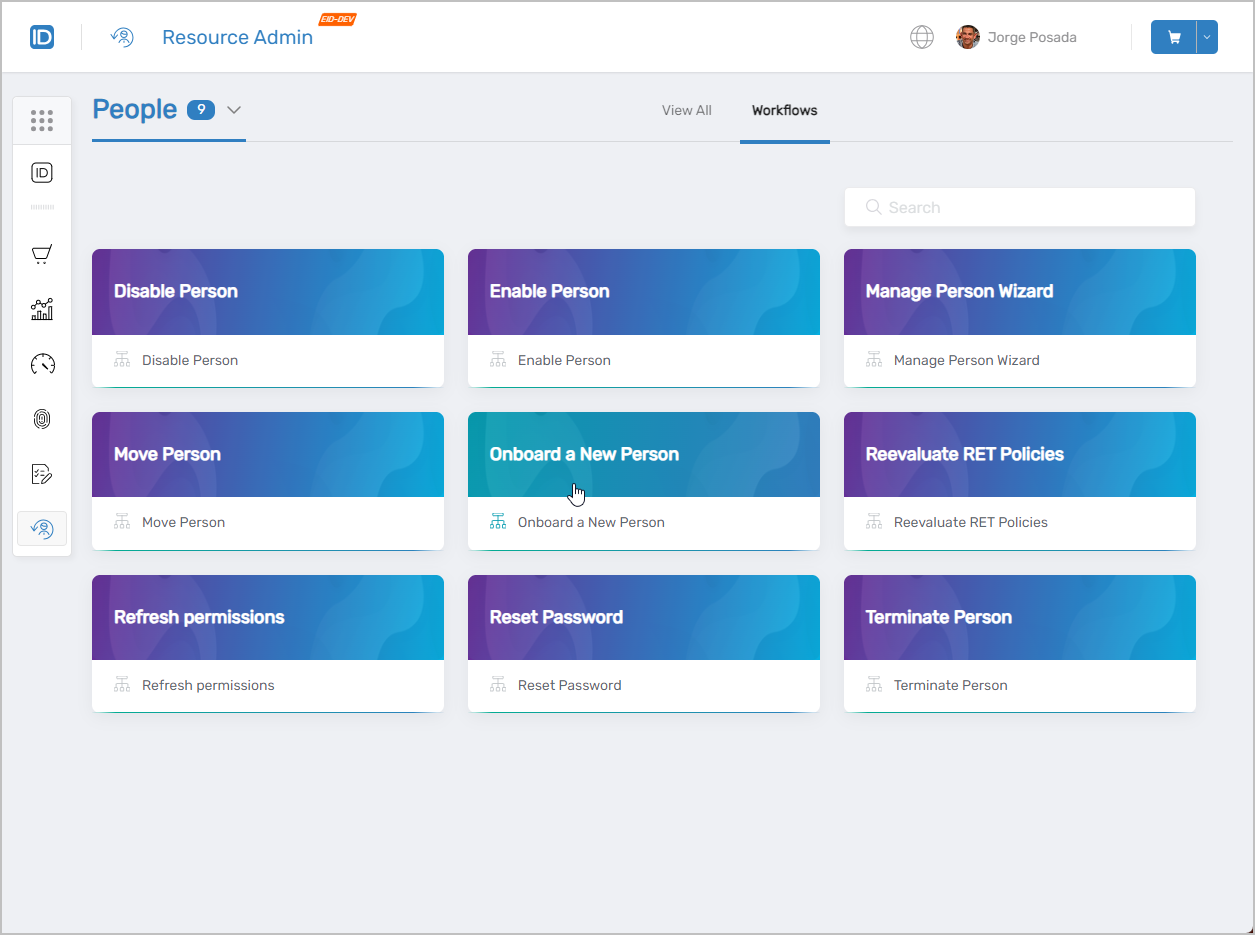 This initiates the Onboard Person workflow.
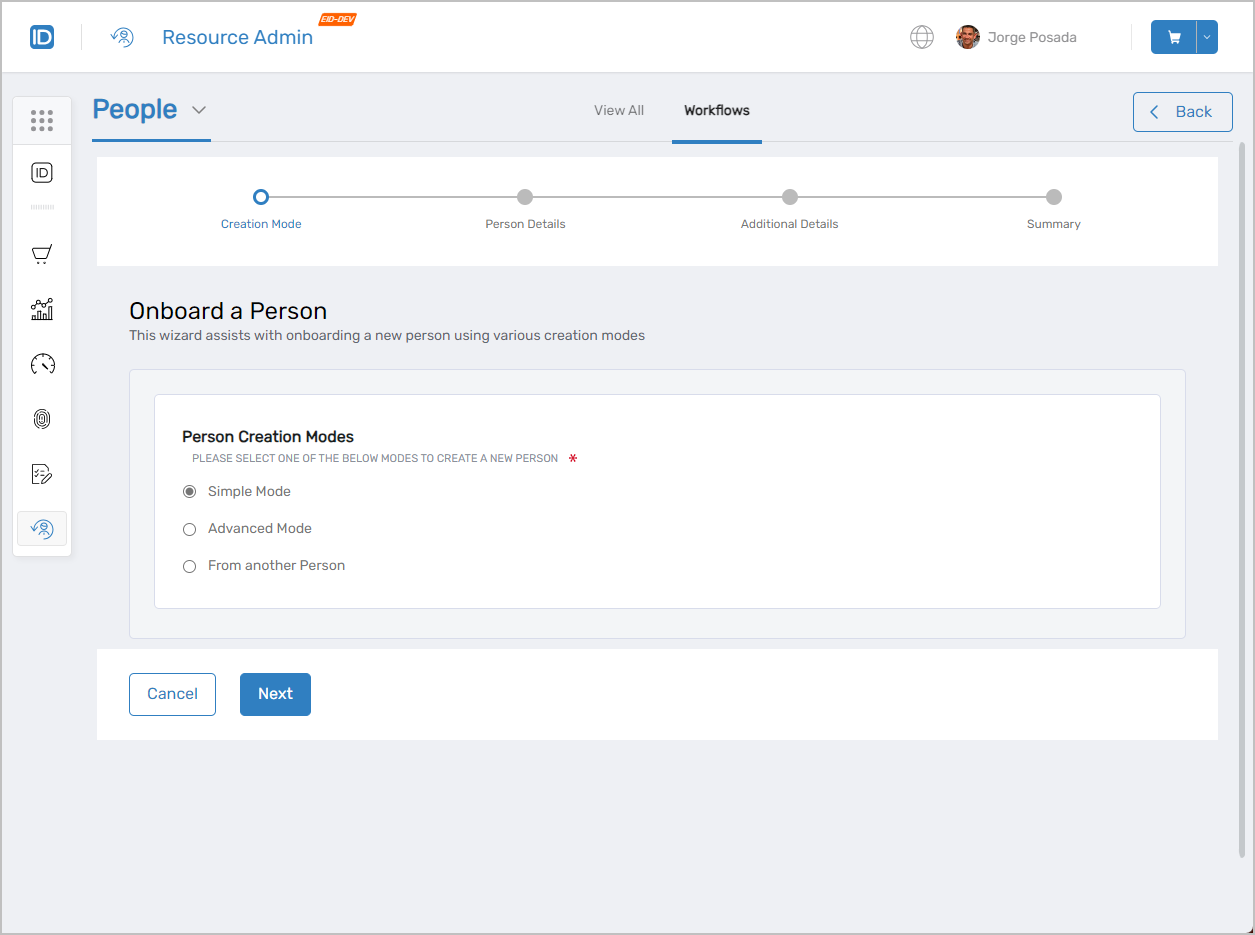
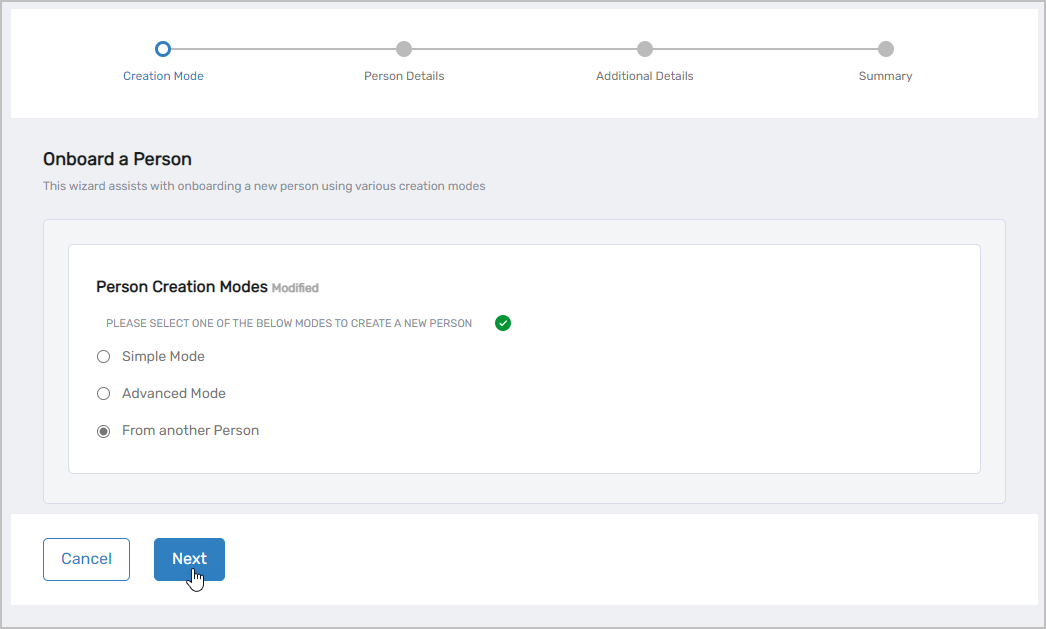
- Select the desired creation mode and follow the wizard to onboard the new person.
- Simple Mode
- Advanced Mode
- From Another Person
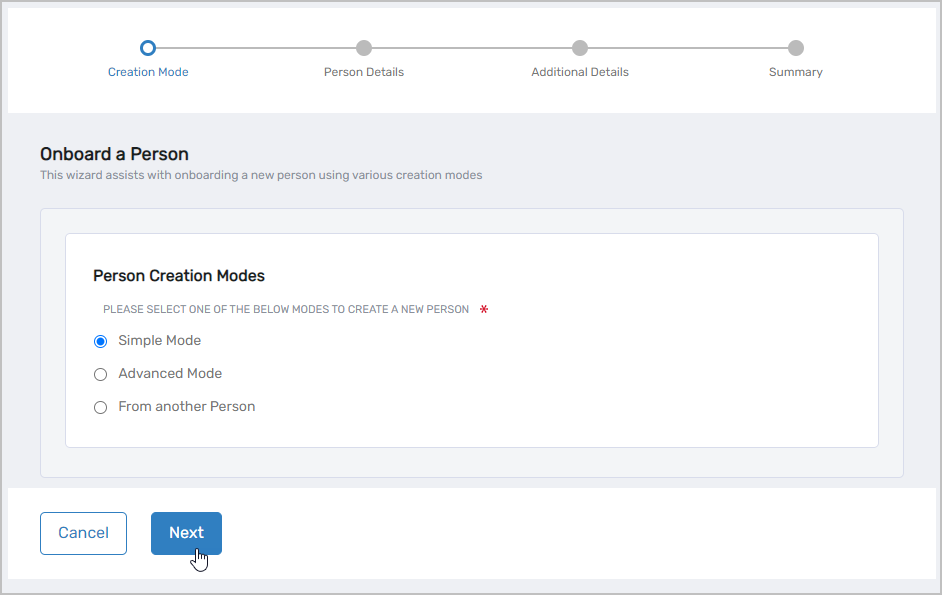
- Select Simple Mode and click Next.
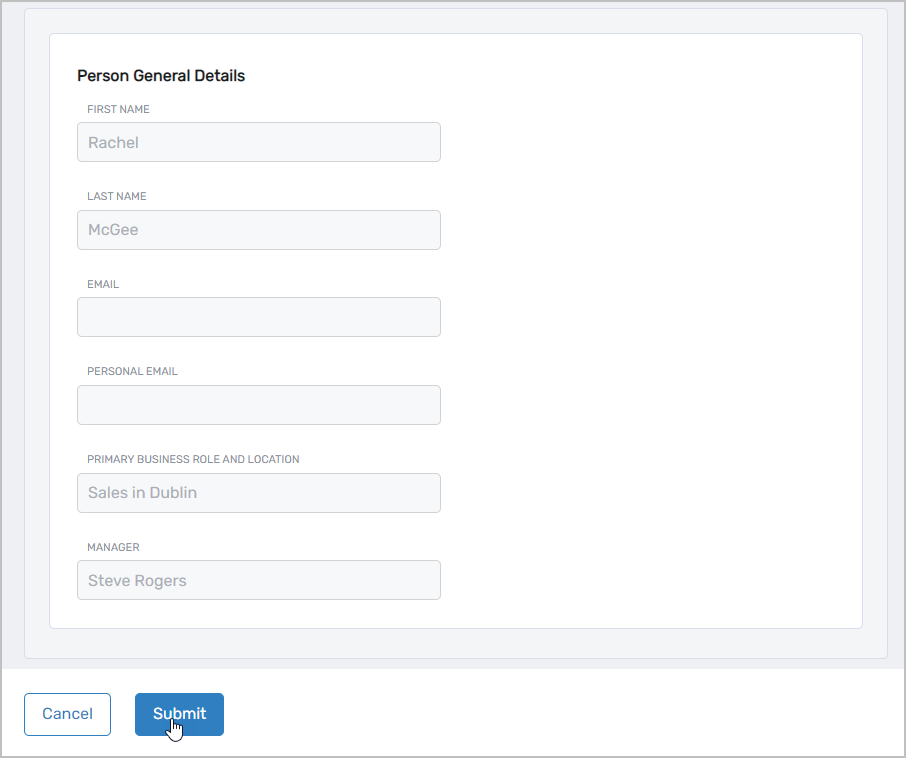
- Enter the following information in the form:
- First Name – First name of the person
- Last Name – Last name of the person
- Email – Email address for the person (Optional)
- Personal Email – Personal email address for the person (Optional). If you add an email address to this field, EmpowerID will use it to send a welcome message to the person.
- Primary Role and Location – Click Select a Role and Location and then do the following:
- Search for and select a Business Role from the Business Role tree
- Click the Location link and then search for and select a location from the Location tree
- Click Select to select the Business Role and Location
- Manager – Manager of the person (Optional)
- Click Next to proceed to the next step.
- Review the summarized person details and click Submit when ready to onboard the person.
- Select Advanced Mode and then select the following Advanced Options:
- Do you want to Auto-Generate a Password? Yes or No
- Do you want to Assign Management Role Bundle Memberships? Yes or No. Please note that you must have access to add the person to the selected role bundles.
- Do you want to Assign Pre-Approved Management Roles? Yes or No. Please note that you must have access to add the person to the selected roles.
- Do you want to Assign Group Memberships? Yes or No. Please note that you must have access to add the person to the selected groups.
- Do you want to Assign Secondary Role and Locations? Yes or No
- Click Next.
- On the Person tab, fill in the general identity information for the person.
- First Name – First name of the person
- Initials – Initials of the person (Optional)
- Last Name – Last name of the person
- Display Name – Name of the person that displays to users in the Web interface
- Login – EmpowerID login for the person
- Email – Email address for the person (Optional)
- Personal Email – Personal email address for the person (Optional). If you add an email address to this field, EmpowerID will use the address to send a welcome message to the person.
- Primary Business Role and Location – Click Select a Role and Location and then do the following:
- Search for and select a Business Role from the Business Role tree
- Click the Location link and then search for and select a location from the Location tree
- Click Select to select the Business Role and Location
- Manager – Manager of the person (Optional). If the manager has an email address registered in the system, EmpowerID sends that person an email notification of the new person.
- Password – Password for the person
- Confirm Password – Password for the person
- Personal Email – Personal email address for the person (Optional). If you add an email address to this field, EmpowerID will use it to send a welcome message to the person.
- Preferred Language – Allows you to select the language the person prefers. When selected the EmpowerID user interfaces reflect the selected preferred language for the person. If no selection is made, the system selects the default preferred language based on the locale of the person.
- Notes – Notes about the person (optional)
- About me – Can be used to provide contextual information about the person, such as their hobbies and interests (Optional)
- Optionally, select the Organization tab and fill in the appropriate information for the person.
- Title – Person's title
- Office – Person's office
- Location – Person's location
- Department – Person's department
- Division – Person's division
- District – Person's district
- Company – Person's company
- Street Address – Person's street address
- Street Address 2 – Second line of the person's street address
- City – Person's location
- State – Person's state
- Province – Person's province
- Country – Person's country
- Postal Code – Code of letters and/or digits for postal delivery to the person
- Telephone – Person's secondary phone number
- Business Phone – Person business phone number
- Mobile Phone Provider – Person's mobile phone provider
- Fax – Person's fax number
- Optionally, select the Advanced tab and fill in the appropriate information for the person.
- Enabled – Selected by default; deselect if the person account should be disabled from logging in to the system.
- Disable Notifications – Select this option if the person should not receive email notifications from the system.
- Allow Attribute Sync – Selected by default; deselect if the person’s attributes should be synced with user accounts in systems managed by EmpowerID.
- Allow Login – Enabled by default; deselect if the person should not be allowed to log in to the system.
- Must Change Password on Next Login – Select to force the person to change their password when they log in to the system.
- Click Next.
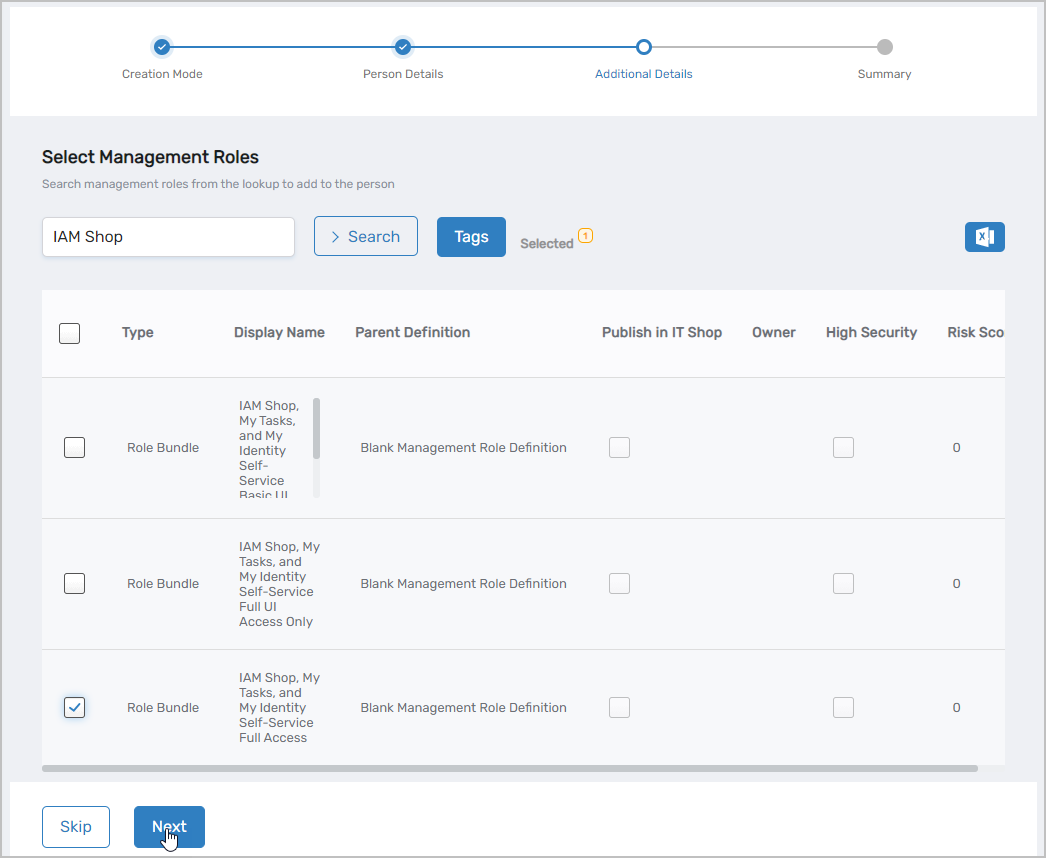
- If you opted to assign pre-approved Management Roles, search for and select the appropriate Management Roles and click Next. If you do not want to select role bundles at this time, click Skip.
- If you opted to select Management Role Bundle Memberships, search for and select the appropriate Management Roles and click Next. If you do not want to select pre-approved roles at this time, click Skip.
- If you opted to select group memberships, search for and select the appropriate groups and click Next. If you do not want to select groups at this time, click Skip.
- Review the summary and click Submit to onboard the person.
Person General Details
Person Password
This section of the form appears when you have opted to not have the system generate a password for the person.
About Person
Organization Information
Address and Phone Numbers

If you do not want to onboard the person, click Cancel to exit the workflow.
- Select From Another Person and click Next.
- Search for and select the person you want to use as a template for the new person and click Next.
- On the Person tab, fill in the general identity information for the person.
- First Name – First name of the person
- Initials – Initials of the person (Optional)
- Last Name – Last name of the person
- Display Name – Name of the person that displays to users in the Web interface
- Login – EmpowerID login for the person
- Email – Email address for the person (Optional)
- Primary Business Role and Location – Click Select a Role and Location and then do the following:
- Search for and select a Business Role from the Business Role tree
- Click the Location link and then search for and select a location from the Location tree
- Click Select to select the Business Role and Location
- Manager – Manager of the person (Optional). If the manager has an email address registered in the system, EmpowerID sends that person an email notification of the new person.
- Password – Password for the person
- Confirm Password – Password for the person
- Personal Email – Personal email address for the person (Optional). If you add an email address to this field, EmpowerID will use it to send a welcome message to the person.
- Preferred Language – Allows you to select the language the person prefers. When selected the EmpowerID user interfaces reflect the selected preferred language for the person. If no selection is made, the system selects the default preferred language based on the locale of the person.
- Notes – Notes about the person (optional)
- About me – Can be used to provide contextual information about the person, such as their hobbies and interests (Optional)
- Optionally, select the Organization tab and fill in the appropriate information for the person.
- Title – Person's title
- Office – Person's office
- Location – Person's location
- Department – Person's department
- Division – Person's division
- District – Person's district
- Company – Person's company
- Street Address – Person's street address
- Street Address 2 – Second line of the person's street address
- City – Person's location
- State – Person's state
- Province – Person's province
- Country – Person's country
- Postal Code – Code of letters and/or digits for postal delivery to the person
- Telephone – Person's secondary phone number
- Business Phone – Person business phone number
- Mobile Phone Provider – Person's mobile phone provider
- Fax – Person's fax number
- Optionally, select the Advanced tab and fill in the appropriate information for the person.
- Enabled – Selected by default; deselect if the person account should be disabled from logging in to the system.
- Disable Notifications – Select this option if the person should not receive email notifications from the system.
- Allow Attribute Sync – Selected by default; deselect if the person’s attributes should be synced with user accounts in systems managed by EmpowerID.
- Allow Login – Enabled by default; deselect if the person should not be allowed to log in to the system.
- Must Change Password on Next Login – Select to force the person to change their password when they log in to the system.
- Click Next.
- Optionally, search for and select the appropriate Management Roles to assign to the person and click Next.
- Optionally, search for and select the appropriate group memberships for the person and click Next.
- Review the summary and click Submit to onboard the person.
Person General Details
Person Password
This section of the form appears when you have opted to not have the system generate a password for the person.
About Person
Organization Information
Address and Phone Numbers
If you do not want to onboard the person, click Cancel to exit the workflow.