Managing Partner Delegations
If your organization has partners that access your system to manage their allocated IT resources, you can quickly set up your environment using the built-in partner roles and locations. This guide demonstrates the complete process using a fictitious partner named "Henrik Hardware" to create test partner admins and users for validation.
When correctly configured, partner admins can only see their own locations—not your IT infrastructure or other partners' resources. Partner admins can manage their partner users independently without your intervention.
Prerequisites
To manage partner delegations, you need appropriate permissions to:
- Create and manage Locations in EmpowerID
- Create and manage Person objects
- Reset passwords for test users
Create Partner Locations
-
On the navbar, expand Role Management and click Business Roles and Locations.
-
Select the Actions tab and click Create Location.
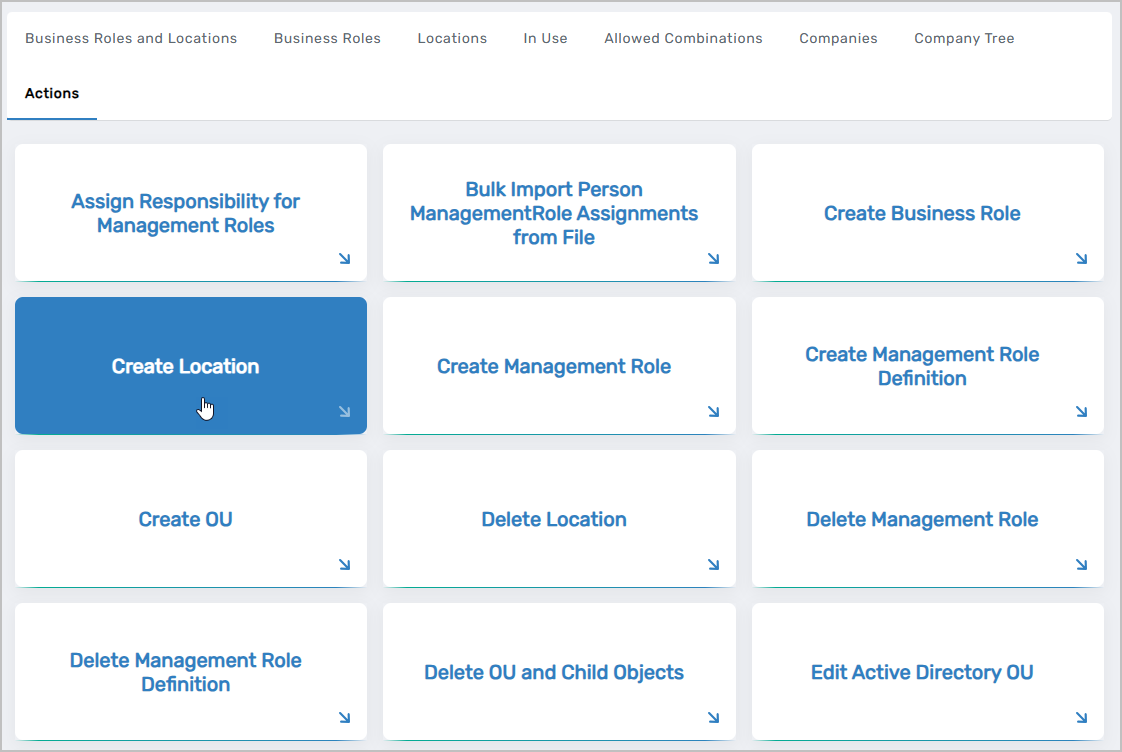 The Location Details form opens.
-
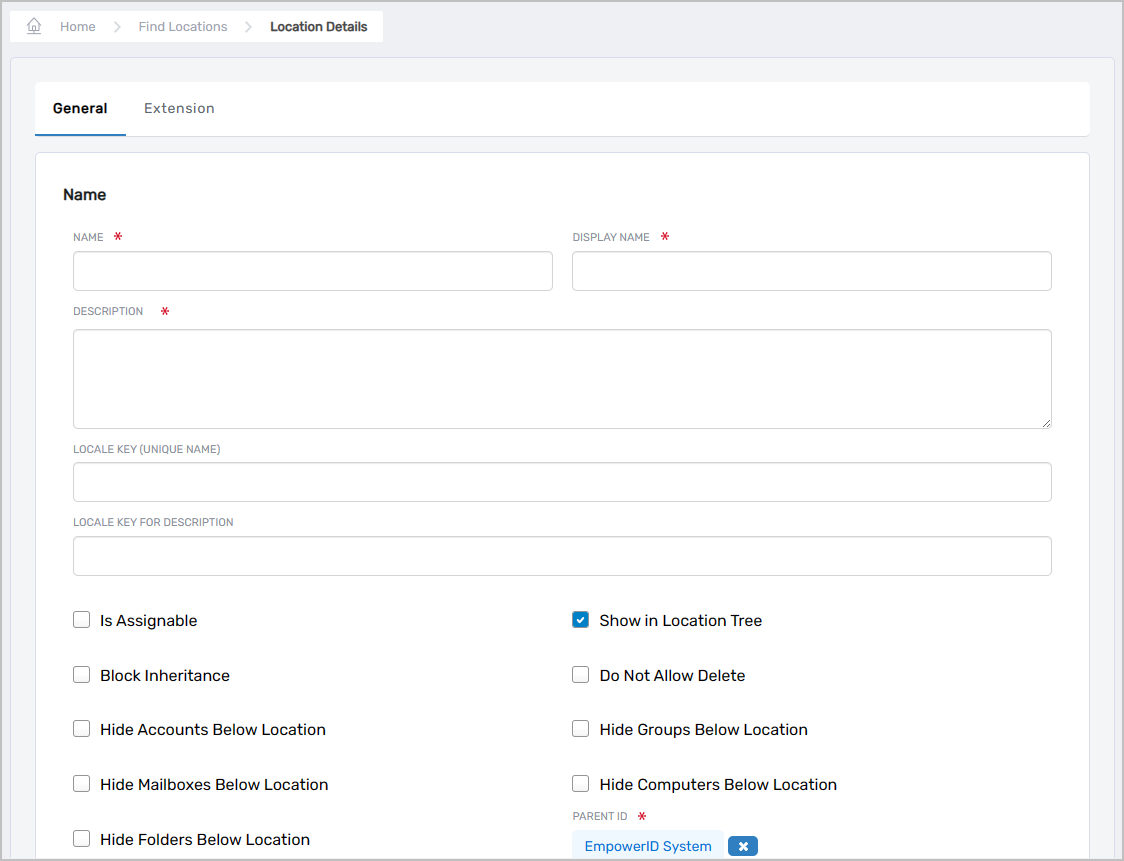
Fill in the following fields:
- Name – Name of the partner location (recommend matching the partner organization name)
- Display Name – Name users see in the EmpowerID UI
- Description – Short characterization of the location
- Is Assignable – Select to enable this option
-
Under Parent ID, click the X to delete the EmpowerID System location.
-
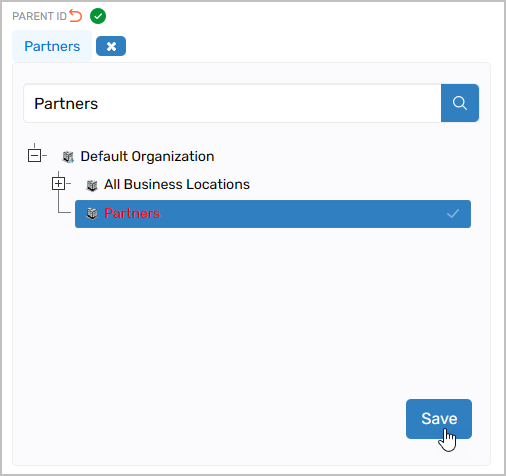
Click the Select a Location link to open the Location Selector.

-
Search for and select Partners.
-
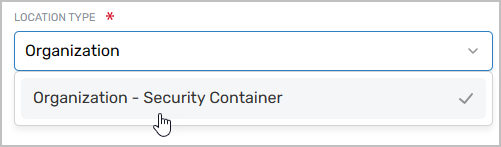
Select Organization - Security Container as the Location Type.
-
Click Save to create the Location.
-
Repeat steps 2-8 to create locations for each additional partner.
Create Test Partner Admins
-
On the navbar, expand Identity Administration and click People.
-
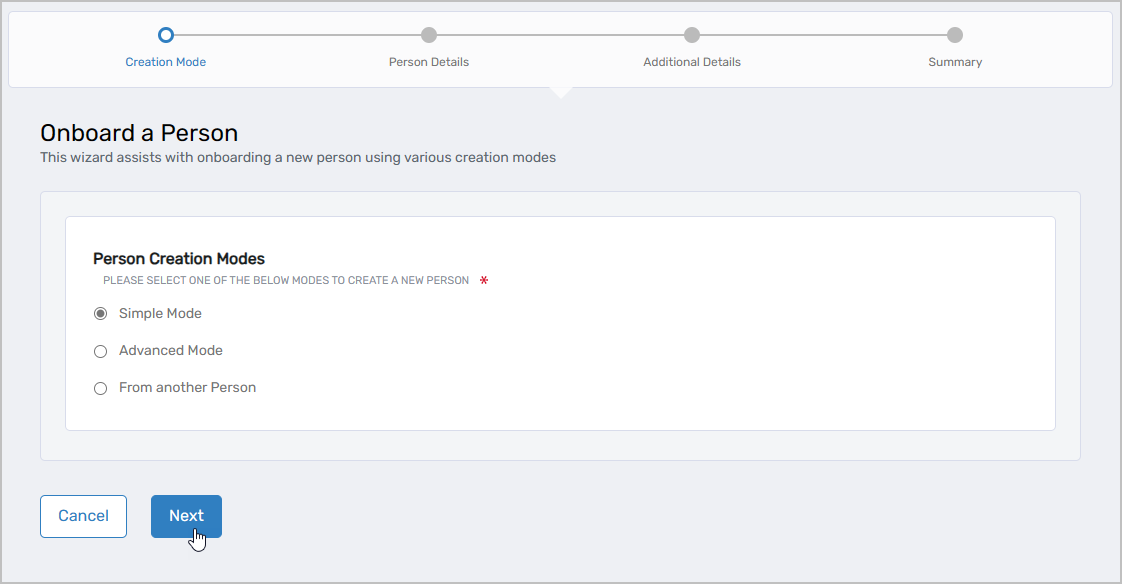
Click the Onboard Person action to initiate the Onboard Person workflow.
-
Select Simple Mode as the Person Creation Mode and click Next.
-
Enter a First Name and Last Name for the partner admin.
-
Enter Email and Personal Email addresses for the partner admin.
-
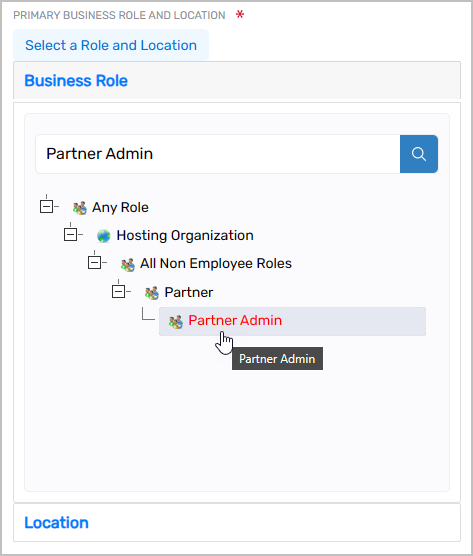
Under Primary Business Role and Location, click the Select a Role and Location link.
-
In the Business Role and Location (BRL) Selector:
- From the Business Role pane, search for and select Partner Admin
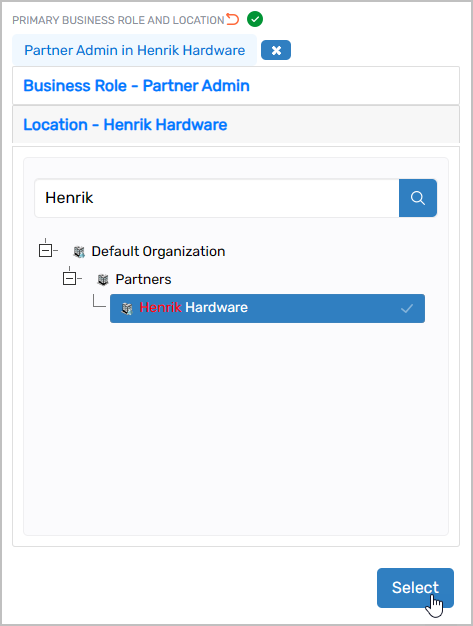
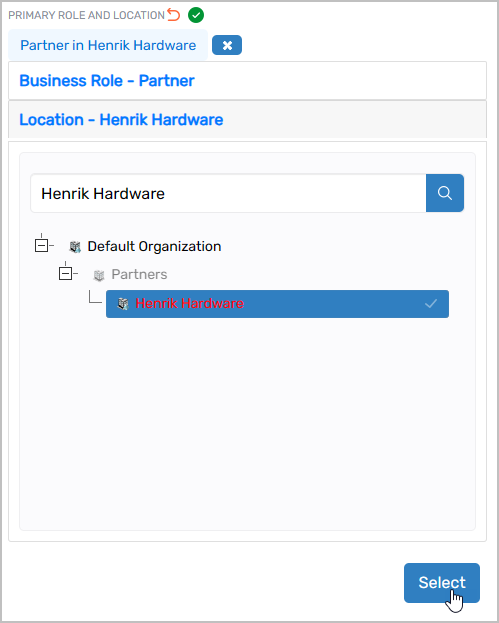
- Click Location to show the Location pane
- Search for and select one of the partner locations you created earlier
- Click Select
- From the Business Role pane, search for and select Partner Admin
-
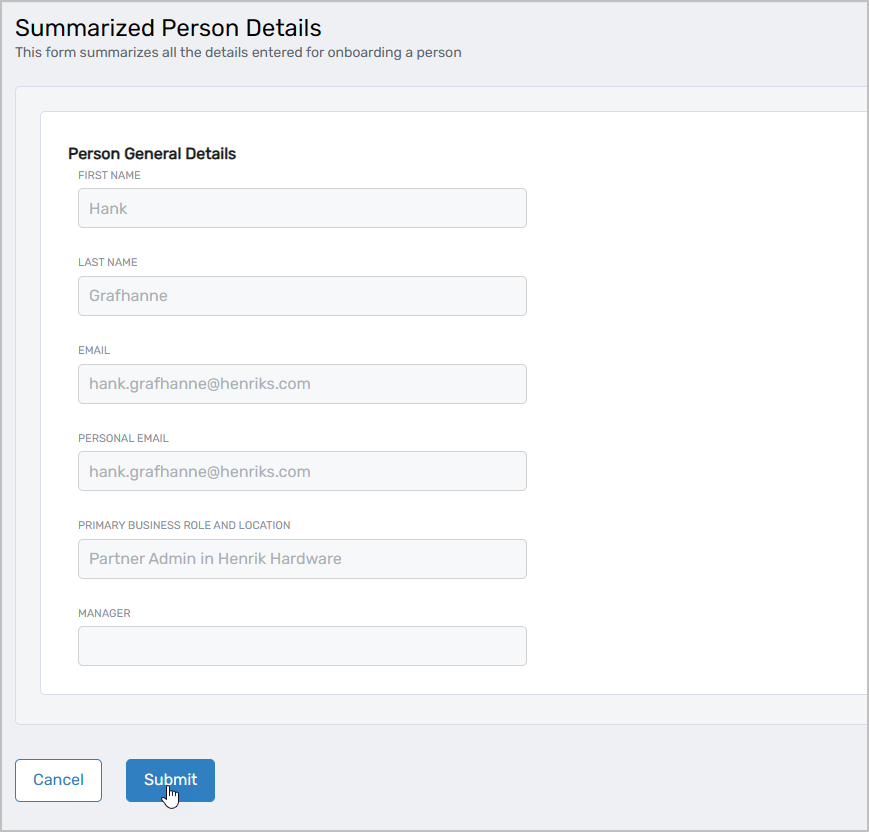
Click Next to proceed to the Additional Information section.
-
Review the summary information and click Submit.
-
Repeat steps 2-9 to create additional test partner admins as needed.
-
Reset the passwords for each test partner admin so they can log in.
Create Test Partner Users
-
On the navbar, expand Identity Administration and click People.
-
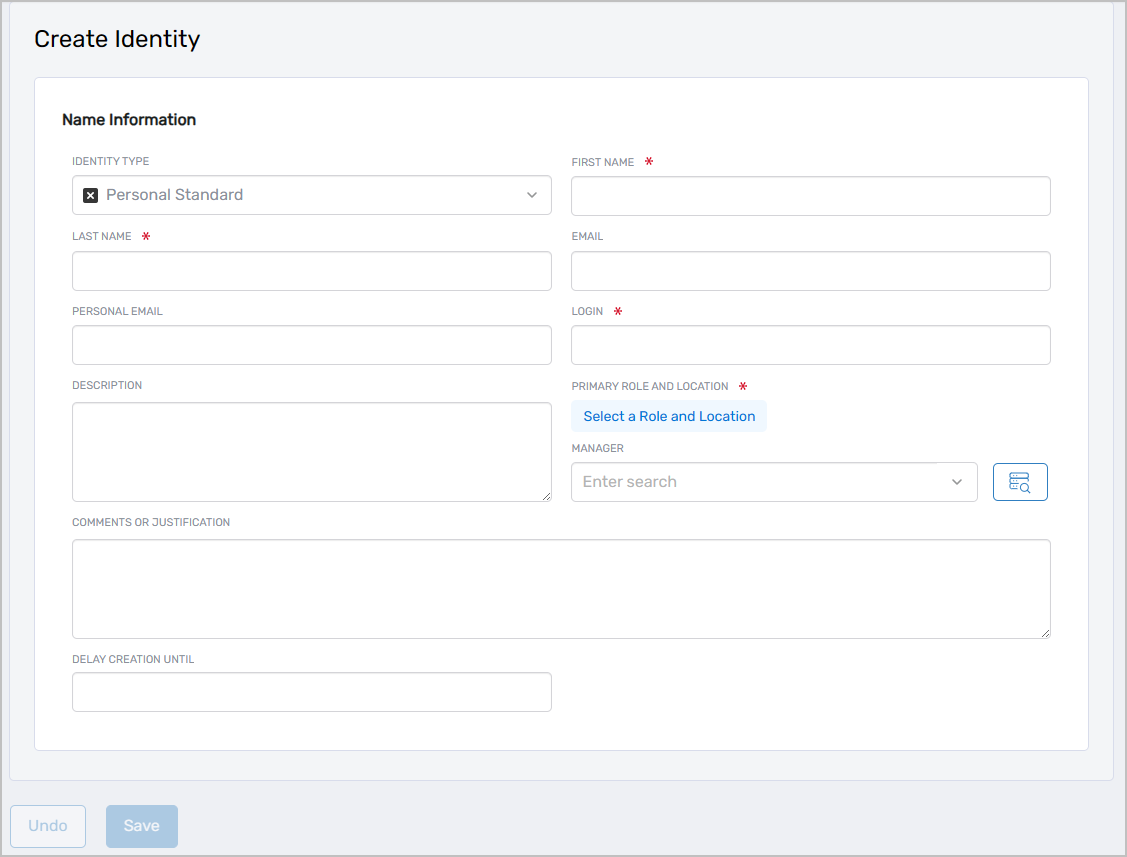
Click the Create Identity action. The Create Identity form opens.
-
Fill in the following required fields:
Field Description Instructions First Name First name of the user Enter the user's first name Last Name Last name of the user Enter the user's last name Login EmpowerID login for the user Enter a unique login identifier Primary Role and Location Business Role and Location for the user 1. Click Select a Role and Location 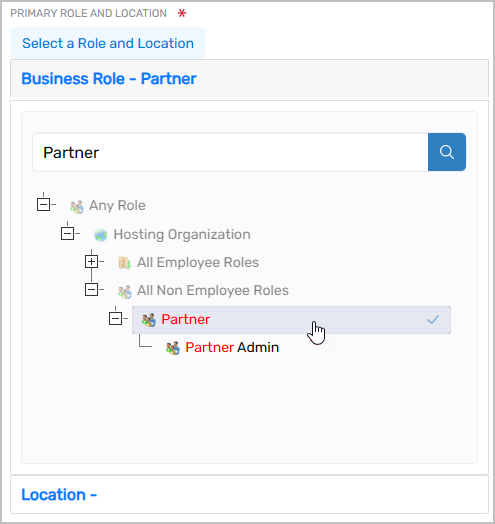 2. From the Business Role pane, search for and select Partner
3. Click Location to show the Location pane
4. Search for and select one of the partner locations you created
5. Click Select -
Click Save.
-
Repeat steps 2-4 to create additional test partner users as needed.
-
Reset the passwords for each test partner user so they can log in.
Test Partner User Delegations
- Log out of the EmpowerID Web application.
- Log in as a partner user.
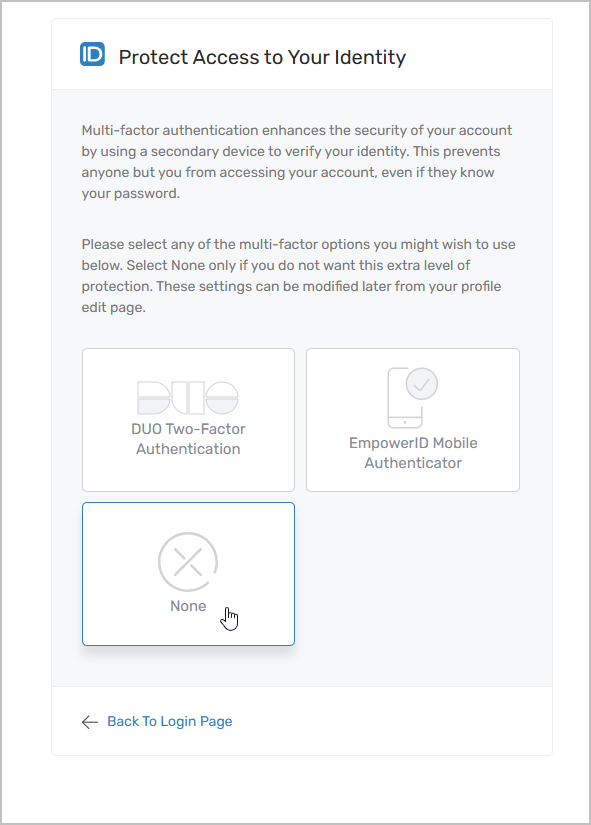
- If prompted to protect access to your identity, select None.
- Click the Global Search dropdown at the top of the page. You should only see search options for People.
- Click in the Global Search field and press ENTER to search for people. You should only see people in the partner organization.
- Review the navbar. You should see the following navigation items:
| Navigation Item | Purpose |
|---|---|
| Dashboards | View personal home dashboard |
| Password Management | Access personal profile, manage identity workflow (delete MFA authenticator, enroll for Q&A password reset, manage account recovery contacts, change password, edit profile, register MFA authenticator) |
| My Identity | Access the My Identity app |
| IAM Shop | Access the IAM Shop app |
| Business Requests and Tasks | Access the My Tasks app |
| Identity Administration | Access the Resource Admin app |
Test Partner Admin Delegations
- Log out of the EmpowerID Web application.
- Log in as a partner admin.
- If prompted to protect access to your identity, select None.
- Verify you see the same navigation and search options as the partner user, with the addition that you can access the Find People page from the navbar.
- On the navbar, expand Identity Administration and click People.
You should see access to the following actions:
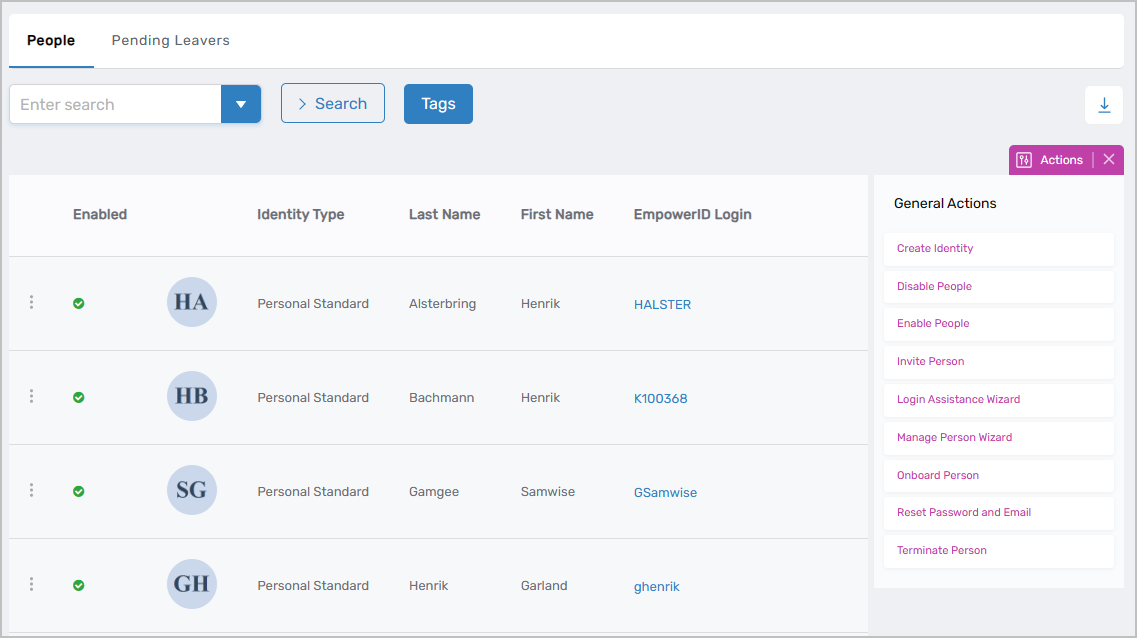
- Test creating, editing, and managing people within your partner location to verify administrative capabilities.
Results
After completing this setup:
- Partner locations exist under the Partners Organization location
- Partner admins can only view and manage resources within their partner locations
- Partner admins cannot see your internal IT infrastructure or other partners' resources
- Partner users have self-service capabilities within their partner context
- Partner admins can manage their users independently
- Access is properly scoped based on the Organization location hierarchy
Optional Exercises
To further validate the partner delegation model:
Exercise 1: Create Multiple Partners Repeat the steps above to create additional partner users and partner admins. Test results should be consistent—each partner admin can only see and manage their own partner location.
Exercise 2: Test Account Provisioning (Non-Production Environment)
- Create test OUs for the partner locations you created
- Map those locations to the appropriate OUs
- Create a Provisioning Policy that provisions an Active Directory user account in the appropriate OU for each person assigned to the Partner in Partners Business Role and Location
- Log in as a partner admin and search for user accounts—you should see one user account for each partner you created
Related Topics
- Overview of Partner Delegations – Understanding partner delegation architecture
- Partner Access Assignment Details – Detailed breakdown of Management Roles
- Add Partner Self Registration to the Login Page – Enable partner self-registration
- Onboard People – Additional details on person onboarding