Create Approval Steps
Approval Steps are the building blocks of Approval Policies in EmpowerID. These steps define how access requests—submitted as "Business Requests" via the IAM Shop—are evaluated and approved. This article guides you through creating a new Approval Step. To modify an existing step, search for and open it, then proceed to the Configure Approver Resolution section below.
Prerequisites
Ensure you have the necessary administrative privileges to access and modify Approval Policies in EmpowerID.
Create the Approval Step
-
Navigate to No Code/Low Code Workflow > Approval Policies.
-
On the Find Approval Policy page, select the Approval Steps tab.
-
Click the Add button in the grid header.
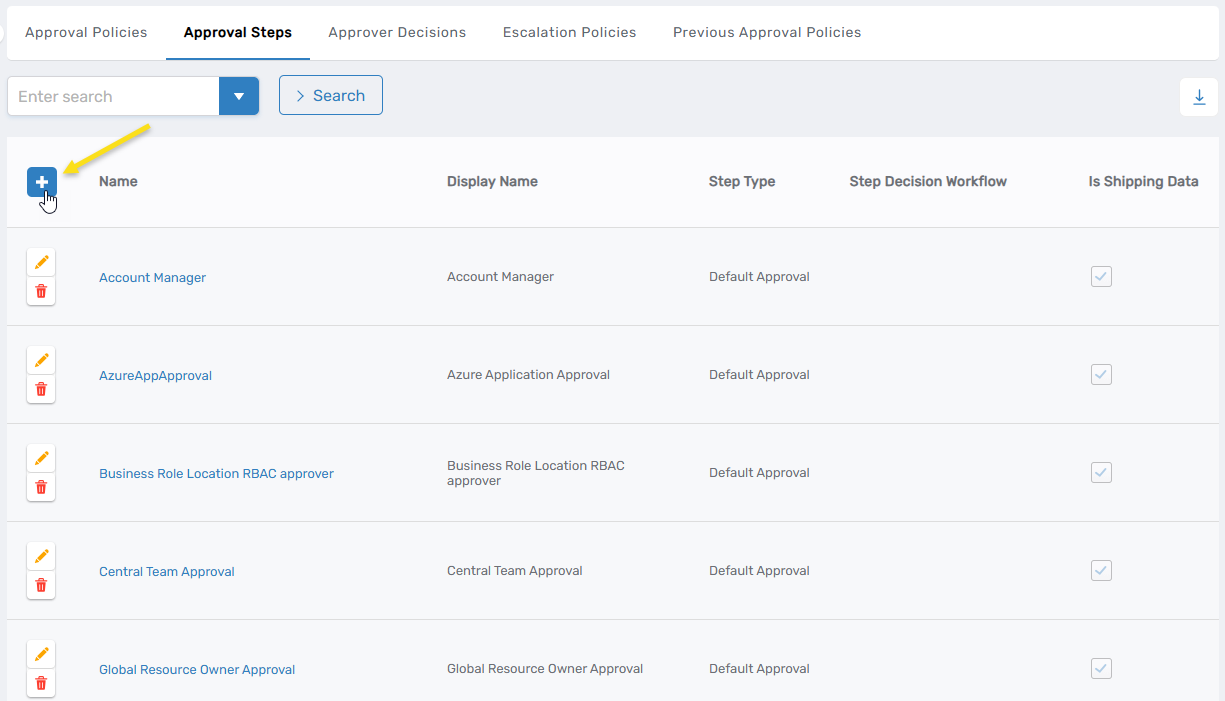
-
In the form that appears, fill out the fields as appropriate. Refer to the table below for field descriptions.
Field Required Description NAME Yes A unique internal name for the step used for system identification. DISPLAY NAME Yes A user-friendly name displayed in the UI to help identify the step. LOCALE KEY (UNIQUE NAME) No Unique identifier for translating the display name into multiple languages. DESCRIPTION No Explanatory text for the step's purpose or context. LOCALE KEY FOR DESCRIPTION No Unique identifier for translating the description into multiple languages. STEP DECISION WORKFLOW No Defines the logic used to evaluate approval decisions. Choose a workflow suited to your approval strategy. STEP TYPE No (defaults to "Default Approval") Specifies the type of approval. Options:
• Default Approval: Standard approval logic
• Risk Approval: For sensitive or high-risk requests, often with stricter rulesAUTO-APPROVE DECISION IF APPROVER PREVIOUSLY APPROVED No Auto-approves if the approver has previously approved the same request type. ESCALATION POLICY Yes Determines what action to take if the approver does not respond within a defined timeframe. Is Shipping Data No For internal use only. Can Edit Length of Access No Allows the approver to modify how long access is granted for approved items. Show In Approval Delegation No Controls whether this approval step appears when delegating approval tasks to other users. -
Click Save to create the step.
Configure Approver Resolution
- Search for the step you just created. You must enter at least 3 characters to search.
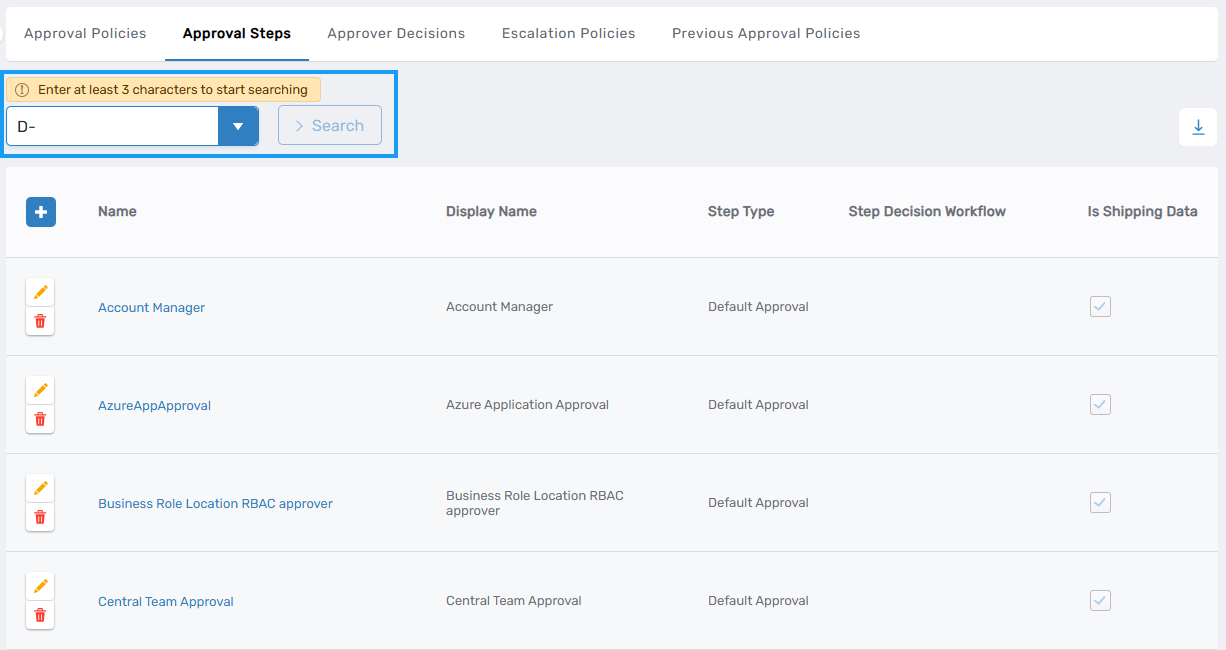
- Click the Name link to open the step configuration page.
- Expand the Approver Resolver Rules accordion section.
- Click the Add button.
- In the Approver Resolver Type dropdown, select the appropriate rule type (e.g., manager of the initiator).
- Click Save, then click Submit to finalize the rule assignment.
- (Recommended) Configure a fallback approver to prevent requests from being blocked when no primary approver is available. To configure:
- Click Add to create a fallback rule
- Select Approver Resolver Type: Static Approver
- Choose Approver Type (e.g., Person, Management Role)
- Select the specific person or role to act as fallback approver
- Click Save, then click Submit
- (Optional) Configure pre-approved groups to automatically approve requests for specific user populations without manual review:
- Locate the Pre-Approved For section
- Add the person, role, or group for whom requests should be auto-approved
- Click Save, then click Submit
Publish the Approval Step
Approval Steps are not active for use in Approval Policies until they are published. Publishing creates a version snapshot that can be used in production workflows. Any subsequent changes to the step will require republishing to take effect. In-flight approvals will continue using the version that was active when the request was submitted.
- Click the Publish button on the approval step's view page.
- Confirm the publication when prompted.
Verification
To verify your approval step is configured correctly:
- Navigate to No Code/Low Code Workflow > Approval Policies > Approval Steps.
- Search for your newly created step.
- Confirm that:
- The step has at least one resolver rule defined
- A fallback approver is configured (recommended)
- The step status shows as "Published"