Onboarding Mailboxes
EmpowerID provides an Onboard Mailbox wizard workflow to streamline the process of integrating mailboxes into an organization's Exchange environment. This workflow aims to simplify the process by assisting system administrators in correctly configuring and connecting room, equipment, and shared mailboxes to the organization's email infrastructure. In addition to provisioning mailboxes, the wizard guides users through configuring access request settings for each mailbox. This comprehensive approach ensures a smooth and efficient onboarding experience for administrators and end-users.
Onboarding Process
- On the navbar, expand Object Administration and select Mailboxes.
- From the Actions pane, click the Onboard Mailbox action.
The wizard will guide you through six configuration steps, each with specific settings and options:
Step 1: General Info
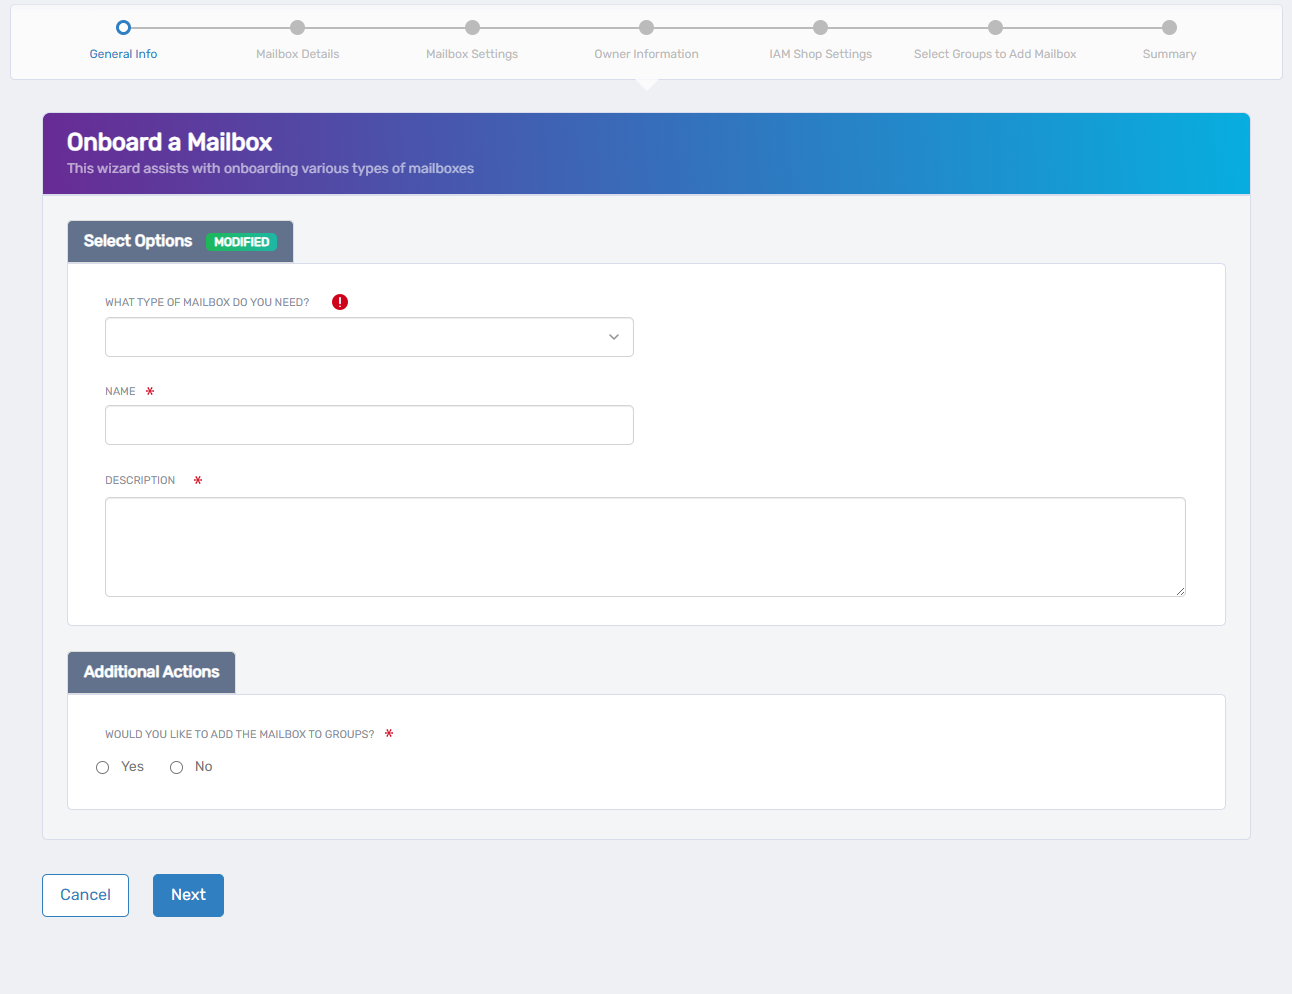
Configure the basic information for your new mailbox:
- Select the type of mailbox: Choose from Room, Equipment, or Shared mailbox options
- Name: Enter a descriptive name that identifies the mailbox's purpose or owner
- Description: Provide details about the mailbox's function or intended use
- Add the mailbox to groups: Select Yes to immediately include this mailbox in distribution groups, or No to configure group membership later
Click Next to continue to the Mailbox Details screen.
Step 2: Mailbox Details
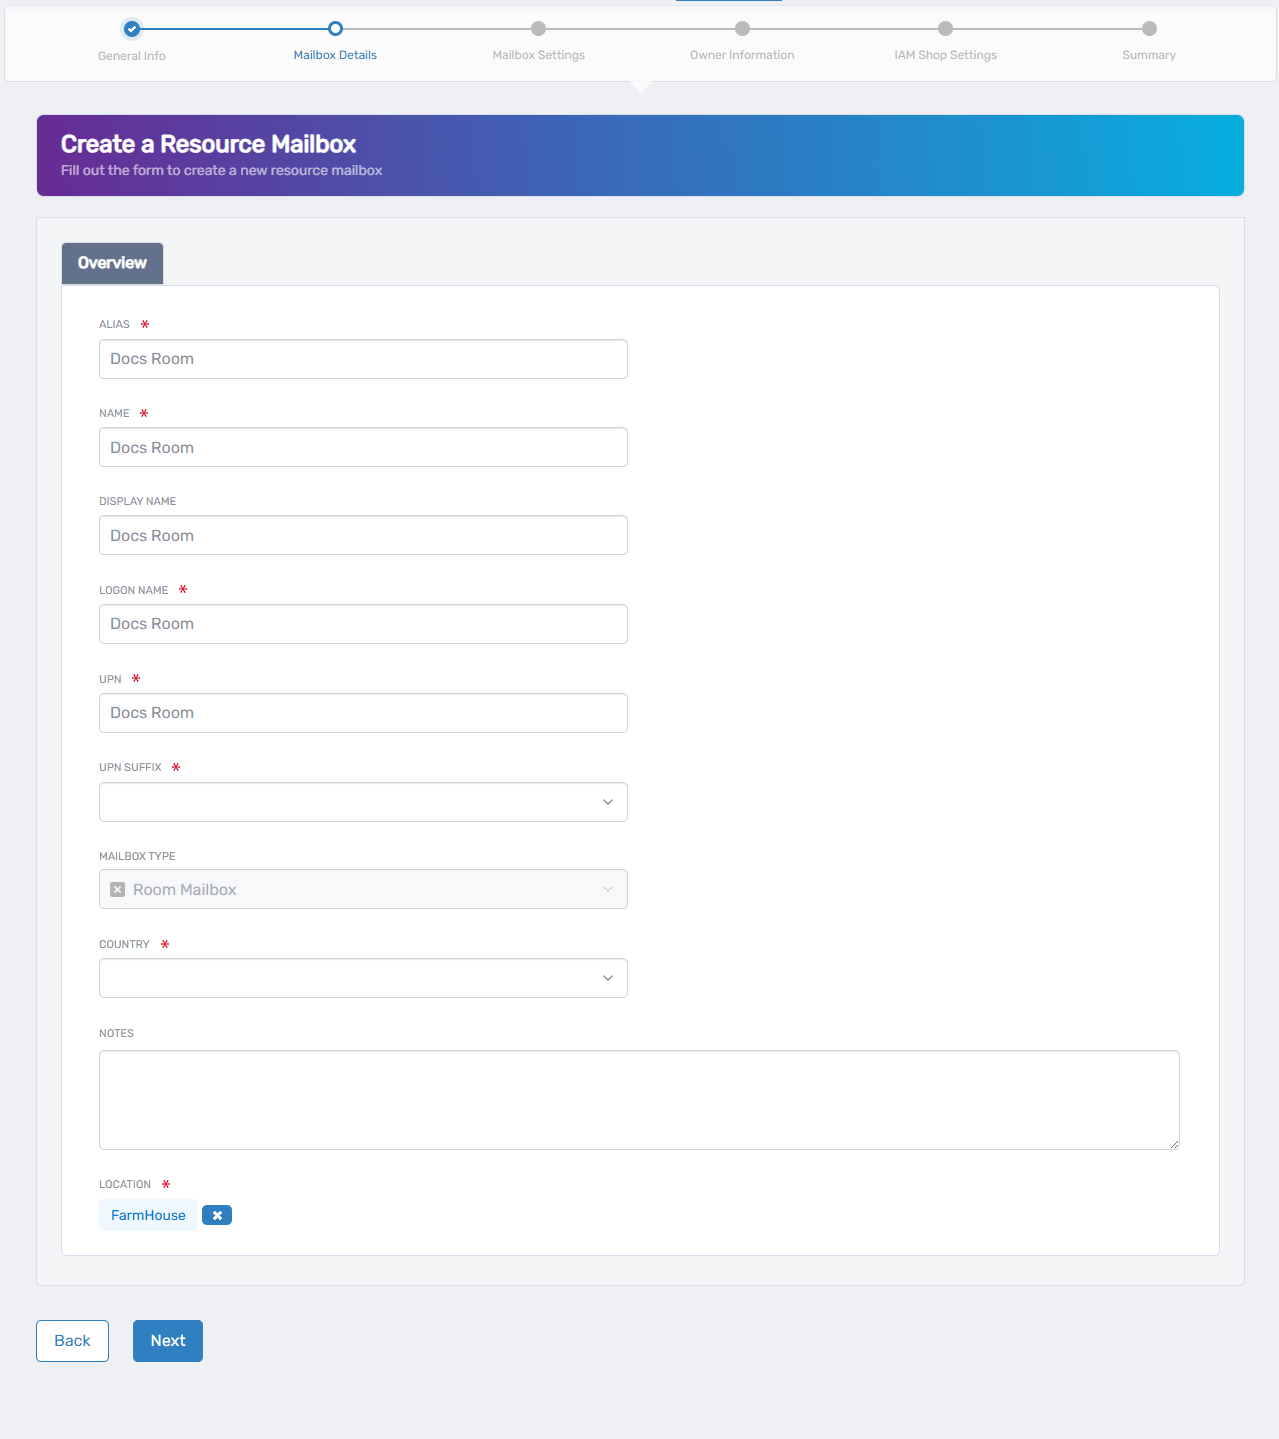
Set up the identification parameters for the mailbox:
- Alias: Enter a short, unique identifier used for email addressing and system references
- Name: Provide the official name for the mailbox record in the directory
- Display Name: Set how the mailbox will appear in address books and email clients
- Login Name: Define the username for authentication when accessing this mailbox
- UPN (User Principal Name): Enter the full identifier typically formatted as username@domain
- UPN Suffix: Select the domain portion that will appear after the @ symbol
- Mailbox Type: Choose Room (for meeting spaces), Equipment (for resources like projectors), or Shared (for team access)
- Country: Specify the country for regional settings and compliance purposes
- Notes: Add any additional information that might be helpful for future administration
- Location: Indicate the physical location where this resource exists (useful for room mailboxes)
Click Next to proceed to the Mailbox Settings screen.
Step 3: Mailbox Settings
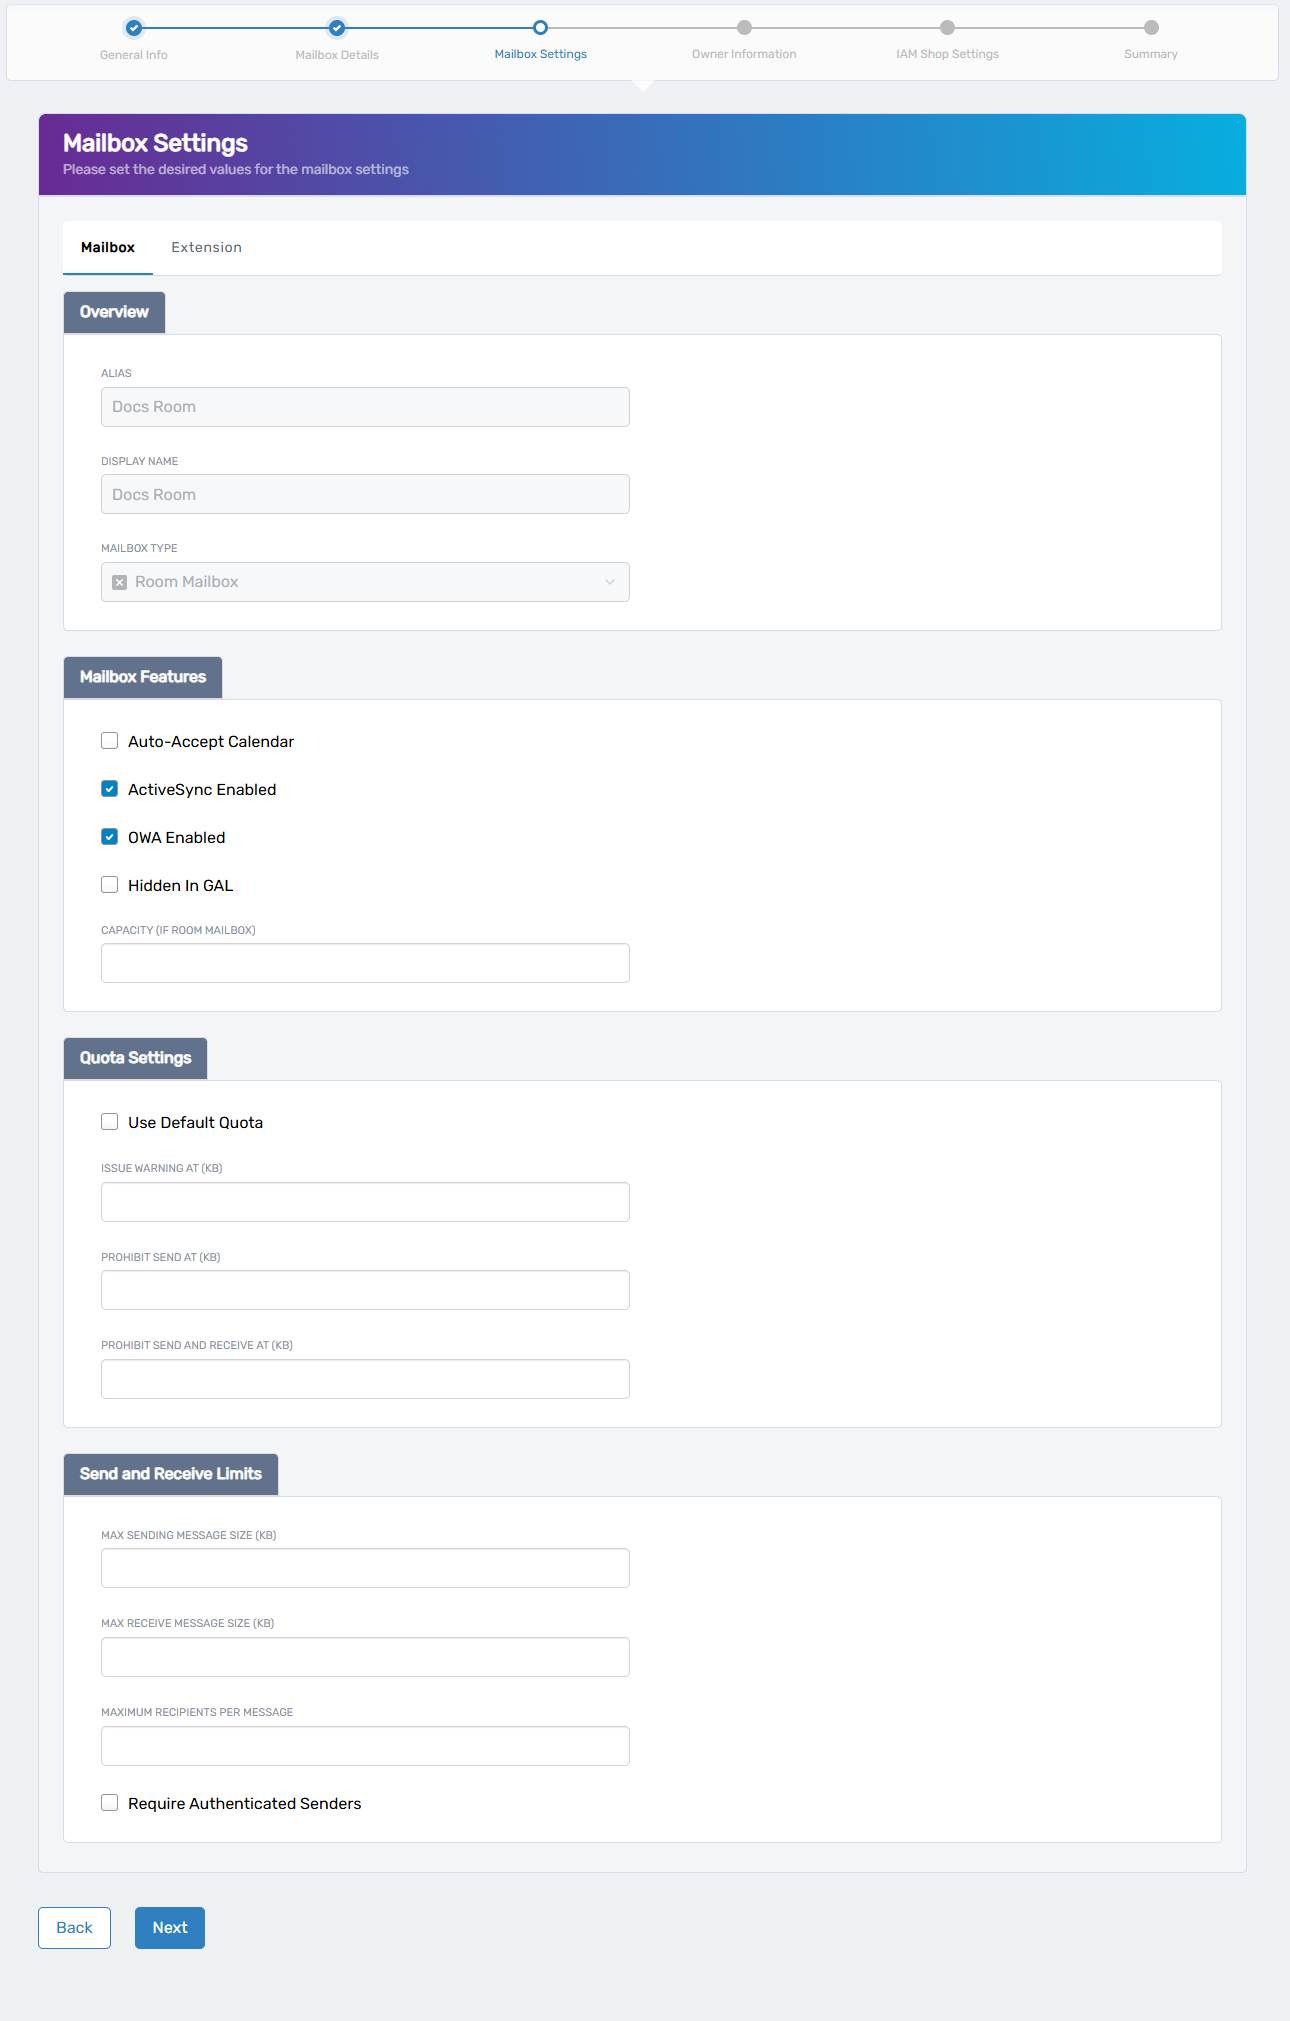
Configure how the mailbox will function:
Mailbox Features
- Auto-Accept Calendar: When checked, automatically processes meeting requests without manual approval
- ActiveSync Enabled: Allows the mailbox to sync with mobile devices
- OWA Enabled: Permits access to the mailbox through web browsers using Outlook Web Access
- Hidden In GAL: When checked, prevents the mailbox from appearing in the Global Address List
- Capacity: For room mailboxes, defines how many people the physical space can accommodate
Quota Settings
- Use Default Quota: Apply organization-wide standard limits instead of custom values
- Issue Warning At: The storage threshold (in KB) that triggers notification emails
- Prohibit Send At: The storage limit (in KB) that prevents sending new messages while still allowing receipt
- Prohibit Send and Receive At: The storage ceiling (in KB) that blocks all mail flow
Send and Receive Limits
- Max Sending Message Size: The largest allowed outgoing email size in KB
- Max Receive Message Size: The largest allowed incoming email size in KB
- Maximum Recipients Per Message: Controls how many addresses can be included in a single email
- Require Authenticated Senders: When checked, rejects messages from unauthenticated sources
Click Next to continue to the Owner Information screen.
Step 4: Owner Information
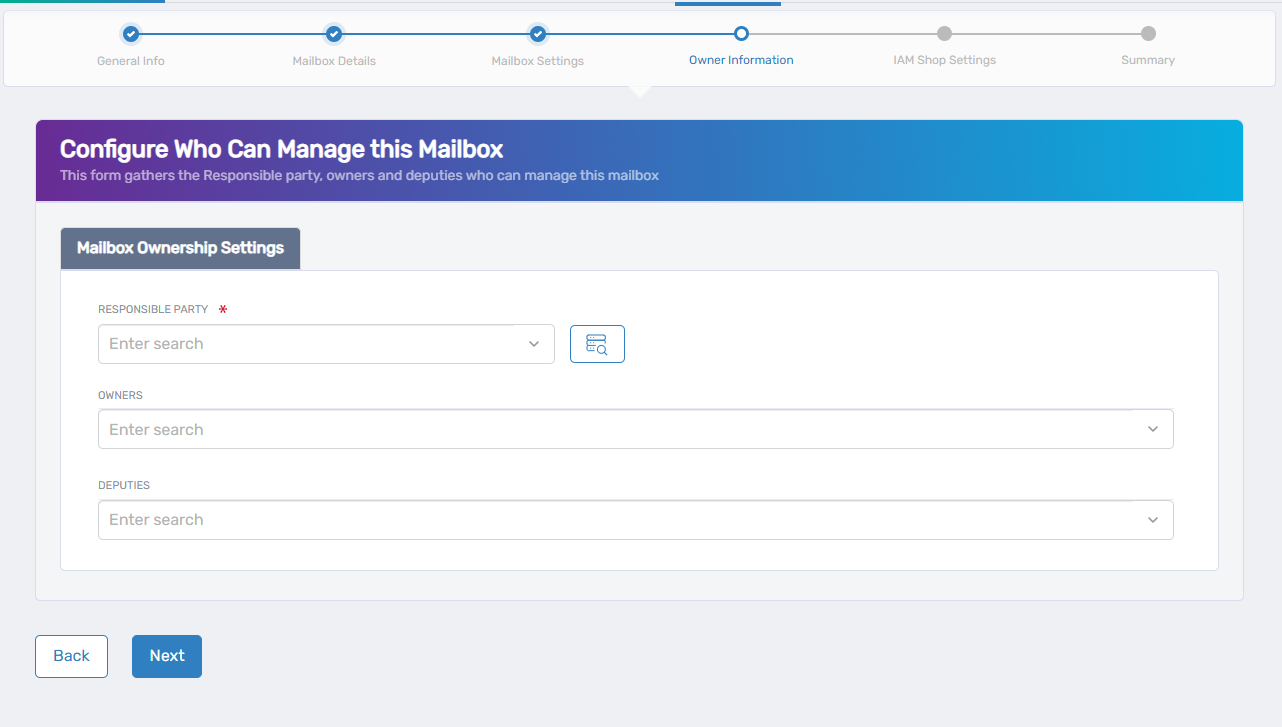
Designate who will manage this mailbox:
- Responsible Party: Designate the primary person accountable for this mailbox and its usage
- Owners: Add users who should have full administrative control over the mailbox
- Deputies: Assign users who will have limited administrative permissions
Click Next to proceed to the IAM Shop Settings screen.
Step 5: IAM Shop Settings
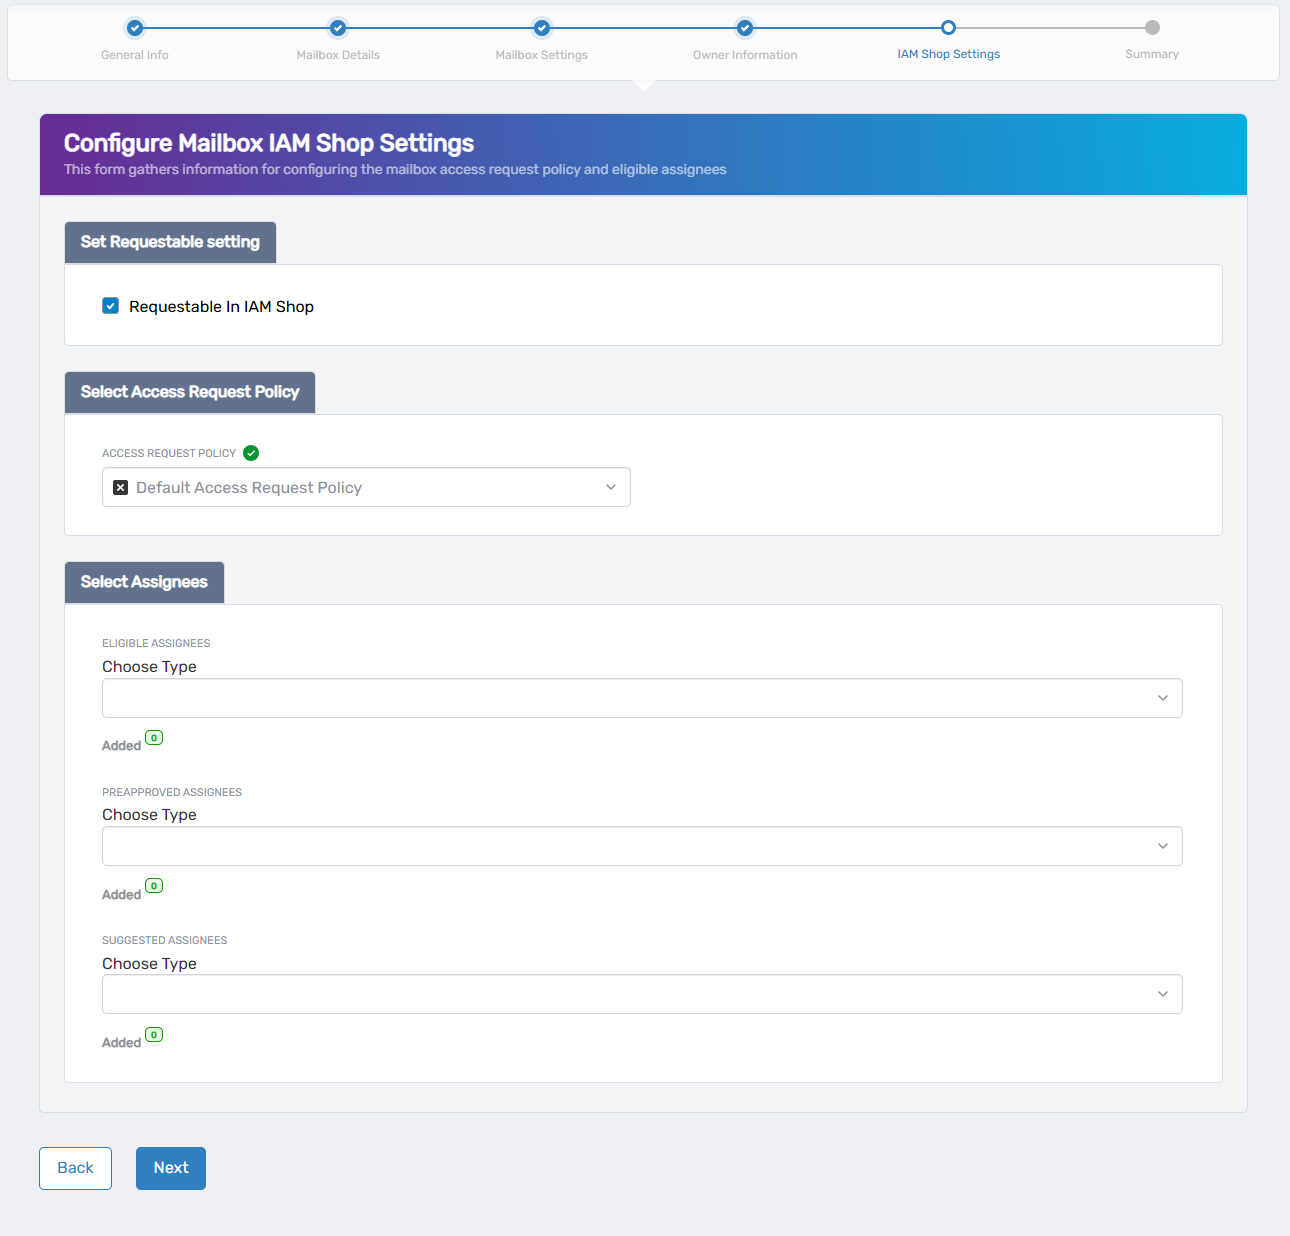
Configure access request settings:
- Requestable in IAM Shop: When checked, makes this mailbox available for users to request access through the identity management portal
- Access Request Policy: Determines the approval workflow and requirements for access requests
Assignees Configuration
- Eligible Assignees: Define which types of users can be granted access to this mailbox
- Preapproved Assignees: Specify users who automatically receive access without approval
- Suggested Assignees: List recommended users for approvers to consider
Click Next to review your configuration.
Step 6: Summary and Submission
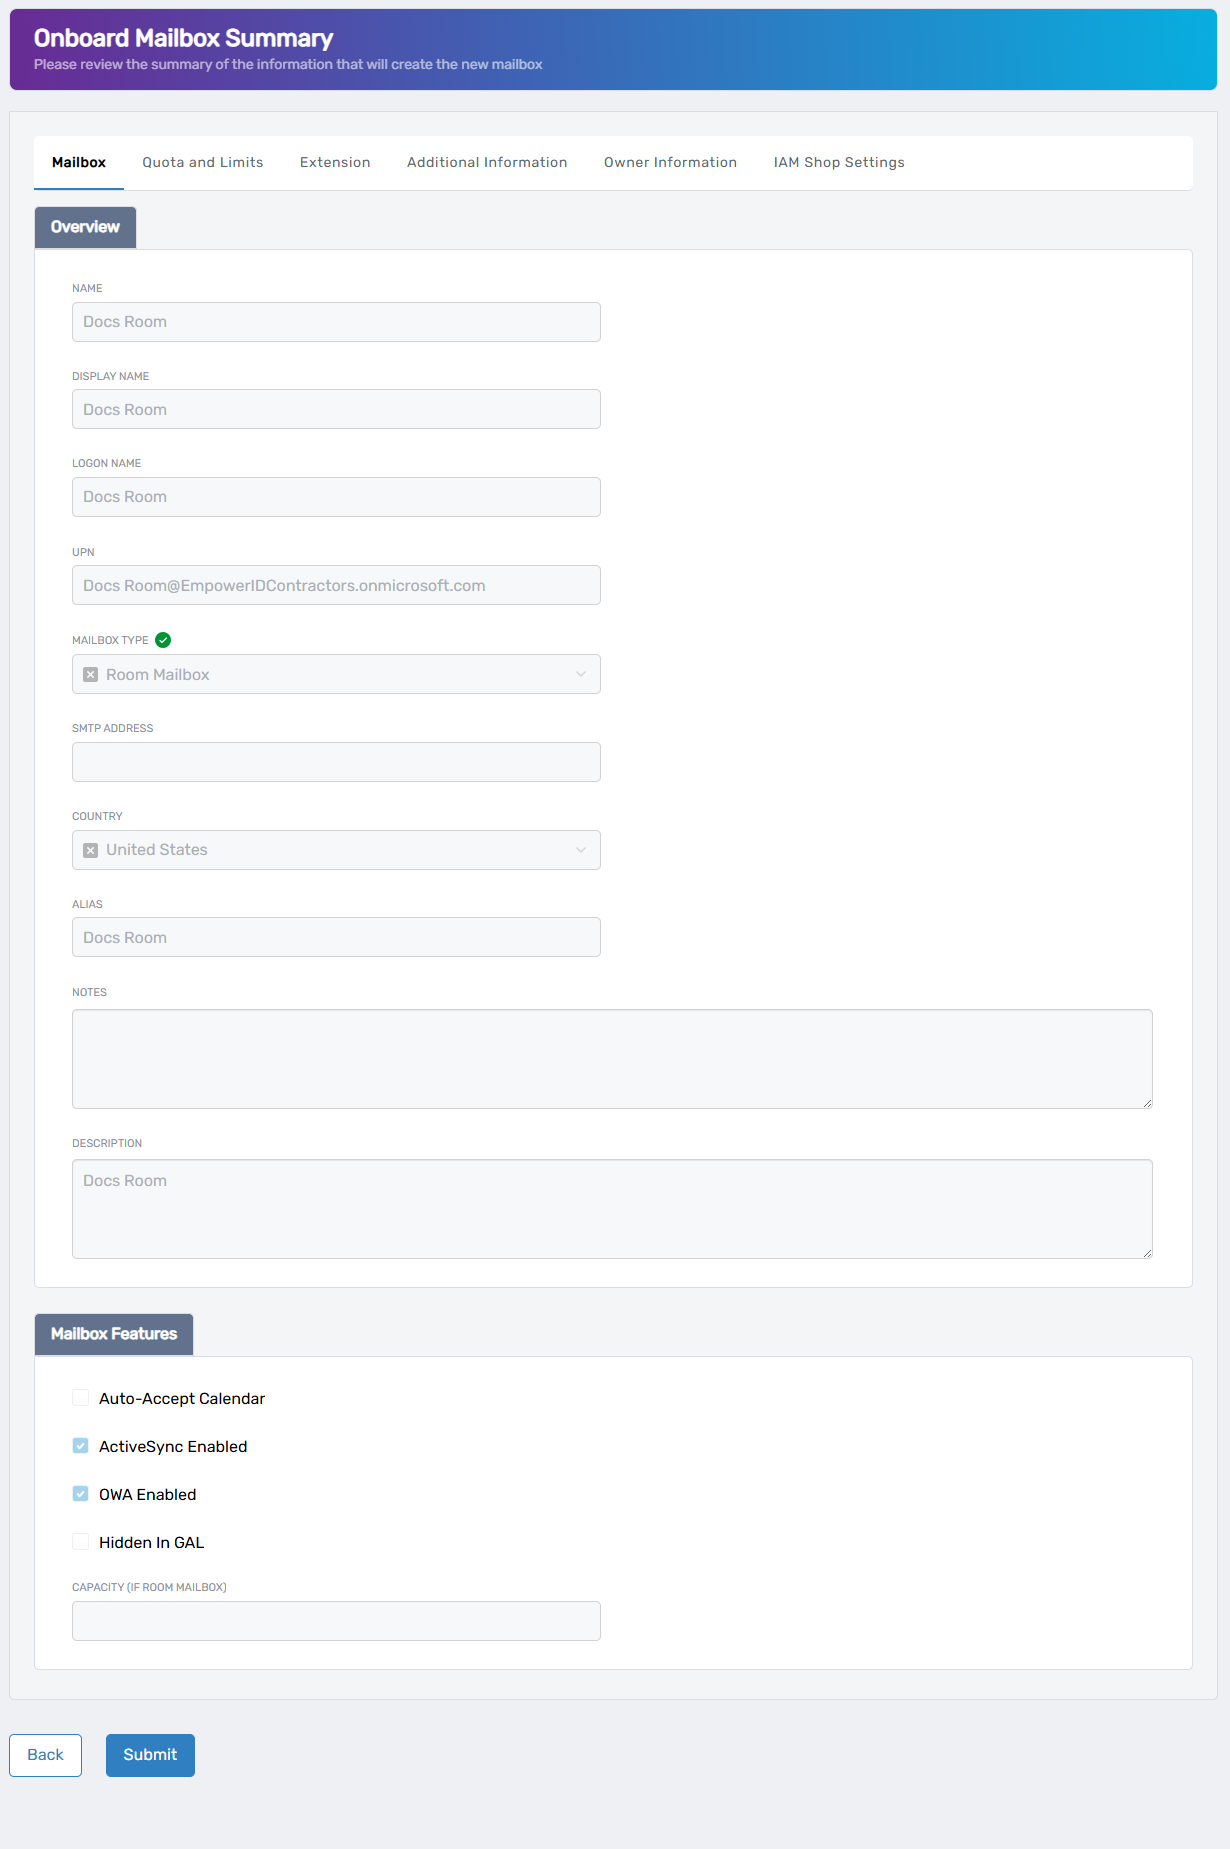
In this final step:
- Review all settings from previous steps to ensure accuracy
- Click Submit to initiate the mailbox creation process
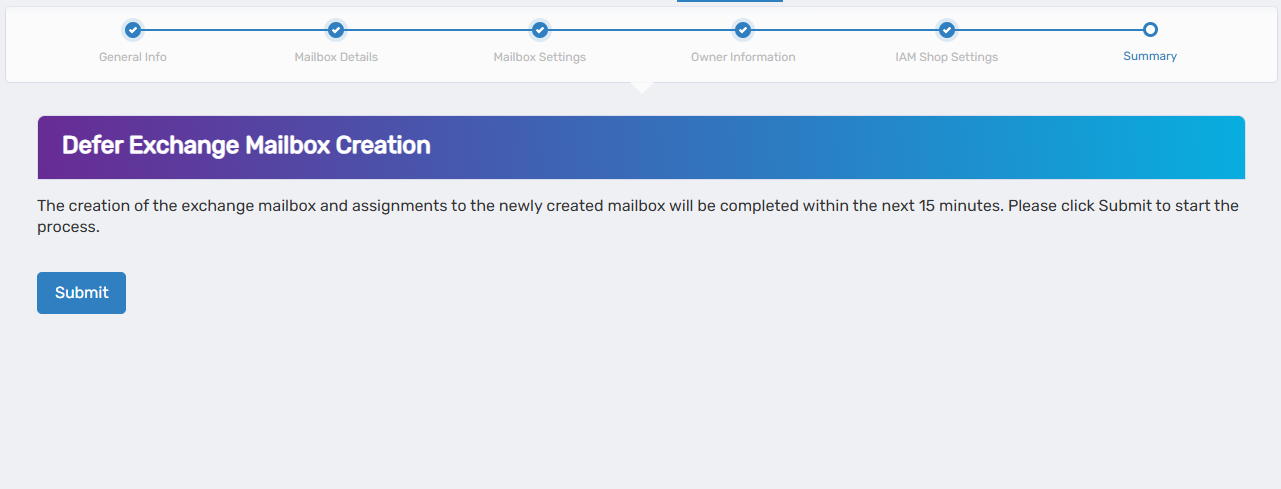
After submission, the system will create the exchange mailbox and complete all assignments within approximately 15 minutes.