Onboarding User Accounts
The Onboard Account wizard facilitates manual creation of user accounts in EmpowerID and connected account directories (account stores). This workflow supports both person-based accounts and non-person technical accounts such as service accounts.
Prerequisites
- Access to Identity Administration in EmpowerID
- Connection to the external account directory where accounts will be created
- For person accounts: business role and location information
- For technical accounts: understanding of the account's purpose and usage type
Configure Workflow Parameters
The Onboard Account wizard includes customizable parameters that control default values and permissions. Configure these parameters before running the workflow to align with organizational requirements.
Available Parameters
| Parameter | Description | Default Value |
|---|---|---|
| DefaultAccessRequestPolicyID | Default Access Request Policy GUID displayed in the Access Request Policy Settings step | 2156D697-42C4-45D2-9F5C-98E51DE927D1 (Default Access Request Policy) |
| DeputyResourceTypeRoleName | Operational capabilities granted to deputy owners of onboarded accounts | Resource Role Assigner (Can add/remove Access Levels) |
| OwnerResourceTypeRoleName | Operational capabilities granted to owners of onboarded accounts | Resource Role Assigner (Can add/remove Access Levels) |
Update Workflow Parameters
- On the navbar, expand Low Code/No Code Workflow and select Low Code Workflows.
- Select the Workflow tab and search for Onboard Account.
- Click the Display Name for the workflow.

This opens the View One page for the workflow.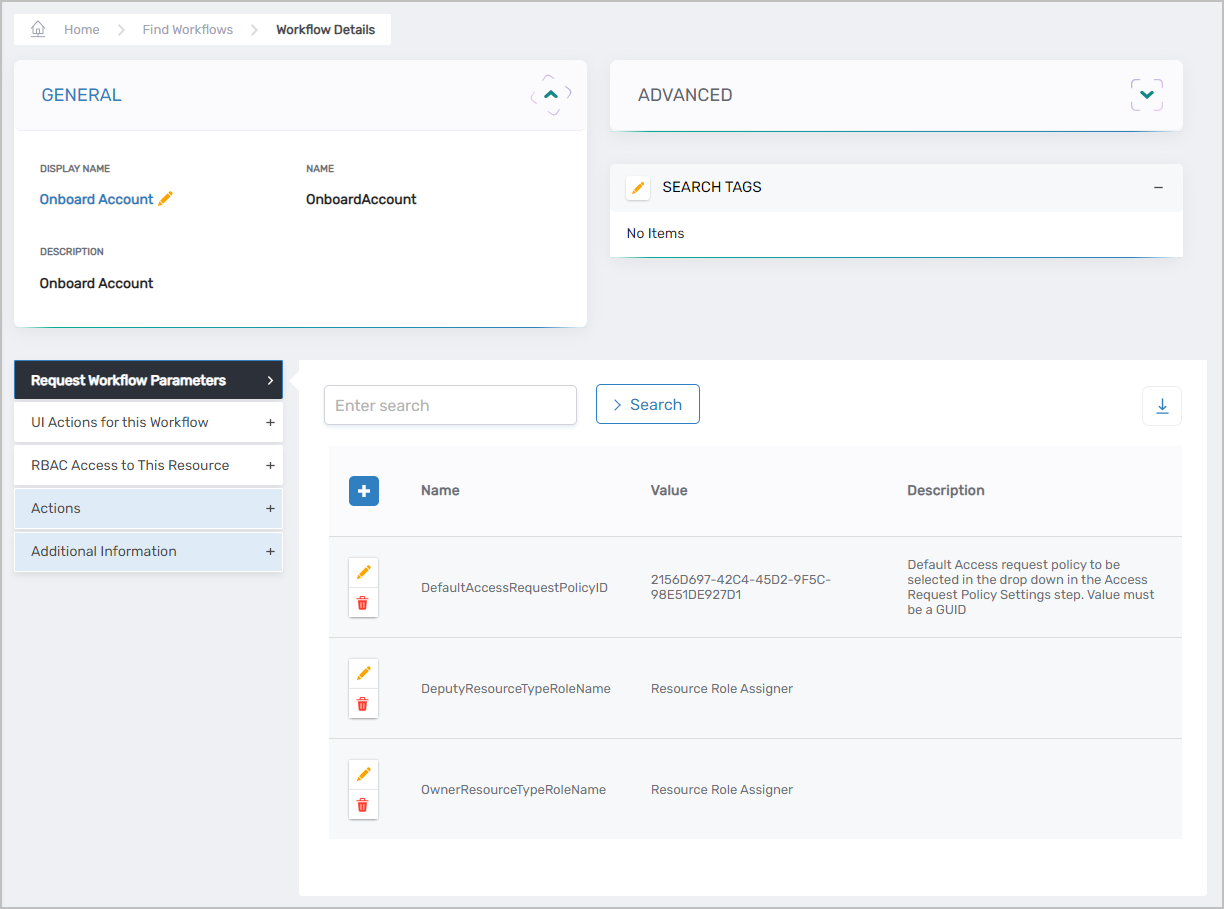
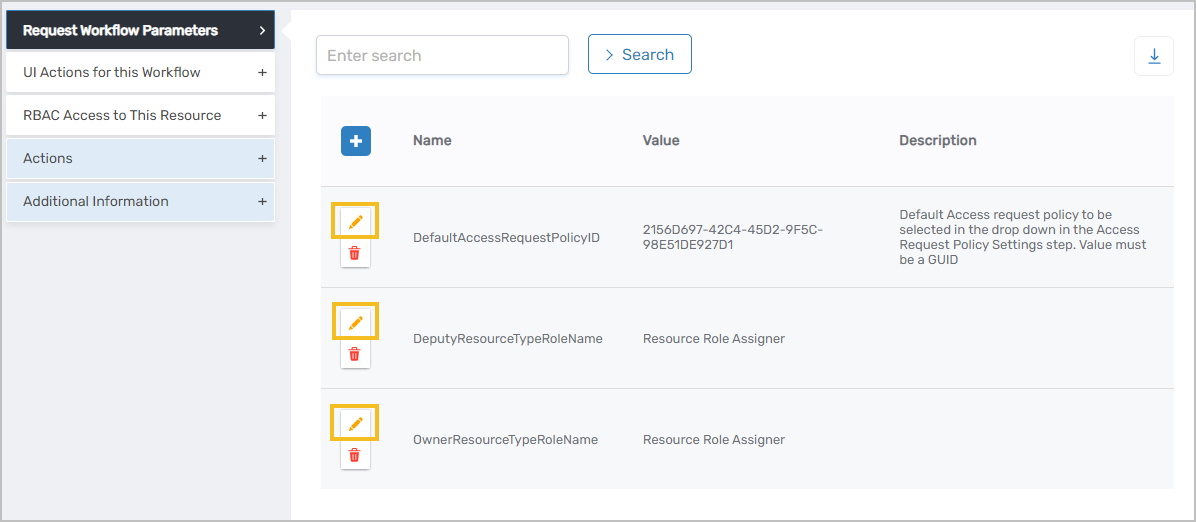
- Expand the Request Workflow Parameters accordion.
- Click the Edit pencil icon for the parameter to modify.
- Enter the new value in the Value field and click Save.
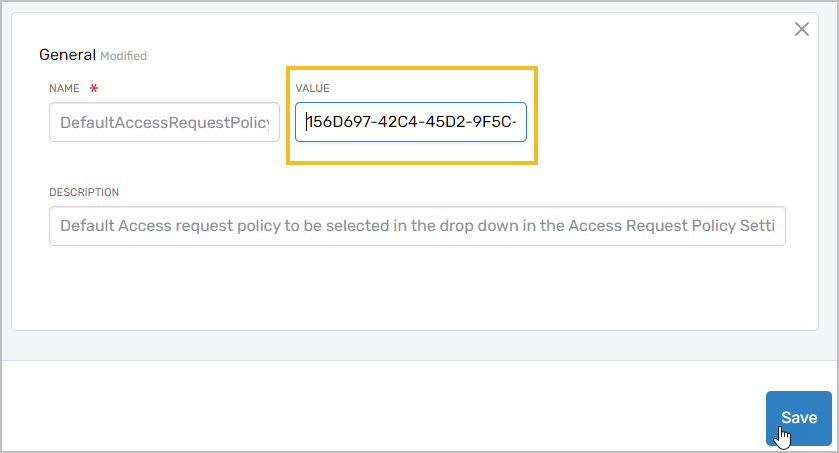
- Repeat for additional parameter changes as needed.
Onboard a User Account
-
On the navbar, expand Identity Administration and select User Accounts.
-
Click Onboard an Account.
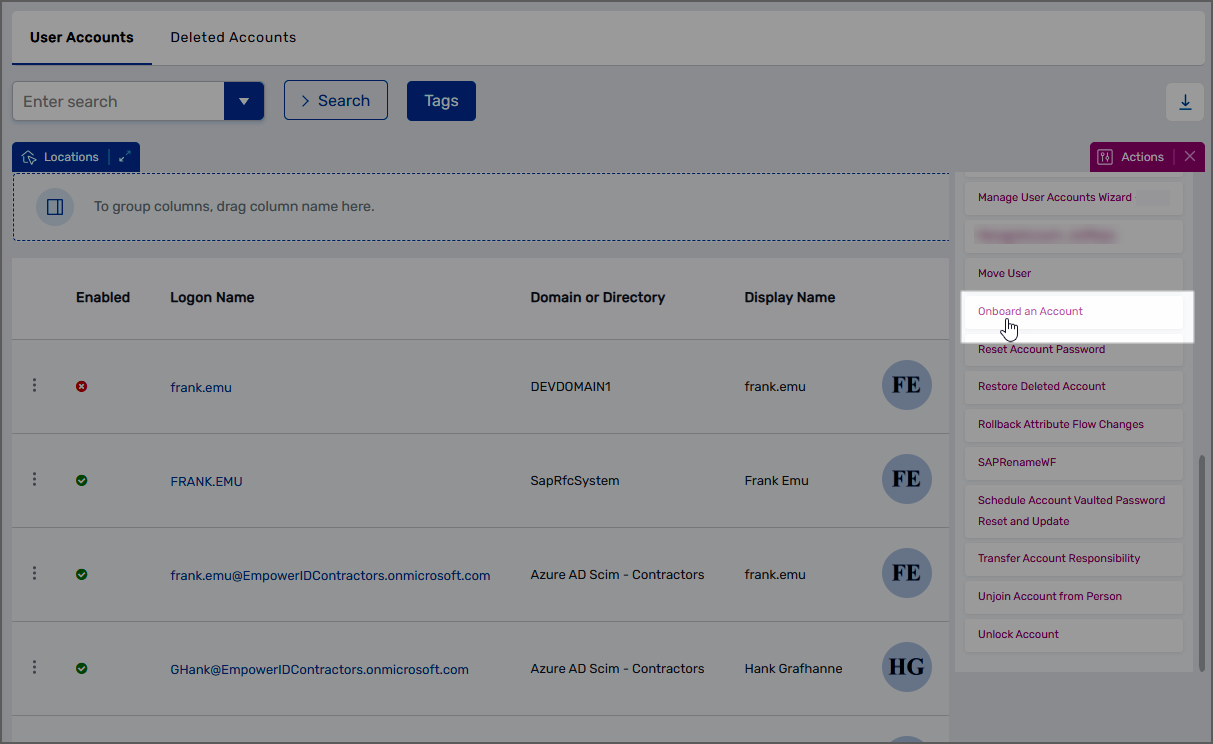
This initiates the Onboard Account Wizard.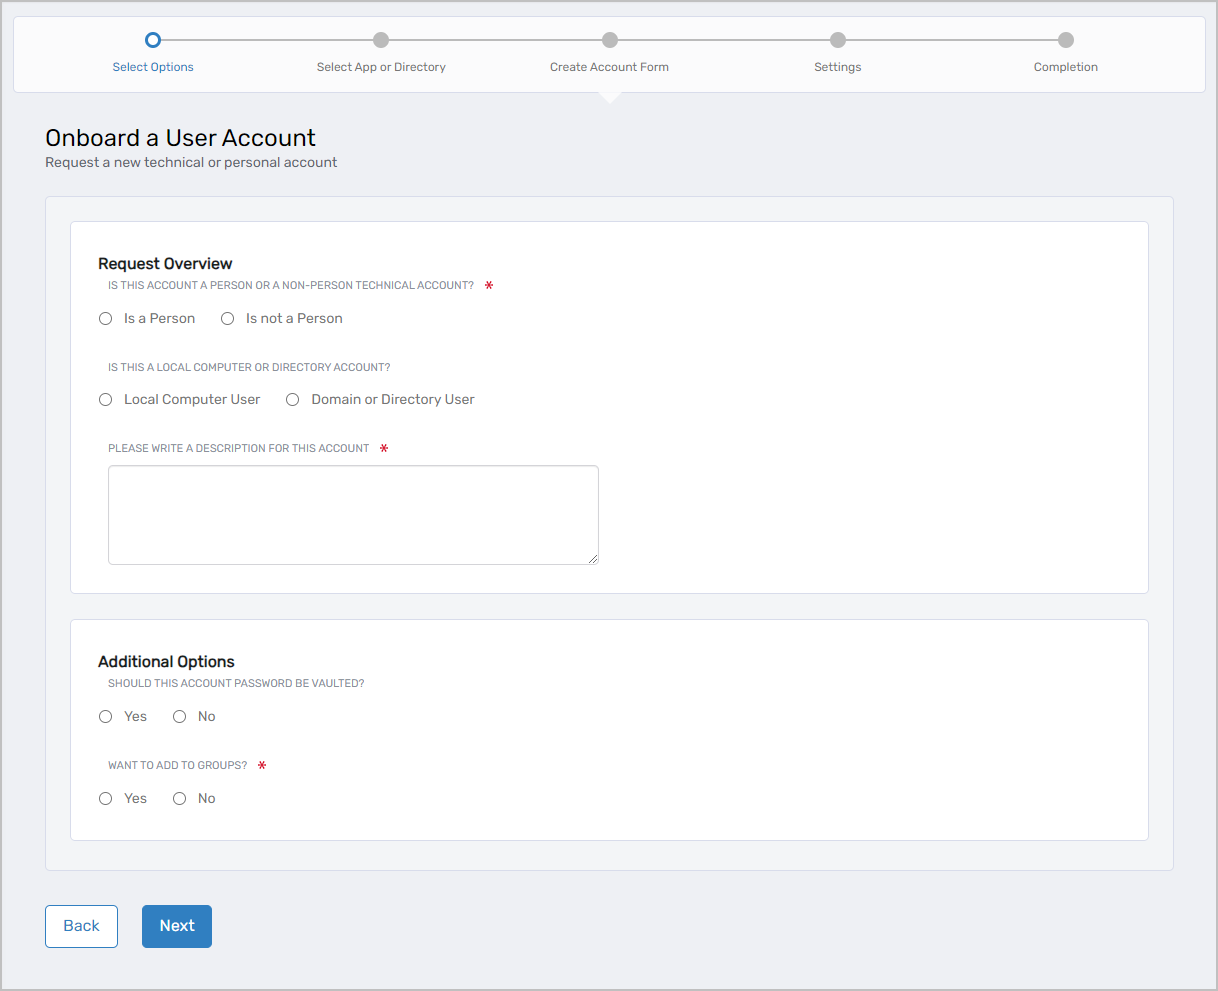
-
Under Request Overview, select the account type:
- Person account (individual user)
- Non-person technical account (service account, application account)
-
Complete the General tab of the Create User form: Account Location and Type:
- Account Creation Location: Select the directory for account creation
- Usage Type: Select the appropriate account classification:
- Personal Standard - Basic user account for everyday tasks (default)
- Personal Privileged - Highly privileged user account
- Application - Account used by applications to access resources
- Contact - Email contact account
- Emergency - "Break glass" account for emergency access
- Service - Service account for automated processes
- Shared Mailbox - Disabled account for room, equipment, or shared mailboxes
- Shared Privileged - Non-personal account shared by administrators
- Test User - Account for testing purposes
- Location: Select the organizational location (if visible)
User Information: - First Name: Enter the user's first name
- Last Name: Enter the user's last name
- Display Name: Enter how the name should appear in directories
- Logon Name: Enter the username for authentication
- UPN Suffix: Select the domain suffix (if visible)
- Country: Select the user's country (optional)
- Comments or Justification: Enter relevant notes (optional)
Person Association: - Join Account to an Existing Person: Search for and select an existing EmpowerID Person (optional)
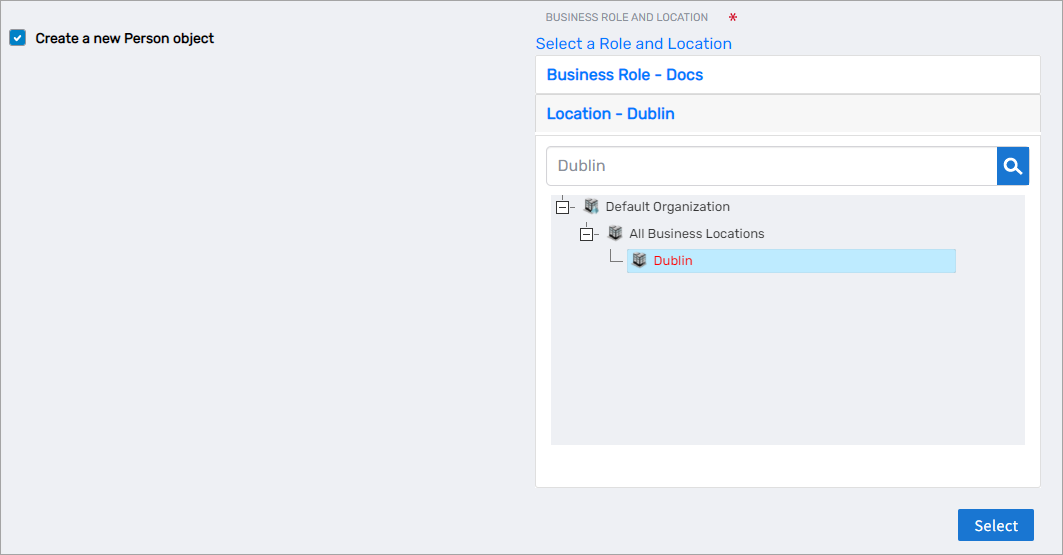
- Create a new Person object: Check to create a new EmpowerID Person as the account owner (optional)
- Select a Role and Location: Search for and select the Business Role and Location for the new Person (if creating a new Person)
- User Personal Email to Notify: Enter an email address for the welcome notification (optional, if creating a new Person)
Password and Account Settings: - Allow me to enter a password: Check to manually set the initial password (optional)
- Password: Enter the password (if password entry is enabled)
- Confirm Password: Re-enter the password (if password entry is enabled)
- Disabled: Check to create the account in a disabled state (optional)
- Allow Join: Permits the account to be joined to an existing Person (selected by default)
- Allow Provision: Permits a new Person to be provisioned from the account (selected by default)
- Enable Sync Password: Synchronizes password changes from EmpowerID to the external directory
- Do Not Allow Delete: Prevents account deletion through the EmpowerID UI (optional)
-
Click the Address tab and complete address information as needed (optional).
-
Click the Personal tab and complete personal information as needed (optional).
-
Click Save.

-
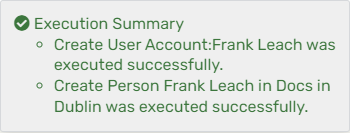
Review the Operation Execution Summary.
The summary confirms successful account creation and Person creation (if applicable).
Results
- User account is created in the specified directory
- Account appears in EmpowerID for management and auditing
- EmpowerID Person is created or linked (if configured)
- Welcome email is sent to the specified address (if applicable)
- Account owners and deputies receive configured permissions
- Account is available for access level assignments and policy enforcement