Connect to Active Directory
Connecting EmpowerID to Active Directory enables EmpowerID to discover accounts and groups in your domain, synchronize identity attributes between systems, and provision accounts automatically based on policy-driven access assignments. This connection establishes the foundation for maintaining consistency between authoritative identity data and Active Directory, ensuring accounts reflect current organizational roles, locations, and access requirements.
This article demonstrates how to create an Active Directory account store and configure basic operational settings for account provisioning and synchronization.
Prerequisites
Before connecting to Active Directory, ensure you have:
- Administrative credentials for the Active Directory domain with privileges to query and manage accounts, groups, and organizational units
- Cloud Gateway server (if connecting to on-premise Active Directory from EmpowerID Cloud) configured and accessible - See Installing the EmpowerID Cloud Gateway Client
- Proxy account permissions appropriate for your environment:
- Read access for discovering accounts, groups, and organizational structure
- Write access for provisioning accounts and managing group memberships
- Cross-domain permissions when managing multiple domains within a forest
In Active Directory forests containing multiple domains, the proxy account must possess permissions in both the forest root domain and all child domains you intend to manage. Without appropriate cross-domain permissions, inventory and provisioning operations may fail or return incomplete results for some domains within the forest.
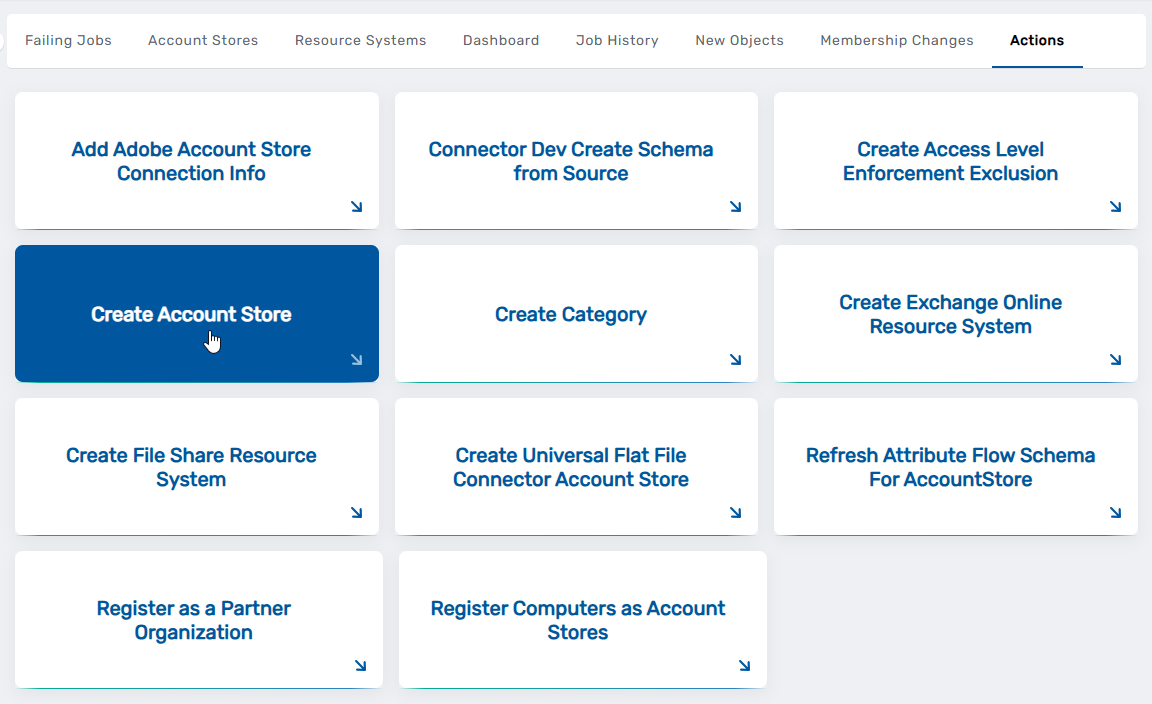
Create the Active Directory Account Store
-
Navigate to Admin > Applications and Directories > Account Stores and Systems.
-
Select the Actions tab and then click Create Account Store.
-
Under System Types, search for Active Directory and click Active Directory Domain Services.
-
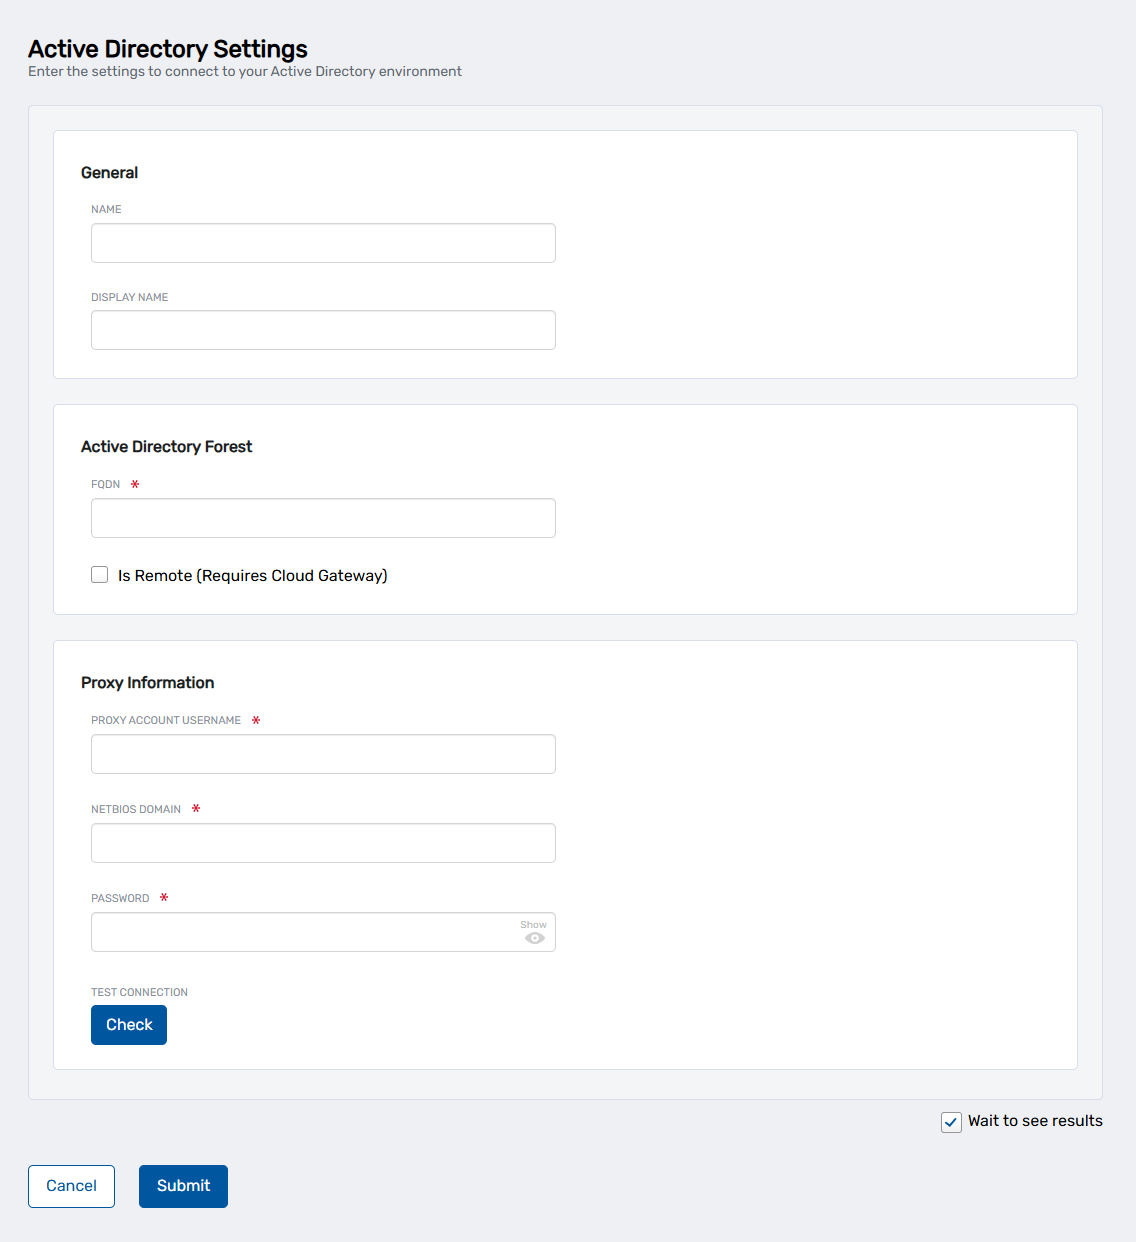
Click Submit. This opens the Active Directory Settings page where you enter the connection details for your Active Directory environment.
-
Enter the connection details for your Active Directory environment:
Field Description Name Internal identifier for the account store (e.g., "AD-CorpDomain"). This name appears in administrative interfaces. Display Name User-facing name displayed in the IAM Shop and other interfaces. FQDN Fully qualified domain name of the Active Directory forest (e.g., "contoso.com"). Is Remote (Requires Cloud Gateway) Check this box if connecting to on-premise Active Directory from EmpowerID Cloud. Proxy Account Username Username of the service account with administrative privileges in Active Directory. NetBIOS Domain NetBIOS name of the domain (e.g., "CONTOSO"). Password Password for the proxy account. Testing Connection CredentialsIf connecting directly to Active Directory without using a Cloud Gateway, you can click Check under Test Connection to verify the proxy account credentials before submitting. For remote connections using Cloud Gateway, credential validation occurs automatically when you select the gateway server in the next step.
-
Click Submit.
-
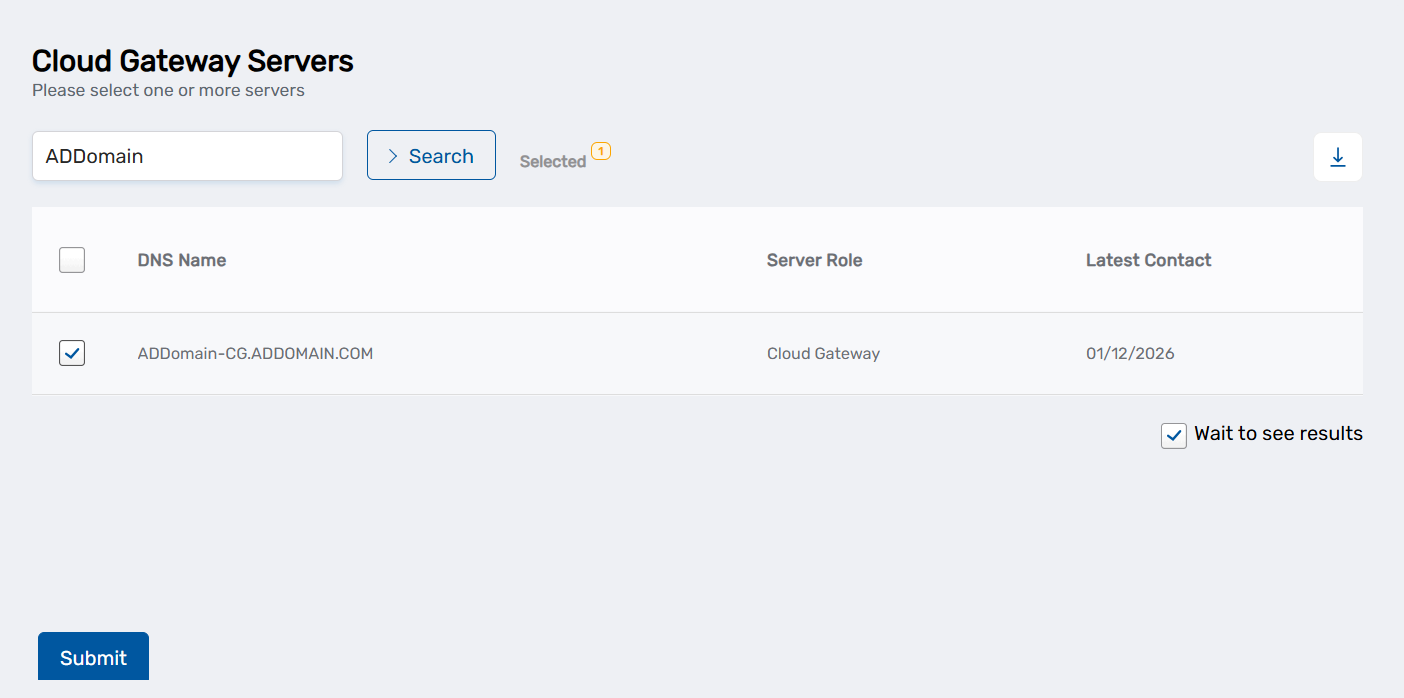
If you checked "Is Remote (Requires Cloud Gateway)": Search for and select your Cloud Gateway server from the list, then click Submit.
-
On the domain selection page, select the domains you want to manage and click Submit.
EmpowerID creates the account store definition and returns you to the Account Stores and Systems page.
Configure Basic Account Store Settings
After creating the account store, configure operational settings that control how EmpowerID will interact with Active Directory. These settings define synchronization behavior, provisioning capabilities, and organizational structure replication.
- From the Account Stores tab on the Account Stores and Systems page, search for the account store you just created and click the Account Store link for it.
This directs you to the Account Store Details page.
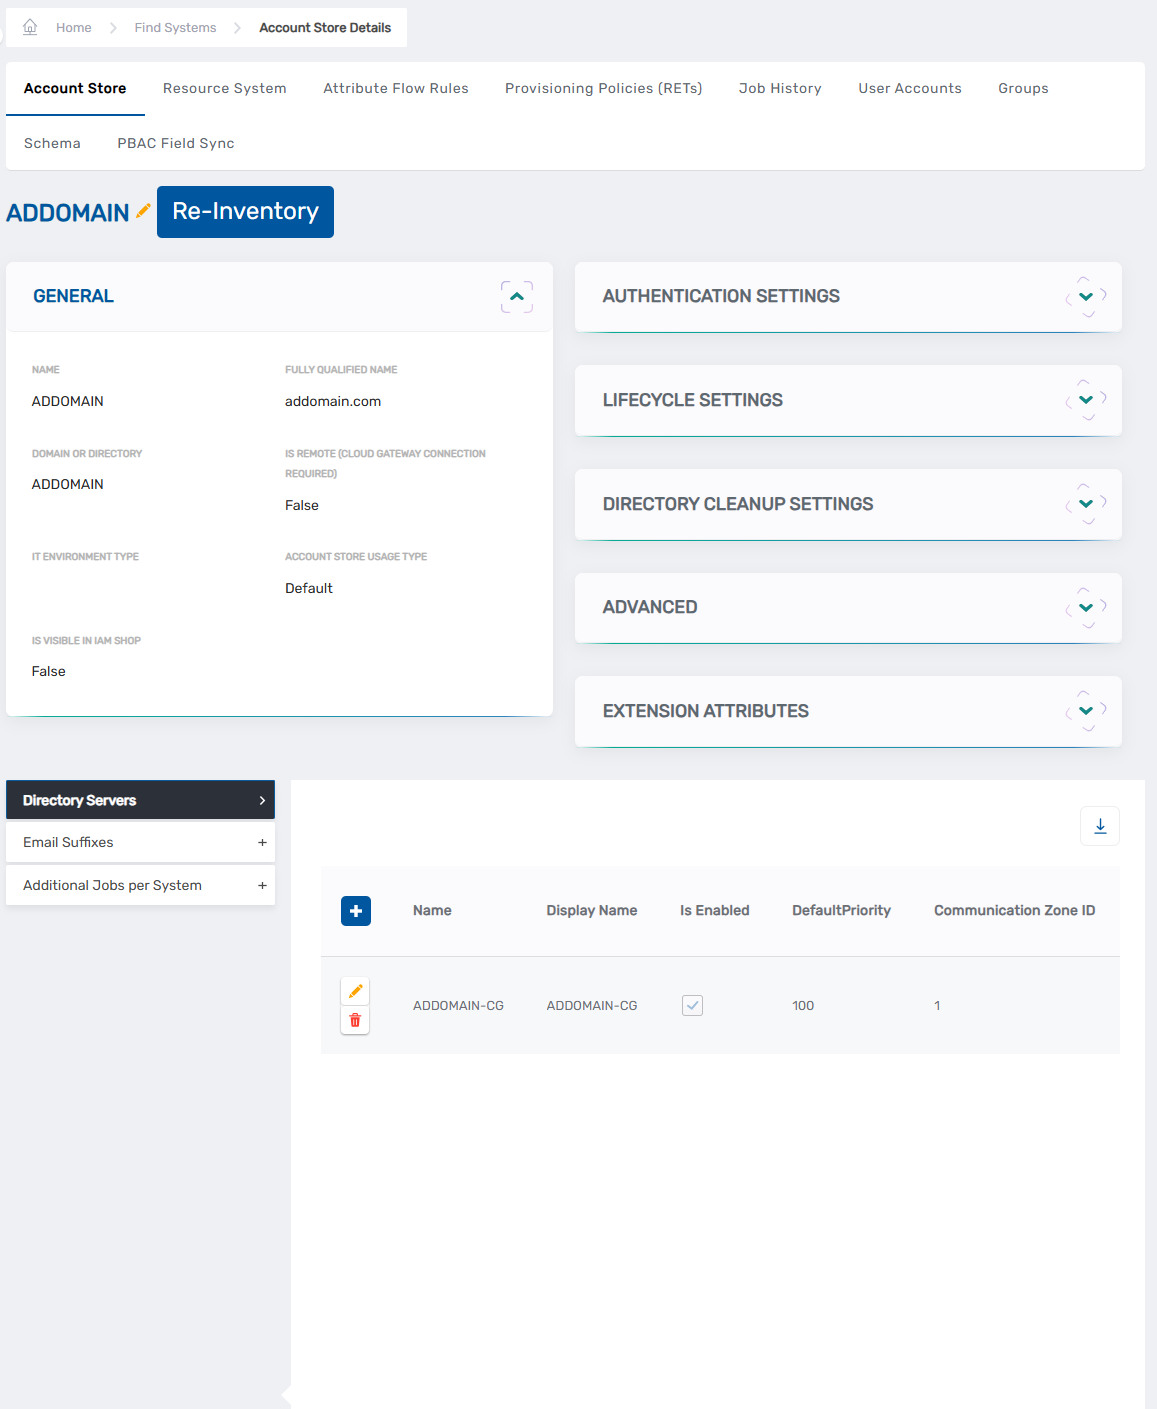 2. Click the account store name link at the top of the page to edit the definition.
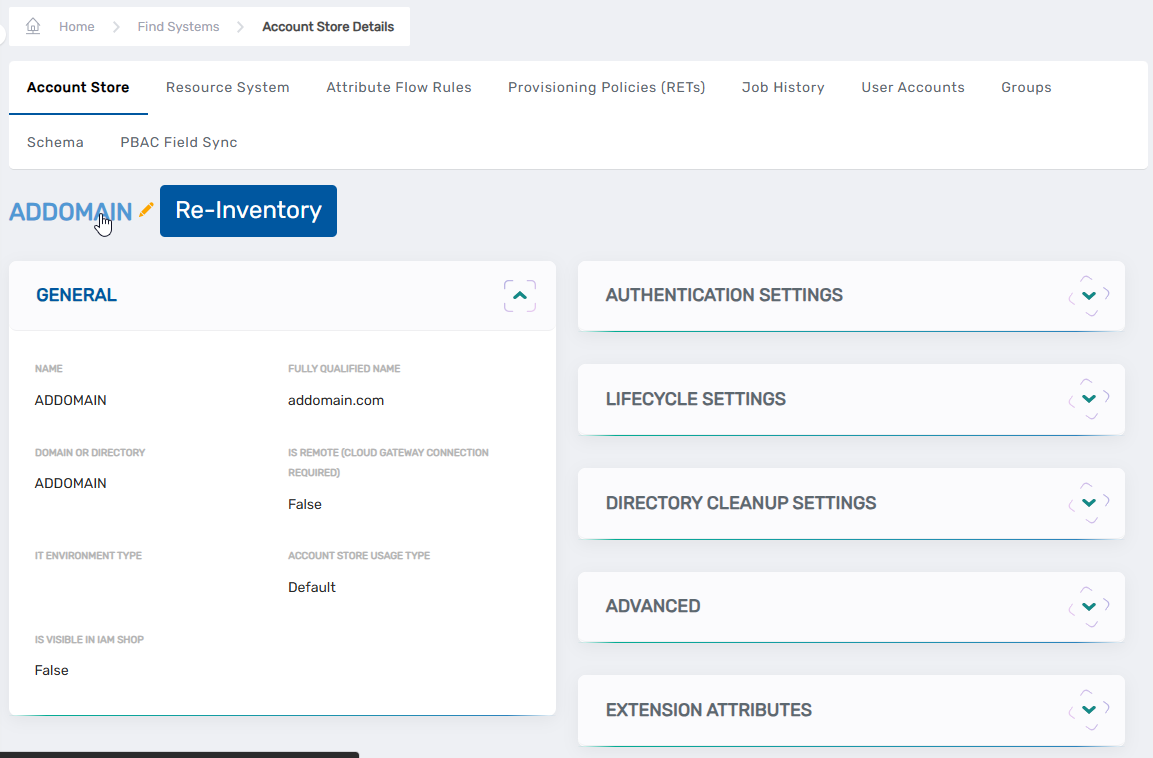 3. On the account store edit page, configure the following settings:
General
Is Visible in IAM Shop — When enabled, resources from this account store become visible in the IAM Shop for users to discover and request. Users can only request resources for which they have been granted eligibility through eligibility rules configured on the resource or their Business Role and Location combinations. For information about configuring eligibility, see Configure Eligibility for Resources.
Authentication and Password Settings
Use for Authentication — Controls whether EmpowerID accepts Active Directory credentials for user authentication. Enable this setting when users should authenticate to EmpowerID using their domain credentials. Leave disabled when authentication occurs through other identity providers.
Allow Password Sync — Enables automatic password synchronization between EmpowerID Person objects and Active Directory accounts. When password changes occur in EmpowerID or authoritative systems, synchronized passwords propagate to Active Directory accounts maintaining consistency across systems.
Queue Password Changes — Controls whether password change operations queue for batch processing rather than executing immediately. Enable this setting when network connectivity to domain controllers is unreliable or when you want to review password changes before processing. For stable network connections, leave this disabled to allow immediate password updates.
Provisioning Settings
Allow Person Provisioning (Identity Source) — Controls whether EmpowerID creates Person objects from accounts discovered during inventory. Leave this disabled in most deployments where HR or another system provides authoritative identity data and EmpowerID provisions accounts to Active Directory. Enable this setting only when Active Directory functions as the authoritative identity source for your organization—a less common scenario in modern identity architectures.
Initial Bulk Person Provision Complete (Enable Flow Events) — When enabled, EmpowerID triggers No Code Flow events when new accounts are discovered during inventory. This setting works in conjunction with Allow Person Provisioning to enable workflow-based processing of newly discovered accounts. Leave this disabled unless you have configured No Code Flows to handle account discovery events and want those workflows to execute automatically during inventory.
Allow Attribute Flow — Enables attribute synchronization between EmpowerID Person objects and Active Directory accounts. This setting must be enabled before configuring attribute flow rules that control synchronization direction and precedence. Without attribute flow enabled, account attributes remain static after initial provisioning.
Allow Provisioning (By RET) — Enables automatic account provisioning in Active Directory through Resource Entitlement policies. When users receive policy-based access assignments requiring Active Directory accounts, EmpowerID automatically creates accounts with appropriate attributes and group memberships.
Allow Deprovisioning (By RET) — Enables automatic account deprovisioning when users no longer satisfy Resource Entitlement policy criteria. Accounts are disabled or deleted based on deprovisioning policy configuration when access requirements change.
Max Accounts per Person — Specifies the maximum number of Active Directory accounts a single Person object can possess. The default value of 1 prevents runaway join operations caused by misconfigured join rules. Increase this value only when users legitimately require multiple accounts in the same domain—for example, separate standard and administrative accounts.
Business Role Settings
Allow Business Role and Location Re-Evaluation (OROZ Source) — Controls whether the Role and Location Compiler job derives Business Role and Location assignments from organizational data in this account store. Leave this disabled when Active Directory serves as a target system. This setting applies primarily to HR systems and other authoritative sources that provide organizational hierarchy information for determining Person assignments.
Inventory Auto Provision OUs as IT System Locations — When enabled, EmpowerID automatically creates IT System Locations that mirror your Active Directory organizational unit structure. These locations enable browsing the OU hierarchy in EmpowerID interfaces and support delegating permissions to specific organizational paths. This setting is recommended for most deployments as it provides visibility into Active Directory structure without requiring manual location configuration.
-
Click the Inventory tab and review inventory configuration:
Inventory Enabled — Leave disabled at this stage. Enable inventory after configuring attribute flow rules to ensure proper attribute synchronization behavior from the first inventory cycle.
Inventory Schedule Interval — Controls how frequently EmpowerID checks for changes in Active Directory. The default interval of 10 minutes provides reasonable balance between currency and system load. Adjust based on your organization's requirements for near-real-time synchronization versus resource utilization.
-
Click the Membership tab and review group management configuration:
Enable Group Membership Reconciliation — Leave disabled until after initial inventory completes successfully. This setting enables ongoing reconciliation of group memberships based on policy-driven access assignments and detected changes in Active Directory.
Membership Schedule Interval — Controls reconciliation frequency. The default 10-minute interval matches the inventory schedule, ensuring group memberships stay current with account and policy changes.
-
Click Save to persist your configuration changes.
The Active Directory account store is now configured with operational settings appropriate for common deployment scenarios. Before enabling inventory, configure attribute flow rules to define how identity data synchronizes between systems.
This procedure configures Active Directory for common deployment scenarios where HR or another system provides authoritative identity data and EmpowerID provisions accounts to Active Directory. Organizations where Active Directory serves as the authoritative identity source require additional configuration for Business Role and Location assignment. For advanced scenarios and comprehensive setting descriptions, refer to the Active Directory Configuration Reference.
Next Steps
Your Active Directory account store is connected and configured with baseline operational settings. Complete these configuration steps before enabling inventory to ensure proper identity data management from the initial synchronization:
Required Before Enabling Inventory
Configure attribute flow rules to control attribute synchronization between Active Directory accounts and EmpowerID Person objects. Attribute flow rules define which attributes synchronize bidirectionally, which flow only from Active Directory to EmpowerID, and which attributes EmpowerID manages exclusively. These rules establish data authority and prevent conflicts when multiple systems manage identity attributes. See Configure Attribute Flow for Active Directory for configuration procedures.
After Configuration Completes
Enable inventory to begin discovering and synchronizing identity data from Active Directory. Navigate to the account store's Inventory tab, enable the Inventory Enabled setting, and save your changes. EmpowerID initiates the initial inventory immediately and continues discovering changes based on the configured schedule.
Enable group membership reconciliation when you want EmpowerID to manage Active Directory group memberships through policies. Access the Membership tab, enable the group membership reconciliation setting, and save. This allows policy-based access control to drive group membership assignments automatically.
Monitor initial inventory progress through the Job History tab to verify EmpowerID discovers accounts, groups, and organizational units successfully. Initial inventory duration varies based on directory size—large environments containing hundreds of thousands of objects may require several hours for complete discovery.
Related Articles
- Active Directory Connector Overview — Architecture, delta inventory mechanics, and connector capabilities
- Configure Attribute Flow for Active Directory — Attribute synchronization rule configuration
- Active Directory Configuration Reference — Comprehensive account store setting descriptions