Adding Groups to Groups
In EmpowerID, you can add one or more groups as members of another group, allowing their members to inherit any entitlements or delegations assigned to the parent group. This simplifies access management by ensuring that permissions are applied consistently across related groups. For example, if a group has a policy that grants members a home folder, adding another group without such a policy will extend that entitlement to all members of the added group.
This article walks through the steps to add groups to other groups in EmpowerID.
Nested groups must belong to the same domain.
Procedure
- Log in to the Resource Admin app in your environment.
- Select Groups as the resource type and then search for the parent group.
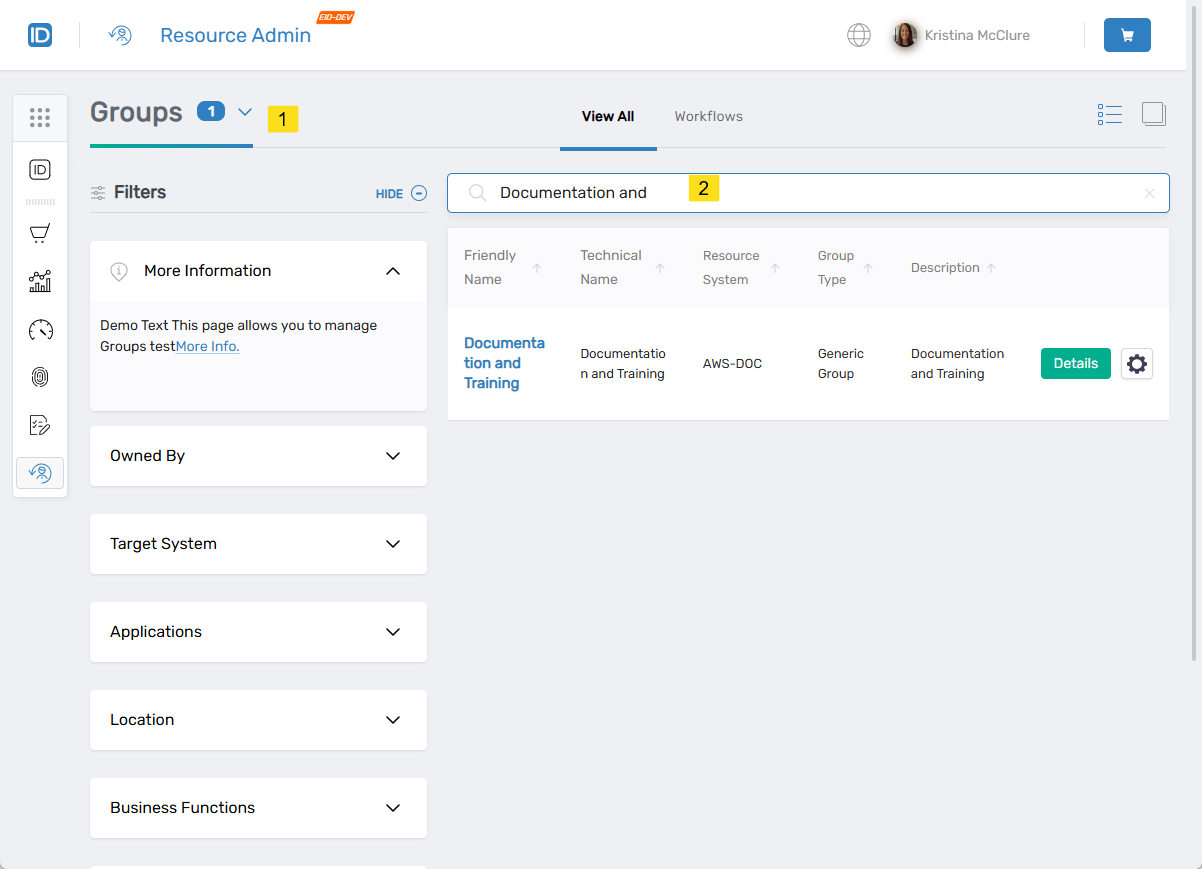
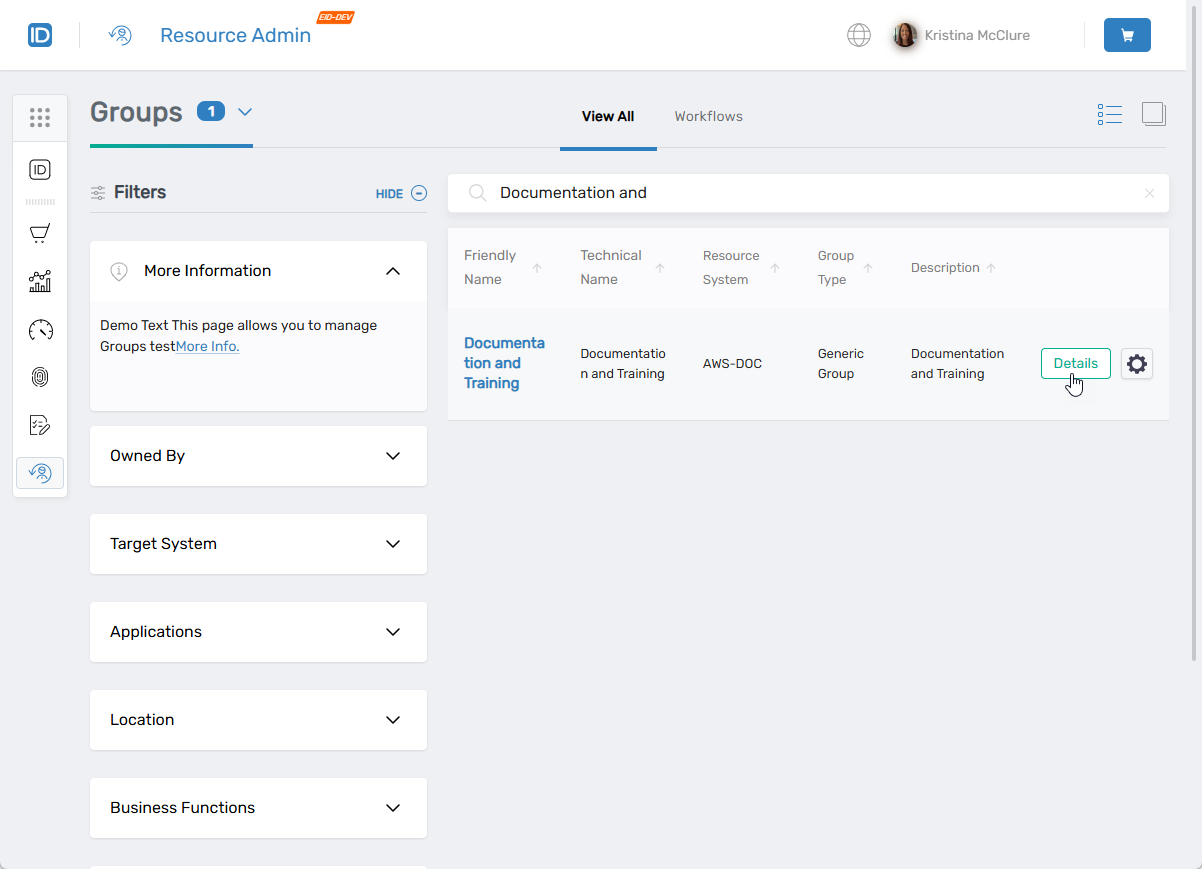
- Click the Details button for the group record to navigate to the Details view.
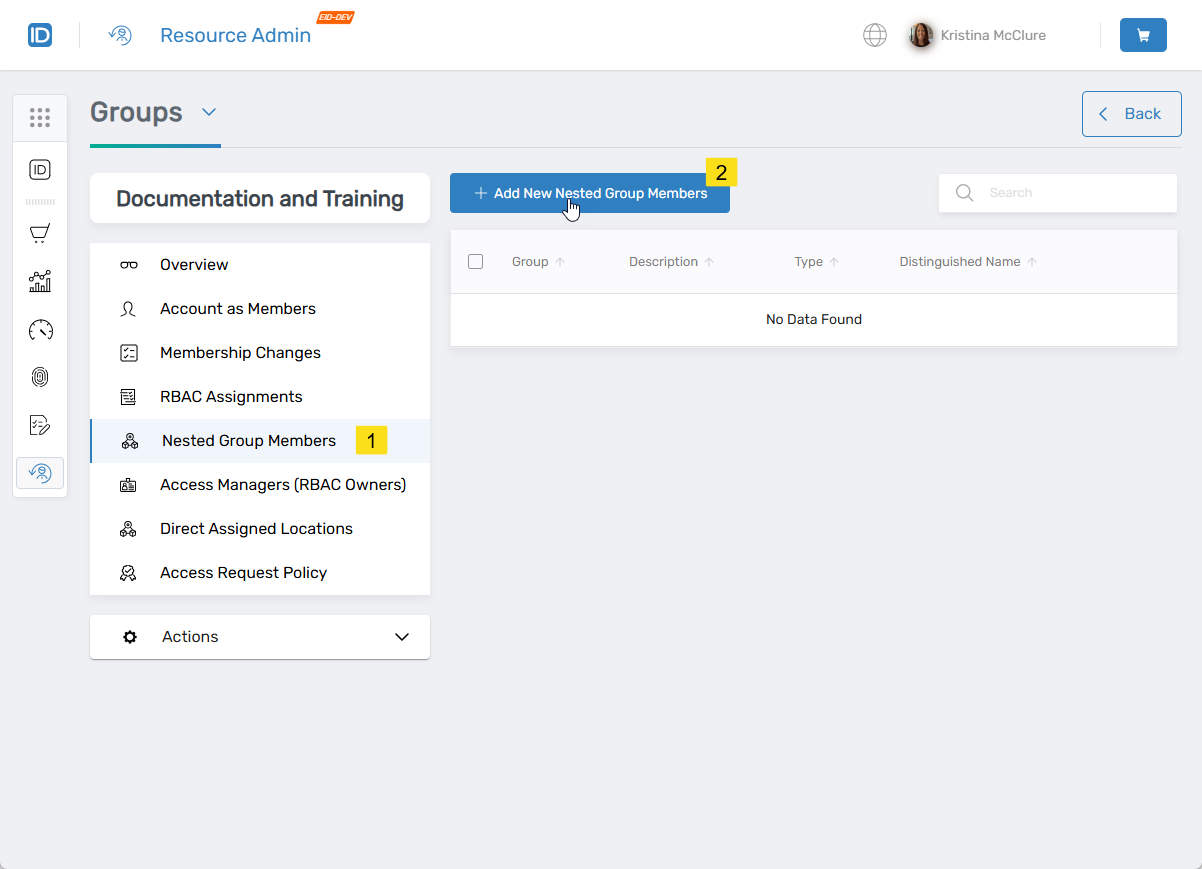
- Select the Nested Group Members menu item and click Add New Nested Group Members.
- In the Add New Nested Group Members modal, search for the group you want to nest.
You will see the group in the All pane.
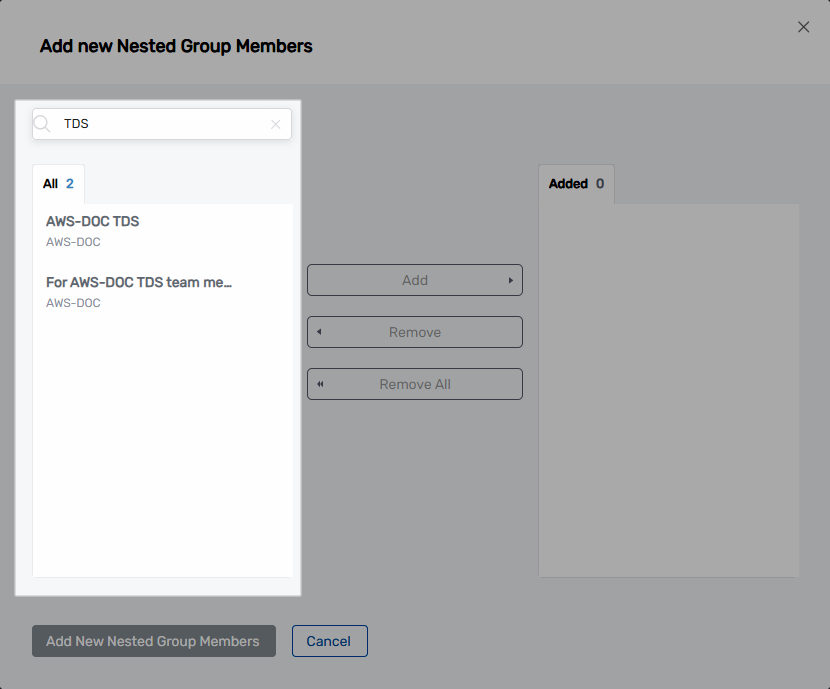
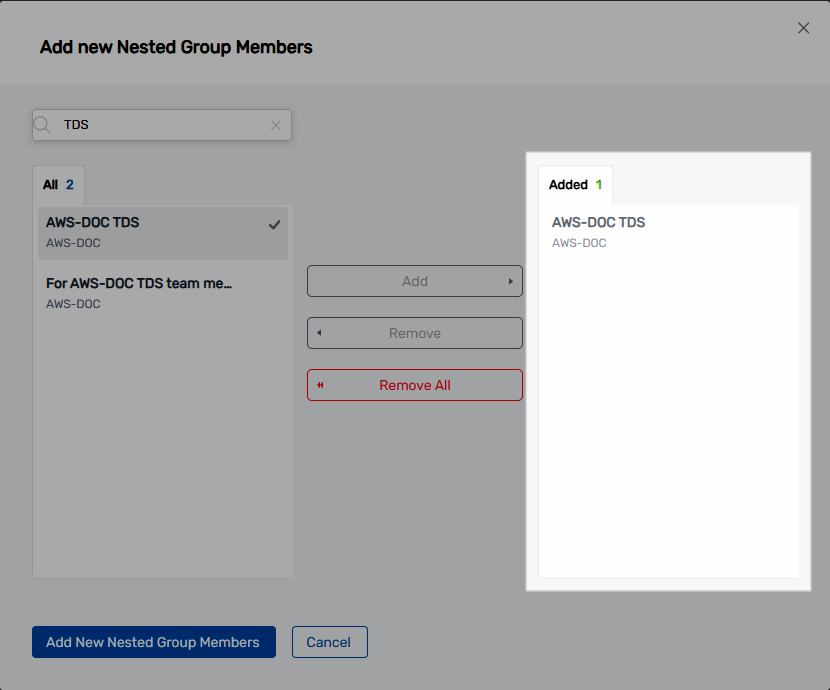
- FRom the All pane, click the target group to select it and then click Add.
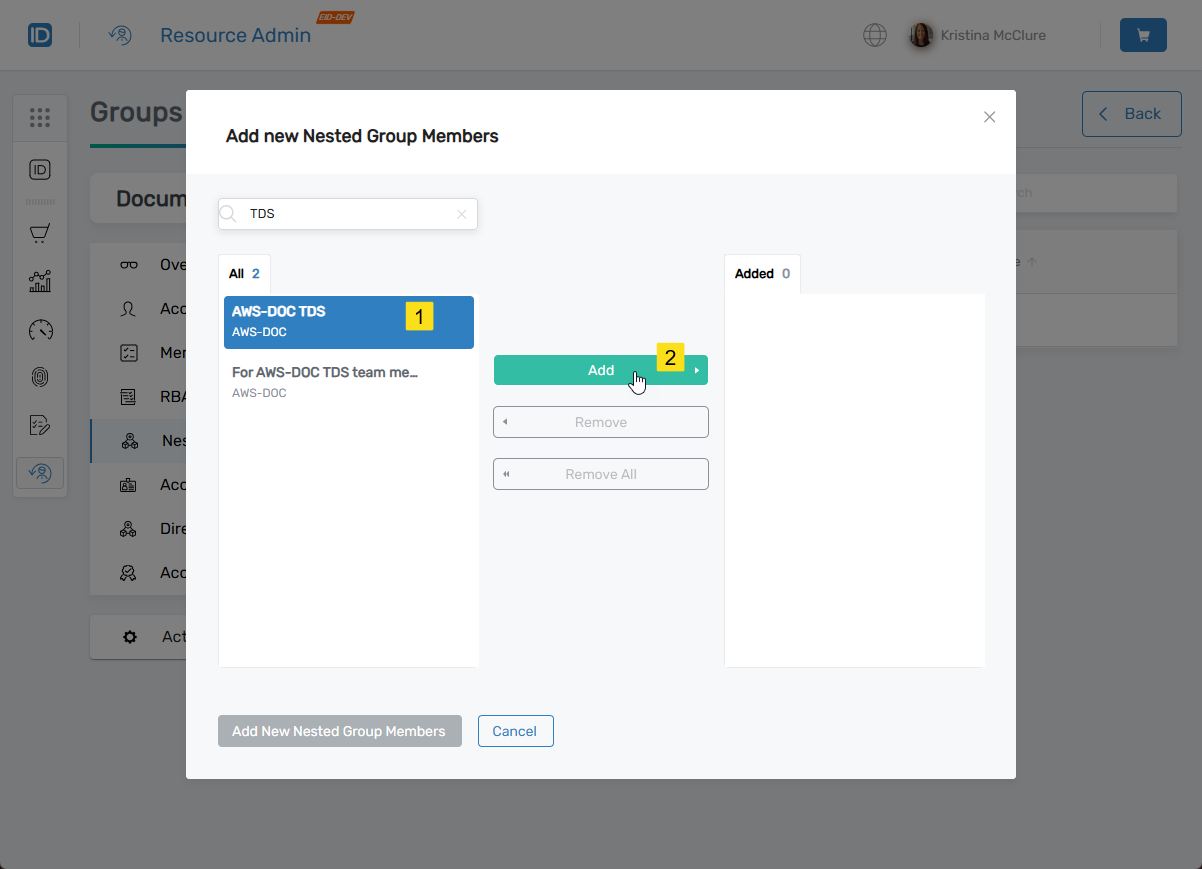 This moves the group to the Addded pane.
- Repeat steps 5 and 6 for each additional group you want to nest.
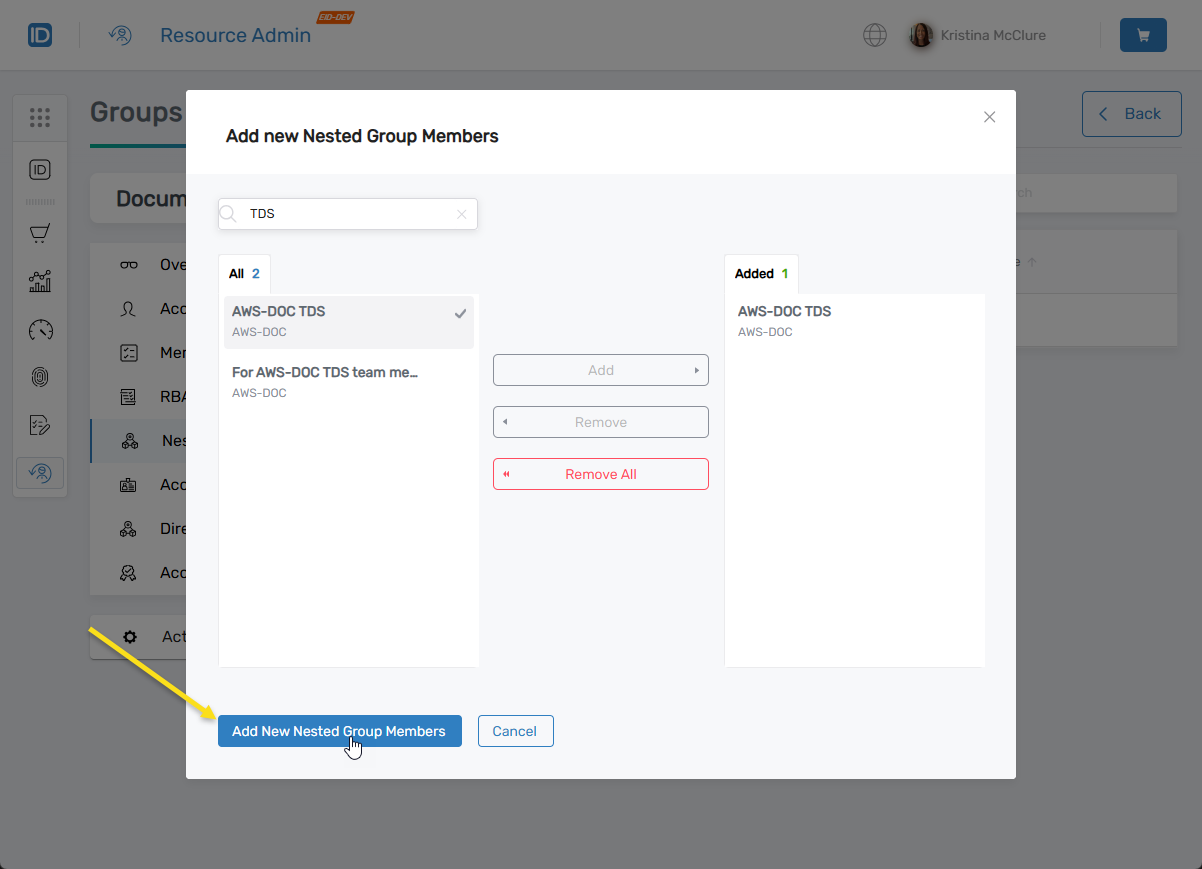
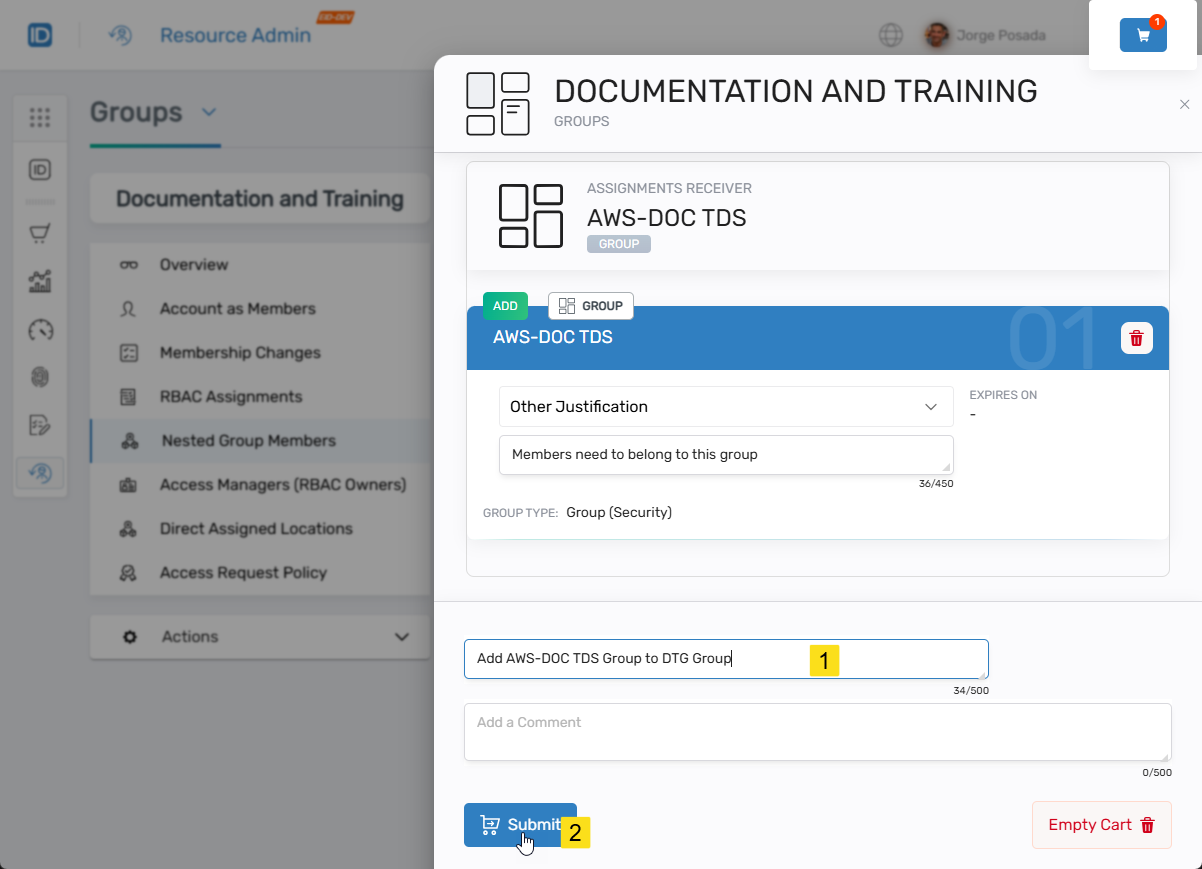
- When ready, click Add New Nested Group Members to add the nesting to the shopping cart or click Cancel to exit the process.
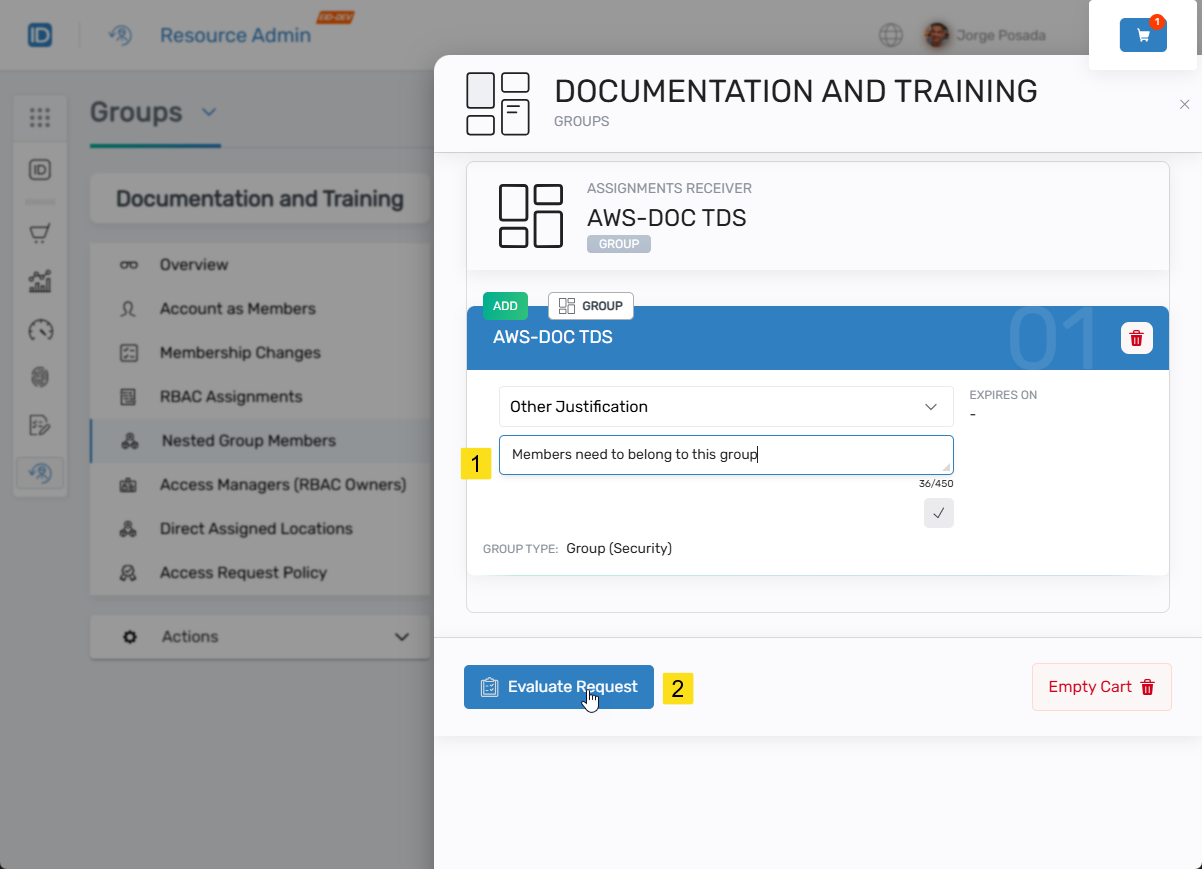
- Click the Shopping cart to open it.
- Enter a comment in the comment field and then click Evaluate Request.
- Enter a Business Request Name and click Submit.
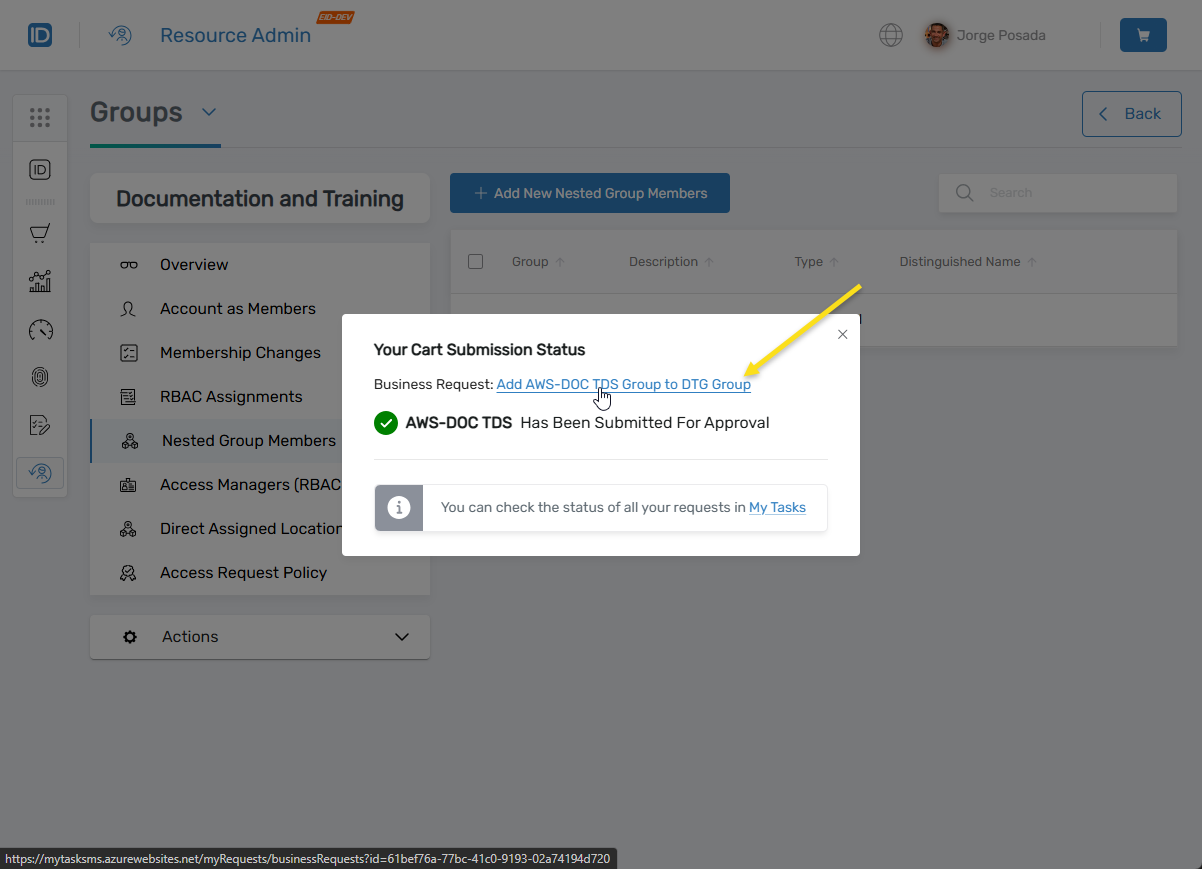
 You should a message stating that the request has been submitted for approval. You can check the status of the request in My Tasks by clicking the link.
Review and Approve the Request
- Click the Business Request link in the Your Cart Submission Status modal.
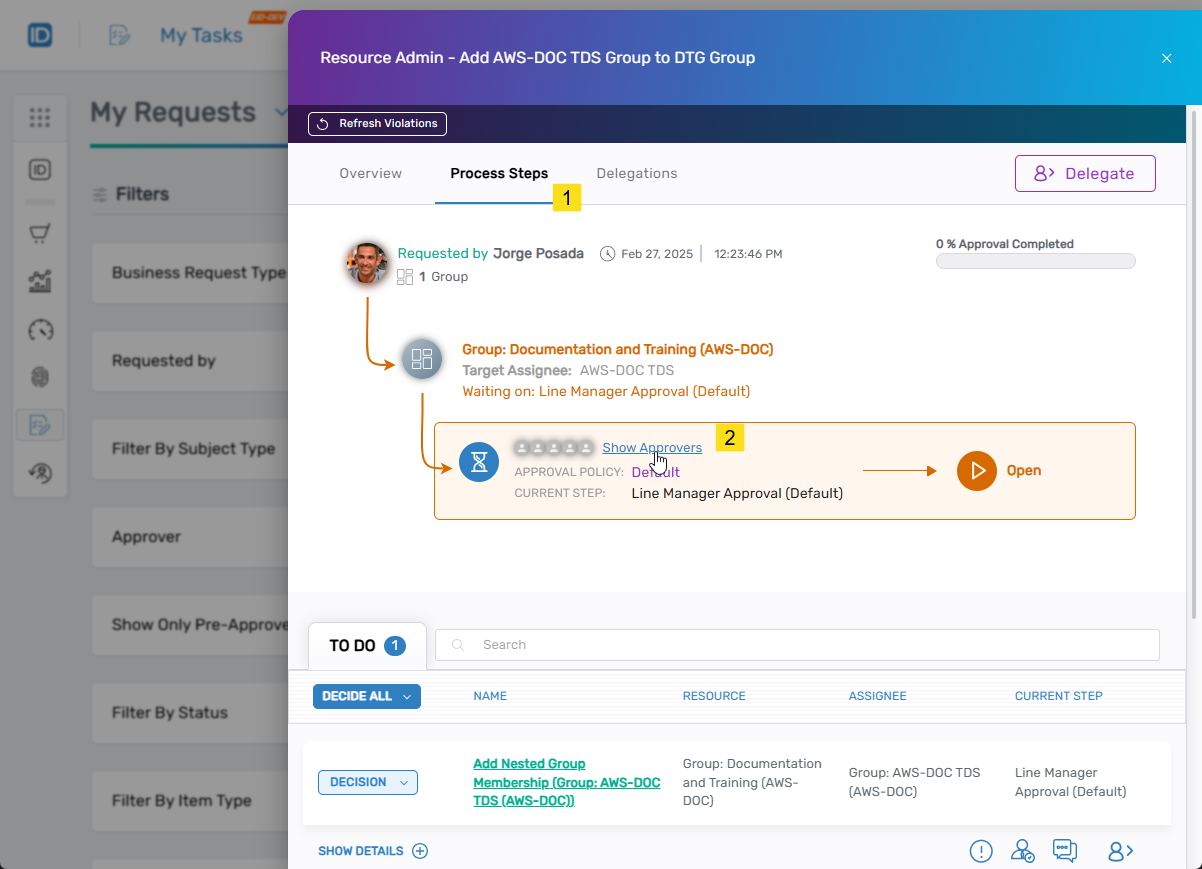
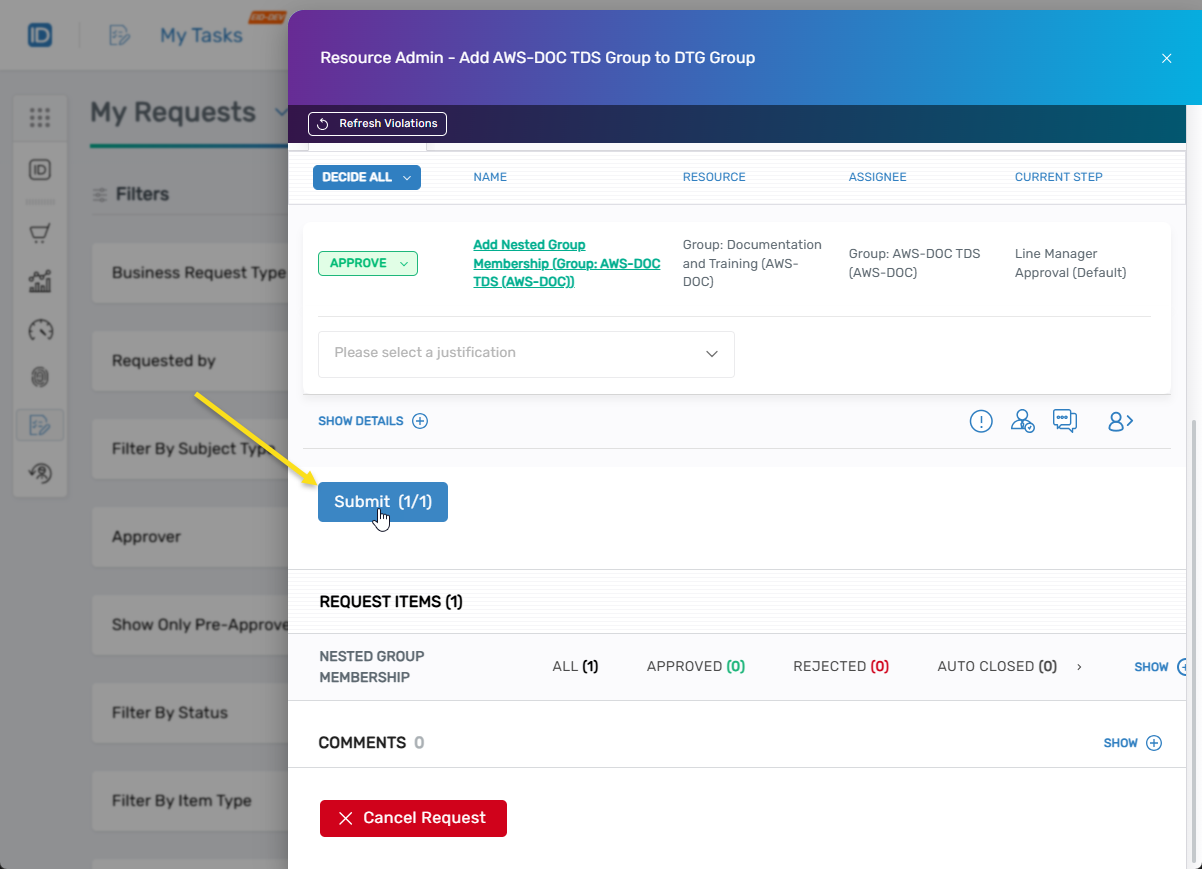
This opens the Request Drawer for the request. From here you can view information about the request to include who can approve the request. If you are an approver, you will see the Decision buttons as shown below.

If you are not an approver, you can view approvers by navigating to the Process Steps tab and clicking the Show Approvers link.
- If you are an approver, click the Decision button for the request and select Approve.
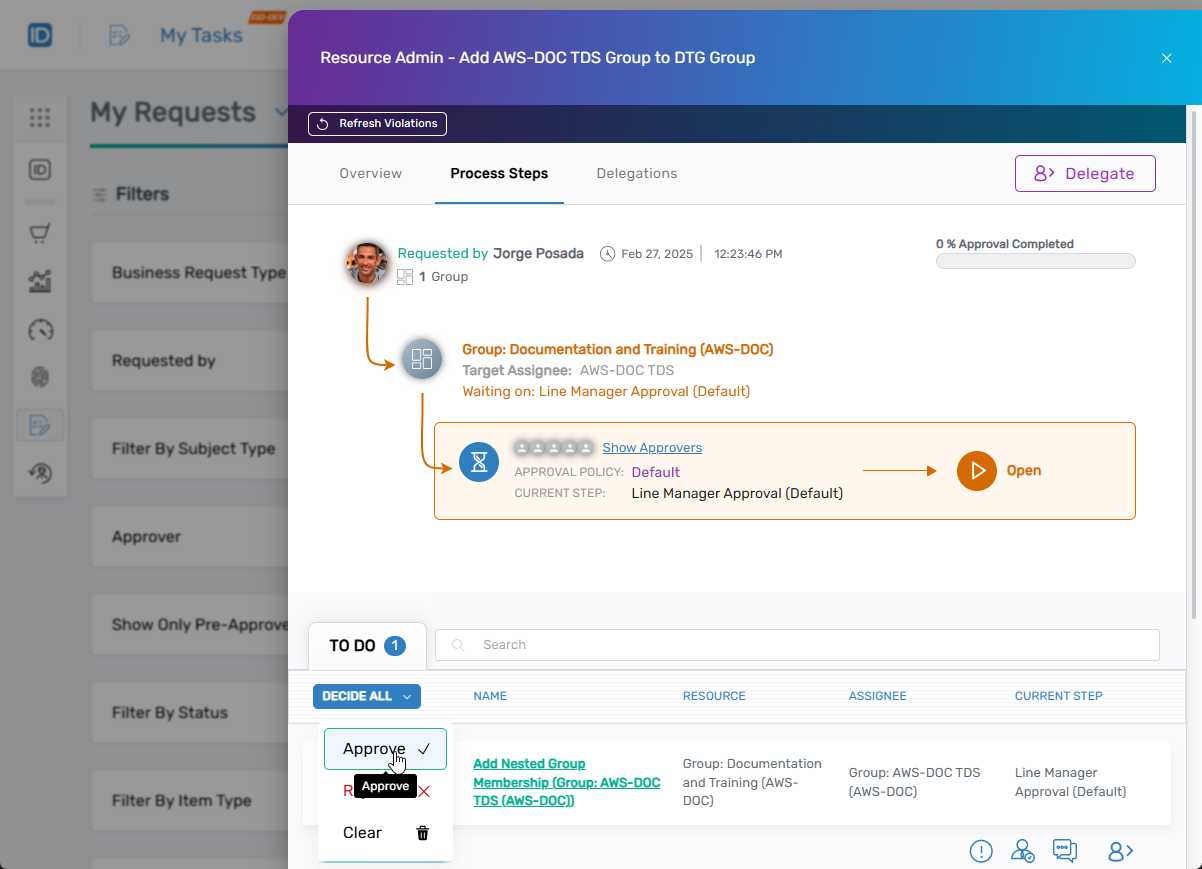
- Click Submit.
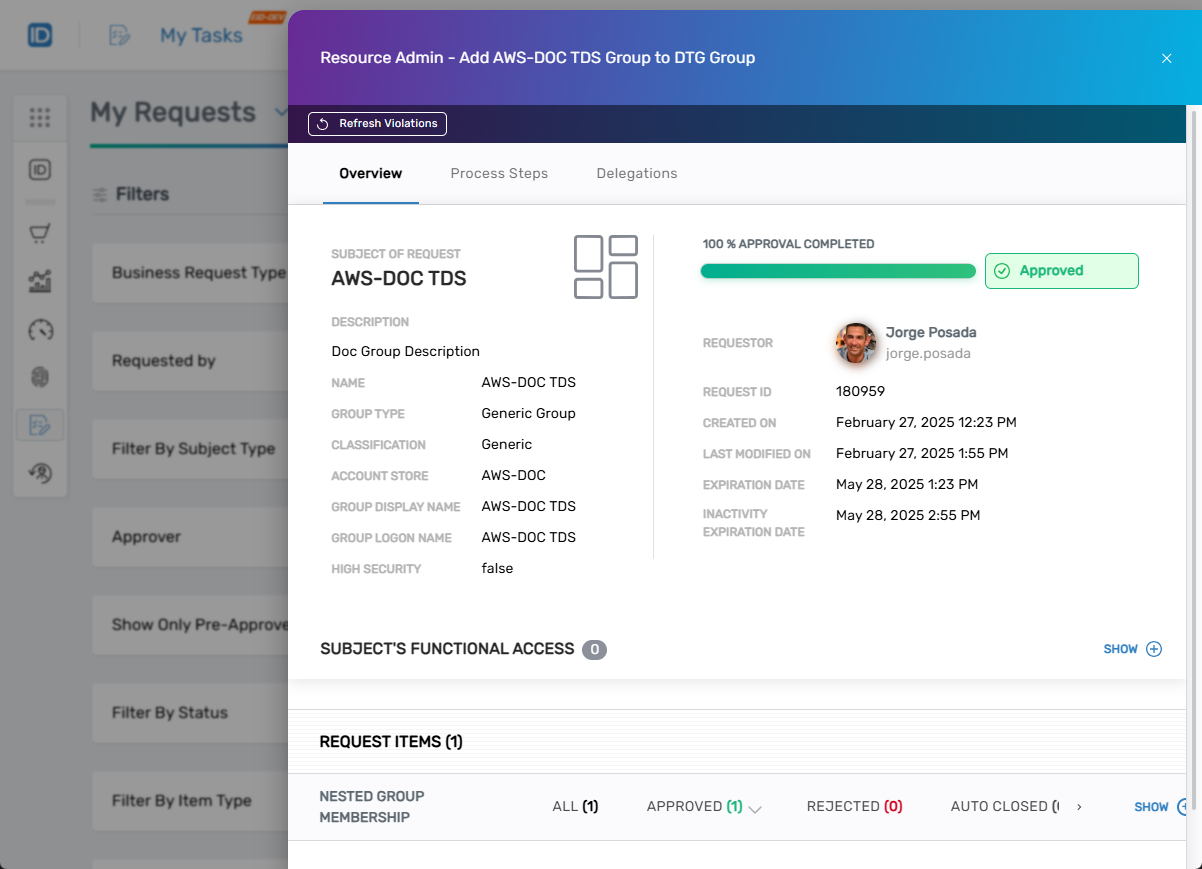
- You should see the task is 100% Approval Completed.
Verify Results
- Return to the Detials page for the group in Resource Admin. (See the first three steps under the Procedure section for a refresher on navigating to the page if needed.)
- Select the Nested Group Members menu item.
You should see the nested group.
