EntraID Authentication
If your organization has one or more Azure tenants managed by EmpowerID, you can configure EmpowerID to allow users with accounts in those tenants to authenticate to EmpowerID with their EntraID credentials. This feature uses the OAuth Password Grant type flow, which requires registering an application with a client secret and at least one exposed scope.
To configure EmpowerID for EntraID authentication, you first need to connect EmpowerID to each Azure tenant you want to enable this feature. See EntraID SCIM Deployment and Configuration for the details.
Steps
To set up EmpowerID for EntraID authentication, you will perform the following tasks:
- Register an application in EntraID
- Create a client secret for the Azure application
- Add an API permission to the Azure application
- Update the EmpowerID account store connected to the Azure tenant for EntraID auth
- Update the EmpowerID resource system for the Azure tenant with Azure Auth configuration parameters
Step 1 – Register the application in EntraID
- In Azure, navigate to your Azure Active Directory.
- On the Azure Active Directory navbar, click App registrations.
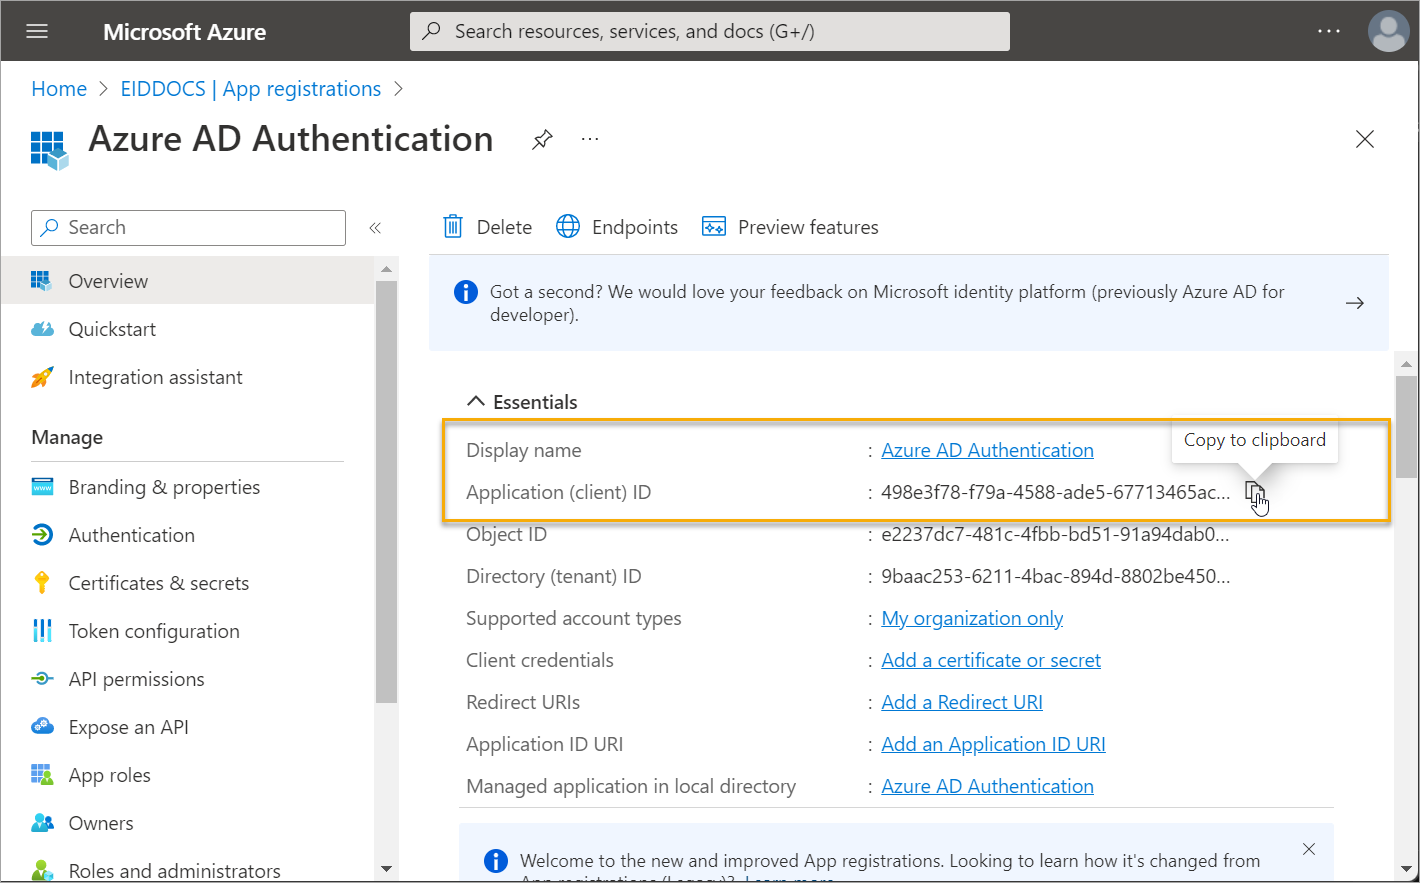
- On the App registrations page, click New registration.

- Once the application is registered, copy the Application (client) ID from the Overview page. You need this to configure EmpowerID for EntraID auth.
Step 2 – Create a client secret for the application
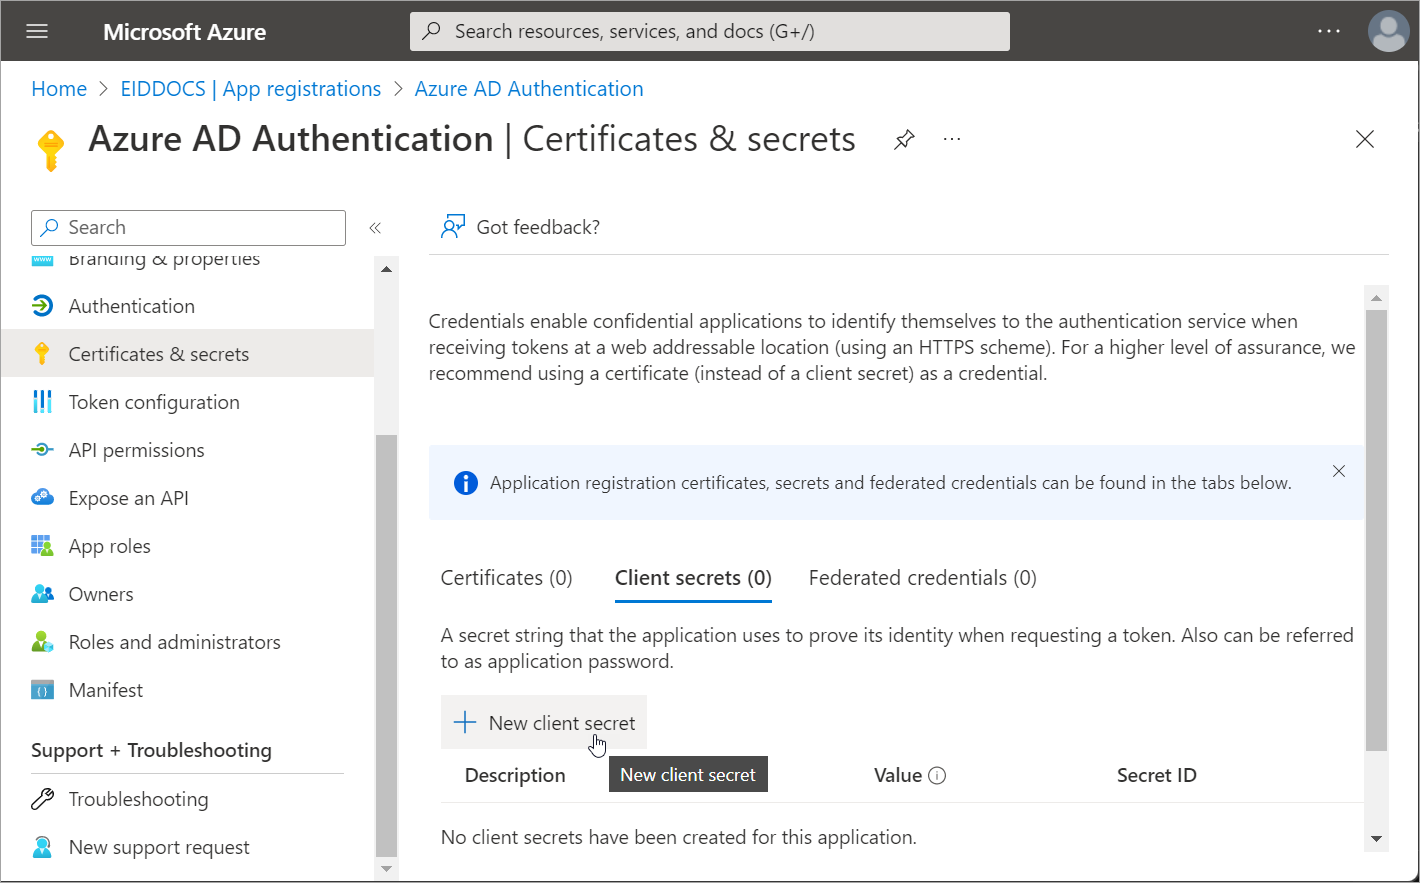
- Navigate to the Certificates & secrets blade for the application, select the Client Secrets tab and click New Client Secret.
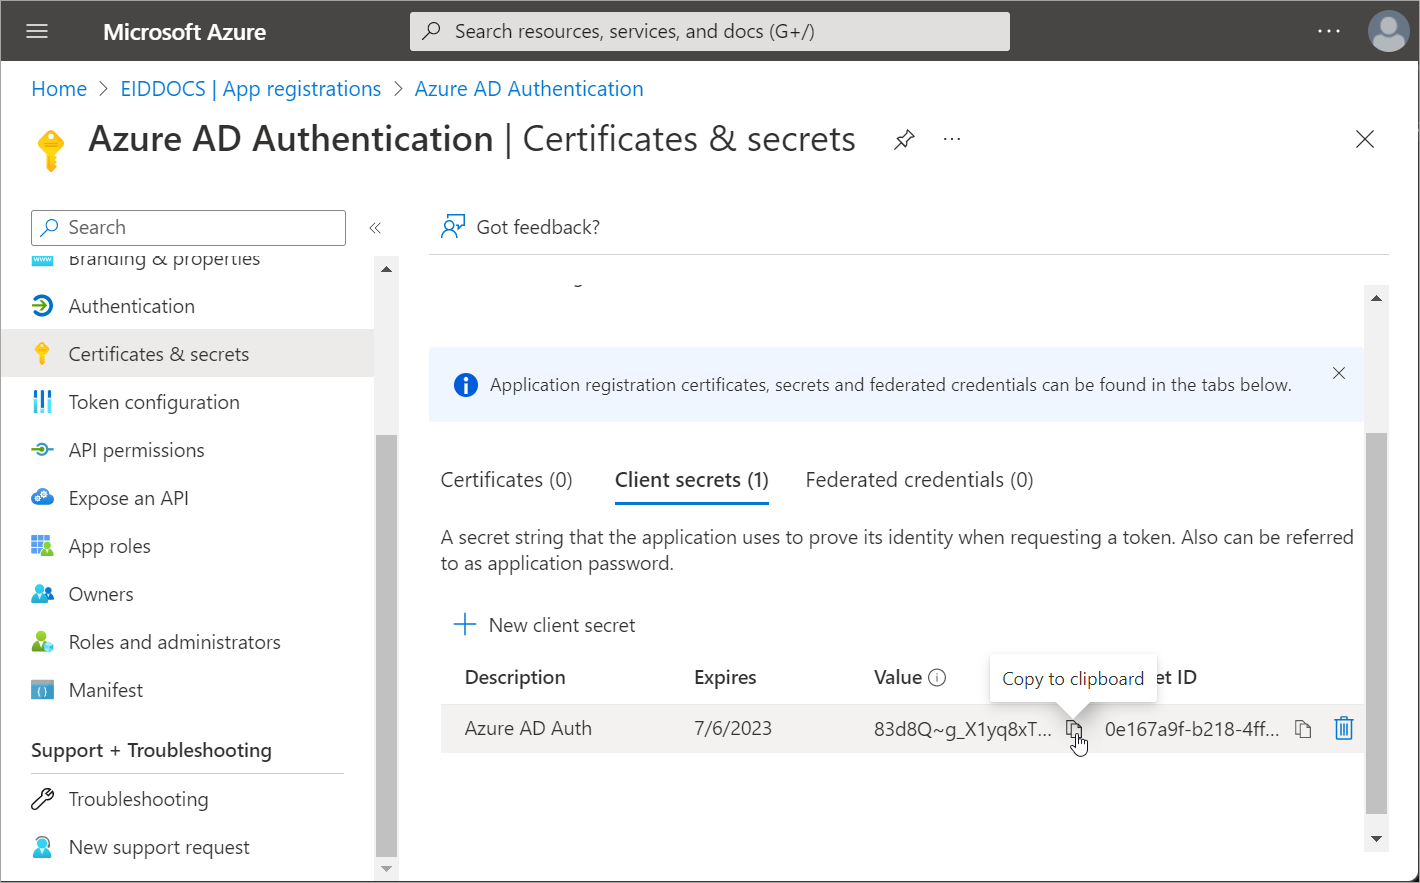
- Create the secret and then copy the Value. You need this to configure EmpowerID for EntraID auth.
Step 3 – Add an API permission to the application
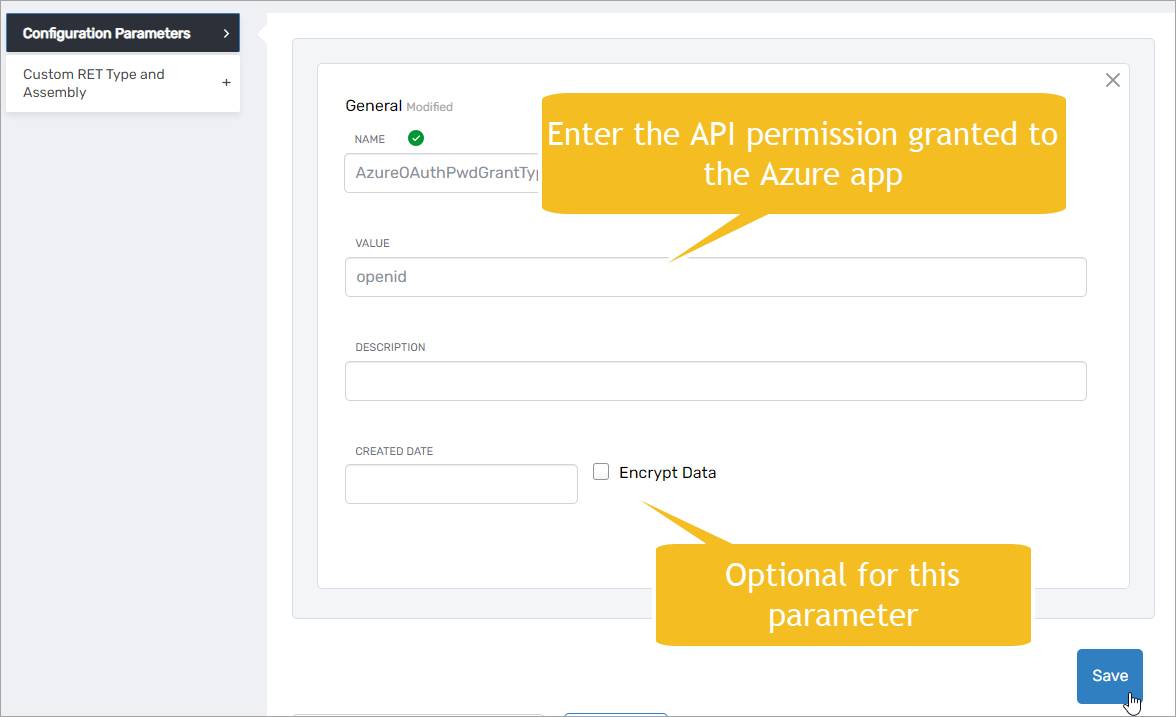
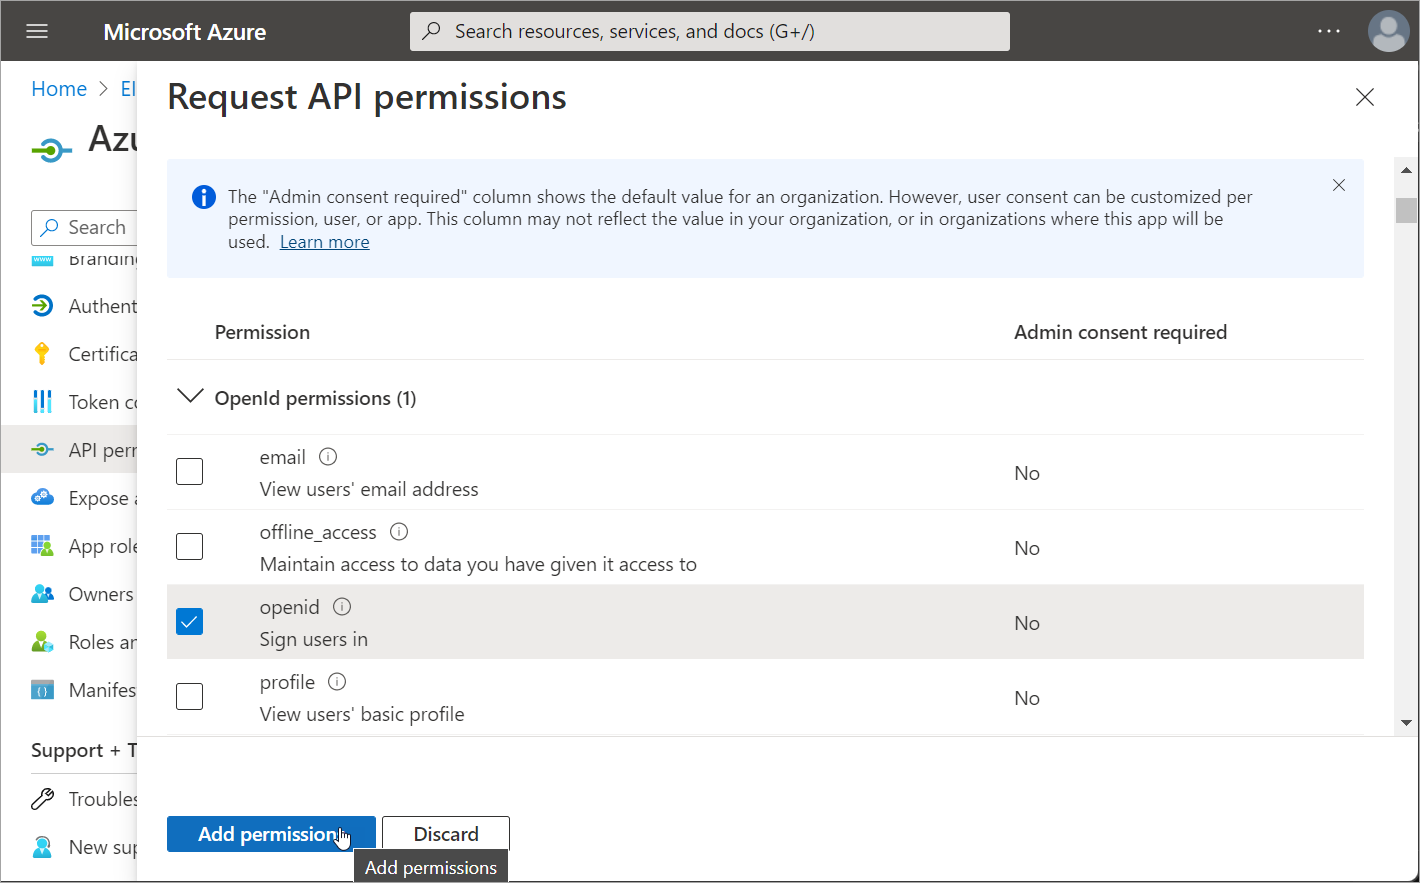
In this step, we add openid as the API permission to self-document the purpose of the application; however, you can select any permission.
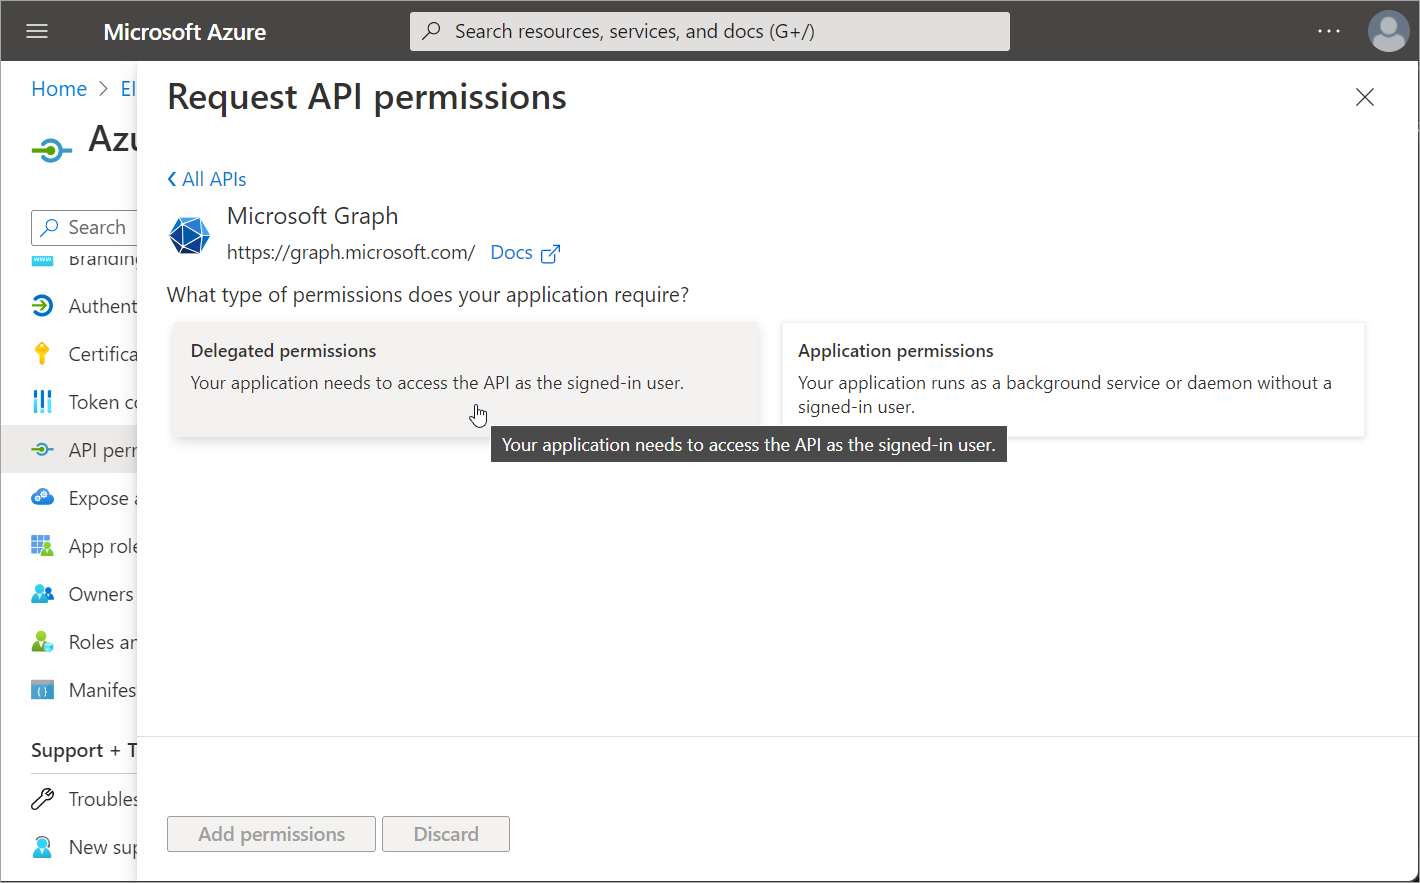
- Navigate to the API permissions blade for the application and click Add a permission.
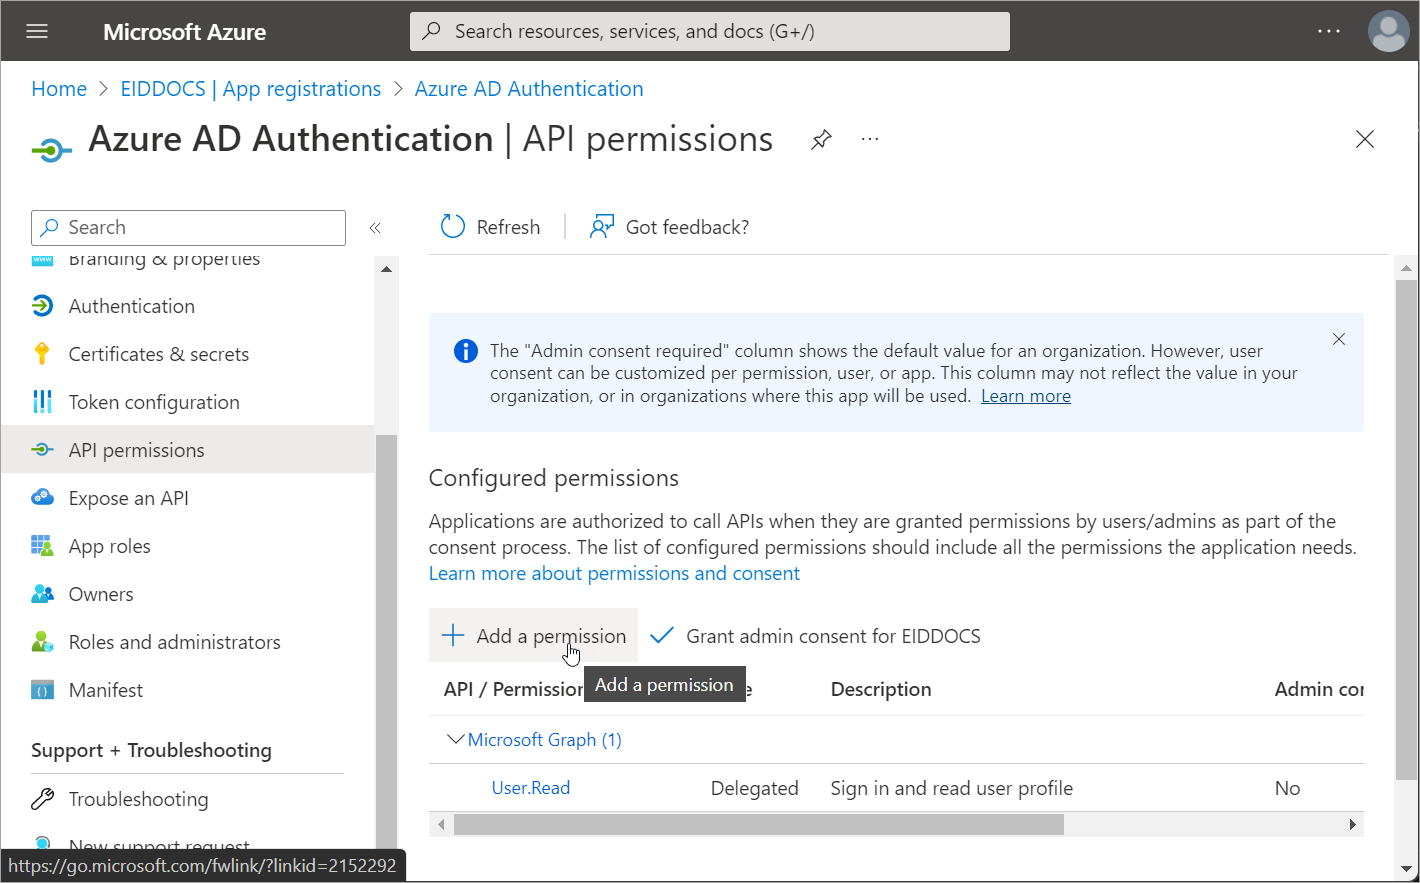
- Select Microsoft Graph as the API and then select Delegated permissions.
- Under OpenId permissions, select openid and then click Add permissions.
Step 4 – Configure the EmpowerID account store for EntraID auth
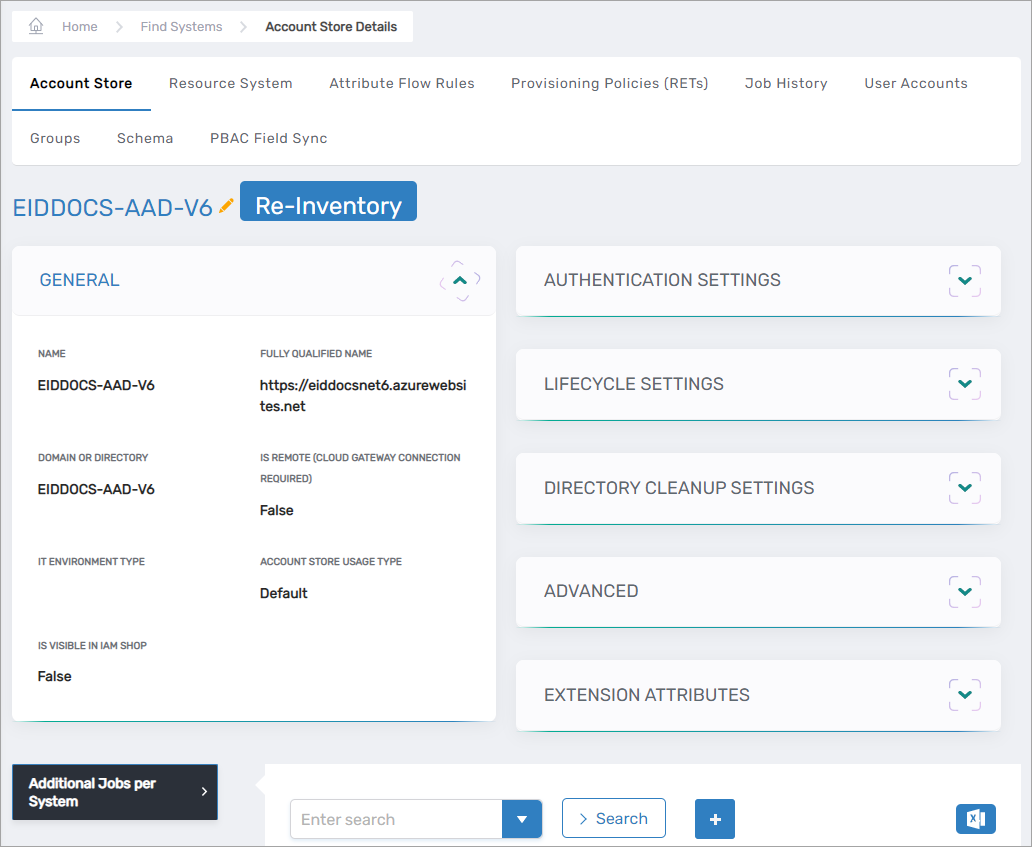
- In EmpowerID, navigate to the Find Account Store page by expanding Admin > Applications and Directories and clicking Account Stores and Systems.
- Select the Account Stores tab and search for your EntraID tenant.
- Click the Account Store link.
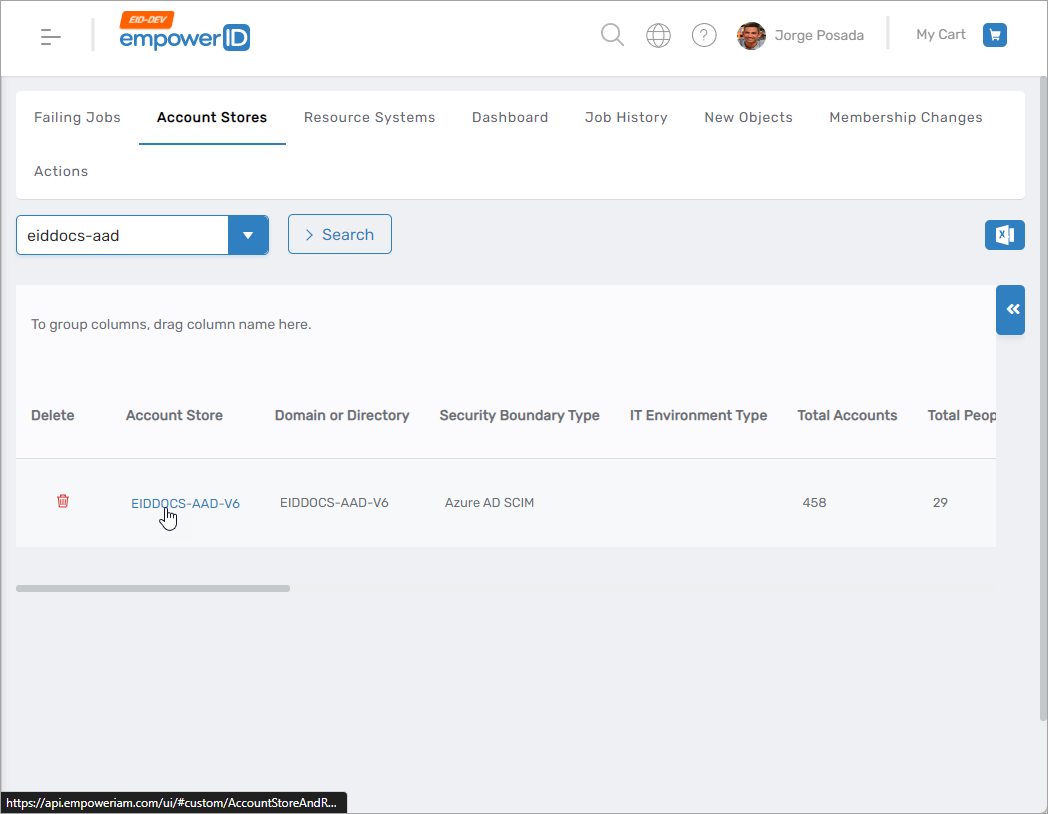
This directs you to the Account Stores and Resource Systems page for the tenant.
- Click the Edit button to put the account store in edit mode.

- Under Authentication and Password Settings, select Use for Authentication and Allow Search for User Name in Authentication.
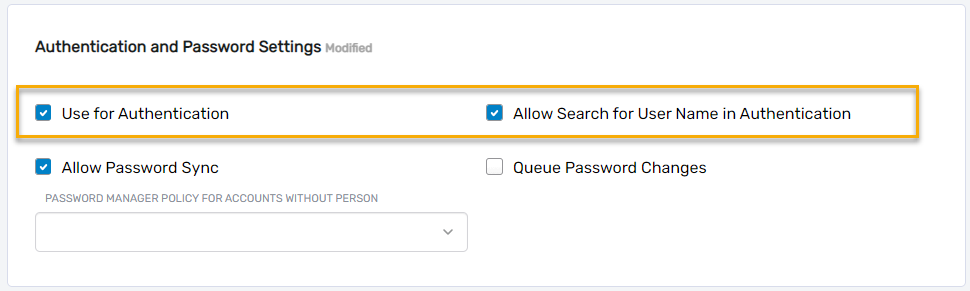
- Click Save.
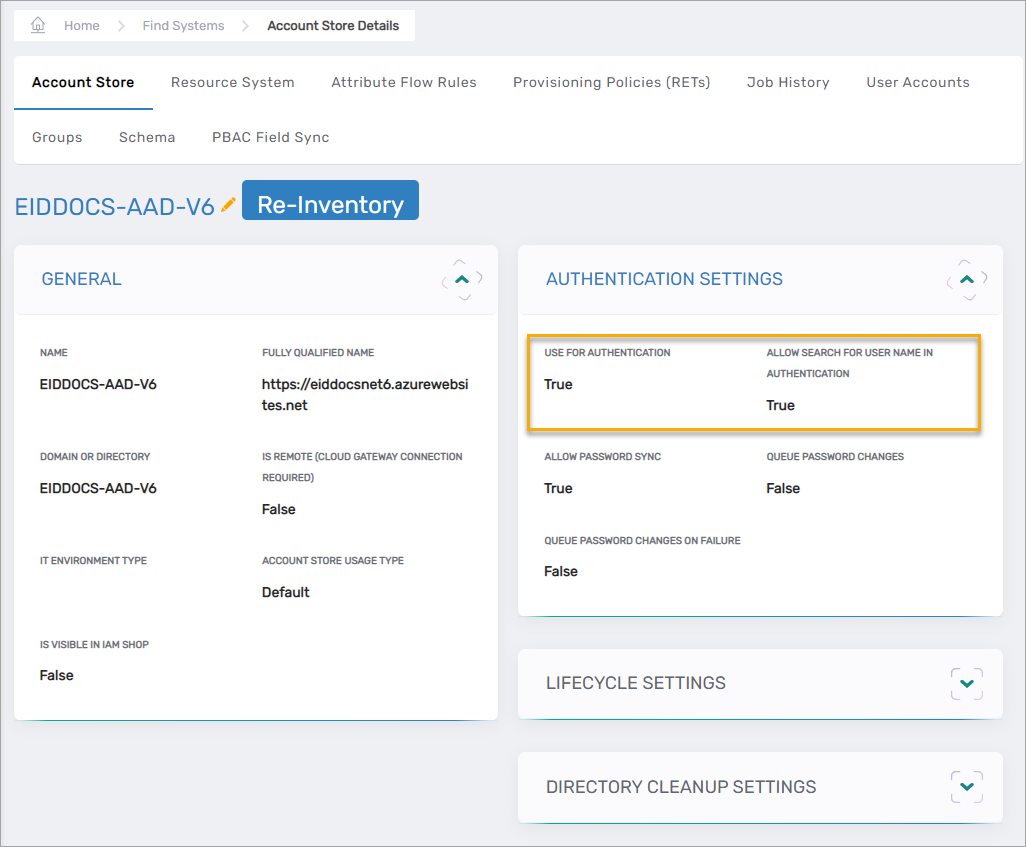
- After EmpowerID saves your changes, you should be directed back to the Account Store and Resource system page. Expand Authentication Settings and verify your changes.
Step 5 – Configure resource system parameters for EntraID auth
For this step, you add the following new Configuration Parameters to the EntraID resource system with the relevant values for your system:
- AzureOAuthPwdGrantTypeClientSecret
- AzureOAuthPwdGrantTypeClientID
- AzureOAuthPwdGrantTypeScope
- Click the Resource System tab on the Account Store and Resource System page and then expand the Configuration Parameters accordion.
- Click the Add New button.
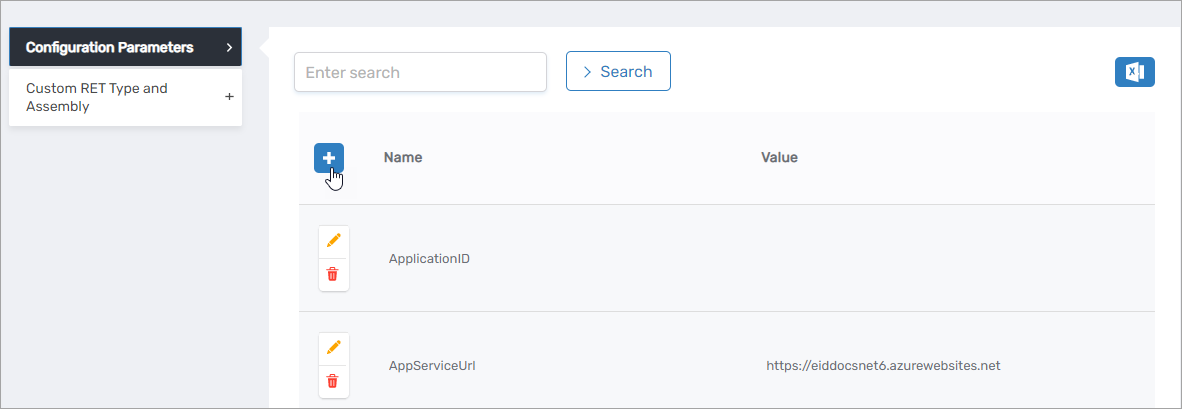
- In the General dialog that opens, do the following:
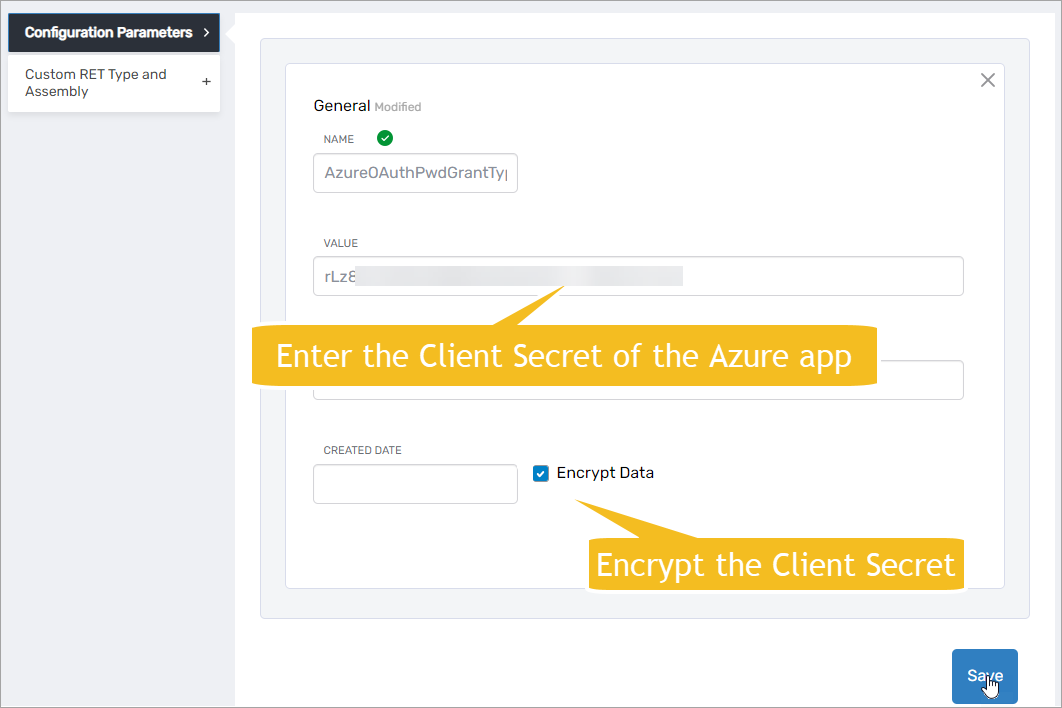
- Enter AzureOAuthPwdGrantTypeClientSecret in the Name field.
- Enter the client secret for the Azure app you created earlier in the Value field.
- Select Encrypt Data and then click Save.
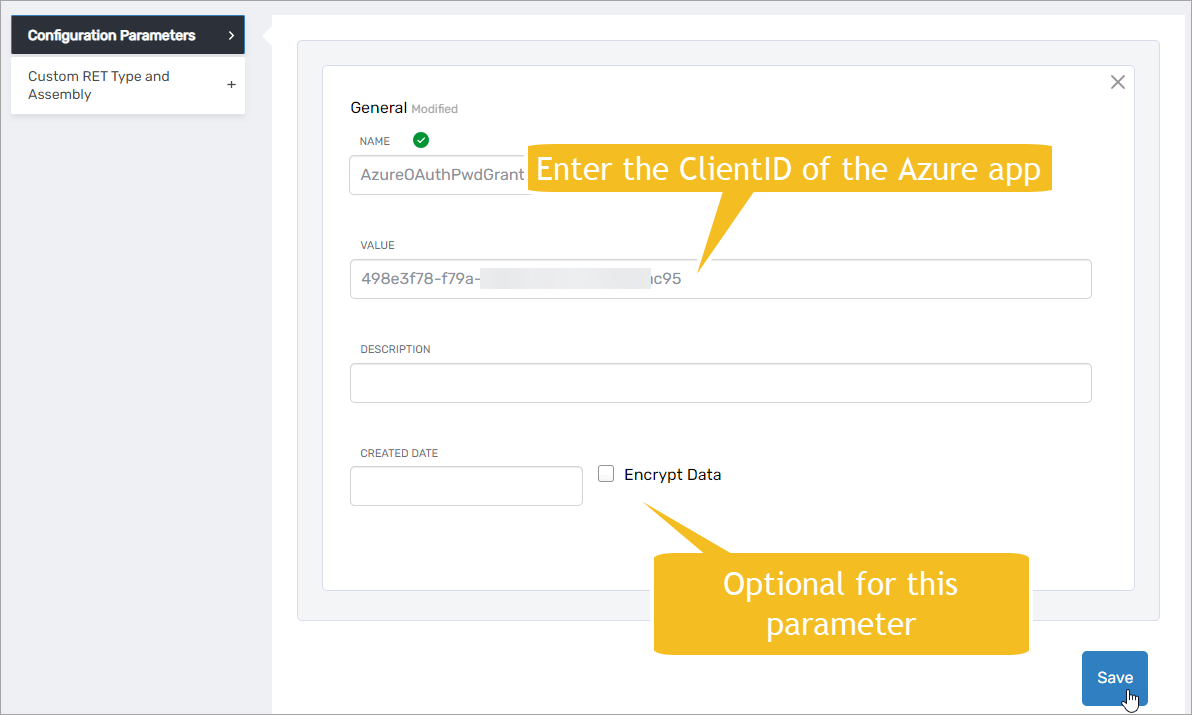
- Click the Add New button again and add AzureOAuthPwdGrantTypeClientID as a Configuration Parameter. Be sure to add the ClientID of the Azure app in the Value field.
- Click the Add New button again and add AzureOAuthPwdGrantTypeScope as a Configuration Parameter. Be sure to add the API permission you set for the Azure app in the Value field.