Creating Fulfillment Workflows
This tutorial demonstrates how to build a fulfillment workflow that disables multiple accounts in bulk. You'll implement the four-stage architecture by extracting account data from Business Request Items, executing a bulk disable operation, and updating each item's status based on the operation results.
For conceptual background on the four-stage architecture and how fulfillment workflows fit into the request pipeline, see Overview of Fulfillment Workflows.
What You'll Learn
- Create a fulfillment workflow from the template in Workflow Studio
- Implement the Prepare Inputs stage to extract and map account data
- Configure a bulk disable operation
- Implement the Update Status stage to track success and failure
- Use skip rules to optimize execution
- Debug workflows with TdnfTrace logging
- Compile, publish, and link the workflow to Item Type Actions
Prerequisites
This tutorial assumes familiarity with Workflow Studio navigation, C# programming, and EmpowerID Business Request concepts.
Create the Workflow
-
In Workflow Studio, navigate to your project's Workflows > Application folder.
-
Right-click the Application folder and select New Workflow > Fulfillment Workflow from the context menu.

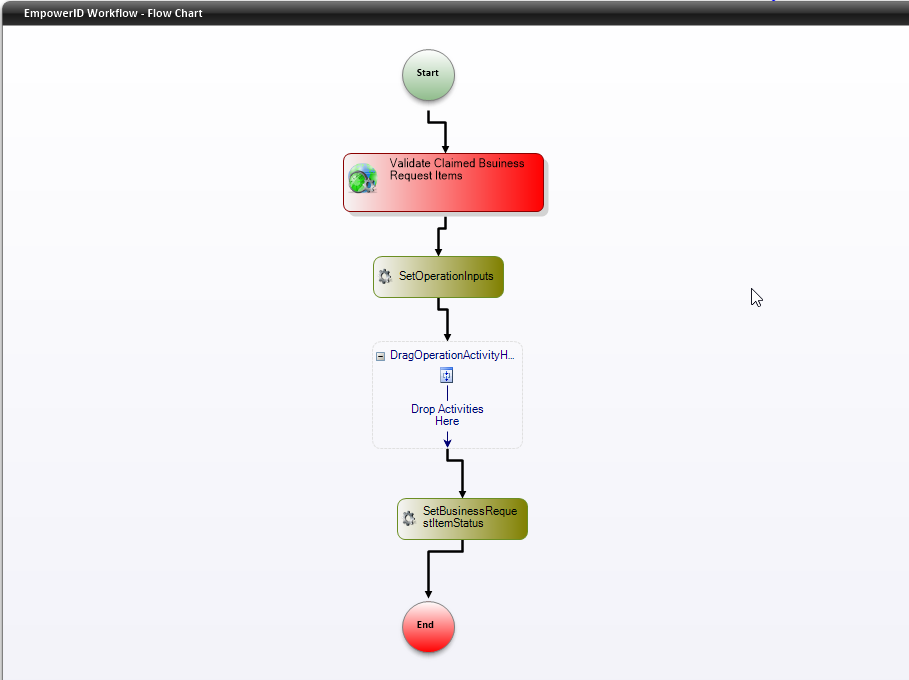
The new workflow opens in the designer with four default activities:
- ValidateClaimedBusinessRequestItems — Validates incoming Business Request Items, verifies their status, and updates the Fulfillment Process ID
- SetOperationInputs — Extracts data from Business Request Items and prepares it for the operation activity
- Drag Operation Activities Here — Placeholder for the bulk operation activity
- SetBusinessRequestItemStatus — Updates the status of each Business Request Item based on operation results
-
Click the Save icon in the toolbar and name the workflow. For fulfillment workflows, use the prefix
FWfollowed by a descriptive name (e.g.,FWTestDisableAccounts).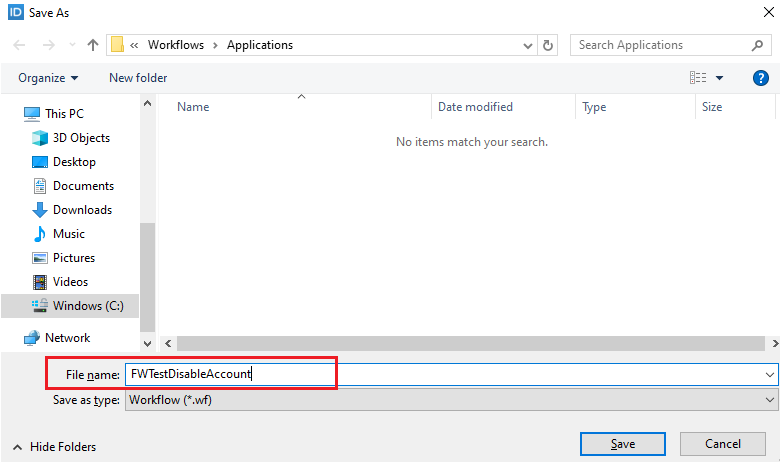
-
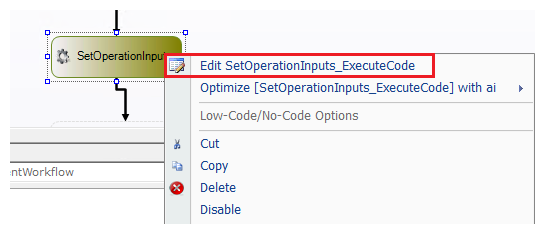
In the workflow editor, double-click SetOperationInputs or right-click on the activity and select Edit SetOperationInputs_ExecuteCode.
- Verify the workflow name appears in the code.
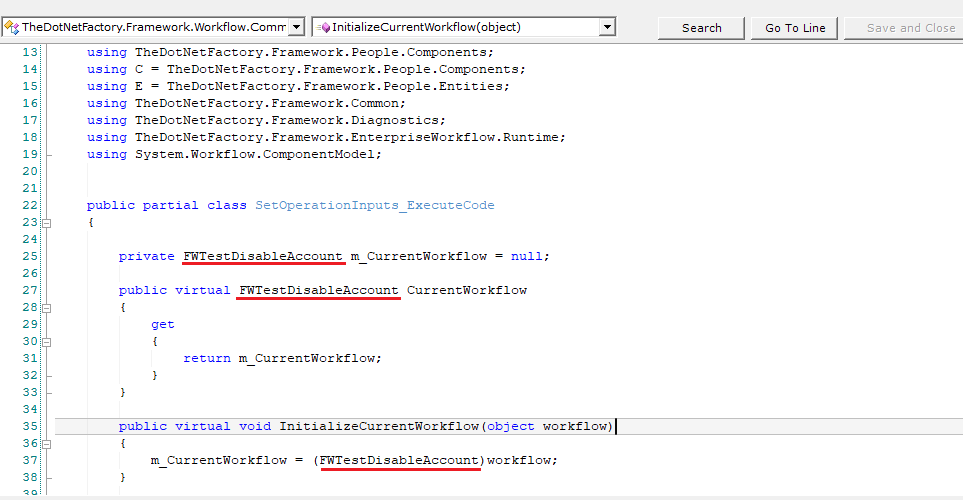
- Repeat for SetBusinessRequestItemStatus.
If the workflow name is missing, close and reopen the workflow to refresh.
Add the Operation Activity
-
In the Activities pane, search for
DisableAccountOperationand drag it to the Drag Operation Activities Here placeholder.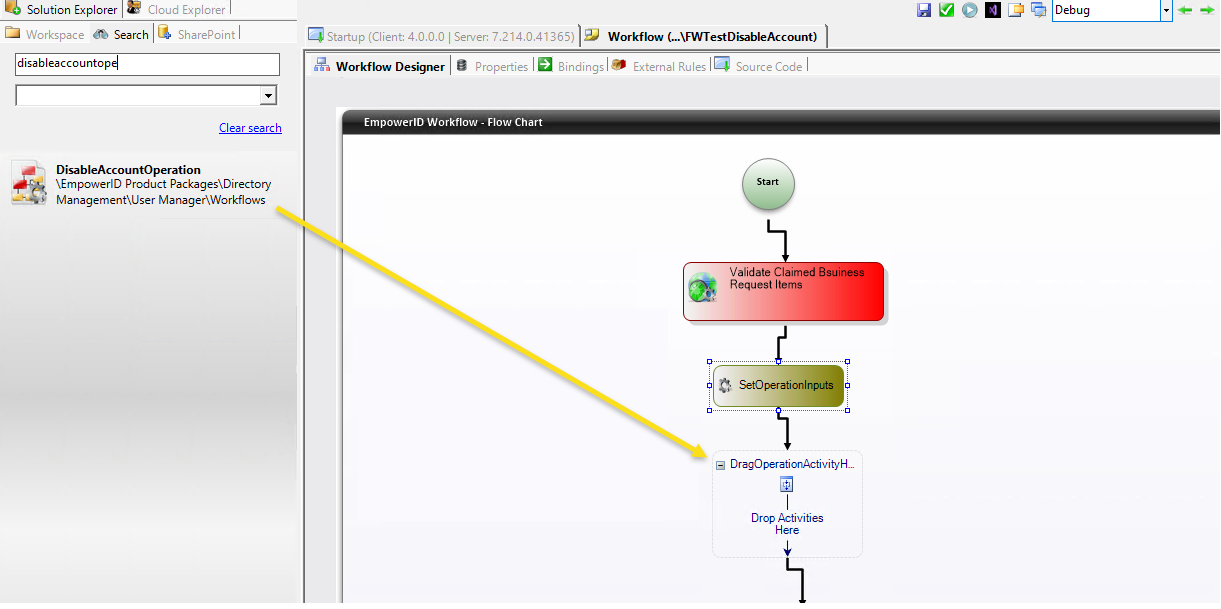
-
Click the operation activity, enter
DisableAccountin the Name field, and provide a description.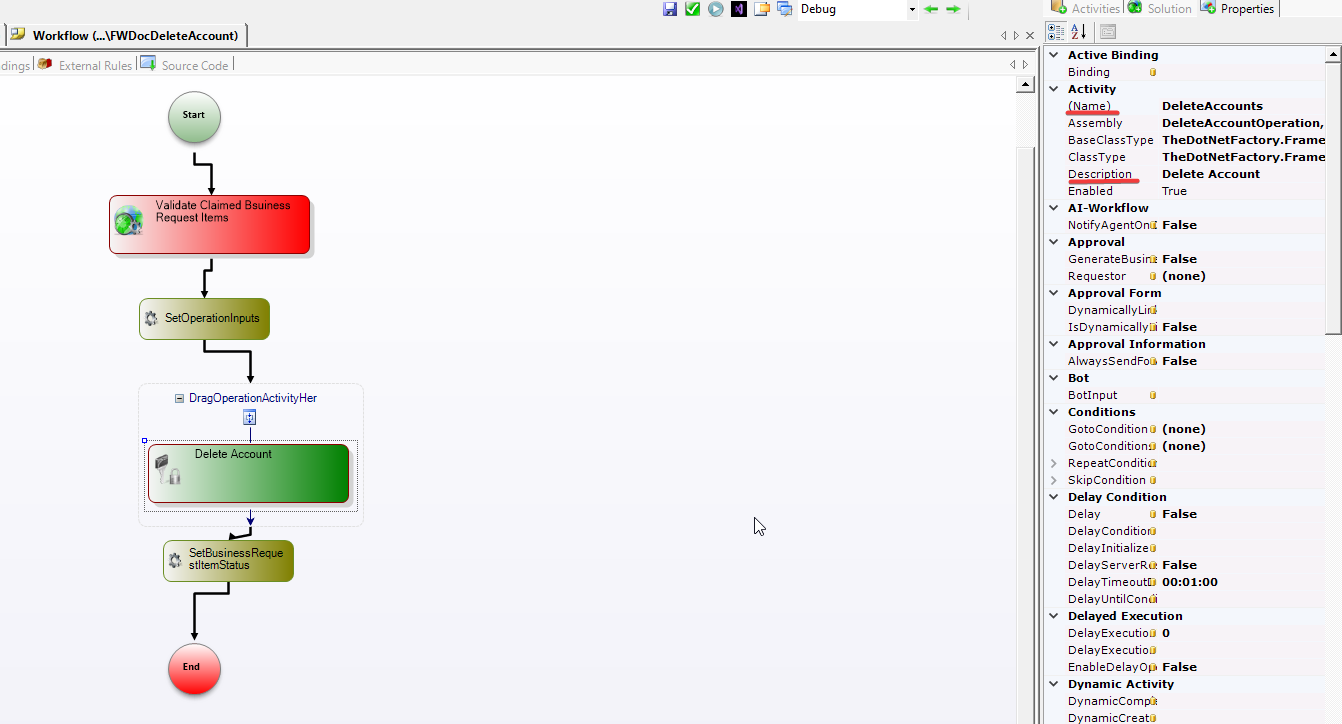
-
Enable the operation by right-clicking it and selecting Enable/Disable.
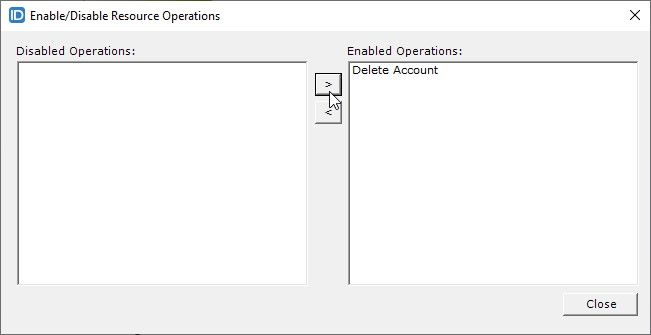
-
In the popup, click the forward arrow (>) to move the operation to the right pane, then click OK.
Implement Prepare Inputs
- Add the following code to the SetOperationInputs activity's Implement method:
List<Guid> accountGuids = CurrentWorkflow.ValidateBRIs.ClaimedBusinessRequestItems
    .Select(a => a.RequestDataTargetResourceID.Value)
    .Distinct()
    .ToList();

var targetAccounts = new E.TList<Account>(C.Account.GetByAccountGuids(accountGuids)
    .Where(a => !a.Disabled)
    .ToList());

CurrentWorkflow.DisableAccount.TargetAccounts = targetAccounts;

CurrentWorkflow.BusinessRequestItemDictionary = new Dictionary<Guid, BusinessRequestItem>();
foreach (var bri in CurrentWorkflow.ValidateBRIs.ClaimedBusinessRequestItems)
{
    if (!targetAccounts.Where(a => a.AccountGUID == bri.RequestDataTargetResourceID.Value).Any())
    {
        bri.ProcessStatus = 4;
        bri.BusinessRequestItemFulfillmentStatusID = 3;
    }
    CurrentWorkflow.BusinessRequestItemDictionary[bri.RequestDataTargetResourceID.Value] = bri;
}
This code extracts account GUIDs from the Business Request Items, fetches all accounts in a single database call, filters out accounts already disabled, assigns the filtered list to the operation, and populates the BusinessRequestItemDictionary for status tracking.
Never iterate through items with individual database calls:
// ❌ WRONG - 100 accounts = 100 database calls
E.TList<C.Account> accounts = new E.TList<Account>();
foreach(Guid acGuid in accountGuids)
{
    C.Account ac = C.Account.GetByAccountGUID(acGuid);
    accounts.Add(ac);
}
Always use bulk retrieval methods like GetByAccountGuids.
Implement Update Status
- Add the following code to the SetBusinessRequestItemStatus activity's Implement method:
List<Framework.Common.Shared.Workflow.OperationExecutionSummary> oplist =
    CurrentWorkflow.DisableAccount.OperationExecutionSummaries;

foreach (Framework.Common.Shared.Workflow.OperationExecutionSummary op in oplist)
{
    var bri = CurrentWorkflow.BusinessRequestItemDictionary[op.TargetResourceGUID];
    bri.ProcessStatus = 2;

    if (op.OperationExecuted)
    {
        bri.BusinessRequestItemFulfillmentStatusID = 3; // Success
    }
    else
    {
        bri.BusinessRequestItemFulfillmentStatusID = 4; // Fail
        bri.ProcessStatus = 3;
        bri.FailedCount += 1;
        bri.LastFailed = DateTime.UtcNow;
        bri.NextAttempt = DateTime.UtcNow.AddMinutes(10 * bri.FailedCount * bri.FailedCount);
        bri.LastFailedError = op.ExecutionResultMessage;
    }
}

var businessRequestItems = new E.TList<BusinessRequestItem>(
    CurrentWorkflow.BusinessRequestItemDictionary.Select(a => a.Value).ToList());
BusinessRequestItem.Update(businessRequestItems);
This code retrieves the operation results, uses the dictionary to find each corresponding Business Request Item, updates the status based on whether the operation succeeded or failed, and commits all status updates in a single bulk database call.
Add Skip Rule
-
Right-click the DisableAccount operation activity and select Select Skip Rule.
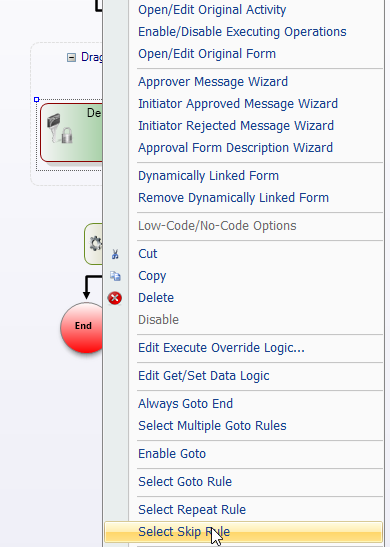
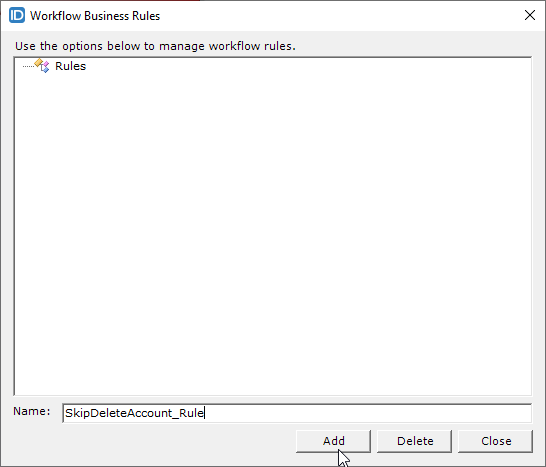
-
Click Create New, enter a rule name, and click Add.
-
Select the new rule from the dropdown and click Apply.

-
Right-click the operation activity and select Edit_{YourRuleName}. Add the following code to the Evaluate method:
return CurrentWorkflow.DisableAccount.TargetAccounts == null ||
       CurrentWorkflow.DisableAccount.TargetAccounts.Count == 0;
This skip rule prevents the operation from executing when there are no accounts to disable, improving efficiency.
Debugging
Method 1: Tracing with TdnfTrace
Add trace statements to your code to log execution details:
TdnfTrace.Current.TraceEvent(System.Diagnostics.TraceEventType.Information, 1234,
    "[FWDisableAccounts] Starting workflow execution");
View the output in DebugView++ or Event Viewer.
Best Practice: Always prefix trace messages with a workflow identifier (e.g., [FWDisableAccounts]) to filter logs easily among thousands of system messages.
Method 2: Attaching the Debugger
For live debugging with breakpoints:
-
Find the Business Request Fulfillment Job ID in the EmpowerID UI (Infrastructure Admin → EmpowerID Servers → Server Jobs tab, search for "business request").
-
Stop the EmpowerID Worker Role Service in Task Manager.
-
Open your workflow project in Visual Studio and set breakpoints.
-
Run the following command from the EmpowerID bin folder:
CustomConnectorUtility.exe --runJob --jobID=82 --debugReplace
82with your Job ID. -
In Visual Studio, attach to the w3wp.exe process.
Your breakpoints will trigger as the workflow executes.
Compile and Publish
-
Click Compile and Publish in the Workflow Studio toolbar.
-
In the wizard, click Next, select the host server, and click Next again.
-
After compilation completes, select Yes to restart services.
-
In the Active Services window, select EmpowerID Web Role Service and click Restart.
-
Click No when prompted to restart Workflow Studio.
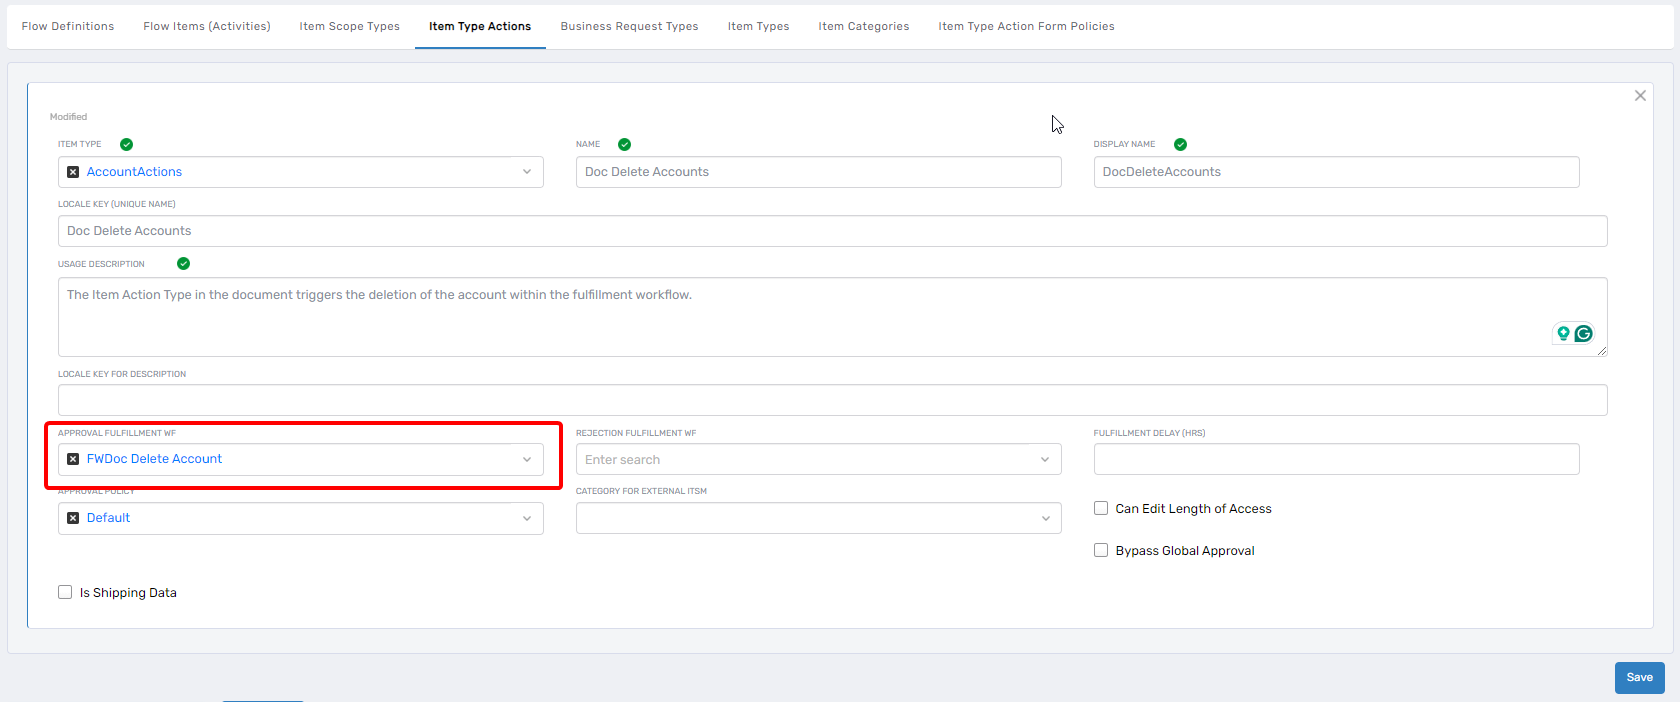
Link to Item Type Action
The workflow executes when linked to an Item Type Action in No Code Flows. When a Business Request Item with that action is approved, the Business Request Fulfillment Job invokes this workflow.
To link the workflow, navigate to No Code Flows in the EmpowerID UI, edit the appropriate Item Type Action (e.g., "Disable Account"), and select your fulfillment workflow from the dropdown.