Publish EmpowerID Microservice to Azure Using PowerShell
After developing and building a microservice, you can deploy it to Azure App Service using a PowerShell script. This script uses the Azure App Service publish profile to authenticate and deploy the microservice package via ZIP deployment.
Prerequisites
Before deploying a microservice, ensure you have:
- Microservice ZIP file - Located in the
..\\EmpowerID\\WFS\\_microservicesfolder after building your project in Visual Studio - Azure App Service - Created and configured in your Azure subscription
- Publish profile - Downloaded from your Azure App Service
- PowerShell - Administrative access to run PowerShell scripts
The microservice ZIP file is automatically created when you build your project in Visual Studio. The file name matches your microservice project name.
Download the Publish Profile
- Log into the Azure Portal.
- Navigate to your App Service.
- Click Get publish profile in the toolbar.
- Save the
.PublishSettingsfile to a known location on your computer.
This file contains the credentials and endpoints needed for deployment.
Create the Deployment Script
-
Open a text editor.
-
Copy the following PowerShell script:
param(
   $pubProfileFilePath
   ,$zipFilePath
)

# Stop execution on any error
$ErrorActionPreference = "Stop"

# Load and parse the publish profile XML
$pubProfile = [xml](gc $pubProfileFilePath)

# Extract the ZIP deploy profile settings
$zipPubProfile = $pubProfile.publishData.publishProfile | where { $_.publishMethod -eq "zipdeploy" }

# Set user agent for the deployment request
$userAgent = "powershell/1.0"

# Create authentication header using publish profile credentials
$base64AuthInfo = [Convert]::ToBase64String([Text.Encoding]::ASCII.GetBytes(("{0}:{1}" -f $zipPubProfile.userName, $zipPubProfile.userPWD)))

# Construct deployment URLs
$zipdeployUrl = "https://$($zipPubProfile.publishUrl)/api/zipdeploy"
$deploymentsUrl = "https://$($zipPubProfile.publishUrl)/api/deployments"

# Deploy the ZIP file to the App Service
Invoke-RestMethod -Uri $zipdeployUrl -Headers @{Authorization=("Basic {0}" -f $base64AuthInfo)} -UserAgent $userAgent -Method Post -InFile $zipFilePath

# Query deployment status
Invoke-RestMethod -Uri $deploymentsUrl -Headers @{Authorization=("Basic {0}" -f $base64AuthInfo)} -UserAgent $userAgent -Method Get -
Save the file as
zipdeploy_appService.ps1in a convenient location.
What the Script Does
The script performs these operations:
- Loads the publish profile - Reads the XML publish settings file
- Extracts credentials - Gets the username and password for ZIP deployment
- Creates authorization header - Encodes credentials in Base64 format
- Deploys the package - POSTs the ZIP file to the App Service ZIP deploy endpoint
- Queries status - Retrieves deployment information to confirm success
The script uses the Kudu ZIP deployment API, which is the same mechanism used by Visual Studio's publish feature.
Deploy the Microservice
-
Open PowerShell as Administrator.
-
Navigate to the directory where you saved the script:
cd C:\path\to\script\directory -
Execute the script with the required parameters:
.\zipdeploy_appService.ps1 -pubProfileFilePath "C:\path\to\your-app-service.PublishSettings" -zipFilePath "C:\path\to\EmpowerID\WFS\_microservices\YourMicroservice.zip" -
Wait for the deployment to complete.
Example command:
.\zipdeploy_appService.ps1 -pubProfileFilePath "C:\Downloads\myapp.PublishSettings" -zipFilePath "C:\EmpowerID\WFS\_microservices\MySCIMService.zip"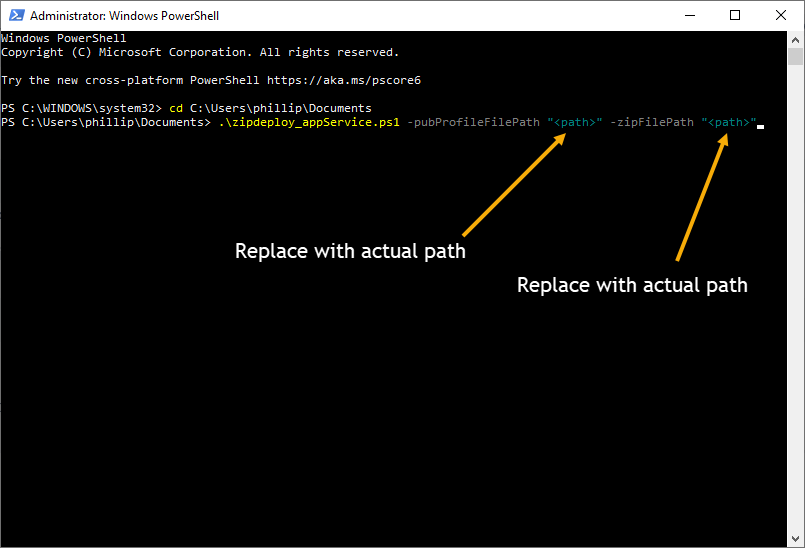
Verify Deployment
After the script completes:
- Navigate to your App Service in the Azure Portal.
- Click Deployment Center in the left menu.
- Verify the deployment appears in the deployment history.
- Check the deployment status shows as successful.
Alternatively, navigate to your microservice endpoint in a browser to verify it's responding.